Table of Contents
Advertisement
Quick Links
Advertisement
Table of Contents

Related Manuals for BTX Gemini X2


Summary of Contents for BTX Gemini X2
- Page 1 Twin Waveform Electroporation Systems USER’S MANUAL 5423-018 REV 1.0...
-
Page 2: Warranty Information
Without limiting the generality nitrous oxide. of the foregoing, BTX shall not be liable for any claims of any kind whatsoever, as to the equipment delivered or for non-delivery of equipment, and whether or not based on negligence. Warranty... -
Page 3: Safety Information
• Removing the cover will void the warranty. for the BTX Gemini Twin Wave Series is 100–240 vac, 50/60 Hz. • Do not connect or disconnect the high voltage cable with Ground the Product the high voltage enabled. -
Page 4: Introduction
A Message from BTX Thank you for investing in a Gemini System. Since its founding in 1983, the main focus of BTX has been in the area of applying controlled electric fields for genetic engineering applications. Because of this, we quickly established a reputation as the technological leader in the fields of electroporation and electrofusion. -
Page 5: Table Of Contents
Table of Contents SUBJECT PAGE # Warranty Information Safety Information Introduction Table of Contents 5–6 Product Overview Unpacking the System Touchscreen Button Reference Software Setup 10–11 Setting Time/Date Setting Audible Alarm Preferences Setting Backlight Preferences Displaying Device Information Preset Protocols 12–14 Using Preset Protocols Customizing a Preset Protocol... -
Page 6: Table Of Contents
Table of Contents SUBJECT PAGE # General Optimization Guide for Electroporation Wave Forms Field Strength Pulse Length Number of Pulses Electroporation Buffer DNA/RNA Concentrations Applications Mammalian Cell Transfection In Vivo, In Utero, In Ovo Bacteria and Yeast Transformation Plant and Insect Transfection Electroporation Buffers Ordering Information 46–47... -
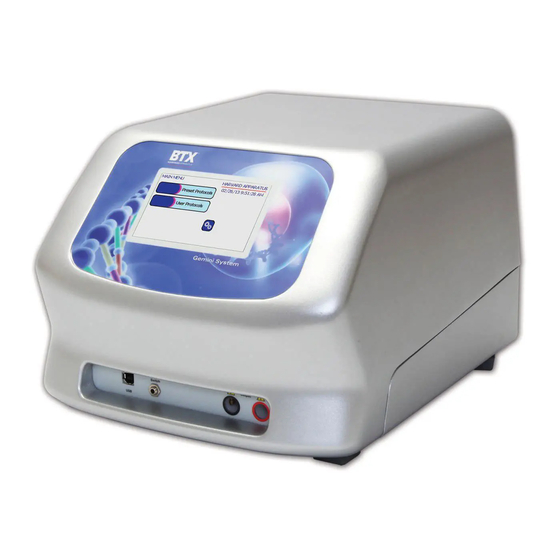
Page 7: Product Overview
96-well CLINICAL OR DIAGNOSTIC USE ON PATIENTS. options. For this reason, some of the specifications of the Gemini SC are not as extensive as what is available in the Gemini X2. 5423-018 REV 1.0 Publication... -
Page 8: Unpacking The System
Connect the mains/power cord to into the back panel at the bottom left. Power up the system by pushing the rocker switch located on the back panel at the bottom left. The display will flash the BTX logo. Once the software initializes, the Main Menu screen will appear. Fuse Holder You are now ready to begin your work. -
Page 9: Touchscreen Button Reference
Touchscreen Icons Reference Accept Stop Protocol Used to accept the parameters/settings on a screen and Used during the pulse delivery sequence to stop the advance to the next screen in the menu, also used in progress of the protocol. place of a double tap on various icons. Back Square Wave Indicator Used to go back one screen. -
Page 10: Software Setup
Software Setup Setting Time/Date Setting Audible Alarm Preferences After initializing, the home screen will appear. On the home screen, tap the Gear icon. Tap the Gear icon. Tap Audible Alarms icon. Tap Time/Date icon. Select preferred audible alarms by tapping the icons to activate or deactivate. -
Page 11: Setting Backlight Preferences
Software Setup Displaying Device Information Setting Backlight Preferences On the home screen, tap the Gear icon. On the home screen, tap the Gear icon. Tap Backlight icon. Tap Device Information icon. Select preferred brightness by tapping the icon indicating View device information. % brightness. -
Page 12: Preset Protocols
Tap desired cells. Once protocol is complete, data regarding your pulse is displayed and stored in the systems logs (BTX Gemini X2 only) for future use. You may continue pulsing, go back to the protocol select screen, or to the home screen. -
Page 13: Customizing A Preset Protocol
Preset Protocols Customizing a Preset Protocol (continued) Customizing a Preset Protocol Use keyboard to name copy of protocol. On the home screen, tap the Preset Protocols icon. Tap the Green Check icon to save. Double tap desired cell type. Tap the Home icon. Scroll through available cells. - Page 14 Preset Protocols Customizing a Preset Protocol (continued) Scroll through user protocols to locate the newly saved method. Double tap the newly saved method. Tap the parameter(s) requiring customization. Proceed to modify selected parameters. Tap the Green Check icon to proceed to the run screen. 5423-018 REV 1.0 Publication •...
-
Page 15: Performing Experiments
Performing Experiments Creating an Exponential Decay Wave Protocol Creating New Protocols Tap the Exponential icon. On the home screen, tap User Protocols icon. Tap the Green Check icon to save. Double tap your newly saved protocol. Double tap New Protocol. Tap the Voltage icon. -
Page 16: Creating An Exponential Decay Wave Protocol
Tap the Number of Pulses icon. Use the numeric keypad to set the number of pulses. NOTE: The BTX Gemini X2 can perform up to 2 pulses with Tap the Resistance (symbol) icon. Exponential Decay Wave only if the Resistance > 100 ohms. - Page 17 Tap the Green Check icon to save. Once protocol is complete, data regarding your pulse is displayed and stored in the systems logs (BTX Gemini X2 only) for future use. You may continue pulsing, go back to set-up screen, or to the home screen.
-
Page 18: Creating A Square Wave Protocol
Performing Experiments Creating New Protocols (continued) Creating a Square Wave Protocol On the home screen, tap User Protocols icon. Double tap New Protocol. Use keyboard to name protocol. Tap the Green Check icon to save. 5423-018 REV 1.0 Publication • www.btxonline.com... - Page 19 Performing Experiments Creating New Protocols (continued) Use the numeric keypad to set voltage. Tap the Green Check icon to save. Creating a Square Wave Protocol Tap the Square Wave icon. Tap the Green Check icon to save. Tap the Duration icon. Double tap your newly saved protocol.
- Page 20 Performing Experiments Creating New Protocols (continued) Tap the Electrode Gap icon. Creating a Square Wave Protocol (continued) Tap the Number of Pulses / Pulse Interval icon. Use the numeric keypad to set the gap between electrodes. Tap the Green Check icon to save. Tap the Number of Pulses icon.
- Page 21 With load measurement OK, press the Green ‘Go’ icon to run protocol. Once protocol is complete, data regarding your pulse is displayed and stored in the systems logs (BTX Gemini X2 only) for future use. You may continue pulsing, go back to the set-up screen, or to the home screen.
-
Page 22: Using Specialty Protocols
Using Specialty Protocols Using an HT Plate Handler, Gemini X2 Only Plug the HT Plate Handler into the front ports of the BTX Gemini X2. Select desired protocol (preset protocol or user protocol). Double tap desired cells. Review parameters. Set the HT plate handler with the correct number of pre-pulse resistance measurement and DC pulses. -
Page 23: Using An Ht Plate Handler
Using Specialty Protocols Using an HT Plate Handler, Gemini X2 Only Review parameters. (continued) Position electrodes on area being electroporated. Once protocol is complete, data regarding your pulse is displayed To run tap the Omega icon. and stored in the systems logs for future use. -
Page 24: Using Specialty Electrodes
Using Specialty Protocols Using Specialty Electrodes, Gemini X2 Only Once protocol is complete, data regarding your pulse is displayed and stored in the systems logs for future use. You may continue pulsing, go back to the settings screen or the protocol select screen, or to the home screen. -
Page 25: Managing Protocols
Symbols / Numbers icon (.@123) to display the list of In addition, the BTX Gemini X2 allows you to export protocol available numbers and symbols that can be included in information to an externally connected generator or to a the Protocol Name. -
Page 26: Deleting A Protocol
Managing Protocols Deleting a Protocol Confirm delete by tapping the Delete icon again. NOTE: Preset protocols cannot be deleted. On the home screen, tap the User Protocols icon. Protocol has been removed from the menu. Tap the protocol you wish to delete. Tap Folder icon. -
Page 27: Password Protecting A Protocol
Managing Protocols Password Protecting a User Protocol Confirm password protection by tapping the Open Lock icon again. On the home screen, tap the User Protocols icon. Use the numeric keypad to set the password. Double tap protocol you wish to password protect. Tap the Green Check icon to save. -
Page 28: Protocol Manager Software
• Upload protocols from the Gemini X2 generator to a PC. • Download protocols from a PC to the Gemini X2 generator. • Upload log files from the Gemini X2 generator to a PC. 3. Select the drive and folder location. -
Page 29: Download- Pc To Generator
Protocol Manager Software NOTE: If a protocol already exists on the Gemini X2 generator, Protocol Manager will not overwrite the file if you attempt to re-download it. 4. Protocol name being downloaded is shown. 5423-018 REV 1.0 Publication • www.btxonline.com... -
Page 30: Upload Log Files
Protocol Manager Software Upload Log Files NOTE: Log Files are saved as a tab delimited text file. They can 1. On the main screen, click ‘Pulse Data’. be opened with any common text editor like Notepad or by using spreadsheet software such as Excel. 2. -
Page 31: Remote Control Software
USB, open the Control Panel and select System and Security, and then System. Click Device Manager on the left hand menu. Under Ports, search for the ‘USB serial port for BTX Gemini.’ This will show the COM Port to which the generator is connected, as shown below. -
Page 32: Generator Specifications
Generator Specifications Generator Gemini X2 Gemini SC Specifications Square Wave Pulse Ranges Voltage Range LV Mode 5 to 500 in 1 V steps 10 to 500 V in 5 V steps HV Mode 505 to 3000 in 5 V steps... - Page 33 Generator Specifications Generator Gemini X2 Gemini SC Specifications (V7) Other Spcifications (continued) Interlock Switches Pre-Pulse Sample resistance check Pulse Over Current Protection Yes PC control PC communications Log Report Remote Operation Foot Switch Control Power Ratings 35 W idle and 350 W pulsing...
-
Page 34: Maintenance
Maintenance Battery Replacement The BTX Gemini Twin Wave Series generators require no special maintenance other than keeping them clean. (Underside of Instrument) To clean the exterior surfaces, use a lint-free cloth to remove loose 1. Disconnect from mains power supply. -
Page 35: Upgrading Gemini Series Software
Update Driver Software. When you connect the BTX Gemini to a computer via USB for the first time, Windows® will seek to install a driver for communication. The following section details the installation of the Virtual CommPort Driver supplied with the BTX Gemini. -
Page 36: Usb Virtual Commport Driver Installation
USB Virtual CommPort Driver 6. Click Close after the software has been successfully installed. Installation (continued) 4. Download the software from BTX website www.btxonline.com. Click on the Technical Resources drop-down menu and select Downloads. Download and install file named BTX Gemini Firmware Update. -
Page 37: Device Updater Program
Click on the Technical Resources drop-down menu and select Downloads. Download and install file named Device Updater. 5. Click Open Update File and browse to the ‘BTX Gemini 7 vx.x.x.srec’. file that was previously saved to the desktop. 6. Click Start Update. -
Page 38: Error Messages & Troubleshooting
Error Messages & Troubleshooting Display Error Message Error Description User Troubleshooting Power Loss Error Power loss during pulsing. Power lost while protocol was running. PFC Over Temp PFC module over temperature. Hardware error. Please contact the manufacturer. Interlock Open Electrode interlock open. Connect electrode connectors to the front of the generator and make sure the cuvette safety dome cover is closed. - Page 39 Troubleshooting Low Battery Indication NOTE: It is recommended that you save your protocols periodically by Time/Date area will flash between Date and Time and LOW uploading them to a PC. BATTERY message will display. Out of Range A value was entered or encountered in a protocol that was beyond the generator’s limits.
- Page 40 Experiment Troubleshooting Arcing Verify electrical component functionality. Verify properties of cell sample. (Do cells need to be washed? Is the buffer appropriate for application?) Verify properties of transfectant molecule (Is the DNA well purified?) Try reducing the voltage or increase sample volume until arcing is no longer a problem.
-
Page 41: Electroporation Overview
The effects of heating result is irreversible damage to the cell or cell lysis. Because can be reduced by using a low conductivity medium such as BTX’s the mechanism of electroporation is not well understood, Cytoporation Medium to resuspend cells prior to electroporation. -
Page 42: General Optimization Guide For Electroporation
General Optimization Guide for Electroporation As described, electroporation is the application of controlled Cell Type Field Strength Ranges direct current (DC) electrical pulses which are applied to living Bacteria/Yeast: 3 – 24 kV/cm cells and tissues for a short duration of time. The pulse induces a Mammalian: 0.25 –... -
Page 43: Pulse Length
Adjusting this parameter is dependent on the BTX offers BTXpress High Performance Electroporation Solution, pulse waveform. The pulse length in a square wave system can be a low conductance buffer that achieves higher transfection inputted directly. -
Page 44: Applications
The ability to introduce genes or molecules is essential to researchers working with either of these two species. This is why researchers consistently turn to BTX for all of their electroporation needs. 5423-018 REV 1.0 Publication •... -
Page 45: Electroporation Buffers
3.45 mS/cm to reduce heating of solution during electroporation. considered “hard to transfect” by chemical and other non-viral methods. This solution, in combination with BTX electroporators, provides researchers with the versatility needed for success across a broad range of cell types while maintaining critical cell viability. -
Page 46: Ordering Information
1 ea 45-0495 Oocyte Electrode, Platinum Plated, 10 mm, 1 ea Includes Gemini X2 Generator, Safety Dome, 1 mm gap (Electrode only) Cuvettes 1 mm, 2 mm, 4 mm pkg. of 30 45-0496 Oocyte Electrode Kit, Platinum Plated, 10 mm,... - Page 47 Ordering Information Order No. Description Qty. Order No. Description Qty. 45-0164 45-0490 Genetrodes, 1 mm L-Shape (GOLD TIP) 1 kit Petri Dish Platinum Electrode for Tissue Slices 1 kit with 45-0203 holder and 45-0216 cables Chamber Kit, 10mm, with 45-0491 chamber, 45-0502 wand 7mm, 45-0503 cables, 45-0204 45-0116 Genetrodes, 3 mm L-Shape (GOLD TIP)
Need help?
Do you have a question about the Gemini X2 and is the answer not in the manual?
Questions and answers