Table of Contents
Advertisement
Quick Links
Advertisement
Table of Contents

Related Manuals for Samsung SYNCM.400B


Summary of Contents for Samsung SYNCM.400B
- Page 1 SAMSUNG SYNCM.400B MODEL SERVICE MANUAL...
-
Page 2: Product Specifications
2 Product Specifications 2-1 Specifications Item Description Picture Tube: CKA42*7L: 14-Inch (36 cm); 13.2-Inch (33.5 cm) viewable, 90° Deflection, CKA5227L: 15-Inch (38 cm); 13.8-Inch (35 cm) viewable, flat-face tube, 90° Deflection, 0.28 mm Dot pitch, Semi-tint, Non-glare, Antistatic silica coating, Invar shadow mask Scanning Frequency Horizontal : 30 kHz to 55 kHz (Automatic) Vertical... -
Page 3: Pin Assignments
2 Product Specifications 2-2 Pin Assignments Sync 15-Pin Signal Cable Connector (Figure 2-1) Type Separate Pin No. Green Blue DDC Return GND-R GND-G GND-B Reserved GND-Sync/Self-raster DDC Data H-Sync V-Sync DDC Clock Figure 2-1. Male Type CKA42*7L/5227L... -
Page 4: Timing Chart
2 Product Specifications 2-3 Timing Chart This section of the service manual describes the timing that the computer industry recognizes as standard for computer-generated video signals. Table 2-1. Timing Chart Mode VESA 720/70 Hz 640/60 Hz 640/75 Hz 640/85 Hz 800/75 Hz 800/85 Hz 1024/60 Hz... - Page 5 2 Product Specifications Memo CKA42*7L/5227L...
- Page 6 10 PCB Diagrams and Electrical Parts List 10-1-3 Main PCB Parts Loc. No. Coordinates (X,Y) New Code No. Description Specification Remarks BD101 167.8 3301-000011 MAG-CORE,FERRITE,BEAD 1.2UH,3.5_5.7MM,10 OHM BD102 157.5 3301-000011 MAG-CORE,FERRITE,BEAD 1.2UH,3.5_5.7MM,10 OHM BD103 252.5 3301-000011 MAG-CORE,FERRITE,BEAD 1.2UH,3.5_5.7MM,10 OHM BD104 3301-000011 MAG-CORE,FERRITE,BEAD 1.2UH,3.5_5.7MM,10 OHM...
- Page 7 10 PCB Diagrams and Electrical Parts List Loc. No. Coordinates (X,Y) New Code No. Description Specification Remarks C127 305.3 141.5 2401-000023 CAP-AL.ELEC,105M,1H (T)50V 1M C129 266.5 2202-002009 C-CERAMIC,MLC-AXIAL 100nF,+80-20%,50V,Y5V,2.3X3.0 C201 2401-001166 CAP-AL.ELEC,336M,1C (T)16V 33M C202 36.3 2202-002008 C-CERAMIC,MLC-AXIAL 10nF,+80-20%,50V,Y5V,2.3X3.0 C203 2201-000017 C-CERAMIC,DISC 1nF,10%,50V,Y5P,4x3.5,5,TP...
- Page 8 10 PCB Diagrams and Electrical Parts List Loc. No. Coordinates (X,Y) New Code No. Description Specification Remarks C414 2303-000305 C-FILM,PPF 3nF,5%,1.6KV,29x13.5x8mm,25mm C415 114.5 2303-000305 C-FILM,PPF 3nF,5%,1.6KV,29x13.5x8mm,25mm C416 230.5 2305-000179 C-FILM,MPEF 10nF,5%,250V,14.5x8.8mm,10mm,B C417 132.8 2301-000133 C-FILM,PEF 10nF,10%,100V,6.5x12.5mm,5mm,T C420 180.5 2401-000023 CAP-AL.ELEC,105M,1H (T)50V 1M C421 137.5...
- Page 9 10 PCB Diagrams and Electrical Parts List Loc. No. Coordinates (X,Y) New Code No. Description Specification Remarks C518 2401-000027 C-AL 4.7uF,20%,50V,GP,5x11mm,5mm,TP C519 235.3 162.3 2401-000010 C-AL 220uF,20%,16V,GP,6.3x11mm,2.5m C520 215.5 224.8 2202-002008 C-CERAMIC,MLC-AXIAL 10nF,+80-20%,50V,Y5V,2.3X3.0 C601 2401-000037 CAP-AL.ELEC,477M,1C (T)470UF,16V,20%C,8x11.5,R-RADIAL C602 18.3 2202-002009 C-CERAMIC,MLC-AXIAL 100nF,+80-20%,50V,Y5V,2.3X3.0 C604...
- Page 10 10 PCB Diagrams and Electrical Parts List Loc. No. Coordinates (X,Y) New Code No. Description Specification Remarks CN601 3711-000217 CON-WALL HEADER,3P,3.96 STRAIGHT,1WALL CN602 272.5 BH71-40300A PIN-HINGE BRASS,D2.36,SN,HEAT/SINK CN603 BH71-40300A PIN-HINGE BRASS,D2.36,SN,HEAT/SINK CN604 311.5 74.8 3722-001100 JACK-DIN 4P/2C,6mm,AG,BLK,NO CN606 300.3 3711-000178 CONNECTOR-HEADER 1WALL,2P,1R,3.96mm,STRAIGHT,SN CRT1...
-
Page 11: Diode-Rectifier
10 PCB Diagrams and Electrical Parts List Loc. No. Coordinates (X,Y) New Code No. Description Specification Remarks D509 210.5 155.5 0401-000005 DIODE-SIG,1N4148,DO-35 75V,150MA,1V,10MA D510 225.8 173.8 0402-000006 DIODE-RECTIFIER 1N4007GP,1000V,1A,DO-41 D513 212.8 137.8 0401-000006 DIODE-SWITCHING BAV21,200V,250mA,400mW,50nS,DO D514 176.5 232.5 0401-000005 DIODE-SIG,1N4148,DO-35 75V,150MA,1V,10MA D515 118.5... - Page 12 10 PCB Diagrams and Electrical Parts List Loc. No. Coordinates (X,Y) New Code No. Description Specification Remarks EY507 176.7 195.5 6042-000002 EYELET EYELET 1.5 HOLE 2.2 PAD 4.0 EY508 166.5 6042-000002 EYELET EYELET 1.5 HOLE 2.2 PAD 4.0 EY509 135.5 202.7 6042-000002 EYELET...
- Page 13 10 PCB Diagrams and Electrical Parts List Loc. No. Coordinates (X,Y) New Code No. Description Specification Remarks L101R 303.8 227.5 2701-001036 INDUCTOR-AXIAL 1.2uH,10%,9.8x4.2mm L401 92.5 220.5 BH27-20003A COIL-LINEARITY 0.06OHM,0.15,DR-1415,IVORY,35M 15” Philips BH27-20309T COIL-LINEARITY 0.06OHM,16.5*16.5*30 14” BH27-20334K COIL-LINEARITY 6.2UH 15” SDD L402 138.5 BH27-20343L...
- Page 14 10 PCB Diagrams and Electrical Parts List Loc. No. Coordinates (X,Y) New Code No. Description Specification Remarks R102R 260.5 131.5 2001-000665 R-CARBON 33ohm,5%,1/6W,AA,TP,1.8x3.2mm R103B 256.8 138.5 2001-000025 R-CARBON 75ohm,5%,1/4W,AA,TP,2.4x6.4mm R103G 138.5 2001-000025 R-CARBON 75ohm,5%,1/4W,AA,TP,2.4x6.4mm R103R 251.3 138.5 2001-000025 R-CARBON 75ohm,5%,1/4W,AA,TP,2.4x6.4mm R104B 230.5 2001-000021...
- Page 15 10 PCB Diagrams and Electrical Parts List Loc. No. Coordinates (X,Y) New Code No. Description Specification Remarks R220 39.5 2001-000097 R-CARBON 1Mohm,5%,1/6W,AA,TP,1.8x3.2mm R221 51.5 2001-000868 R-CARBON 56ohm,5%,1/6W,AA,TP,1.8x3.2mm R222 2001-000868 R-CARBON 56ohm,5%,1/6W,AA,TP,1.8x3.2mm R223 2001-000868 R-CARBON 56ohm,5%,1/6W,AA,TP,1.8x3.2mm R224 67.5 2001-000868 R-CARBON 56ohm,5%,1/6W,AA,TP,1.8x3.2mm R225 2001-000067 REF-CF,10K,5%,1/6W...
- Page 16 10 PCB Diagrams and Electrical Parts List Loc. No. Coordinates (X,Y) New Code No. Description Specification Remarks R271 227.5 109.5 2001-000056 REF-CF,4.7K,5%,1/6W 150V,-1300 TO +350PPM/C,R-A R301 109.7 2001-000056 REF-CF,4.7K,5%,1/6W 150V,-1300 TO +350PPM/C,R-A R302 89.5 2001-000056 REF-CF,4.7K,5%,1/6W 150V,-1300 TO +350PPM/C,R-A R305 93.5 2001-000059 REF-CF,5.6K,5%,1/6W...
- Page 17 10 PCB Diagrams and Electrical Parts List Loc. No. Coordinates (X,Y) New Code No. Description Specification Remarks R432 80.5 119.3 2001-000090 R-CARBON 180Kohm,5%,1/6W,AA,TP,1.8x3.2m 15” 2001-000086 R-CARBON 100Kohm,5%,1/6W,AA,TP,1.8x3.2m 14” R434 166.5 102.8 2001-000538 R-CARBON 24Kohm,5%,1/6W,AA,TP,1.8x3.2mm 15” 2001-000562 R-CARBON 27Kohm,5%,1/6W,AA,TP,1.8x3.2m R435 143.5 2001-000053 R-CARBON 3.3Kohm,5%,1/6W,AA,TP,1.8x3.2m...
- Page 18 10 PCB Diagrams and Electrical Parts List Loc. No. Coordinates (X,Y) New Code No. Description Specification Remarks R537 127.5 2001-000053 R-CARBON 3.3Kohm,5%,1/6W,AA,TP,1.8x3.2m R538 137.5 2001-000056 REF-CF,4.7K,5%,1/6W 150V,-1300 TO +350PPM/C,R-A R539 201.3 122.5 2001-000069 R-CARBON 12Kohm,5%,1/6W,AA,TP,1.8x3.2mm R540 132.5 2001-000067 REF-CF,10K,5%,1/6W 150V,-1300 TO +350PPM/C,R-A R542 219.8 143.5...
-
Page 19: Trans-Power
10 PCB Diagrams and Electrical Parts List Loc. No. Coordinates (X,Y) New Code No. Description Specification Remarks SW209 120.2 3404-000244 SWITCH-TACT,7.3X7.1X4 12V,50MA,SPST,160G,MECH SW210 131.7 3404-000244 SWITCH-TACT,7.3X7.1X4 12V,50MA,SPST,160G,MECH SW211 147.5 3404-000244 SWITCH-TACT,7.3X7.1X4 12V,50MA,SPST,160G,MECH SW401 86.5 3406-000002 SWITCH-TOGGLE,SP3T ON-ON-ON,STRAIGHT T401 187.5 BH26-30336A TRANS-HOR.DRIVE 9.6MH,6P,EE2017,SB-5S,9.6MH/10 T501... -
Page 20: Usb Option
10 PCB Diagrams and Electrical Parts List 10-1-4 USB OPTION Loc. No. Code No. Description Specification Remarks C622 2401-000038 C-AL 470UF,20%,25V,GP,TP,10X12.5 CN604 3722-001100 JACK-DIN 4P/2C,6MM,AG,BLK D612 0402-000005 DIODE-RECTIFIER 31DF4,400V,3A,DO-201AD 10-1-5 TCO OPTION Loc. No. Code No. Description Specification Remarks CN606 3711-000178 CONNECTOR-HEADER 1WALL,2P,1R,3.96mm,STRAIGHT,SN... - Page 21 10 PCB Diagrams and Electrical Parts List Others Loc. No. Code No. Description Specification Remarks BH03-10337E CRT-COLOR,MPR II,14” M34KZM16XX61(A) ORION BH03-10338J CRT-COLOR,MPR II,14” M34QBH351X122 SDD (N.H.) BH03-10338P CRT-COLOR,MPR II,14” M34QBH351X122(M) SDD (E.) BH03-10338Q CRT-COLOR,MPR II,14” M34QBH351X122(R) SDD (S.H.) BH03-10337F CRT-COLOR,MPR II,14” M34AFA83X46 BH03-10337Z CRT-COLOR,MPR II,15”...
-
Page 22: Block Diagram
8 Block Diagram CKA42*7L/5227L... -
Page 23: Semiconductor Lead Identification
10 PCB Diagrams and Electrical Parts List 10-2 Semiconductor Lead Identification PARTS TYPE NO. REF. NO. PARTS TYPE NO. REF. NO. FMP-G2FS D403 KSC5088 Q402 KSC945 Q201, Q301, Q406, Q407, Q501, Q502, Q507, Q601, Q604 KA431 IC601 KSA733 Q203, Q408, Q409, Q505, Q506, Q509 2N3904 Q202, Q602... - Page 24 10 PCB Diagrams and Electrical Parts List PARTS TYPE NO. REF. NO. PARTS TYPE NO. REF. NO. TDA9302H IC301 KA2141 IC101 LM2406 IC102 TDA9109 IC401 LTV817M-SM QP601 MC68HC705 IC202 24LC04 IC203 24LC21 IC204 L272M IC302 10-20 CKA42*7L/5227L...
-
Page 25: Wiring Diagram
9 Wiring Diagram SK01 CRT GND CN102 GT07 CN101 SIGNAL CABLE CN201 CN202 CKA42*7L/5227L... - Page 26 11 Schematic Diagrams 11-1 Cautions 1. The areas marked with a on the schematic diagram designate components which have special characteristics important for safety. Replace these parts only with parts identical to those in the original circuit and those specified in the parts list. Before replacing any of these components, carefully read the ÒProduct Safety Notice.Ó...
- Page 27 11 Schematic Diagrams 11-4 Micom/SMPS Part Schematic Diagram 14 15 11-2 CKA42*7L/5227L...
- Page 28 11 Schematic Diagrams 11-5 HV-Defl/High-Voltage Part Schematic Diagram CKA42*7L/5227L 11-3...
- Page 29 11 Schematic Diagrams 11-6 Video Part Schematic Diagram 11-4 CKA42*7L/5227L...
- Page 30 11 Schematic Diagrams 240 V (IC602, Drain) 55.2 V (T601, #7) 8.44 V (IC602, #5) 4.52 V (CN201, #9) 4.52 V (CN201, #11) 0.714 V (CN201, R-Video) 5.00 V (IC202, #11) 1.7 V (IC202, #2) CH1 ∆ = 240 V CH1 ∆...
- Page 31 11 Schematic Diagrams Table 11-1. IC101 (KA2141) Table 11-2. IC102 (LM2406) Table 11-3. IC201 (KIA7545) Table 11-4. IC202 (68HC705) MODES MODES MODES MODES MODES MODES 1024 x 768 / 60 Hz 640 x 480 / 60 Hz 1024 x 768 / 60 Hz 640 x 480 / 60 Hz 1024 x 768 / 60 Hz 640 x 480 / 60 Hz 1024 x 768 / 60 Hz 640 x 480 / 60 Hz...
-
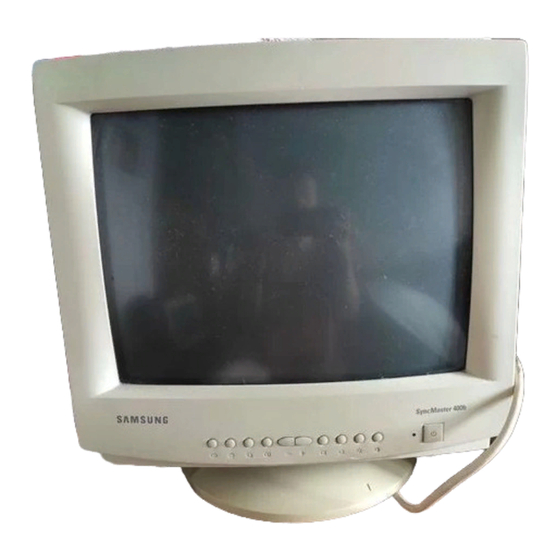
Page 32: Front View And Controls
3 Operating Instructions 3-1 Front View and Controls 3-1-1 CKA4227L Front View Table 3-1. Front Panel Controls Location Symbol Description Power Button Power Indicator LED (Dual Color) Horizontal Position Button Vertical Position Button Horizontal Size Button Vertical Size Button Contrast Control Brightness Control Trapezoid Button Side Pincushion Button... - Page 33 3 Operating Instructions 3-1-2 CKA5227L Front View Table 3-2. Front Panel Controls Location Symbol Description Power Button Power Indicator LED (Dual Color) Horizontal Position Button Vertical Position Button Horizontal Size Button Vertical Size Button Contrast Control Brightness Control Trapezoid Button Side Pincushion Button Adjustment Buttons Parallelogram...
- Page 34 3 Operating Instructions 3-1-3 CKA4217L Front View Table 3-3. Front Panel Controls Location Symbol Description Power Button Power Indicator LED (Dual Color) Horizontal Position Button Vertical Position Button Horizontal Size Button Vertical Size Button Contrast Control Brightness Control Trapezoid Button Side Pincushion Button Adjustment Buttons Parallelogram...
- Page 35 3 Operating Instructions Note 1: When used with a computer equipped with VESA DPMS functions, this monitor is EPA Energy Star compliant and NUTEK compliant. Table 3-4. Display Power Management Signaling (DPMS); CKA42*7L Power saving function EPA/NUTEK State Normal Operation Stand-By Suspend Mode Power Off Mode...
-
Page 36: Disassembly And Reassembly
4 Disassembly and Reassembly This section of the service manual describes the disassembly and reassembly procedures for the CKA42*7L/5227L monitors. WARNING: This monitor contains electrostatically sensitive devices. Use caution when handling these components. 4-1 Disassembly Cautions:1. Disconnect the monitor from the power source before disassembly. 2. - Page 37 4 Disassembly and Reassembly 4-2 Reassembly With the CRT facing downward on a protective pad, use the steps that follow to reassemble the monitor. 4-2-1 Replacing the CRT 4-2-3 Replacing the CRT Socket PCB 1. Loop the CRT Ground Ass’y around the back 1.
-
Page 38: Alignment And Adjustments
5 Alignment and Adjustments This section of the service manual explains how to make permanent adjustments to the monitor. Directions are given for adjustments using the monitor Interface Board Ver. 2.0 and software (SoftJig). 5-1 Adjustment Conditions Caution: Changes made without the SoftJig are saved only to the user mode settings. As such, the settings are not permanently stored and may be inadvertently deleted by the user. -
Page 39: Required Equipment
5. Signal generator, or Computer with a video board that uses the ET-4000 chipset (strongly recommended if using Samsung DM 200 software) and that displays: 800 x 600 @ 85 Hz, or 800 x 600 @ 75 Hz (minimum). 6. Personal computer 7. - Page 40 5 Alignment and Adjustments 5-1-3 Connecting the SoftJig Connect the monitor to the signal generator and/ MONITOR or PC as illustrated in Figures 5-1 and 5-2. INTERFACE BOARD VER. 2.0 Note: The signal cable connector which includes the 3-wire cable must connect to the 7 PIN MINI DIN monitor.
- Page 41 5 Alignment and Adjustments 5-2 Display Control Adjustments 5-2-1 Centering 5-2-1 (c) HORIZONTAL POSITION ADJUSTMENT CONDITIONS Centering means to position the center point of Scanning frequency: 53.7 kHz/85 Hz (15”) the display in the middle of the display area. 43.8 kHz/85 Hz (14”) Horizontal size and position and vertical size and Display image: Crosshatch pattern...
- Page 42 5 Alignment and Adjustments | C1 |, | C2 | ≤ 1.5 mm, | D1 |, | D2 | ≤ 1.5 mm. 5-2-3 Trapezoid Adjustment CONDITIONS Scanning frequency: 53.7 kHz/85 Hz (15”) 43.8 kHz/85 Hz (14”) Display image: Crosshatch pattern Make the the test pattern rectangular.
- Page 43 5 Alignment and Adjustments 5-2-8 Pin Balance Adjustments To activate the pin balacne function, push both the horizontal position and vertical position buttons and hold then in for longer than 3 seconds, or until the power indicator LED changes from green to blink and back to green.
-
Page 44: Color Adjustments
1. Signal Generator 2. Adjust VR102R (R-Bias) and VR102B (B-Bias) so Back Raster color is white. 2. Computer with Samsung DM 200 software or (x = 0.283 ± 0.02 and y = 0.298 ± 0.02) DisplayMate for Windows software from... - Page 45 5 Alignment and Adjustments PROCEDURE 5-3-7 Focus Adjustment 1. Display the full white pattern. CONDITIONS 2. Adjust VR101 (R-Gain) and VR103 (B-Gain) so Measurement instrument: Color analyzer that the video is white. Scanning frequency: 53.7 kHz/85 Hz (15”) (x = 0.283 ± 0.02 and y = 0.298 ± 0.02) 43.8 kHz/85 Hz (14”) Display image: “H”...
- Page 46 5 Alignment and Adjustments 5-3-9 Color Purity Adjustment 3. Make sure the spacing between the PCM assembly and the CRT stem is Color purity is the absence of undesired color. 22.5 mm ± 1 mm. Conspicuous mislanding (unexpected color in a 4.
-
Page 47: Convergence Adjustments
5 Alignment and Adjustments 5-4 Convergence Adjustments Misconvergence occurs when one or more of the electron beams in a multibeam CRT fail to meet the other beams at a specified point. Table 5-4. Misconvergence Tolerances FRONT Position Error in mm CRT Dot Pitch Center (A) 0.30... - Page 48 5 Alignment and Adjustments 5-4-1 Static (Center) Convergence 5-4-2 Dynamic (Edge) Convergence Static convergence involves alignment of the red, CONDITIONS blue and green lines in the center area of the Direction: Monitor facing east display. Warm-up: 30 minutes See “Dynamic Convergence” for alignment of Display image: Crosshatch pattern color fields around the edges of the display.
- Page 49 5 Alignment and Adjustments 5-4-3 Bow Convergence Adjustments 5-4-4 (a) HORIZONTAL LINE RED AND BLUE BALANCE CONVERGENCE CONDITIONS Orientation: Monitor facing east. BLUE Display Image: Crosshatch pattern with mixed RGB colors. Required tools: Philips (+) screwdriver, 1.5 mm Hexkey, 2.5 mm Figure 5-12.
-
Page 50: Troubleshooting
6 Troubleshooting Notes: 1. If a picture does not appear, fully rotate the brightness and contrast controls clockwise and reinspect. 2. Check the following circuits. • No raster appears: Power circuit, Horizontal output circuit, H/V control circuit, and H/V output circuit. •... - Page 51 6 Troubleshooting 6-3 No Raster WAVEFORMS Does the drive pulse appear Check the horizontal drive at Pin 26 of IC401? circuits. (IC401) 4.76 V (IC401, #26) Does the drive pulse appear at the collctor of Check Q403 and T401 Q403? CH1 P-P = 4.76 V CH1 RMS = 3.652 V 29.4 V (Q403, Collector)
- Page 52 6 Troubleshooting 6-4 No Video WAVEFORMS 5.04 V (IC202, #37), Clamp Power indicator is green Does DC 12 V appear at Check IC604. Pins 16 and 5 of IC101? CH1 P-P = 5.04 V CH1 RMS = 5.024 V 4.92 V (IC101, #19) Does the video pulse Check signal cable appear at Pins 4, 6 and 8...
- Page 53 6 Troubleshooting 6-5 No Specific Color Appears The raster color is The raster color is light green The raster color is light red or cyan or magenta light blue or yellow Check the video circuits Check the video circuits Check the video circuits (IC101, IC102 pin #1, and (IC101, IC102 pin #3, and (IC101, IC102 pin #5, and...
- Page 54 6 Troubleshooting 6-7 Power Save Management System Failure 6-7-1 Stand-By Mode 6-7-2 Suspend Mode 1. Check V-sync input (inactive) Does 0 V appear at Does +5 V appear at 2. Check IC202 and its related Pin 3 of IC202? Pin 12 of IC202? circuits Does 0 (zero) V appear at Check IC604 and Q602.
- Page 55 6 Troubleshooting 6-8 User Controls Don’t Work Does the DC level change at Check the button Pins 29, 30, 31 and 32 of IC201 when (SW201~SW203, you push the front panel button? SW205~SW208 and SW211) Does the DC level change at the positive pole capacitors when you push the Check IC202.
- Page 56 8 Exploded View and Parts List 8-1 CKA4217L SIGNAL CABLE HEATSINK-POWER BH62-30411A A6030S HEATSINK-VER, IC BH62-30411A A6030S 6021-000118 M3, SM20C HEATSINK-TR BH62-30312A SPC-1, T1.0 SCREW-ASS’Y MACHINE 6006-001008 M3, L10 TAPTITE SCREW 6003-000010 D3, L10, W/W HEATSINK-FBT BH62-30336B A1050S T=1.0 TAPTITE SCREW 6003-000129 M4,L10,ZPC SPRING-PS...
- Page 57 8 Exploded View and Parts List 8-2 CKA4227L SIGNAL CABLE BH62-30411A ABS, V0, IV16 HEATSINK-POWER BH62-30411A A6030S HEATSINK-VER, IC BH62-30411A A6030S 6021-000118 M3, SM20C HEATSINK-TR BH62-30312A SPC-1, T1.0 SCREW-ASS’Y MACHINE 6006-001008 M3, L10 TAPTITE SCREW 6003-000010 D3, L10, W/W HEATSINK-FBT BH62-30336B A1050S T=1.0 TAPTITE SCREW...
- Page 58 8 Exploded View and Parts List 8-3 CKA5227L SIGNAL CABLE HEATSINK-POWER BH62-30411A A6030S HEATSINK-VER, IC BH62-30411A A6030S 6021-000118 M3, SM20C HEATSINK-TR BH62-30312A SPC-1, T1.0 SCREW-ASS’Y MACHINE 6006-001008 M3, L10 TAPTITE SCREW 6003-000010 D3, L10, W/W HEATSINK-FBT BH62-30336B A1050S T=1.0 TAPTITE SCREW 6003-000129 M4,L10,ZPC SPRING-PS...
- Page 59 8 Exploded View and Parts List Memo CKA42*7L/5227L 13-4...
Need help?
Do you have a question about the SYNCM.400B and is the answer not in the manual?
Questions and answers