Table of Contents
Advertisement
Quick Links
Advertisement
Table of Contents

Related Manuals for Focus TView Micro


Summary of Contents for Focus TView Micro
- Page 1 TView Micro User’s Guide Rev. 04/02...
-
Page 2: Fcc Notice
FCC NOTICE This equipment has been tested and found to comply with the limits for a Class B digital device, pursuant to Part 15 of the FCC Rules. These limits are designed to provide reasonable protection against harmful interference in a residential installation. - Page 3 United States Copyright Laws. No part of this document or software may be copied without prior written consent from FOCUS Enhancements, Inc. except in the normal use of the software as described in this documentation. All printed circuits, their physical implementation on printed circuit boards and associated software are copyrighted with all rights reserved.
-
Page 4: Table Of Contents
This is a blank page Table of Contents CHAPTER 1 CHAPTER 2 Checking the Packing List Packing List Inspecting the Equipment CHAPTER 3 Windows 95, 98, NT, 2000, ME & XP Macintosh Configuring the Macintosh Monitor Mode CHAPTER 4 Brightness Color Sharpness Tint or Hue... - Page 5 About the User’s Guide The TView Micro User’s Guide is designed to help you to quickly and easily connect the hardware and install the software for this product. The guide is divided into the following chapters: Chapter 1: Introduction: which describes the key features and functionality of the product and some of its many uses.
-
Page 6: Notation Conventions
TView Micro User’s Guide Notation Conventions This user’s guide uses the following conventions to specify certain types of information. Warns you about potential problems and hazards during the installation or use of the product. Read these warnings carefully, and be sure you... - Page 7 On-line: URL : http://www.FOCUSinfo.com e-mail: info@FOCUSinfo.com Preface...
- Page 8 TView Micro User’s Guide Chapter 1 Introduction The TView Micro converts the VGA output from your computer into video that can be displayed on a television or recorded to a VCR. TView Micro automatically detects VGA, SVGA, and XGA resolutions and synchronizes them with your television.
- Page 9 Works with multiple platforms including Mac OS 7.1 or higher, Microsoft Windows 95, 98 , NT, 2000 and 8 Levels of Brightness Control along with 8 Levels of Sharpness and Flicker Filter 8 Levels of Over/UnderScan and Horizontal/Vertical Scan EE-ROM auto save TV-Position and Size Zoom/Pan and freeze/unfreeze 2D Flicker Filter with 8 Levels Auto power on/off...
-
Page 10: Modes Of Operation
TView Micro User’s Guide Modes of Operation The TView Micro has ability to operate in three separate modes: 1. Presentation Mode: Display the same image on your computer 2. Television Only Mode: Use the television as your only display. Video Record Mode: Record your video image directly to videotape. - Page 11 SIZE ZOOM PICTORE VXIZE/FLICKER Figure 2-1: Connecting TView Micro to the Television & Computer Note: You have the option to use either the USB or PS2/AT power cables, which are both included inside. The DC adapter is not included but can be purchased through our customer service.
- Page 12 TView Micro User’s Guide Suggested Uses for the TView Micro The TView Micro can be used for many purposes. For example: Bring sales or other multimedia presentations from a laptop to a large TV Create training tapes or outfit a training room...
-
Page 13: Specifications
Specifications Table 1: TView Micro Specifications. Computer Multiple platforms include Mac OS, Compatibility Windows 95, 98, 2000 , ME & XP along with any computer with a VGA output Television Works with any size television monitor Compatibility (NTSC or PAL) with an RCA (composite), S-Video input connection. -
Page 14: Hardware Installation
TView Micro User’s Guide Chapter 2 Hardware Installation This chapter describes the information you should know before installing and connecting the TView Micro hardware, and the steps required to perform the installation System Requirements Before installation, the following are system requirements... -
Page 15: Checking The Packing List
If anything is missing, contact FOCUS Enhancements Customer Service department by calling 1-800-338-3348. Packing List Your TView Micro includes the following items: TView Micro (NTSC or PAL version sold seperately) Keyboard power cable (PS2/AT) 1 S-Video and 1 Composite video cable (connected to unit) User’s guide and QuickStart guide (on CD ROM) -
Page 16: Inspecting The Equipment
If any of the equipment is damaged, contact FOCUS Enhancement’s Customer Service department by calling 1-800-338-3348. Connecting the TView Micro to an IBM PC or Macintosh Computer This section describes the steps to connect your TView Micro to a television or VCR. - Page 17 Notes: 1. Before performing the steps to connect the TView Micro to a laptop computer, you must turn on the external video connector. This is accomplished by using a particular key sequence on the keyboard (for example, FN + F11) or through the BIOS setup program. Refer to your laptop owner's manual to determine how the external video connector is turned on.
- Page 18 VGA input cable. 6. Connect the composite or S-Video cable from the TView Micro to the TV. 7. Connect the PS2/AT power cable to the keyboard port and the other end to the PC keyboard port.
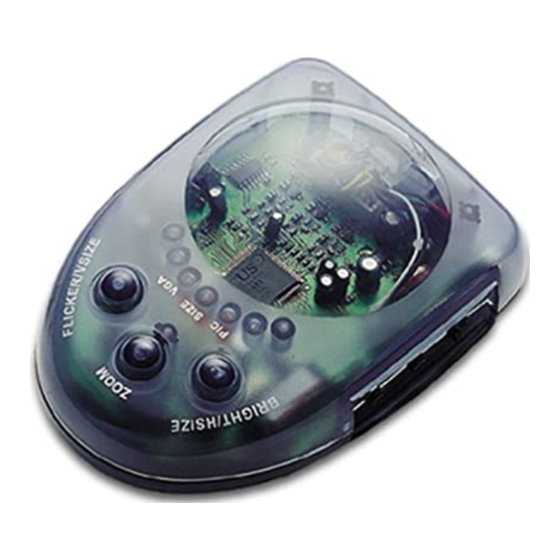
- Page 19 2.1 TView Micro OUTLINE DESCRIPTION FREEZE/Un FREEZE UP-KEY DOWN-KEY VSIZE/FLICKER SIZE ZOOM PICTORE HSIZE/BRIGHT RIGHT KEY PIC/SIZE LEFT KEY Figure 2-1: Connecting the TView Micro XGA to an IBM or Macintosh PC DC/KB KB power cable (PTA 8015) Chapter 2...
- Page 20 PS2/AT or USB power cable. You can purchase the DC power cable through our customer service. Connecting the TView Micro to a Television The next step in connecting your system is to connect it to the television. (If you are planning to connect to a VCR, see "Connecting to a VCR"...
- Page 21 To determine if your television supports composite video, look for a port on your television that matches the composite video out port at the rear of the TView Micro unit. Note: The composite video port on the television may or may not be labeled "video in.”...
- Page 22 ANT IN. This input is used by cable TV companies and uses a different type of video than that used by TView Micro. It is not possible to connect directly to this input. If this is the only...
-
Page 23: Connecting To The Television Using An Rf Modulator
Video, you will need a special adapter called an RF Modulator. This device converts the Composite Video signal from the TView Micro unit to an antenna signal. The RF Modulator is not supplied. Note: When using a RF Modulator, the TV may have to be set to a particular channel (for instance, 3 or 4) to accept the TView Micro video. - Page 24 In certain configurations, the video will be run through a VCR. Therefore the unit must be connected to the VCR. By connecting the TView Micro unit, you will also be able to record the computer screen to videotape. To connect your TView Micro to a VCR, perform the following steps: 1.
- Page 25 2. Turn on the VCR. 3. Turn on your television and tune it to channel 3 or 4. 4. Turn the TView Micro unit on. 5. Turn the computer on. Find a button on the front of the VCR called "Line,"...
-
Page 26: Image Control
Screen Controls If you look at the top of your TView Micro unit, you will notice three buttons on top and two on the left and right side of the unit. These buttons are used to perform various adjustments to the unit’s video output. - Page 27 “PIC/SIZE” switch on the right of the unit is in the Size position, this button is used to size your computer’s screen vertically to fit the television screen. Zoom: When you choose to click on the Zoom Button (Button 2) you can use the “Up & Down” and “Left &...
- Page 28 Freeze/ Un Freeze mode. Auto-Save Memory Function After you have changed the settings of the TView Micro, the changes are automatically saved to memory with the unit’s auto-save memory function. Each set- up will be saved into EEROM, which means all settings will be saved even if the unit is powered off and on.
-
Page 29: Windows 95, 98, Nt, 2000, Me & Xp
Changing Screen Resolutions Windows 95, 98, NT, 2000, ME & XP To change screen resolutions perform the following steps: 1. Click on the "Start" button. 2. Choose "Settings" and go to the "Control Panel" submenu. 3. Double-click on the "Display" icon. 4. -
Page 30: Configuring The Macintosh Monitor Mode
PowerBook’s internal screen is turned off. When the TView Micro is connected to the PowerBook, and the PowerBook is initially turned on, it defaults to the dual monitor mode. To ensure that the PowerBook recognizes the second monitor, select "Monitors"... - Page 31 2. In the resolution area of the "Monitors and Sound" window, use the "Show" pull down menu. 3. Select "Simulscan." Select the resolution with the word "Simulscan" in parentheses. Chapter 3...
-
Page 32: Tuning Your Television
TView Micro User’s Guide Chapter 4 Tuning Your Television This chapter describes the methods you can use to tune the image on your television. Using Your Television’s Video Settings Picture quality varies from television to television. To obtain the clearest and sharpest picture from your television, it is important to spend some time adjusting the television’s video settings. -
Page 33: Brightness
Brightness The Brightness adjustment on the television adjusts the brightness levels of black areas of the picture. Raise or lower the brightness until the picture appears bright without a "blooming" effect. The sides of the picture should be straight, not curved or bowed. Color The color adjustment on the television adjusts the intensity of the colors in the picture. -
Page 34: Troubleshooting
Ensure that your television or VCR has been configured to accept auxiliary video input. Ensure that the TView MIcro is connected to the appropriate video connector on your TV or VCR. At the TV or VCR end, the cable should be connected to the VIDEO, VIDEO IN, or AUX port. - Page 35 Adjust the color and contrast controls on poor quality your TV. or non- Adjust the Video settings of the TView Micro existent Use of a RF modulator may cause image quality problems. If at all possible, avoid those devices that convert the TView Micro signal into an antenna signal.
- Page 36 RMA number that is written on the outside of the package. 2. Pack the TView Micro carefully. If possible, use the original shipping package. Send the package pre- paid and insured via United Parcel Service (UPS) or...
- Page 37 ATTN: RMA# (Your RMA Number) 1370 Dell Avenue Campbell, CA 95008 FOCUS Enhancements will repair or replace your TView Micro within 5-15 working days. For units not covered under the 1-year warranty, or where the warranty has been voided, we charge a minimum fee of $90.00.
Need help?
Do you have a question about the TView Micro and is the answer not in the manual?
Questions and answers