South Shore 7260 Assembly Instructions Manual
Hide thumbs
Also See for 7260:
- Assembly instructions manual (19 pages) ,
- Assembly instructions manual (15 pages) ,
- Assembly instructions manual (16 pages)
Advertisement
Quick Links
Modèle
Model/
/ Modelo
-7260-
Item
Article/
/ Articulo
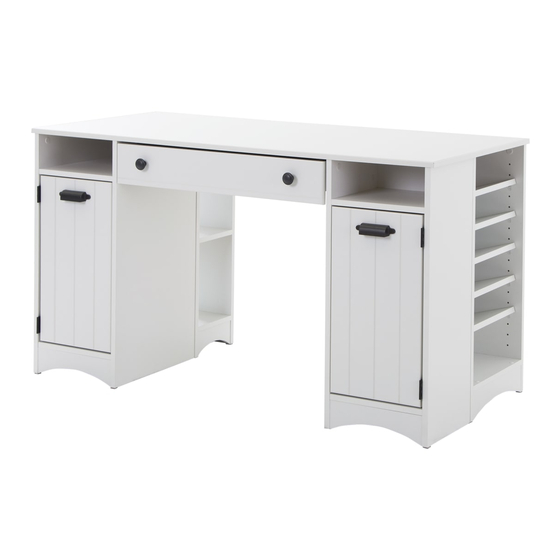
Craft table
-
727
-
Table de travail
Mesa de trabajo
Assembly time
Temps d'assemblage
tiempo de montaje
OPTION B
ASSEMBLY INSTRUCTIONS
INSTRUCTIONS D'ASSEMBLAGE
INSTRUC I
T VO
This number is mandatory for all request regarding warranty
Ce numéro est obligatoire pour toutes demandes concernant la garantie
Este numero es obligatorio para cualquier solicitud relativa a garantia.
2H
DE
ARMADO
OPTION A
ADULT ASSEMBLY REQUIRED
DOIT ÊTRE ASSEMBLÉ PAR UN ADULTE
DEBE DE SER ARMADO POR UN ADULT0
Advertisement

Related Manuals for South Shore 7260


Summary of Contents for South Shore 7260
- Page 1 Modèle Model/ / Modelo This number is mandatory for all request regarding warranty Ce numéro est obligatoire pour toutes demandes concernant la garantie -7260- Este numero es obligatorio para cualquier solicitud relativa a garantia. Item Article/ / Articulo Craft table...
- Page 2 N.B.: It is important to carefully read instructions before beginning the assembly and before use of the furniture Keep the assembly instructions for future use and for warranty purposes. N.B. Il est important de bien lire toutes les instructions avant de commencer l’assemblage et avant d’utiliser le meuble Gardez les instructions d’assemblage pour utilisation future...
- Page 3 -727- Steps 15 to 22 Étapes 15 à 22 Etapas 15 a 22 Steps 1 to 7 Étapes 1 à 7 Etapas 1 a 7 Steps 8 to 14 Étapes 8 à 14 Etapas 8 a 14 Steps 23 to 31 Étapes 23 à...
- Page 4 HARDWARE QUINCAILLERIE / HERRAJE #131 #205 #144 #231 #286 #148 #158 #299 #380 #171 #101 #173 #494 #121 #180 #529 #129 * ardware package have spare parts . Le sac de quincaillerie peut contenir des pièces de remplacement . La bolsa de herraje puede contener piezas adicionales de repuesto...
- Page 5 ASSEMBLY ASSEMBLAGE ARMADO Steps 2 to 7 Étapes 2 à 7 Etapas 2 a 7 C-C1-G-G1-P F-F1-G6-P1(2) Section #1 Section #1 ección #158 #144 #144 #158 #158 #144 #158 #144 #144 #158 #158 #158 #144 #158 #144 #158 #144 #144 #158 #158...
- Page 6 #148 #158 #158 #158 #148 #158 #158 #158 #158 #158 #231 #158 #231 #158 #158 #231 inished surface Surface finie Acabado #158...
- Page 7 #144 #158 #144 #144 #231 #144 #144 #158 #158 #231 #158 #158 P1 (2x) #158 #158 #158 #144 #144 #158 #231 #144 #144 #158 #158 #158...
- Page 8 #144 #144 Section #1 Section #1 #144 ección #144 #144 #158 ASSEMBLY ASSEMBLAGE ARMADO Steps 9 to 14 Étapes 9 à 14 Etapas 9 a 14 C2-C3-G3-G4-P F2-F3-G8(2)-P2(2) Section #2 Section #2 ección...
- Page 9 #144 #158 #158 #144 #158 #158 #144 #158 #144 #144 #158 #144 #158 #158 #144 #158 #144 #144 #158 #158 #148 #148 #158 #158 #158 #158 #158 #158 #231 #158 #158 #231 #158 #231...
- Page 10 inished surface Surface finie Acabado #158 #144 #144 #144 #144 #158 #144 #158 #158 #231 #158 #158 #144 #158 #144 #158 #144 G8(2x) #231 #144 P2(2x) #158 #158 #231...
- Page 11 inished surface Surface finie Acabado #158 BRUT CRUDO #144 #144 #144 Section #2 Section #2 ección #144 #144 #158...
- Page 12 ASSEMBLY ASSEMBLAGE ARMADO Steps 16 to 22 Étapes 16 à 22 Etapas 16 a 22 R-S12(2)-T5-U1 Section #3 Section #3 ección #144 #144 #144 #144 #144 #144 #144 #144 #144 #144 #144 #144 #144 #144...
- Page 13 #144 #158 #231 #158 #144 #144 #231 #158 #158 #144 #144 #158 #231 #158 #144 #144 #158 #158 #231 #158 #144 #144 #231 #158 #158 #158 BRUT CRUDO...
- Page 14 #158 BRUT CRUDO #121 #380 #121 #380 #121 #380...
- Page 15 #205 #205 #205 BRUT CRUDO #205 Section #3 Section #3 ección Pre-drilled holes Trous pré-percés Agujeros pre-perforados...
- Page 16 #231 OPTION A OPTION B Section #1 #231 Section #1 #231 ección #231 #231 #231 #231...
- Page 17 #131 #171 #173 OPTION A #158 Section #1 Section #1 ección Section #2 Section #2 ección Section #3 Section #3 ección #173 -158- -171-...
- Page 18 #131 #171 #173 OPTION B #158 Section #2 Section #2 ección Section #1 Section #1 ección Section #3 Section #3 ección -158- -171- #173...
- Page 19 #180 2 manières de placer les tablettes. 2 ways to place the shelves. 2 maneras de colocar los estantes. F / F1 #180 G (5x)
- Page 20 #101 #101 #101 #101 #101 #101 #101 #129 #129 #286 #286 #129 #286...
- Page 21 #101 #101 #101...
- Page 22 #299 OPTION A #529 Section #2 Section #2 ección Section #1 Section #1 ección #299 #529 #299 #299 #529 #299...
- Page 23 #299 OPTION B #529 Section #2 Section #1 Section #2 Section #1 ección ección #299 #299 #529 #299 #299 #529...
- Page 24 #494 OPTION A Section #1 Section #1 ección Section #2 Section #2 ección #494 OPTION B Section #1 Section #1 ección Section #2 Section #2 ección #494...
- Page 25 Important / Important / Importante to prevent damage f you want to move the unit, remove the - Si vous voulez déplacer l'unité, afin de ne pas l'endommager retirez le dessus A. - Si desea mover la unidad para evitar daños, retire la tapa A. #158...
-
Page 26: Maintenance Tips
ONSEILS D ENTRETIEN ’ AINTENANCE TIPS CONSEJOS DE MAN TENI IENTO - Never let liquids or damp cloths sit on this furniture. - Ne jamais laisser de liquide ou linge humide sur le meuble. - Nunca deje un líquido o un trapo húmedo sobre el mueble. - Never use chemical cleaning products...
Need help?
Do you have a question about the 7260 and is the answer not in the manual?
Questions and answers