Specialized Turbo LEVO FSR 6FATTIE User Manual
Hide thumbs
Also See for Turbo LEVO FSR 6FATTIE:
- User manual (28 pages) ,
- Instruction manual (28 pages)
Table of Contents
Advertisement
Advertisement
Table of Contents

Related Manuals for Specialized Turbo LEVO FSR 6FATTIE


Summary of Contents for Specialized Turbo LEVO FSR 6FATTIE
- Page 1 ENGLISH - USER MANUAL...
-
Page 2: Table Of Contents
(translation of Original instructions). SPECIALIZED BICYCLE COMPONENTS 15130 Concord Circle, Morgan Hill, CA 95037 (408) 779-6229 0000092227_UM_EN_R3, 10/17 EN 15194 Please note all instructions and notices are subject to change and updates without notice. Please visit www.specialized.com for periodic tech updates. Feedback: techdocs@specialized.com... -
Page 3: Introduction
Owner’s Manual, because it has additional important general information and instructions which you should follow. If you do not have a copy of the Owner’s Manual, you can download it at no cost at www.specialized.com, or obtain it from your nearest Authorized Specialized Retailer or Specialized Rider Care. -
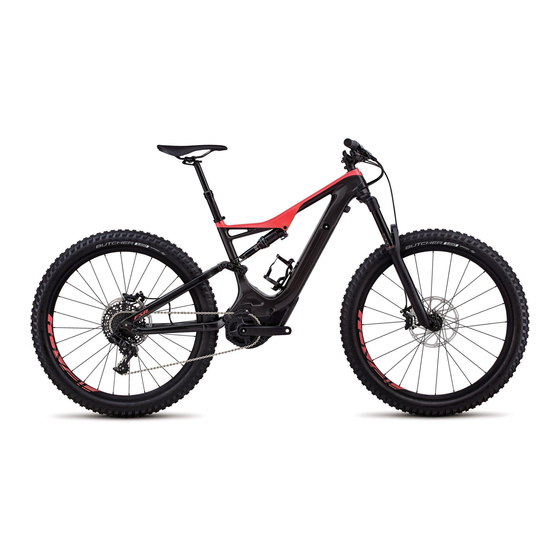
Page 4: Levo/Kenevo Components
2. LEVO/KENEVO COMPONENTS 17 18 1. Top tube 20. Handlebar with grip 2. Down tube 21. Shifter 3. Seat tube 22. Brake lever 4. Head tube 23. Stem 5. Chain stay 24. Headset 6. Seat stay 25. Rechargeable Battery 7. Fork 26. -
Page 5: General Information About Your Levo/Kenevo
This user manual is not intended as a comprehensive use, service, repair or maintenance guide. Please see your Authorized Specialized Retailer for all service, repairs or maintenance. Your Authorized Specialized Retailer may also be able to refer you to classes, clinics or books on bicycle use, service, repair, and maintenance. -
Page 6: Speed Sensor
„ and a 1.5” (52mm x 40 x 7mm, 45x45°) lower bearing. Ensure that replacement bearings are compatible with the Specialized headset specification. No tools are needed for installation or removal of both bearings. Grease bearing surfaces before installation. Inspect the fork, stem, seatpost and seat tube, to ensure that there are no burrs or sharp edges. Remove any „... -
Page 7: Seatpost
CARBON FRAMES: Do not apply grease to the contact surfaces between the seatpost and the seat tube. Grease reduces the friction, which is critical to proper seatpost grip. Specialized recommends the application of carbon assembly compound (fiber paste), which can increase friction between carbon surfaces. -
Page 8: General Notes About Riding
5. GENERAL NOTES ABOUT RIDING The LEVO/KENEVO motor provides pedal assistance only while you are pedaling and the bicycle is in motion. The amount of pedal assistance will be higher or lower depending on the amount of force applied to the pedals. If you stop pedaling, the motor will stop providing any assistance. -
Page 9: Before Your First Ride
There are many different setups that allow you to ride with kids. Please look at the Riding Safely section in the Owner’s Manual regarding general information and instructions on child carriers or trailers. If you regularly ride with kids on your bicycle, your Authorized Specialized Retailer should conduct a periodic safety inspection. -
Page 10: General Notes About Maintenance
Dirt can also accelerate wear of surfaces and bearings. The surfaces of the bicycle should be cleaned before each ride. The bicycle should also be maintained regularly by an Authorized Specialized Retailer, which means it should be cleaned, inspected for signs of corrosion and/or cracks and lubricated. If you notice any signs of corrosion or cracking on the frame or any component, the affected item must be replaced. -
Page 11: System Interface
7. SYSTEM INTERFACE 7.1. HANDLEBAR REMOTE The handlebar remote is included on all LEVO/KENEVO models (fig.4) and controls the level of motor support. TURBO BOOST WALK-ASSIST TURBO BOOST BUTTON: Automatically changes to TURBO mode regardless of the mode the bike is in. „... -
Page 12: Connectivity Options
The level of motor support in TURBO, TRAIL and ECO modes can be customized for your individual needs. Using the Mission Control App or with help from your local Authorized Specialized Retailer, you can adjust the ECO and TRAIL modes to provide between 10% and 70% of motor support. -
Page 13: Battery / Charger
Make sure the charging socket and plug are dry before connecting and charging the battery. „ Only use the Specialized charger supplied with the bicycle or other chargers approved by Specialized. Inspect „ the charger before every use for possible damage to the charger itself, the cable or the charging plug. Never use a charger which you suspect is damaged or know is broken. - Page 14 However, in order to maintain the best possible battery performance and lifespan, Specialized recommends regularly recharging the battery to at least ¾ full (7 LEDs). Please note that Li-ion batteries gradually lose capacity depending on age and use. Strongly reduced operating time after charging can be a sign that the battery is reaching the end of its useful life and has to be replaced.
-
Page 15: Charge Level Display
8.3. CHARGE LEVEL DISPLAY The charge level of the battery is permanently displayed during your ride. The number of LEDs glowing will indicate the remaining battery charge. When the battery charge reaches 20%, the last two LEDs will glow red (fig.8). At 10% battery charge remaining, the system will start to reduce the amount of support. -
Page 16: Charging The Battery In The Frame
Plug the charger’s plug into an outlet (100 - 240V), using the appropriate plug for the country’s standards, then connect the charging plug with the charging socket on the battery. Specialized recommends charging the battery in an area with a smoke detector. WIRING HARNESS... -
Page 17: Cleaning
Please ensure no water comes into contact with the electrical components while washing. Ask your Authorized Specialized Retailer for additional information about cleaning your bicycle. CAUTION: Do not use alcohol, solvents or abrasive cleaners to clean the charger or battery. -
Page 18: Battery Technical Data
8.11. BATTERY TECHNICAL DATA DESCRIPTION UNIT SPECIFICATION OPERATING VOLTAGE VOLT °C 0 — +50 CHARGING TEMPERATURE °F +32 — +122 °C -20 — +70 DISCHARGING TEMPERATURE °F -4 — +158 °C < +35 STORAGE TEMPERATURE °F < +95 DEGREE OF PROTECTION IP67 WEIGHT (WITHOUT ROCKGUARD) BATTERY... -
Page 19: Autosag Air Shock Setup
9. AUTOSAG AIR SHOCK SETUP LEVO FSR bicycles are equipped with AUTOSAG, a unique new feature designed to simplify and speed up the adjustment of air pressure. The AUTOSAG feature automatically determines the correct amount of sag, and eliminates the need to refer to an air chart to determine the correct pressure based on rider weight. However, the shock still requires compression and rebound adjustment based on type of terrain and rider weight. -
Page 20: Step 2: Adjusting Compression
X-LARGE 72N/mm (411 lbs/in) 80N/mm (457 lbs/in) 88N/mm (502 lbs/in) 96N/mm (548 lbs/in) Additional spring rates are available through your Authorized Specialized Retailer. 68N/mm // 388 lbs/in 80N/mm // 457 lbs/in 92N/mm // 525 lbs/in 106N/mm //605 lbs/in 72N/mm // 411 lbs/in... -
Page 21: Specifications
Upper shock eye 12.2. FORK TRAVEL WARNING! Specialized frames are compatible ONLY with forks that have a specific maximum amount of travel (see table below). Use of different styled forks or forks with longer travel may result in catastrophic failure of the frame which may result in serious personal injury or death. -
Page 22: Bolt Size / Torque Specs
12.3. BOLT SIZE / TORQUE SPECS WARNING! Correct tightening force on fasteners (nuts, bolts, screws) on your bicycle is important for your safety. If too little force is applied, the fastener may not hold securely. If too much force is applied, the fastener can strip threads, stretch, deform or break. -
Page 23: Frame Specifications
12.4. FRAME SPECIFICATIONS ITEM SPECIFICATION HEADSET 1 1/8” UPPER / 1.5” LOWER SEAT COLLAR DIAMETER (LEVO) 34.9MM SEAT COLLAR DIAMETER (KENEVO) 38.6MM SEATPOST DIAMETER (LEVO) 30.9MM SEATPOST DIAMETER (KENEVO) 34.9MM DERAILLEUR HANGER S172600003 (AMAZINGER 2.1) REAR HUB 148MM X 12MM FRONT HUB 110MM X 15MM 12.5. -
Page 24: Ec - Declaration Of Conformity
13. EC – DECLARATION OF CONFORMITY The manufacturer: Specialized Bicycle Components Inc. 15130 Concord Circle Morgan Hill, CA 95037, USA Tel: +1 408 779-6229 hereby confirms for the following products: Product description: EPAC (Electrically Pedal Assisted Cycle) Model designation: Levo FSR 6Fattie... -
Page 25: Retailer Service Schedule
14. RETAILER SERVICE SCHEDULE 1st Inspection: 2nd Inspection: 3rd Inspection: After approx. 200 kilometers (120 miles) After approx. 1000 kilometers (600 miles) After approx. 2000 kilometers (1200 miles) Work done: Work done: Work done: ______________________________________________ ______________________________________________ ______________________________________________ ______________________________________________ ______________________________________________ ______________________________________________ ______________________________________________ ______________________________________________ ______________________________________________...
Need help?
Do you have a question about the Turbo LEVO FSR 6FATTIE and is the answer not in the manual?
Questions and answers