Advertisement
Quick Links
SERVICE MANUAL
2007
3 S ERVICE MANUAL
MA308
KD-ADV5380J,KD-DV5300J,KD-DV5301E,KD-DV5301EU,
KD-DV5302E,KD-DV5302EU,KD-DV5304UI,KD-DV5305U,
KD-DV5305UN,KD-DV5305UT,KD-DV5305A,KD-DV5306U,
KD-DV5306UN,KD-DV5306UT,KD-DV5306A,KD-DV5307EE,
KD-DV5308EE,KD-DV5388UF,KD-DV4304UI,KD-DV4305U,
KD-DV4305UN,KD-DV4305UT,KD-DV4305A,KD-DV4306U,
KD-DV4306UN,KD-DV4306UT,KD-DV4306A,KD-DV4388UF,
KD-ADV5380/KD-DV5300/KD-DV5306
KD-DV5305/KD-DV5304/KD-DV5303
COPYRIGHT © 2007 Victor Company of Japan, Limited
Lead free solder used in the board (material : Sn-Ag-Cu, melting point : 219 Centigrade)
Lead free solder used in the board (material : Sn-Cu, melting point : 230 Centigrade)
1
PRECAUTION. . . . . . . . . . . . . . . . . . . . . . . . . . . . . . . . . . . . . . . . . . . . . . . . . . . . . . . . . . . . . . . . . . . . . . . . . 1-9
2
SPECIFIC SERVICE INSTRUCTIONS . . . . . . . . . . . . . . . . . . . . . . . . . . . . . . . . . . . . . . . . . . . . . . . . . . . . . 1-12
3
DISASSEMBLY . . . . . . . . . . . . . . . . . . . . . . . . . . . . . . . . . . . . . . . . . . . . . . . . . . . . . . . . . . . . . . . . . . . . . . 1-13
4
ADJUSTMENT . . . . . . . . . . . . . . . . . . . . . . . . . . . . . . . . . . . . . . . . . . . . . . . . . . . . . . . . . . . . . . . . . . . . . . . 1-34
5
TROUBLESHOOTING . . . . . . . . . . . . . . . . . . . . . . . . . . . . . . . . . . . . . . . . . . . . . . . . . . . . . . . . . . . . . . . . . 1-40
DVD/CD RECEIVER
KD-DHV426UN
KD-DV5308/KD-DV5307/KD-DV5302
KD-DV5301/KD-DV4306/KD-DV4305
KD-DV4304/KD-DV4303
TABLE OF CONTENTS
COPYRIGHT © 2007 Victor Company of Japan, Limited
except
KD-DVH426
only for
KD-ADV5380
KD-DV5300
KD-DVH426
only for
KD-DV5308
KD-DV5307
KD-DV5302
KD-DV5301
No.MA308
2007/3
Advertisement

Related Manuals for JVC KD-ADV5380J


Summary of Contents for JVC KD-ADV5380J
-
Page 1: Table Of Contents
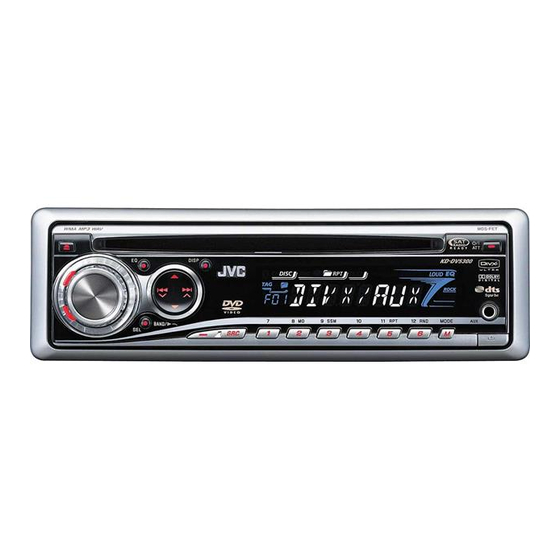
SERVICE MANUAL DVD/CD RECEIVER MA308 2007 3 S ERVICE MANUAL KD-ADV5380J,KD-DV5300J,KD-DV5301E,KD-DV5301EU, KD-DV5302E,KD-DV5302EU,KD-DV5304UI,KD-DV5305U, KD-DV5305UN,KD-DV5305UT,KD-DV5305A,KD-DV5306U, KD-DV5306UN,KD-DV5306UT,KD-DV5306A,KD-DV5307EE, KD-DV5308EE,KD-DV5388UF,KD-DV4304UI,KD-DV4305U, KD-DV4305UN,KD-DV4305UT,KD-DV4305A,KD-DV4306U, KD-DV4306UN,KD-DV4306UT,KD-DV4306A,KD-DV4388UF, KD-DHV426UN except KD-DVH426 only for KD-DV5308 only for KD-DV5307 KD-ADV5380 KD-DV5302 KD-DV5300 KD-DV5301 KD-ADV5380/KD-DV5300/KD-DV5306 KD-DV5308/KD-DV5307/KD-DV5302 KD-DVH426 KD-DV5305/KD-DV5304/KD-DV5303 KD-DV5301/KD-DV4306/KD-DV4305 KD-DV4304/KD-DV4303 COPYRIGHT © 2007 Victor Company of Japan, Limited... - Page 2 SPECIFICATION KD-ADV5380/KD-DV5300 AUDIO AMPLIFIER SECTION 20 W RMS × 4 Channels at 4 Ω and - 1% THD+N Power Output 80 dBA (reference: 1 W into 4 Ω) Signal to Noise Ratio 4 Ω (4 Ω to 8 Ω allowance) Load Impedance Tone Control Range Bass...
- Page 3 KD-DV5302/KD-DV5301 AUDIO AMPLIFIER SECTION Maximum Power Output Front/Rear 50 W per channel 19 W per channel into 4 Ω, 40 Hz to 20 000 Hz at no more than 0.8% total Continuous Power Output (RMS) Front/Rear harmonic distortion 4 Ω (4 Ω to 8 Ω allowance) Load Impedance Tone Control Range Bass...
- Page 4 KD-DV5304/KD-DV4304 AUDIO AMPLIFIER SECTION Maximum Power Output Front/Rear 50 W per channel 19 W per channel into 4 Ω, 40 Hz to 20 000 Hz at no more than 0.8% Continuous Power Output (RMS) Front/Rear total harmonic distortion 4 Ω (4 Ω to 8 Ω allowance) Load Impedance Tone Control Range Bass...
- Page 5 KD-DV5306/KD-DV5305/KD-DV4306/KD-DV4305 AUDIO AMPLIFIER SECTION Maximum Power Output Front/Rear 50 W per channel 19 W per channel into 4 Ω, 40 Hz to 20 000 Hz at no more than 0.8% total har- Continuous Power Output Front/Rear (RMS) monic distortion 4 Ω (4 Ω to 8 Ω allowance) Load Impedance Tone Control Range Bass...
- Page 6 KD-DV5308/KD-DV5307 AUDIO AMPLIFIER SECTION Maximum Power Output Front/Rear 50 W per channel 19 W per channel into 4 Ω, 40 Hz to 20 000 Hz at no more than 0.8% total Continuous Power Output (RMS) Front/Rear harmonic distortion 4 Ω (4 Ω to 8 Ω allowance) Load Impedance Tone Control Range Bass...
- Page 7 KD-DV5388/KD-DV4388 AUDIO AMPLIFIER SECTION Maximum Power Output Front/Rear 50 W per channel 19 W per channel into 4 Ω, 40 Hz to 20 000 Hz at no more than 0.8% Continuous Power Output (RMS) Front/Rear total harmonic distortion 4 Ω (4 Ω to 8 Ω allowance) Load Impedance Tone Control Range Bass...
- Page 8 KD-DVH426 AUDIO AMPLIFIER SECTION Maximum Power Output Front/Rear 50 W per channel 19 W per channel into 4 Ω, 40 Hz to 20 000 Hz at no more than 0.8% total Continuous Power Output (RMS) Front/Rear harmonic distortion 4 Ω (4 Ω to 8 Ω allowance) Load Impedance Tone Control Range Bass/Treble...
-
Page 9: Precaution
SECTION 1 PRECAUTION Safety Precautions Burrs formed during molding may be left over on some parts of the chassis. Therefore, pay attention to such burrs in the case of preforming repair of this system. Please use enough caution not to see the beam directly or touch it in case of an adjustment or operation check. - Page 10 Preventing static electricity Electrostatic discharge (ESD), which occurs when static electricity stored in the body, fabric, etc. is discharged, can destroy the laser diode in the traverse unit (optical pickup). Take care to prevent this when performing repairs. 1.2.1 Grounding to prevent damage by static electricity Static electricity in the work area can destroy the optical pickup (laser diode) in devices such as laser products.
- Page 11 Important for laser products 1.CLASS 1 LASER PRODUCT 5.CAUTION : If safety switches malfunction, the laser is able to function. 2.CAUTION : (For U.S.A.) Visible and/or invisible class II laser radiation 6.CAUTION : Use of controls, adjustments or performance of when open.
-
Page 12: Specific Service Instructions
SECTION 2 SPECIFIC SERVICE INSTRUCTIONS This service manual does not describe SPECIFIC SERVICE INSTRUCTIONS. 1-12 (No.MA308) -
Page 13: Disassembly
SECTION 3 DISASSEMBLY Main body 3.1.1 Removing the Bottom chassis (See Fig.1) (1) Disengage the five hooks a engaged bottom chassis. Fig.1 3.1.2 Removing the Heat sink (See Fig.2) (1) Remove the two screws A and three screws B attaching the Heat sink. - Page 14 3.1.4 Removing the Main board assembly (See Fig.4 and 5) (1) Remove the three screws D attaching the Main board as- sembly. (See Fig.4) CN961 (2) Remove the three screws E attaching Rear bracket. (See Fig.5) (3) Disconnect the connector CN961 connected to DVD mech- anism assembly.
- Page 15 3.1.5 Removing the DVD mechanism assembly (See Fig.6 and 7) (1) Remove the three screws F attaching the DVD mechanism assembly. (See Fig.6) (2) Remove the two screws G attaching the DVD bracket. (See Fig.7) Fig.6 Fig.7 3.1.6 Removing the Switch board assembly (See Fig.8) (1) Remove the Volume knob from Front panel assembly.
- Page 16 DVD mechanism assembly (except KD-DVH426) 3.2.1 Removing the mechanism control board (See Fig.1) Caution: Before disconnecting the flexible wire extending from the DVD Lug wire Flexible wire pickup, solder the short-circuit point on the flexible wire using Feed motor a grounding soldering iron. If you do not follow this instruction, Double tape the DVD pickup may be damaged.
- Page 17 3.2.2 Removing the top cover (See Fig.2) (1) Remove the two screws D attaching the top cover on the back of the body. (2) Remove the top cover upward. Reference: When reassembling, set part b of the top cover under the bending part c of the chassis frame.
- Page 18 3.2.4 Removing the clamper unit (See Fig.5 to 7) • Remove the top cover and the mechanism section. (1) Remove the clamper2 spring on the bottom of the mecha- Clamper2 spring nism section. (See Figs.5.and 6.) (2) Release the part d of the clamper spring from the bending part of the chassis base assembly.
- Page 19 Clamper unit Clamper spring Fig.8 Clamper unit Notch Fig.9 (No.MA308)1-19...
- Page 20 3.2.6 Removing the front unit (See Fig.10 to 12) • Remove the top cover and the mechanism section. (1) Disconnect the flexible wire from connector CN202 on the mechanism control board at the bottom of the body. (See Front unit Fig.10.) (2) Remove the screw G attaching the front unit on the top of the body.
- Page 21 3.2.7 Removing the loading arm assembly (See Fig.13 , 14) • Remove the top cover, the mechanism section and the front unit. (1) From the top of the body, move the loading arm assembly from the front side upward, and release the bosses from the right and left joints k and m of the chassis base assem- bly.
- Page 22 3.2.8 Removing the rod (L)(R)/roller assembly (See Fig.15 and 16) • Remove the top cover, the mechanism section, the front unit and the loading arm assembly. Collar Collar (1) Release the rod (L) and (R) from the joints q at the bottom of the loading arm assembly (See Fig.15.) (2) Remove the roller assembly from the loading arm assem- bly.
- Page 23 3.2.9 Removing the DVD pickup assembly (See Fig.17 to 19) • Remove the mechanism control board. (1) From the bottom of the body, turn the feed gear in the di- Feed gear rection of the arrow to move the DVD pickup outwards. (See Fig.17.) (2) Remove the screw J attaching the thrust spring.
- Page 24 3.2.10 Removing the spindle motor (See Fig.20) • Remove the mechanism control board. Remove the two screws L attaching the spindle motor on the Spindle motor bottom of the body. Caution: Perform adjustment when reattaching the spindle motor. Fig.20 3.2.11 Removing the feed motor assembly (See Fig.21 and 22) •...
- Page 25 DVD mechanism assembly (for KD-DVH426) 3.3.1 Removing the mechanism control board (See Fig.1) Caution: Before disconnecting the flexible wire extending from the DVD Lug wire Flexible wire pickup, solder the short-circuit point on the flexible wire using Feed motor a grounding soldering iron. If you do not follow this instruction, Double tape the DVD pickup may be damaged.
- Page 26 3.3.2 Removing the top cover (See Fig.2) (1) Remove the two screws D attaching the top cover on the back of the body. (2) Remove the top cover upward. Reference: When reassembling, set part b of the top cover under the bending part c of the chassis frame.
- Page 27 3.3.4 Removing the clamper unit (See Fig.5 to 7) • Remove the top cover and the mechanism section. (1) Remove the clamper2 spring on the bottom of the mecha- Clamper2 spring nism section. (See Figs.5.and 6.) (2) Release the part d of the clamper spring from the bending part of the chassis base assembly.
- Page 28 Clamper unit Clamper spring Fig.8 Clamper unit Notch Fig.9 1-28 (No.MA308)
- Page 29 3.3.6 Removing the front unit (See Fig.10 to 12) • Remove the top cover and the mechanism section. (1) Disconnect the flexible wire from connector CN202 on the mechanism control board at the bottom of the body. (See Front unit Fig.10.) (2) Remove the screw G attaching the front unit on the top of the body.
- Page 30 3.3.7 Removing the loading arm assembly (See Fig.13 , 14) • Remove the top cover, the mechanism section and the front unit. (1) From the top of the body, move the loading arm assembly from the front side upward, and release the bosses from the right and left joints k and m of the chassis base assem- bly.
- Page 31 3.3.8 Removing the rod (L)(R)/roller assembly (See Fig.15 and 16) • Remove the top cover, the mechanism section, the front unit and the loading arm assembly. Collar Collar (1) Release the rod (L) and (R) from the joints q at the bottom of the loading arm assembly (See Fig.15.) (2) Remove the roller assembly from the loading arm assem- bly.
- Page 32 3.3.9 Removing the DVD pickup assembly (See Fig.17 to 19) • Remove the mechanism control board. (1) From the bottom of the body, turn the feed gear in the di- Feed gear rection of the arrow to move the DVD pickup outwards. (See Fig.17.) (2) Remove the screw J attaching the thrust spring.
- Page 33 3.3.10 Removing the spindle motor (See Fig.20) • Remove the mechanism control board. Remove the two screws L attaching the spindle motor on the Spindle motor bottom of the body. Caution: Perform adjustment when reattaching the spindle motor. Fig.20 3.3.11 Removing the feed motor assembly (See Fig.21 and 22) •...
-
Page 34: Adjustment
SECTION 4 ADJUSTMENT Test instruments required for adjustment Standard measuring conditions (1) Digital oscilloscope (100MHz) Power supply voltage : DC14.4V(11V to 16V) (2) Jitter meter Load impedance : 4Ω(2 Speakers connection) (3) Digital tester Line output : 20kΩ (4) Electric voltmeter Caution: (5) Tracking offset meter Be sure to attach the heat sink and rear bracket onto the power... - Page 35 Adjustment method for jitter After replacing the pickup, set the unit in the service mode to display a jitter value on the LCD. Confirm that the jitter value measured with a jitter meter is within 12% of the jitter value displayed on the LCD. If it is within 12%, then adjustment is not necessary.
- Page 36 Jitter value conversion table Load the test DVD and set the unit to the service mode. A jitter value converted to the hex value is displayed on the LCD. Refer to the corresponding decimal notation value shown in the following Jitter Conversion Table. The adjustment is OK if the jitter value measured with a jitter meter is within 12% of the jitter value displayed on the LCD.
- Page 37 Operation procedures Keep this state more than 2 seconds while continuing pressing the [SEL] button, [SOURCE] button and [STANDBY/ON ATTENUATOR] button sequentially. The unit enters the service mode. "INIT ALL" is Press the [SEL] key Initialize all data to the factory setting indicated on the LCD.
- Page 38 Detailed error code (2 bytes) *Displayed with loading/ejection error only..First byte Higher 4 bits Route NO. (Process of error occurrence) Refer to charts 1.1 and 1.2..Lower 4 bits Error type [1] Time out [2] Switch status error [3] Swinging error...
- Page 39 DVD unit check mode Change LCD indication with a [FF ] button and a [REW ] button. Check item list Example of A/D key DVD unit operation Indication contents LCD indication Start at normal speed NORMPLAY (After start, it is measured JITTER on the Laser current value * * * * internal position)
-
Page 40: Troubleshooting
SECTION 5 TROUBLESHOOTING 16PIN CORD DIAGRAM (for KD-ADV5380, KD-DV5300) Black Green GN/BK WH/BK Violet VI/BK GY/BK Gray Blue White Yellow BL/WH Yellow Green 1 BK MEMORY 16 YL 2 RD 9 WH 10 WH/BK 12 GY 11 GY/BK 8 GN 7 GN/BK 5 VI 6 VI/BK... - Page 41 16 PIN CORD DIAGRAM (for KD-DV5301, KD-DV5302, KD-DV5307, KD-DV5308) Black Green GN/BK WH/BK Violet GY/BK VI/BK Gray Blue White Yellow Brown Yellow Green BL/WH BL/WH 7 RD RD 7 MEMORY 16 YL YL 4 1 BK REMOTE 3 BL/WH 13 BR TEL MUTING 8 GN 7 GN/BK...
- Page 42 16PIN CORD DIAGRAM (for KD-DV5304, KD-DV5305, KD-DV5306, KD0DV4304, KD-DV4305, KD-DV4306) Black Green GN/BK WH/BK Violet VI/BK GY/BK Gray Blue White Yellow BL/WH Yellow Green 1 BK MEMORY 16 YL 2 RD 9 WH 10 WH/BK 12 GY 11 GY/BK 8 GN 7 GN/BK 5 VI 6 VI/BK...
- Page 43 16 PIN CORD DIAGRAM (for KD-DV5388, KD-DV4388) Black Green GN/BK WH/BK Violet VI/BK GY/BK Gray Blue White Yellow BL/WH YellowGreen Brown YL 2 GN/BK VI/BK WH/BK GY/BK BL/WH VI/BK GY/BK WH/BK GN/BK (No.MA308)1-43...
- Page 44 Victor company of Japan, Limited Mobile Entertainment Business Group Mobile Entertainment Category 10-1,1chome,Ohwatari-machi,Maebashi-city,Gumma-ken, 371-8543,Japan (No.MA308) Printed in Japan...
Need help?
Do you have a question about the KD-ADV5380J and is the answer not in the manual?
Questions and answers