
Related Manuals for Vizio SB4451-C0


Summary of Contents for Vizio SB4451-C0
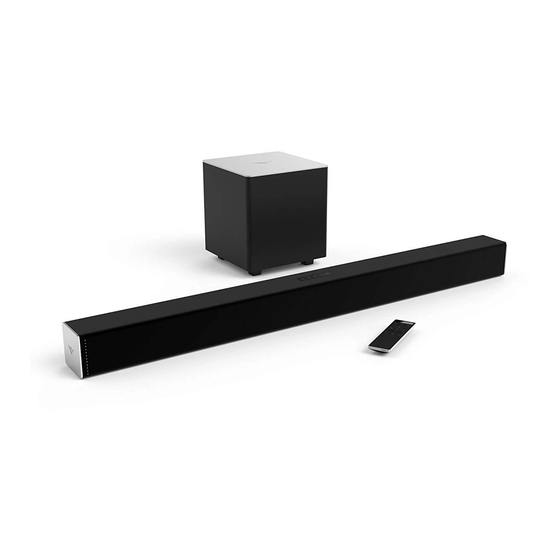
- Page 1 USER MANUAL Sound bar appearance may vary. SB4451-C0, SB351-D0, SB3531-D0, SB3830-D0...
- Page 2 Safety Information IMPORTANT SAFETY INSTRUCTIONS - SMARTCAST SOUND BAR ™ Your sound bar is designed and manufactured to operate within defined design limits. Misuse may result in electric shock or fire. To prevent your sound bar from being damaged, the following instructions should be observed for the installation, use, and maintenance of your sound bar.
-
Page 3: Table Of Contents
Table of Contents First-Time Setup ............4 Pairing a Device with the Sound Bar ..........5 VIZIO SmartCast App ..........8 ™ Register for a MyVIZIO account ............8 Navigating the SmartCast App ............9 ™ ser Profile Settings ................. 11 Picking something to Listen to ............13 Managing Categories ............... -
Page 4: First-Time Setup
And then just tap to cast and listen on your VIZIO Sound Bar- from anywhere in your home. It works over WiFi, so you can control your VIZIO Sound Bar from any room, and keep using your device to continue browsing, play games, text or even watch another show, without disrupting what’s playing... -
Page 5: Pairing A Device With The Sound Bar
Refer to the printed Quick Start Guide (included) for detailed instructions on how to setup your new sound bar. You can also find a digital copy on support.vizio.com. Turn on the SmartCast Sound Bar by pressing the Power button on the top of the sound bar or by pressing the Power button on the sound bar remote. - Page 6 Use your device to name your sound bar. Take a moment to read the VIZIO Terms of Service and Privacy Policy, as well as Google’s Terms of Service and Privacy Policy. When you are done, tap NEXT to continue.
- Page 7 Use your device to register your sound bar. If you do not wish to register, tap Skip in the lower left corner. The First-Time setup is complete. The VIZIO SmartCast™ App is displayed. Sound bar appearance may vary.
-
Page 8: Vizio Smartcast ™ App
Tap Create an Account to register for a MyVIZIO account. Follow the on-screen instructions to complete the registration process. If you do not want to register for a MyVIZIO account, tap Skip to continue. To take full advantage of the VIZIO SmartCast app, VIZIO ™... -
Page 9: Navigating The Smartcast App
NAVIGATING THE SMARTCAST ™ After you Creating/Logging into your MyVIZIO account, the home page of the SmartCast™ app is displayed. Search Menu Device Power Device Settings Device Input Volume Controls Device Menu The Device Menu is available throughout the SmartCast app, allowing you to easily access the device controls. - Page 10 Swipe to reveal a list of content categorized into TV Shows, Movies, Music, Live TV, Kids, and Live Streams. You can also access these categorizes by tapping the button in the top left corner. Please Note: Only content in the Music category can be cast to the sound bars.
-
Page 11: Ser Profile Settings
USER PROFILE SETTINGS Every user can register their very own user profile MyVIZIO, Facebook, or Google . To access the Profile page: Tap the button to reveal the side menu. Tap ie rofile. - Page 12 To modify the account settings: Tap the button to access the account settings page. You can change the First Name, Last Name, E-mail Address, and password by tapping on each of them. To edit profile settings: From the Profile page, tap Edit rofile. You can edit the Profile Color, Profile Name, and Location by taping on each of them.
-
Page 13: Picking Something To Listen To
PICKING SOMETHING TO LISTEN TO If you are in the mood to listen to some music, you can also browse directly from the SmartCast app. Tap on Music from the Home page. Music will be organized into several collections scroll up and down to reveal additional collection . - Page 14 Tap on the content you want to listen to. A) Tap on the play button. B) Select On Demand or On Now Online feed and tap the play button. C) For On Demand: Select a source and tap the play button. Your content begins playing on your SmartCast device.
-
Page 15: Managing Categories
MANAGING CATEGORIES You can add, remove, and rearrange the content categories on the Home page to your preference. Please Note: Only content in the Music category can be cast to the sound bars. To add or remove a category: From the Home page, tap on the button and select Manage Categories. -
Page 16: Device Settings
SETTING UP ADDITIONAL SMARTCAST DEVICES To add additional SmartCast devices: From the Home page, tap on the button and select Device Settings. The VIZIO Devices menu is displayed. Tap ADD NEW DEVICE and follow the on-screen instructions to pair your SmartCast device. - Page 17 To remove a SmartCast device: • From the VIZIO Devices menu, tap on the button and tap Remove to remove the SmartCast device from the SmartCast App. To modify SmartCast device settings: From the VIZIO Devices menu, tap on the SmartCast device listed. •...
- Page 18 To change your SmartCast device name: From the Sound Bar Settings menu, tap on Device Name and enter a • new name. Tap Save when you are done.
-
Page 19: Renaming An Input
RENAMING AN INPUT To access the Input menu: From the Speaker Settings menu, tap on Inputs. The Inputs menu • is displayed. • From the Device Menu, tap on the button. The Speaker Settings menu is displayed. Then tap on Inputs to access the Inputs menu. Note: Available inputs will vary by model. -
Page 20: Renaming Devices On The Input Menu
Renaming Devices on the Input Menu You can rename the inputs to make them easier to recognize on the Input menu. For example, if you have a Stereo Receiver connected to the HDMI input, you can rename that input to display “Stereo Reciever”. To change the name of an input: From the Inputs menu, tap the input you would like to rename. -
Page 21: Adjusting Audio Settings
ADJUSTING AUDIO SETTINGS To access the Audio settings menu: • From the Speaker Settings menu, tap on Audio. The Audio menu is displayed. • From the Device Menu, tap on the button. The Speaker Settings menu is displayed. Then tap on Audio to access the Audio menu. -
Page 22: Using The Audio Menu
Using the Audio Menu • Bluetooth Pairing - Places the sound bar in bluetooth pairing mode to pair a new device or reconnect a previously paired device. • Bass Adjust low-frequency sounds. • Treble - Adjust high-frequency sounds. • Center - Adjust the prescence of dialog in the center channel. -
Page 23: Adjusting System Settings
ADJUSTING SYSTEM SETTINGS To access the System settings menu: • From the Sound Bar Settings menu, tap on System The System menu is displayed. • From the Device Menu, tap on the button. The Sound Bar Settings menu is displayed. Then tap on System to access the System menu. -
Page 24: Viewing System Information
Using the System menu, you can: • View system information • Change the app menu language • Auto Detect inputs • Enable, disable, or program a TV remote • Enable or disable Eco settings • Perform a speaker test • Set sleep timers •... -
Page 25: Performing A Speaker Test
Performing a Speaker Test. The sound bar can perform a sound test to ensure all channels are functioning. To perform a speaker test: From the System menu, tap Speaker • test. Select the channel you would like to test. Setting a Sleep Timer hen activated, the sound bar timer will turn the sound bar off after a set time. -
Page 26: Pairing A Subwoofer
Pairing a Subwoofer* The Subwoofer Pair function allows reconnect a wireless subwoofer to the sound bar. Note: this option only available on models that include a subwoofer. To Pair a Subwoofer to the sound bar: From the System menu, tap Subwoofer Pair. -
Page 27: Adjusting Network Settings
ADJUSTING NETWORK SETTINGS To access the Network settings menu: • From the Sound Bar Settings menu, tap on Network. The Network menu is displayed. • From the Device Menu, tap on the button. The Sound Bar Settings menu is displayed. Then tap on Network to access the Network menu. -
Page 28: Using The Network Connection Menu
Using the Network Connection menu Your sound bar is Internet-ready, featuring both an Ethernet port and built-in high-speed Wireless-AC. Connecting to a Wireless Network To connect to a wireless network whose network name (SSID) is being broadcast: If your sound bar is connected to a network with an Ethernet cable, you will not see the wireless network connection menu. - Page 29 Finding the MAC Addresses for Network Setup The security settings on your router may require you to enter the sound bar’s MAC address in the router’s settings. To find the display’s MAC address: From the Network menu, tap Manual Setup. The Manual Setup menu is displayed.
- Page 30 Testing your Network Connection To test your network connection: From the Network menu, tap Test Connection. The Test Connection menu is displayed. When the test is complete, your connection results are displayed.
-
Page 31: Troubleshooting
Customized Support Get assistance quickly with your information on-hand. News & Offers Take advantage of the latest news and special offers from VIZIO. Safety & Satisfaction Stay up to date with important product updates and notifications. REGISTER YOUR VIZIO PRODUCT NOW... -
Page 32: Specifications
S ecifications SB4451-C0 Two 2.75” Full Range Drivers for Each Channel Sound Bar (2 for left, 2 for right) Two 2.75” Full Range Drivers for Center One 2. ” High-E ciency Full-Range Driver Each Satellite Satellite) Sub oofer One 8” Subwoofer Driver... - Page 33 S ecifications SB3831-D0 Two 2.75” Full Range Drivers for Each Channel Sound Bar (2 for left, 2 for right) One 2.75” Full Range Drivers for Center Sub oofer One 5” Subwoofer Driver One 3.5 mm Mini Jack Stereo One RCA Coaxial One Optical (Toslink) In uts One HDMI (ARC on output HDMI)
-
Page 34: Warranty Information
If you feel VIZIO has not met its obligations under this warranty, you may attempt to resolve the issue informally with VIZIO. If you are unable to resolve the issue informally and wish to file a formal claim against VIZIO, and if you are a resident of the nited States, you must submit your claim to binding arbitration according to the procedures described below, unless an exception applies. - Page 35 General No employee or agent of VIZIO may modify this warranty. If any term of this warranty, other than the class action waiver, is found to be unenforceable, that term will be severed from this warranty and all other terms will remain in effect. If the class action waiver is found to be unenforceable, then the entire section titled “Binding Arbitration Agreement;...
-
Page 36: Legal & Regulatory
All software is provided subject to a software license agreement(s) and you agree that you will be bound by such license agreement(s) in addition to these terms. Your use of this product is subject to VIZIO’s privacy policy, which may be updated from time to time, and is available to view at http://www.vizio.com/privacy. - Page 37 Manufactured under license from Dolby Laboratories. Dolby, Dolby Audio, and the double-D symbol are trademarks of Dolby Laboratories. For DTS patents, see http://patents.dts.com. Manufactured under license from DTS Licensing Limited. DTS, the Symbol, & DTS and the Symbol together are registered trademarks, and DTS Digital Surround is a trademark of DTS, Inc.
- Page 38 © 2016 VIZIO INC. ALL RIGHTS RESERVED. 160718AD-US-NC...
Need help?
Do you have a question about the SB4451-C0 and is the answer not in the manual?
Questions and answers