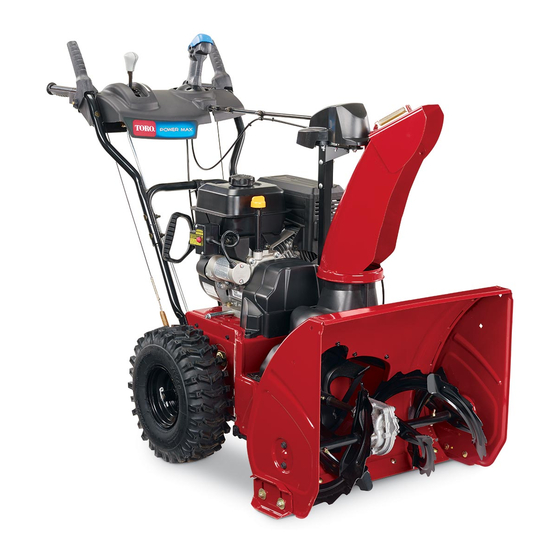
Toro 824 Power Shift Operator's Manual

Toro 824 Power Shift Operator's Manual

Hide thumbs Also See for 824 Power Shift:

Advertisement

FORM NO. 3319–428
824 Power Shift
Snowthrower
Model No. 38540–8900001 & Up
Operator's Manual

Advertisement

Table of Contents
loading

Summary of Contents for Toro 824 Power Shift

  • Page 1 FORM NO. 3319–428 824 Power Shift Snowthrower Model No. 38540–8900001 & Up Operator’s Manual...
  • Page 2 WARNING: The engine exhaust from this product contains chemicals known to the State of California to cause cancer, birth defects, or other reproductive harm.
  • Page 3: Table Of Contents

    3. Flange head capscrew 1. Auger housing 4. Idler pulley assembly 2. Engine frame 5. Mounting screws (2) 3. Impeller pulley 1. Upper belt cover 3. Flange head capscrew 2. Cable cover The Toro Company – 1997 Printed in USA All Rights Reserved...
  • Page 4 1. Discharge chute 3. Chute retainer plate 2. Plastic chute retainer 4. Chute ring 1. Shift rod 5. Locknut 2. Ball joint 6. Jam nut 3. Shift bracket 7. Gear shift lever 4. Transmission lever 8. Power Shift slot 1. Gear bracket 3.
  • Page 5 1. Scraper 3. Auger blades 1. Pipe plug 2. Carriage bolt 1. Flange bolts 4. Locknut 2. Skid 5. Sideplate 3. Flat washers 1. Dipstick 3. Fuel tank cap 2. Filler hole...
  • Page 6 1. Fuel shut-off valve 3. Fuel line 2. Hose clamp 1. Auger/impeller control 4. Ignition switch 2. Traction drive control 5. Discharge chute control 3. Speed shift control 1. Deflector handle 2. Discharge chute 1. Throttle 3. Primer 2. Choke 1.
  • Page 7 1. Mounting screw 2. Heater box 1. Axle pin 3. Outer axle hole and wheel 2. Inner axle hole 1. Drive chain 1. Drain cap...
  • Page 8 1/8” min. (3 mm) 1. Impeller idler arm 2. Brake arm 1. Feeler gauge 2. Center of spring 1. Idler pulley assembly 5. Auger/impeller belt 1. Auger/impeller cable 3. Mounting bracket 2. Flange head capscrews 6. Traction belt (outer cable) 4.
  • Page 9 1/8” – 3/8” DEFLECTION 1. Spark plug wire 0.30” (0.76 mm) 1. Transmission 2. Transmission frame 1. Flange head capscrews...
  • Page 10: Introduction

    Maintaining Snowthrower ... . . All of us at Toro want you to be completely satisfied with your new product, so feel free to contact your Safety Decals and Instructions .
  • Page 11: Safety

    Also, tighten any loose Safety nuts, bolts or screws. Wear adequate winter clothing and rubber boots The 824 POWER SHIFT SNOWTHROWER meets that will ensure proper footing on slippery or exceeds the Outdoor Power Equipment Institute’s surfaces. Do not wear loose-fitting clothing that safety standards for snowthrowers;...
  • Page 12: Auger Housing

    11. Fill fuel tank with gasoline before starting the 14. Before leaving the operator’s position (behind engine. Avoid spilling any gasoline. Because handles), rotate ignition key to OFF and wait for gasoline is highly flammable, handle it carefully. all moving parts to stop. Remove key from DO NOT SMOKE WHILE HANDLING switch if snowthrower will be left unattended.
  • Page 13: Maintaining Snowthrower

    TORO replacement parts and are tight. accessories to keep the TORO all TORO. NEVER USE “WILL FIT” REPLACEMENT 28. Maintain or replace safety and instruction labels, PARTS AND ACCESSORIES.
  • Page 14 BEFORE OPERATING Read and understand the contents of this manual CAUTION: IMPROPER USE MAY RESULT before operating the snowthrower. Become IN LOSS OF FINGERS, HANDS OR FEET. familiar with all controls and know how to stop the engine quickly. HIGH SPEED IMPELLER WITHIN 2 INCHES OF OPENING OPERATOR’S...
  • Page 15: Safety Decals And Instructions

    Safety Decals and Instructions...
  • Page 16: Lower Belt Cover

    Loose Parts Part Flange head capscrew — 5/16–18 x 3/4” lg. Lower belt cover Mount Auger Housing page 8 Mount Auger Housing, page 8 Flange head capscrew — 1/4–20 x 1/2” lg. Cable cover Shift rod Install Shift Rod page 8 Install Shift Rod, page 8 Locknut—3/8-24 Discharge chute...
  • Page 17: Engine Frame

    Assembly Install Shift Rod (Fig. 5) Insert upper shift rod ball joint stud through Note: Determine left and right sides of front of shift bracket and secure with 3/8–24 snowthrower by standing in the normal locknut. operating position. Note: Shift rod to be positioned with bend rearward.
  • Page 18: Mounting Flange

    Make sure chute rotates freely on ring. If chute Install (2) flange bolts thru front slots in skids binds, move right hand retainer outward to ease and thru sideplates. Install flat washers and operation. locknuts on inside of sideplates. Do not tighten bolts.
  • Page 19: Before Starting

    SF or SG. Toro also recommends that Toro Note: Dipstick must be fully installed to Stabilizer/Conditioner be used regularly in all Toro ensure accurate gauging of oil level. gasoline powered products during operation and DO NOT OVERFILL. storage seasons. Toro Stabilizer/Conditioner cleans...
  • Page 20: Auger/Impeller Control

    THAN THOSE MANUFACTURED FOR FUEL FORWARD speeds without releasing STABILIZATION DURING STORAGE SUCH the traction drive control. AS TORO’S STABILIZER/CONDITIONER OR A SIMILAR PRODUCT. TORO’S Auger Lock–Up (Fig. 13)—When the STABILIZER/CONDITIONER IS A auger/impeller control and traction drive control are...
  • Page 21: Starting/Stopping Engine

    Starting/Stopping Engine Grasp recoil starter handle (Fig. 17) and pull it out slowly until positive engagement results; then pull vigorously to start the engine. Keep Starting firm grip on starter handle and return the rope slowly. Note: If engine is operated when temperature is +40 F (4 C) or higher, remove Note: If engine does not start or if...
  • Page 22: Power Shift Operation

    Power Shift Operation Snowthrowing Tips When snowthrower is not being used, close fuel Wheels will shift forward (or rearward) with every shut–off valve and remove key from the switch. other movement of the shift control. Remove snow as soon as possible after it falls. Move wheels to the rear Power Shift position in This produces best snow removal results.
  • Page 23: Adjusting Scraper

    Support the auger blades so that the auger is 1/8 – 1/4 inch off the ground. POTENTIAL HAZARD Move the scraper so that it contacts the flat surface all the way across, then tighten the two Rotating impeller or auger can cut off or rear flanged cap screws securing scraper and injure fingers or hands.
  • Page 24: Maintenance

    Move the skids down to sit flat on the ground and tighten the (4) flange bolts securing both skids to the auger side plates. POTENTIAL HAZARD Gasoline is highly flammable. WHAT CAN HAPPEN For Gravel Surfaces Gasoline can be ignited and cause serious personal injury.
  • Page 25: Auger Gear Box Oil

    WHENEVER A NEW BELT IS Do not adjust the auger/impeller drive belt INSTALLED, AN ADJUSTMENT IS too tight because it may cause the REQUIRED. USE ONLY GENUINE TORO auger/impeller to turn when the control REPLACEMENT PARTS. lever is in the disengaged position. If this occurs, decrease belt tension.
  • Page 26: Adjusting Traction Drive Belt

    Adjusting Traction Drive Belt Remove capscrew and lockwasher securing half sheave to front of pulley assembly. (Fig. 25) Slide half sheave and auger/impeller belt off If the wheels do not turn when the traction lever is crankshaft and remove belt from impeller pulley. depressed, the traction belt tension should be increased.
  • Page 27: Adjusting Drive Chain

    Chain adjustment will affect gearshift lever alignment. If gear shift lever is not aligned with Power Shift slot in control panel (Fig. 5, inset), Add Toro Stabilizer/Conditioner to the fuel tank shift rod length must be adjusted as follows: (one ounce per gallon of fuel).
  • Page 28 Stop engine, allow it to cool, and drain fuel tank Clean the snowthrower. Touch up chipped or run engine until it stops. surfaces with paint. Toro Re–Kote paint is available from an Authorized TORO Service Restart the engine again and run it until it stops.

This manual is also suitable for:

38540

Table of Contents