Table of Contents
Advertisement
Available languages
Available languages
Quick Links
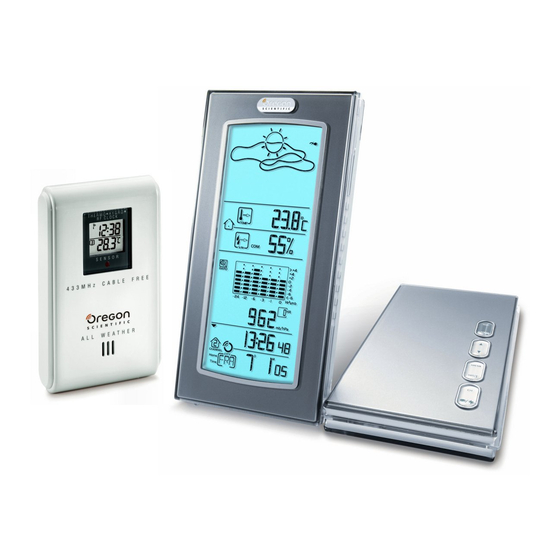
Wireless Weather Station
with World Time Clock
Model: BAR916HG
USER MANUAL
CONTENTS
Introduction .............................................................. 3
Product Overview ..................................................... 4
Front View ............................................................. 4
Back View .............................................................. 5
Table Stand and Wall Mount.............................. 5
LCD Display ........................................................... 6
Remote Sensor (RTGR328N) ................................ 9
Getting Started.......................................................... 9
Batteries ............................................................... 9
Change Settings................................................... 10
Remote Sensor ....................................................... 10
Sensor Data Transmission ................................... 12
Search for Sensor ................................................ 12
Clock and Calendar ................................................ 12
Radio-Controlled Clock ........................................ 12
Turn Radio-Controlled Clock ON / OFF ............... 13
Set Clock.............................................................. 14
Switch Clock Display ............................................ 14
World Time Clock .................................................... 14
Alarms ..................................................................... 19
Set Daily Alarm..................................................... 19
Set Pre-Alarm....................................................... 19
Activate Alarm ...................................................... 20
Snooze ................................................................. 20
Barometer................................................................ 20
View Barometer Area ........................................... 20
Select Measurement Unit..................................... 20
View Barometer History ....................................... 20
Bar Chart Display ................................................. 21
Set Altitude ........................................................... 21
Weather Forecast ................................................... 21
Weather Forecast Icons ....................................... 21
UV Measurement .................................................... 22
New Additional UV Features ................................ 22
Temperature and Humidity .................................... 23
View Temperature and Humidity Area .................. 24
Select Measurement Unit..................................... 24
Select Sensor Channel ........................................ 24
Minimum / Maximum Records.............................. 24
Temperature and Humidity Trend......................... 24
Comfort Zone ....................................................... 25
Heat Index............................................................ 25
Backlight ................................................................. 25
1
Advertisement
Chapters
Table of Contents

Subscribe to Our Youtube Channel
Related Manuals for Oregon Scientific BAR916HG


Summary of Contents for Oregon Scientific BAR916HG
-
Page 1: Table Of Contents
Wireless Weather Station World Time Clock ............ 14 Alarms ..............19 with World Time Clock Set Daily Alarm............. 19 Model: BAR916HG Set Pre-Alarm............19 USER MANUAL Activate Alarm ............20 Snooze ..............20 CONTENTS Barometer..............20 Introduction .............. 3 View Barometer Area ........... 20 Product Overview ............. - Page 2 Reset System ............25 Safety and Care ............26 Warnings ..............26 Troubleshooting ............. 26 Specifications ............27 About Oregon Scientific ........28 EU-Declaration of Conformity ......29...
-
Page 3: Introduction
INTRODUCTION Thank you for selecting the Oregon Scientific Wireless Weather Station with World Time Clock (BAR916HG). This powerful device bundles time keeping, weather monitoring, indoor and outdoor temperature and humidity readings, barometric trends and altitude adjustment, into a single tool you can use from the convenience of your home. -
Page 4: Product Overview
PRODUCT OVERVIEW FRONT VIEW 1. SNOOZE / LIGHT: Activate 8-minute snooze or backlight 2. LCD display 3. SEL: Switch areas 4. MODE: Change settings / display : Increase setting / activate radio-controlled clock : Decrease setting / deactivate radio- controlled clock 7. -
Page 5: Back View
BACK VIEW TABLE STAND AND WALL MOUNT To stand the unit on a table, twist the lock button (on the back of the unit) so that the two main unit segments are unlocked from each other. Then position the unit as shown below. -
Page 6: Lcd Display
LCD DISPLAY 1. Weather Forecast Area: Animated weather forecast. 2. Temperature / Humidity / Comfort Zone Area: Readings and trend lines; comfort zone; sensor channel number. 3. UVI / Barometer Area: UV level and barometric pressure bar chart; UV Index and barometric readings. - Page 7 Weather Forecast Area Temperature / Humidity / Comfort Zone Area 1. Selected Area icon 2. Temperature trend 3. Channel number (1-5) / reception status 1. Low battery icon for main unit 4. Low battery icon for remote sensor 2. Weather display 5.
- Page 8 UVI / Barometer Area Clock / Alarm / Calendar Area 1. Pre-Alarm is set 2. Pre-Alarm display / Pre-Alarm setting 1. Barometric pressure is showing 3. Channel with RF clock reception is locked 2. UV is showing 4. RF clock reception icon 3.
-
Page 9: Remote Sensor (Rtgr328N)
1. Signal reception REMOTE SENSOR (RTGR328N) 2. Channel number 1. LCD display 3. Low battery icon 2. LED status indicator 4. Time 3. Ventilation duct 5. Temp (°C or °F) 6. Humidity % 7. Temp / Humidity GETTING STARTED BATTERIES Batteries are supplied with this product: •... -
Page 10: Change Settings
To install the main unit batteries: 2. Most Areas have alternate display options (for example, Clock / Alarm or Barometer / UVI). Press MODE to switch options, or switch between clock and alarm. 3. Press and hold MODE for 2 seconds to enter setting NOTE Do not use rechargeable batteries. -
Page 11: Set Up Thermo / Hygro Sensor (Rtgr328N)
The RTGR328N Sensor collects temperature and To fold out the stand: humidity readings, and signals from official time-keeping organizations for the radio-controlled clock. SET UP THERMO / HYGRO SENSOR (RTGR328N) 1. Open the battery compartment with a small Phillips screwdriver. For best results: 2. -
Page 12: Sensor Data Transmission
SENSOR DATA TRANSMISSION Then, press and hold MEM and CH for 2 seconds. Data is sent from the sensor(s) every 60 seconds. The reception icon shown in the Temperature / Humidity Area NOTE If the sensor is still not found, check the indicates the status. -
Page 13: Turn Radio-Controlled Clock On / Off
you first set up the unit, and whenever you press RESET. The unit cannot reach the remote Once complete, the reception icon will stop blinking. sensor. To force a manual search for RF clock NOTE In addition to the local time and calendar display, you reception, press and hold SEARCH on the sensor can also select to display the corresponding time of 130 (RTGR328N) for 2 seconds. -
Page 14: Set Clock
SET CLOCK • Clock with day and date You only need to do this if you have disabled the radio- controlled clock, or if you are too far from a RF signal. When the World Time city is set, you can toggle between: •... - Page 15 CITY, COUNTRY CITY CODE TIME OFFSET SUMMER TIME START DATE SUMMER TIME END DATE Addis Ababa, Ethiopia No DST Adelaide, Australia Last Sunday in October Last Sunday in March Auckland, New Zealand 1st Sunday in October 3rd Sunday in March Ankara, Turkey Last Sunday in March Last Sunday in October...
- Page 16 Cape Town, South Africa No DST Dhaka, Bangladesh No DST Damascus, Syria 1st April 1st October New Delhi, India No DST Detroit MI, USA 1st Sunday in April Last Sunday in October Dublin, Ireland Last Sunday in March Last Sunday in October Frankfurt, Germany Last Sunday in March Last Sunday in October...
- Page 17 Melbourne, Australia Last Sunday in October Last Sunday in March Mexico City, Mexico 1st Sunday in April Last Sunday in October Managua, Nicaragua No DST Miami FL, USA 1st Sunday in April Last Sunday in October Milan, Italy Last Sunday in March Last Sunday in October Manama, Bahrain No DST...
- Page 18 Singapore, Singapore No DST San Jose, Costa Rica No DST San Juan, Puerto Rico No DST Salt Lake City UT, USA 1st Sunday in April Last Sunday in October Sofia, Bulgaria Last Sunday in March Last Sunday in October Sao Paulo, Brazil 2nd Sunday in October 3rd Sunday in February Stockholm, Sweden...
-
Page 19: Alarms
For example, if you set the alarm to 7:00 AM, and the ALARMS Pre-Alarm to 45 minutes, the Pre-Alarm will sound at 6:15 AM provided the outdoor temperature at Channel This product has 2 alarms: The Daily Alarm and a Pre-Alarm for snowy weather. -
Page 20: Activate Alarm
Barometric data is shown in 2 areas at the bottom of the ACTIVATE ALARM display. The upper area shows a 24-hour bar chart. The Navigate to the Clock Area, then press lower area shows current and historical readings. switch to Daily Alarm or Pre-Alarm view. To activate or deactivate the alarm, press When the alarm time is reached, the backlight will be on for 8 seconds and crescendo alarm will sound for 2... -
Page 21: Bar Chart Display
1. Navigate to the Barometer Area. 2. Press and hold HIST for 2 seconds. 3. Press to set the altitude in 10-metre increments (-100m to 2500m). 4. Press HIST to confirm. WEATHER FORECAST This product forecasts the next 12 to 24 hours of weather within a 30-50 km (19-31 mile) radius. -
Page 22: Uv Measurement
MODE to select the UV display. The UVR128 Ultra-Violet Radiation Sensor is included with the BAR966HG and is available as an optional item for the BAR916HG. The UV sensor gives you the following information at your fingertips: • 10-hour Ultra-Violet Index (UVI) record. -
Page 23: Temperature And Humidity
2. Press CH to select user 1-4. countdown. The remaining user UV exposure time will display and the will flash. 3. Press and hold MODE for 2 seconds to enter the Skin Type Setting Mode of the selected user. 7. When the countdown has reached “0”, an alarm will sound for 2 minutes. -
Page 24: View Temperature And Humidity Area
• To auto-scan between sensors, press and hold CH Data is collected and displayed approximately every for 2 seconds. Each sensor’s data will be displayed 60 seconds. for 3 seconds. • To end auto-scan, press CH or MEM with the VIEW TEMPERATURE AND HUMIDITY AREA Temperature / Humidity Area selected. -
Page 25: Comfort Zone
will show next to the Area. COMFORT ZONE 2. Press MODE to reach the Heat Index display. The Comfort Zone indicates how comfortable the 3. Press CH to select the desired channel. climate is, based on current temperature and humidity measurements. -
Page 26: Safety And Care
Strange Change language WARNINGS date / month This product is designed to give you years of service if handled properly. Oregon Scientific will not be Clock Cannot Disable radio- responsible for any deviations in the usage of the adjust controlled clock device from those specified in the user instructions or... -
Page 27: Specifications
Resolution SPECIFICATIONS Comfort 40% to 70% Main Unit Dimensions Memory Min / max L x W x H 195 x 26 x 192 mm (7.6 x 0.8 x 7.5 inches) Barometer Weight 578 grams (20.4 ounces) Unit mb / hPa or inHg without battery Resolution 1 mb (0.03 inHg) -
Page 28: About Oregon Scientific
Hour format 12hr AM/PM (MSF format) ABOUT OREGON SCIENTIFIC 24hr (DCF format) Visit our website (www.oregonscientific.com) to learn Calendar DD / MM or MM / DD; more about Oregon Scientific products such as digital Day of the week in 1 of cameras;... -
Page 29: Eu-Declaration Of Conformity
EU-DECLARATION OF CONFORMITY Hereby, Oregon Scientific, declares that this Wireless Weather Station with World Time Clock model BAR916HG is in compliance with the essential requirements and other relevant provisions of Directive 1999/5/EC. A copy of the signed and dated Declaration of Conformity is available on request via our Oregon Scientific Customer Service. - Page 30 Funkgesteuerte Wetterstation Umstellen der Zeitanzeige ........14 Weltzeituhr ............15 mit Weltzeituhr Weckalarmfunktionen ........... 20 Modell: BAR916HG Einstellen des normalen Weckalarms....20 BEDIENUNGSANLEITUNG Einstellen des Frostwarners ......... 20 INHALT Aktivieren der Weckalarmfunktion ......21 Einführung ..............3 Schlummerfunktion ..........21 Produktübersicht ............
- Page 31 Hitzeindex ............27 Hintergrundbeleuchtung ........27 System zurücksetzen ..........27 Sicherheits- und Pflegehinweise ......28 Warnungen .............. 28 Fehlersuche und Abhilfe ........29 Technische Angaben ..........29 Über Oregon Scientific ........... 31 EU-Konformitätserklärung ........31...
-
Page 32: Mit Weltzeituhr
EINFÜHRUNG Danke, dass Sie sich für die funkgesteuerte Wetterstation mit Weltzeituhr BAR916HG von Oregon Scientific™ entschieden haben. Dieses leistungsfähige Gerät vereint Zeitmessungsfunktionen mit der Wetterbeobachtung, der Messung von Innen- und Außentemperatur, L u f t f e u c h t i g k e i t s o w i e L u f t d r u c k t r e n d s m i t Höhenanpassung in einem einzigen Apparat, den Sie... -
Page 33: Produktübersicht
PRODUKTÜBERSICHT VORDERANSICHT 1. SNOOZE / LIGHT: Aktivierung der achtminütigen Schlummerfunktion oder der Hintergrundbeleuchtung 2. LCD-Display 3. SEL: Wechseln von Bereichen 4. MODE: Ändern von Einstellungen/Display : Erhöhen von Einstellungswerten/Einschalten der funkgesteuerten Uhr : Ve r m i n d e r n v o n E i n s t e l l u n g s w e r t e n / Ausschalten der funkgesteuerten Uhr 7. -
Page 34: Rückansicht
RÜCKANSICHT TISCHAUFSTELLER UND WANDBEFESTIGUNG Zum Stellen des Gerätes auf einen Tisch den Verriegelungsknopf (auf der Geräterückseite) so drehen, dass die beiden Teile des Gerätes voneinander getrennt werden. Dann das Gerät der unteren Abbildung gemäß positionieren. Zum Befestigen des Gerätes an der Wand den 1. -
Page 35: Lcd-Display
LCD-DISPLAY 1. W e t t e r v o r h e r s a g e b e r e i c h : A n i m i e r t e Wettervorhersage 2. T e m p e r a t u r . / L u f t e u c h t i g k e i t s - / Komfortzonenbereich: Messwerte und Trends, Komfortzone, Nummer der Funksendeeinheit... - Page 36 Wettervorhersagebereich Temperatur- / Luftfeuchtigkeit / Komfortzonenbereich 1. Batteriewechselanzeige für Empfangseinheit 1. Symbol für Bereichsauswahl 2. Wetteranzeige 2. Temperaturtrend 3. Kanalnummer (1-5)/Empfangsstatus 4. Batteriewechselanzeige für Funksendeeinheit 5. Luftfeuchtigkeitstrend 6. MAX-/MIN-Temperatur 7. Temperatur - °C/°F 8. Hitzeindex 9. MAX-/MIN-Luftfeuchtigkeit 10. Luftfeuchtigkeit 11. Komfortzonen...
- Page 37 UVI-/ Barometerbereich Uhr-/Weckalarm-/Kalenderbereich 1. Frostwarner aktiviert 2. Frostwarner Anzeige/ Einstellung 3. Kanal für Zeitsignalempfang gesperrt 1. Anzeige des Luftdrucks 4. Zeitsignal-Empfangsindikator 2. Anzeige der UV-Strahlung 3. Batteriewechselanzeige für UV-Sensor 5. Wecker gestellt 6. Ort für Lokal- oder Weltzeit 4. Anzeige des UVI-Wertes 7.
-
Page 38: Funksendeeinheit (Rtgr328N)
FUNKSENDEEINHEIT (RTGR328N) 1. Signalempfang 2. Kanalnummer 1. LCD-Display 3. Batteriewechselanzeige 2. LED-Statusanzeige 4. Uhrzeit 3. Lüftungsschlitze 5. Temperatur (in °C oder °F) 6. Luftfeuchtigkeit in % 7. Temperatur/ Luftfeuchtigkeit ERSTE SCHRITTE BATTERIEN Im Lieferumfang dieses Produkts sind Batterien enthalten: 1. Wandbefestigung 2. -
Page 39: Änderung Von Einstellungen
So legen Sie die Batterien in die Empfangseinheit ein: 2. F ü r d i e m e i s t e n B e r e i c h e w e c h s e l n d i e Anzeigeoptionen ab (zum Beispiel Uhrzeit/Wecker oder Barometer/UVI). -
Page 40: Einrichten Des Temperatur-/ Luftfeuchtigkeitsmessers (Rtgr328N)
THWR288. (Zusätzliche Funksendeeinheiten sind 5. Schließen Sie das Batteriefach. separat erhältlich. Weitere Informationen erhalten Sie So klappen Sie den Ständer aus: vom Händler vor Ort.) Die Funksendeeinheit RTGR328N erfasst Temperatur- und Luftfeuchtigkeitswerte sowie offizielle Zeitsignale für die Funkuhr. EINRICHTEN DES TEMPERATUR-/ Voraussetzungen für eine optimale Funktionsweise: LUFTFEUCHTIGKEITSMESSERS (RTGR328N) •... -
Page 41: Übertragung Von Daten Der Funksendeeinheit
SUCHE NACH FUNKSENDEEINHEIT HINWEIS Die Sendereichweite kann variieren und hängt von der Empfangsreichweite der Empfangseinheit Um nach einem Temperatur-/Luftfeuchtigkeitsmesser ab. Probieren Sie verschiedene Standorte aus, um den zu suchen, betätigen Sie SEL, um zum Temperatur-/ Empfang zu optimieren. Luftfeuchtigkeitsbereich zu wechseln. wird neben dem Bereich angezeigt. -
Page 42: Funkuhr
1. Funkuhrzeit Zusammen haben die Symbole folgende Bedeutungen: 2. Weltzeitstadt BEDEUTUNG SYMBOL 3. Weltzeituhr Die Empfangseinheit steht im Kontakt mit der Funksendeeinheit und hat die Zeitsynchronisierung durchgeführt. FUNKUHR D i e E m p f a n g s e i n h e i t s t e h t i m Kontakt mit der Funksendeeinheit, Die Uhr führt eine automatische Synchronisierung mit hat aber keine Zeitsynchronisierung... -
Page 43: Stellen Der Uhr
stündiges Anzeigeformat, Stunden, Minuten, Jahr, Betätigen Sie dann an der Empfangseinheit und Datums-/Monatsformat, Monat, Datum und Display- halten Sie die Taste zwei Sekunden gedrückt. Um Sprache. die Funktion zu aktivieren, wählen Sie den Uhren- /Weckalarmbereich, betätigen Sie und halten Sie 4. -
Page 44: Weltzeituhr
Wenn die Weltzeitstadt festgelegt ist, können Sie wechseln zwischen: • Funkuhr mit Sekunden und Weltzeituhr • Funk- und Weltzeituhr mit Wochentag • Funk- und Weltzeitdatum WELTZEITUHR Diese Uhr weist eine Anzeigefunktion für die Weltzeit auf, so dass Sie die entsprechende Zeit an verschiedenen Orten auf der Welt augenblicklich erfassen können, wobei die Sommerzeit (DST) automatisch berücksichtigt wird. - Page 45 ZEITABWEICHUNG LÄNDERNAME STADT CODE SOMMERZEIT PERIODE (GMT = 0) Addis Abeba, Äthiopien Keine Sommerzeit Adelaide, Australien Letzter Sonntag im Oktober bis letzter Sonntag im März Auckland, Neuseeland Erster Sonntag im Oktober bis dritter Sonntag im März Ankara, Türkei Letzer Sonntag im März bis letzter Sonntag im Oktober Algier, Algerien Keine Sommerzeit Amsterdam, Niederlande...
- Page 46 Kopenhagen, Dänemark Letzter Sonntag im März bis letzter Sonntag im Oktober Kapstadt, Südafrika Keine Sommerzeit Dhaka, Bangladesh Keine Sommerzeit Damaskus, Syrien Erster April bis erster Oktober New Delhi, Indien Keine Sommerzeit Detroit MI, USA Erster Sonntag im April bis letzter Sonntag im Oktober Dublin, Irland Letzter Sonntag im März bis letzter Sonntag im Oktober Frankfurt, Deutschland...
- Page 47 Madrid, Spanien Letzter Sonntag im März bis letzter Sonntag im Oktober Melbourne, Australien Letzter Sonntag im Oktober bis letzter Sonntag im März Mexiko City, Mexiko Erster Sonntag im April bis letzter Sonntag im Oktober Managua, Nicaragua Keine Sommerzeit Miami FL, USA Erster Sonntag im April bis letzter Sonntag im Oktober Mailand, Italien Letzter Sonntag im März bis letzter Sonntag im Oktober...
- Page 48 San Francisco CA, USA Erster Sonntag im April bis letzter Sonntag im Oktober Schanghai, China Keine Sommerzeit Singapur, Singapur Keine Sommerzeit San Jose, Costa Rica Keine Sommerzeit San Juan, Puerto Rico Keine Sommerzeit Salt Lake City UT, USA Erster Sonntag im April bis letzter Sonntag im Oktober Sofia, Bulgarien Letzter Sonntag im März bis letzter Sonntag im Oktober Sao Paulo, Brasilien...
-
Page 49: Weckalarmfunktionen
WECKALARMFUNKTIONEN EINSTELLEN DES FROSTWARNERS Dieses Produkt weist zwei Weckalarmfunktionen auf: Der Frostwarner kann darauf eingestellt werden, 15, Eine normale Weckalarmfunktion und einen Frostwarner 30, 45 oder 60 Minuten vor dem normalen Weckalarm für Schneewetter. Die normale Weckalarmfunktion ausgelöst zu werden. Dieser Alarm ertönt, sobald die wird bei Aktivierung jeden Tag um die gleiche Zeit von der Funksendeeinheit auf Kanal 1 übermittelte ausgelöst. -
Page 50: Aktivieren Der Weckalarmfunktion
BAROMETER wird bei aktiviertem Frostwarner angezeigt. Dieses Produkt zeichnet Luftdruckschwankungen auf, um eine Wettervorhersage durchführen zu können. HINWEIS Nach Auslösen des Frostwarners wird Darüberhinaus werden die mit der Funksendeeinheit in der normale Weckalarm erst wieder am nächsten den jeweils vergangenen 24 Stunden durchgeführten Tag ausgelöst. -
Page 51: Auswahl Der Maßeinheit
AUSWAHL DER MAßEINHEIT Schieben Sie den Schalter mb / inHg (im Batteriefach der Uhr) auf die gewünschte Maßeinheit. ANZEIGE DER LUFTDRUCKENTWICKLUNG Wechseln Sie zum Barometerbereich. Betätigen EINSTELLEN DER HÖHE Sie dann wiederholt HIST, um die Messwerte zu Stellen Sie die Höhe über dem Meeresboden ein, in durchlaufen. -
Page 52: Wettervorhersagesymbole
Im oberen Bereich wird das vorhergesagte Wetter UV-MESSUNG durch ein animiertes Symbol angezeigt. Der Ultraviolettstrahlensensor UVR128 ist im Lieferumfang der Wetterstation BAR966HG enthalten WETTERVORHERSAGESYMBOLE und für die Wetterstation BAR916HG optional erhältlich. Der UV-Sensor stellt Ihnen die folgenden Funktionen SYMBOL BESCHREIBUNG zur Verfügung: Klar (Tag) •... -
Page 53: Neue Zusatzfunktionen
HINWEIS Weitere Informationen über die neuen SONNEN- AUGEN- HAUTTYP BRÄUNUNG HAARFARBE UVFunktionen finden Sie in der Bedienungsanleitung BRAND FARBE des UVR128 und weiter unten. Niemals Immer Blau Blau / NEUE ZUSATZFUNKTIONEN Manchmal Manchmal Blond Grün COUNTDOWN FÜR UV BELICHTUNGSZEIT Grau / Immer Selten Braun... -
Page 54: Temperatur Und Luftfeuchtigkeit
und den Countdown für die UV-Belichtungszeit zu TEMPERATUR UND LUFTFEUCHTIGKEIT starten. Die verbleibende UV-Belichtungszeit D i e W e t t e r s t a t i o n k a n n f ü r j e d e d e r f ü n f für den Benutzer wird angezeigt, außerdem blinkt Funksendeeinheiten die folgenden Informationen das Symbol... -
Page 55: Auswahl Der Maßeinheit
AUSWAHL DER MAßEINHEIT AUFZEICHNUNG DER MINIMAL- / MAXIMALWERTE Schieben Sie den °C / °F-Wahlschalter (innerhalb des Batteriefachs) auf die gewünschte Stellung. • Betätigen Sie wiederholt MEM, um aktuelle, minimale und maximale Werte für die gewählte Funksendeeinheit anzuzeigen. AUSWAHL DES KANALS FÜR DIE •... -
Page 56: Hitzeindex
2. Betätigen Sie MODE, um die Anzeige des Hitzeindex ZONE TEMPERATUR LUFTFEUCHTIGKEIT aufzurufen. Beliebig >70% 3. Betätigen Sie CH, um den gewünschten Kanal zu 20-25°C 40-70% wählen. (68-77°F) HINWEIS Bei Temperaturen unter 26°C oder wenn Beliebig <40% der gewählte Kanal nicht funktionsfähig ist, wird statt des Hitzeindex „NA”... -
Page 57: Sicherheits- Und Pflegehinweise
• Entnehmen Sie die Batterien, wenn Sie das Gerät über SICHERHEITS- UND PFLEGEHINWEISE e i n e n l ä n g e r e n Z e i t r a u m l a g e r n u n d n i c h t Verwenden Sie für die Reinigung des Geräts ein verwenden. -
Page 58: Fehlersuche Und Abhilfe
TECHNISCHE ANGABEN FEHLERSUCHE UND ABHILFE Abmessungen Empfangseinheit PROBLEM SYMPTOM ABHILFE L x B x H 195 x 26 x 192 mm Barometer Höhe einstellen / Gerät Ungewöhnliche zurücksetzen Gewicht 578 Gramm Messwerte ohne Batterie Kalender Ungewöhn- Sprache ändern licher Tag / Monat Abmessungen Funksendeeinheit Uhr lässt Funkuhr... - Page 59 Komfortbereich 40% bis 70% 24-stündig (DCF-Format) Speicher Min / Max Kalender TT / MM oder MM / TT; Wochentag in einer von Barometer 5 Sprachen (E, G, F, I, S) Maßeinheit mb / hPa oder inHg Weckalarm Normal und Frostwarner; Messschritte 1 mb (0.03 inHg) zweiminütiges Crescendo...
-
Page 60: Über Oregon Scientific
Besuchen Sie unsere Website (www.oregonscientific. diese/dieses Wetterstation mit Weltzeituhr Modelle de) und erfahren Sie mehr über unsere Oregon BAR916HG in Übereinstimmung mit den grundlegenden Scientific-Produkte wie zum Beispiel Wetterstationen, Anforderungen und den anderen relevanten Vorschriften Projektions-Funkuhren, Produkte für Gesundheit und der Richtlinie 1999/5/EG befindet”. - Page 61 Cambiar pantalla del reloj ........14 Reloj con la hora mundial ........15 con Reloj con la Hora Mundial Alarmas ..............20 Modelo: BAR916HG MANUAL DE USUARIO Ajuste de la alarma diaria ........20 Ajuste de la alarma previa ........20 Activación de la alarma ........
- Page 62 Iluminación ............. 26 Reinicio del sistema ..........26 Seguridad y cuidado ..........27 Avisos ..............27 Solución de problemas .......... 27 Ficha técnica ............28 Sobre Oregon Scientific ......... 30 Declaración de conformidad CE ......30...
-
Page 63: Introducción
INTRODUCCIÓN Gracias por elegir la Estación Meteorológica Inalámbrica con Reloj con la hora mundial (BAR916HG) de Oregon Scientific™. Este potente dispositivo combina un reloj con seguimiento meteorológico, lecturas de temperatura y humedad interior y exterior, tendencias barométricas y ajuste de altura en una única herramienta que puede utilizar desde la comodidad de su hogar. -
Page 64: Panorámica General Del Producto
PANORÁMICA GENERAL DEL PRODUCTO VISTA FRONTAL 1. Botón de REPETICIÓN DE ALARMA / LUZ: Activa una función de repetición de alarma a los 8 minutos o la luz de la pantalla 2. Pantalla LCD 3. SEL: Cambio de área 4. MODO: Cambiar configuración / pantalla : Aumentar configuración / activar reloj controlado por radio : Disminuir configuración / desactivar reloj... -
Page 65: Vista Trasera
VISTA TRASERA SOPORTE DE MESA O MONTAJE EN PARED Para colocar la unidad sobre una mesa, haga girar el botón de bloqueo (situado en la parte posterior de la unidad) de tal manera que los dos segmentos de la unidad principal se separen. A continuación coloque la unidad tal y como se muestra a continuación. -
Page 66: Pantalla Lcd
PANTALLA LCD 1. Área de predicción meteorológica: Predicción meteorológica animada 2. Temperatura / Humedad / Área de zona de confort: Lecturas y tendencias; zona de confort; número de canal del sensor. 3. UVA / área del barómetro Nivel de rayos UVA y diagrama de barras de presión barométrica;... - Page 67 Área de predicción meteorológica Temperatura / Humedad / Área de zona de confort 1. Icono de área seleccionada 1. Icono de pila gastada para la unidad principal 2. Tendencia de la temperatura 2. Pantalla del tiempo 3. Número del canal (1-5) / estado de la recepción 4.
- Page 68 UVA / Área del barómetro Reloj / Alarma / Área de calendario 1. La alarma previa está configurada 2. Pantalla de alarma previa / Configuración de alarma 1. Se muestra la presión barométrica previa 2. Se muestran los rayos UVA 3.
-
Page 69: Sensor Remoto (Rtgr328N)
SENSOR REMOTO (RTGR328N) 1. Recepción de señal 2. Número de canal 1. Pantalla LCD 3. Icono de pila 2. Indicador LED de gastada estado 4. Hora 3. Conducto de ventilación 5. Temperatura (°C / °F) 6. Humedad % 7. Temperatura / Humedad % PARA EMPEZAR PILAS... -
Page 70: Cambiar Configuración
Para instalar las pilas de la unidad principal: 2. La mayoría de Áreas ofrecen varias opciones de pantalla (por ejemplo, Reloj / Alarma o Barómetro /UVA). Pulse MODO para cambiar de opción, o para pasar de reloj a alarma o viceversa NOTA No use pilas recargables. - Page 71 El Sensor RTGR328N recoge lecturas de temperatura Para desplegar el soporte: y humedad, y la señal de organizaciones de control de la hora para el reloj controlado por radio. CONFIGURACIÓN DEL SENSOR THERMO- HIGRO (TEMPERATURA Y HUMEDAD) (RTGR328N) Para conseguir los mejores resultados: 1.
-
Page 72: Transmisión De Datos Del Sensor
de la cobertura de recepción de la unidad principal. Se mostrará al lado del Área. A continuación, pulse y mantenga pulsados durante 2 segundos simultáneamente MEM y CH. Es posible que tenga que probar varias ubicaciones para obtener los mejores resultados. Para buscar el sensor de rayos UVA, pulse SEL y acceda al área de rayos UVA / Barómetro. -
Page 73: Reloj Controlado Por Radio
SIGNIFICADO ICONO RELOJ CONTROLADO POR RADIO La unidad ha contactado con La hora y la fecha se actualizan automáticamente el sensor y ha sincronizado la mediante señales de reloj controladas por radio emitidas hora. por las organizaciones oficiales de seguimiento de La unidad ha contactado con el la hora situadas en Frankfurt (Alemania) y Rugby sensor pero no ha sincronizado... -
Page 74: Ajuste Del Reloj
3. Seleccione la ciudad de hora local, la ciudad de A continuación, pulse y mantenga pulsado durante 2 hora mundial, formato de 12 o 24 horas, hora, minuto, segundos en la unidad principal. Para activarla, acceda año, formato fecha / mes, mes, fecha e idioma. al Área de Reloj / Alarma, pulse y manténgalo pulsado durante 2 segundos. -
Page 75: Reloj Con La Hora Mundial
Si se ha establecido la ciudad de hora mundial, puede elegir entre: • Reloj RF con segundos y Reloj con la hora mundial • Reloj RF y Reloj de hora mundial con día • Fecha RF y fecha mundial RELOJ CON LA HORA MUNDIAL Este reloj dispone de una función que muestra la hora y le permite consultar la hora en distintos lugares del mundo instantáneamente con el sistema de ahorro... - Page 76 CÓDIGO DE LA HORA AJUSTADA NOMBRE DEL PAÍS PERIODO DE LA FUNCIÓN DST (GMT = 0) CIUDAD Addis Ababa, Etiopía, No hay DST Adelaide, Australia, Del Ultimo domingo en octubre al Ultimo domingo en marzo Auckland, Nueva Zelanda, Del primer 1 domingo en octubre al tercer 3 domingo en marzo Ankara, Turquía, Del Ultimo domingo en marzo al Ultimo domingo en octubre Argel, Argelia,...
- Page 77 Copenhague, Denmark Del Ultimo domingo en marzo al Ultimo domingo en octubre Cape Town, Sud Africa No hay DST Daka, Bangladesh No hay DST Damasco, Siria Del primero 1 de abril al primero de octubre 1 Nuevo Delhi, India, No hay DST Detroit MI, EE.UU., Del primer 1 domingo en abril al Ultimo domingo en octubre Dublín, Irlanda...
- Page 78 Madrid, España, Del Ultimo domingo en marzo al Ultimo domingo en octubre Melbourne, Australia, Del Ultimo domingo en octubre al Ultimo domingo en marzo Ciudad de México, México, Del primer domingo en abril al Ultimo domingo en octubre Managua, Nicaragua, No hay DST Miami FL, EE.UU., Del primer domingo en abril al Ultimo domingo en octubre...
- Page 79 San Francisco CA, EE.UU., Del primer domingo en abril al Ultimo domingo en octubre Shanghai, China, No hay DST Singapur, Singapur, No hay DST San José, Costa Rica, No hay DST San Juan, Puerto Rico, No hay DST Ciudad del Lago de sal/Salt Lake City Del primer 1 domingo en abril al Ultimo domingo en octubre UT, EE.UU., Sofía, Bulgaria,...
-
Page 80: Alarmas
Por ejemplo, si configura la alarma a las 7:00 AM, y la ALARMAS alarma predefinida a 45 minutos, la alarma predefinida sonará a las 6:15 AM si la información sobre la Este producto tiene 2 alarmas: Una alarma diaria y una alarma predefinida para tiempo con nieve. -
Page 81: Activación De La Alarma
No se muestra, pulse MODE. ACTIVACIÓN DE LA ALARMA Navegue hasta el área del reloj, luego pulse Los datos barométricos se muestran en 2 parte inferior para cambiar de la vista de la alarma diaria la vista del display. En la parte superior un gráfico de barras del la alarma predefinida. -
Page 82: Pantalla Que Muestra Diagramas De Barras
1. Navegue hasta el área del Barómetro. 2. Pulse HIST durante 2 segundos. 3. Pulse para configurar la altitud incrementando en saltos de 10 (de -100m a 2500m). 4. Pulse HIST para confirmar. PREDICCIÓN METEOROLÓGICA Este producto realiza la previsión meteorológica de las próximas 12 a 24 horas de un radio de 30-50 km (19-31 millas). -
Page 83: Medición De Uv
El sensor de rayos UVA UVR128 viene incluido en el luego pulse MODE para seleccionar el display UV. BAR966HG y puede adquirirse como objeto opcional con el BAR916HG. El sensor de rayos UVA le permite tener la siguiente información al alcance de la mano:... - Page 84 5. Pulse para aumentar o disminuir el valor SPF. Luego pulse MODE para confirmar y pasar al modo de configuración de la cuenta atrás del tiempo de exposición UV. 6. Pulse para habilitar o deshabilitar la cuenta atrás. Pulse MODE para salir del display del modo de tiempo restante de exposición y empezar con la cuenta atrás de exposición.
-
Page 85: Temperatura Y Humedad
TEMPERATURA Y HUMEDAD SELECCIÓN DEL CANAL DEL SENSOR La Estación Meteorológica puede mostrar la siguiente Pulse CH para cambiar entre los sensores 1-5. información recogida de cualquiera de los 5 sensores remotos: • Temperatura mínima, máxima y actual y porcentajes El Icono mostrará... -
Page 86: Zona De Confort
CATEGORÍA TEMPERATURA TENDENCIA AUMENTO QUIETA CAIDA DEL AVISO °C °F TEMPERATURA Extremo Peligro >54.5 >130 Peligro 40.5-54.4 105-130 HUMEDAD Precaución 32.2-40.5 90-105 Extrema Precaución 80-90 26.6-32.2 Para ver el índice de calor: ZONA DE CONFORT 1. Pulse SEL para navegar al área de temperatura. aparecerá... -
Page 87: Seguridad Y Cuidado
• No fuerce los componentes internos. para pilas de la unidad principal. Pulse REINICIO cuando cambie las pilas y siempre que el rendimiento no • No mezcle pilas nuevas y viejas ni de diferentes tipos. sea el esperado (por ejemplo, si no consigue conectar •... -
Page 88: Ficha Técnica
Temperatura Temperatura fuera Temperatura Muestra Unidad °C o °F de rango “LLL” o Rango Exterior -5 °C a 50 °C “HHH” (23 °F a 122 °F) Sensor No localiza Comprobar las pilas Rango Interior -20 °C a 60 °C Remoto el sensor remoto (-4 °F a 140 °F) - Page 89 Unidad Remota(RTGR328N) Unidad remota Termo / Higro (temperatura / humedad) Frecuencia RF 433 MHz Pilas 2 pilas UM-3 / AA 1,5V Rango Hasta 70 metros (230 pies) sin obstrucciones Trasmisión Aprox. Cada 1 minuto NOTA Se recomienda usar pilas alcalinas con este producto para que funcione más tiempo.
-
Page 90: Declaración De Conformidad Ce
Visite nuestra página web (www.oregonscientific.com) que el Estación Meteorlogógica Inalámbrica con Reloj para conocer más sobre los productos de Oregon con la hora mundial modelo BAR916HG cumple con los Scientific tales como: Reproductores MP3, juegos y requisitos esenciales y cualesquiera otras disposiciones productos de aprendizaje electrónico para niños, relojes... - Page 91 Station Météo Sans Fil Alterner entre les Différents Affichages de l’Heure ..............14 avec Heure Internationale Heure Internationale ..........15 Modèle : BAR916HG Alarmes ..............20 MANUEL D’UTILISATION Réglage de l’Alarme Quotidienne ......20 TABLE DES MATIÈRES Réglage de la Pré-Alarme ........20 Introduction ...............
- Page 92 Niveau de Confort ..........26 Indice de Chaleur ..........26 Rétro-éclairage ............26 Réinitialiser le Système ......... 27 Sécurité et Entretien ..........27 Avertissements ............27 Résolution des Problèmes ........27 Spécifications ............28 À Propos d’Oregon Scientific ....... 29 Déclaration de Conformité...
-
Page 93: Introduction
• Appareil Principal • Sonde Sans Fil (RTGR328N) • Sonde UV en Option (UVR128) • Piles BAR916HG --- Appareil Principal BAR916HG + Sonde Sans Fil RTGR328N REMARQUE L’appareil principal est compatible avec les sondes suivantes : THGR228N, THGR328N, THR228N, THR328N, THWR288. Les sondes supplémentaires sont vendues séparément. -
Page 94: Vue D'ensemble Du Produit
VUE D’ENSEMBLE DU PRODUIT FACE AVANT 1. SNOOZE / LIGHT : Permet d’activer la fonction de Répétition 8 Minutes ou le rétro-éclairage 2. Affichage à cristaux liquides 3. SEL : Permet d’alterner entre les différentes Zones d’affichage 4. MODE : Permet de modifier les Réglages / de changer d’affichage : Permet d’augmenter un réglage / d’activer l’heure radio-pilotée... -
Page 95: Face Arrière
FACE ARRIÈRE INSTALLATION SUR PIED ET FIXATION MURALE Pour installer l’appareil sur une table, mettre le verrou (à l’arrière de l’appareil) sur la position permettant de désolidariser les deux éléments de l’appareil. Puis positionner l’appareil comme indiqué ci-après. 1. Sélecteur mb / inHg (à l’intérieur du logement Pour fixer l’appareil sur un mur, mettre le verrou des piles) (à... -
Page 96: Affichage À Cristaux Liquides
AFFICHAGE À CRISTAUX LIQUIDES 1. Zone d’Affichage des Prévisions Météo : Prévisions Météo Animées. 2. Zone d’affichage de la Température / de l’Humidité / du Niveau de Confort : Relevés et tendances; niveau de confort ; numéro de canal de la sonde. 3. - Page 97 Zone d’Affichage des Prévisions Météo Zone d’affichage de la Température / de l’Humidité / du Niveau de Confort 1. Icône indiquant des piles faibles sur l’appareil 1. Icône indiquant la Zone sélectionnée principal 2. Tendance de la température 2. Affichage de la météo 3.
- Page 98 Zone d’affichage du Baromètre / de l’Indice UV Zone d’Affichage de l’Heure / de l’Alarme / de la Date 1. Indique que la pression atmosphérique est affichée 1. Indique que la Pré-Alarme est réglée 2. Indique que les UV sont affichés 2.
-
Page 99: Sonde Sans Fil (Rtgr328N)
SONDE SANS FIL (RTGR328N) 1 . R é c e p t i o n d u signal 1. Affichage à cristaux 2. Numéro du canal liquides 3 . I c ô n e d e p i l e s 2. -
Page 100: Modifier Les Réglages
MODIFIER LES RÉGLAGES Pour installer les piles de l’appareil principal : 1. A p p u y e r s u r S E L p o u r a l t e r n e r e n t r e les différentes Zones d’affichage. -
Page 101: Mise En Service De La Sonde Thermo / Hygro (Rtgr328N)
L’appareil principal est compatible avec les sondes 4. Appuyer sur RESET. Puis, sélectionner une unité de suivantes : température. THGR228N, THGR328N, THR228N, THR328N et SÉLECTEUR OPTION THWR288. (Les sondes supplémentaires sont vendues Temp. °C / °F séparément. Veuillez contacter votre revendeur pour plus d’informations.) 5. -
Page 102: Transmission Des Données De La Sonde
EFFECTUER UNE RECHERCHE DE SONDE la sonde de l’appareil principal ; les températures inférieures à zéro peuvent perturber les performances Pour effectuer une recherche de la sonde Thermo des piles ainsi que la transmission du signal. / Hygro : appuyer sur SEL pour accéder à la Zone d’affichage de la Température / de l’Humidité. -
Page 103: Heure Radio-Pilotée
1. Heure radio-pilotée Comment interpréter ces indicateurs : 2. Ville étrangère SIGNIFICATION ICÔNE 3. Heure à l’étranger L’appareil a établi le contact avec la sonde et l’heure est synchronisée. HEURE RADIO-PILOTÉE L’appareil a établi le contact avec la sonde mais l’heure n’est pas L’heure et la date sont mises à... -
Page 104: Régler L'heure
3. Il est également possible de sélectionner la Ville de sur l’appareil principal sans relâcher pendant 2 votre domicile, une Ville étrangère, le format horaire secondes. Pour réactiver l’heure radio-pilotée, aller sur 12 / 24 heures, les heures, les minutes, l’année, la Zone d’affichage de l’Heure / de l’Alarme, puis appuyer le format jour / mois, le mois, le jour et la langue sans relâcher pendant 2 secondes. -
Page 105: Heure Internationale
Si une ville étrangère est sélectionnée, il est possible d’alterner entre les affichages suivants : • Heure Radio-Pilotée avec secondes et heure à l’étranger • Heure Radio-Pilotée et heure à l’étranger avec jour • Date Radio-Pilotée et Date à l’étranger HEURE INTERNATIONALE Cette fonction horaire permet d’afficher l’heure de différents endroits dans le monde ;... - Page 106 CODE DE LA COMPENSATION NOM DU PAYS PÉRIODE HEURE D’ÉTÉ VILLE HORAIRE (GMT = 0) Addis-Ababa, Ethiopie Pas d’heure d’été Adélaïde, Australie Du dernier dimanche d’octobre au dernier dimanche de mars Auckland, Nouvelle-Zélande Du premier dimanche d’octobre au troisième dimanche de mars Ankara, Turquie Du dernier dimanche de mars au dernier dimanche d’octobre Alger, Algérie...
- Page 107 Copenhague, Danemark Du dernier dimanche de mars au dernier dimanche d’octobre Le Cap, Afrique du Sud Pas d’heure d’été Dhaka, Bangladesh Pas d’heure d’été Damas, Syrie Du 1er avril au 1er octobre New Delhi, Inde Pas d’heure d’été Detroit MI, Etats-Unis Du premier dimanche d’avril au dernier dimanche d’octobre Dublin, Irlande Du dernier dimanche de mars au dernier dimanche d’octobre...
- Page 108 Madrid, Espagne Du dernier dimanche de mars au dernier dimanche d’octobre Melbourne, Australie Du dernier dimanche d’octobre au dernier dimanche de mars Mexico City, Mexique Du premier dimanche d’avril au dernier dimanche d’octobre Managua, Nicaragua Pas d’heure d’été Miami FL, Etats-Unis Du premier dimanche d’avril au dernier dimanche d’octobre Milan, Italie Du dernier dimanche de mars au dernier dimanche d’octobre...
- Page 109 Shanghai, Chine Pas d’heure d’été Singapour, Singapour Pas d’heure d’été San José, Costa Rica Pas d’heure d’été San Juan, Porto Rico Pas d’heure d’été Salt Lake City UT, Etats-Unis Du premier dimanche d’avril au dernier dimanche d’octobre Sofia, Bulgarie Du dernier dimanche de mars au dernier dimanche d’octobre Sao Paulo, Brésil Du deuxième dimanche d’octobre au troisième dimanche de février Stockholm, Suède...
-
Page 110: Alarmes
par la sonde du Canal 1 atteint 2°C (35,6 °F) ou une ALARMES température inférieure. Cet appareil est équipé de deux alarmes : une Alarme Par exemple, si l’alarme quotidienne est réglée sur 7:00 Quotidienne et une Pré -Alarme pour temps neigeux. AM, et la Pré-Alarme sur 45 minutes, la Pré-Alarme L’alarme Quotidienne peut être réglée pour sonner tous sonne à... -
Page 111: Activer L'alarme
ZONE D’AFFICHAGE DU BAROMÈTRE ACTIVER L’ ALARME Appuyer sur SEL pour accéder à la zone Baromètre. Accéder à la Zone d’affichage de l’Heure, puis appuyer pour afficher l’Alarme Quotidienne ou la n’apparaît PAS à l’affichage, appuyer sur Pré-Alarme. Pour activer ou désactiver l’alarme, appuyer MODE. -
Page 112: Affichage De L'histogramme
plusieurs fois sur HIST pour faire défiler les mesures. précision des relevés de la pression atmosphérique. Le numéro indiqué dans la case HR indique quand 1. Aller sur la zone Baromètre. la mesure a été prise (ex : 2 heures avant, 3 heures 2. -
Page 113: Mesure Uv
1. Appuyer sur SEL pour aller sur la zone Baromètre, La sonde Ultraviolets UVR138 est fournie avec le modèle puis appuyer su MODE pour sélectionner BAR966HG et est en option pour le modèle BAR916HG. l’affichage UV. La sonde UV fournit les informations suivantes : •... - Page 114 2. Appuyer sur CH pour sélectionner un utilisateur (1 à 4). Mode Compte à rebours du temps d’exposition et démarrer le compte à rebours.Le temps restant 3. Appuyer pendant 2 secondes sur MODE pour d’exposition aux UV de l’utilisateur s’affiche et l’icône entrer dans le Mode de Réglage du Type de Peau clignote.
-
Page 115: Température Et Humidité
TEMPÉRATURE ET HUMIDITÉ SÉLECTION DU CANAL DE LA SONDE La station météo peut afficher les informations suivantes Appuyer sur CH pour alterner entre les 5 sondes. venant d’une des 5 sondes : • Températures actuelles, minimales et maximales et humidité relative. Une icône de maison indique la sonde sélectionnée. -
Page 116: Tendance De La Température Et De L'humidité
TENDANCE DE LA TEMPÉRATURE ET DE INDICE DE CHALEUR L’HUMIDITÉ L’Indice de Chaleur dispose de 4 niveaux d’alerte en cas de température élevée. Les courbes des tendances sont indiquées à côté des relevés de température et d’humidité. NIVEAU DE TEMPÉRATURE DANGER TENDANCE EN HAUSSE... -
Page 117: Réinitialiser Le Système
• Ne pas soumettre l’appareil principal à une RÉINITIALISER LE SYSTÈME force, choc, ou à des variations de température ou Le bouton RESET se trouve dans le logement des piles d’humidité. de l’appareil principal. Appuyer sur RESET lorsque les • Ne pas toucher aux composants internes. piles sont remplacées ou à... -
Page 118: Spécifications
Poids 108 g (0,24 livre) sans pile Heure Impossible de 1. Vérifier les piles Température synchroniser 2. Appuyer sur Unité °C ou °F l’heure RESET 3. Activer Plage de mesure à manuellement l’intérieur -5°C à 50°C (23°F à 122°F) l’heure atomique Plage de mesure à... -
Page 119: À Propos D'oregon Scientific
N° de Canal. 1, 2, 3, 4 ou 5 Unité °C ou °F À PROPOS D’OREGON SCIENTIFIC Heure radio pilotée En consultant notre site internet (www.oregonscientific. fr), vous pourrez obtenir des informations sur les Synchronisation Auto ou désactivée... -
Page 120: Déclaration De Conformité Européenne
DÉCLARATION DE CONFORMITÉ EUROPÉENNE Par la présente Oregon Scientific déclare que l’appareil Station Météo Sans Fil avec Heure Internationale modèle n° BAR916HG est conforme aux exigences essentielles et aux autres dispositions pertinentes de la directive 1999/5/CE PAYS CONCERNÈS RTT&E Tous les pays de l’UE, Suisse CH... - Page 121 Impostazione dell’Orologio ......... 14 visuallizzazione dell’orario in 130 Attivazione del Display dell’Orologio ....14 città nel mondo Orario in 130 città nel mondo ......15 Modello: BAR916HG Allarmi ..............20 MANUALE D’USO Impostazione dell’Allarme Giornaliero ....20 INDICE Impostazione del Preallarme ....... 20 Introduzione .............
- Page 122 Registrazioni Massime / Minime ......26 Tendenza della Temperatura e dell’Umidità ..26 Livello di Comfort ..........26 Indice di Calore ........... 26 Retroilluminazione ..........27 Funzione RESET ............ 27 Sicurezza e Manutenzione ........27 Avvertenze .............. 27 Risoluzione dei Problemi ........28 Specifiche ...............
-
Page 123: Città Nel Mondo
INTRODUZIONE Grazie per avere scelto la stazione meteorologica senza fili con visualizzazione dell’orario corrispondente in 130 città nel mondo (BAR916HG) di Oregon Scientific™. Questo efficiente dispositivo integra funzioni di rilevazione dell’ora, di monitoraggio del tempo, di lettura dell’umidità e delle temperature interna ed esterna,... -
Page 124: Panoramica Del Prodotto
PANORAMICA DEL PRODOTTO VISTA ANTERIORE 1. SNOOZE / LIGHT: attiva la funzione snooze di 8 minuti o la retroilluminazione 2. Display LCD 3. SEL: attiva le sezioni 4. MODE: modifica le impostazioni e/o la visualizzazione : aumenta il valore dell’impostazione e/o attiva l’orologio radiocontrollato : diminuisce il valore dell’impostazione e/o disattiva l’orologio radiocontrollato... -
Page 125: Vista Posteriore
VISTA POSTERIORE SUPPORTO DA TAVOLO DA PARETE Per posizionare l’unità su una superficie piana, ruotare il pulsante di bloccaggio (sul retro dell’unità) in modo da sganciare i due segmenti dell’unità principale uno dall’altro. Posizionare quindi l’unità come illustrato nella figura seguente. Per fissare l’unità... -
Page 126: Display Lcd
DISPLAY LCD 1. Sezione Previsioni meteorologiche: previsioni del tempo animate. 2. Sezione Temperatura / Umidità / Livello di comfort valori e linee di tendenza, livello di comfort, numero di canale del sensore remoto. 3. Sezione UVI / Barometro: grafico a barre dei valori barometrici e del livello UV;... - Page 127 Sezione Previsioni meteorologiche Sezione Temperatura / Umidità / Livello di comfort 1. Simbolo della sezione selezionata 1. Simbolo di batteria scarica dell’unità principale 2. Tendenza della temperatura 2. Visualizzazione delle previsioni del tempo 3. Numero di canale (1-5) / stato di ricezione 4.
- Page 128 Sezione Barometro/UVI Sezione Orologio/Allarme/Calendario 1. Pre-allarme impostato 2. Visualizzazione pre-allarme/impostazione pre-allarme 3. Canale con ricezione del segnale di radiocontrollo 1. Visualizzazione della pressione barometrica 4. Simbolo ricezione orologio RF 2. Visualizzazione dell’indice UV 5. Allarme giornaliero impostato 3. Simbolo di batteria scarica per il sensore UV 6.
-
Page 129: Sensore Remoto (Rtgr328N)
SENSORE REMOTO (RTGR328N) 1. Ricezione segnale 2. Numero di canale 1. Display LCD 3. Simbolo di batteria 2. Indicatore di stato scarica a LED 4. Ora 3. Fori di areazione 5. Temp (°C o °F) 6. Umidità % 7. Temp / Umidità OPERAZIONI PRELIMINARI BATTERIE Le batterie sono fornite insieme al prodotto:... -
Page 130: Modifica Delle Impostazioni
Per installare le batterie nell’unità principale: 2. Quasi tutte le sezioni dispongono di opzioni di visualizzazione alternative, ad esempio Barometro/UVI. Premere MODE per individuare le opzioni desiderate, oppure per attivare l’orologio NOTA Si consiglia di utilizzare batterie alcaline con o l’allarme. questo prodotto per prolungarne la durata. -
Page 131: Configurazione Del Sensore
Il sensore RTGR328N rileva i valori della temperatura Per aprire il supporto: e dell’umidità, nonché i segnali trasmessi dalle organizzazioni dell’ora ufficiali per quanto riguarda l’orologio radiocontrollato. CONFIGURAZIONE DEL SENSORE TERMO-IGROMETRO (RTGR328N) 1. Aprire il vano batterie con un piccolo cacciavite a Per risultati ottimali: croce. -
Page 132: Ricerca Del Sensore
RICERCA DEL SENSORE NOTA Il campo di trasmissione può variare ed è soggetto al campo di ricezione dell’unità principale. Per cercare un sensore termo-igrometro, premere SEL in modo da esplorare la sezione Temperatura/Umidità. verrà visualizzato accanto alla sezione. Tenere Potrebbe essere necessario sperimentare varie premuti contemporaneamente per 2 secondi i tasti ubicazione prima di individuare quella che consente di MEM e CH. -
Page 133: Orologio Radiocontrollato
1. Orario radiocontrollato Interpretazione del segnale: 2. Città selezionata tra le 130 disponibili SIGNIFICATO SIMBOLO 3. Orario relativo alla città selszionata L’unità si è collegata con il sensore e ha sincronizzato l’ora. OROLOGIO RADIOCONTROLLATO L’unità si è collegata con il La data e l’ora vengono aggiornati automaticamente sensore ma l’ora non è... -
Page 134: Impostazione Dell'orologio
l’ora, i minuti, l’anno, il formato data/mese, il mese, tasto nell’unità principale. Per riattivare la funzione, la data e la lingua. individuare la sezione orologio/Allarme, quindi tenere premuto per 2 secondi. 4. Premere per modificare l’impostazione. 5. Premere MODE per confermare. Funzione di radiocontrollo abilitata: NOTA Sono disponibili le lingue (E) Inglese, (F) Francese, (D) Tedesco, (I) Italiano e (S) Spagnolo. -
Page 135: Orario In 130 Città Nel Mondo
• Orario corrente con visualizzazione dei secondi e orologio con visualizzazione dell’ora mondiale coordinata • Orario corrente e ora mondiale coordinata con il giorno • Calendario e ora mondiale coordinata ORARIO IN 130 CITTA’ NEL MONDO Questo orologio supporta la visualizzazione dell’ora mondiale coordinata che consente di controllare immediatamente l’ora corrispondente in diverse città... - Page 136 NOME DELLA NAZIONE CODICE CITTÀ ORA OFFSET (GMT = 0) PERIODO DST Addis Ababa, Etiopia Niente ora legale (DST) Adelaide, Australia Dall’ultima domenica di ottobre all’ultima domenica di marzo Auckland, Nuova Zelandia Dalla prima domenica di ottobre alla terza domenica di marzo Ankara, Turchia Dall’ultima domenica di marzo all’ultima domenica di ottobre Algiers, Algeria...
- Page 137 Cape Town, Sudafrica Niente ora legale (DST) Dhaka, Bangladesh Niente ora legale (DST) Damasco, Siria Dal 1 aprile al 1 ottobre Nuova Delhi, India Niente ora legale (DST) Detroit MI, USA Dalla prima domenica di aprile all’ultima domenica di ottobre Dublino, Irlanda Dall’ultima domenica di marzo all’ultima domenica di ottobre Francoforte, Germania...
- Page 138 Melbourne, Australia Dall’ultima domenica di ottobre all’ultima domenica di marzo Mexico City, Messico Dalla prima domenica di aprile all’ultima domenica di ottobre Managua, Nicaragua Niente ora legale (DST) Miami FL, USA Dalla prima domenica di aprile all’ultima domenica di ottobre Milano, Italia Dall’ultima domenica di marzo all’ultima domenica di ottobre Manama, Barain...
- Page 139 Shanghai, Cina Niente ora legale (DST) Singapore, Singapore Niente ora legale (DST) San Jose, Costa Rica Niente ora legale (DST) San Juan, Porto Rico Niente ora legale (DST) Salt Lake City UT, USA Dalla prima domenica di aprile all’ultima domenica di ottobre Sofia, Bulgaria Dall’ultima domenica di marzo all’ultima domenica di ottobre San Paolo, Brasile...
-
Page 140: Allarmi
preallarme suonerà quando il barometro prevede pioggia ALLARMI e la temperatura registrata dal sensore del canale 1 L’unità dispone di due allarmi: un allarme giornaliero e un raggiunge il valore 2°C (35,6°F) o inferiore. preallarme in caso di previsione di precipitazioni nevose. È... -
Page 141: Attivazione Dell'allarme
VISUALIZZAZIONE DELLA SEZIONE DEL ATTIVAZIONE DELL’ALLARME BAROMETRO Accedere alla sezione dell’orologio, quindi premere Premere SEL per accedere alla sezione del barometro. per attivare la visualizzazione dell’allarme giornaliero o del preallarme. Per attivare o disattivare l’allarme, premere Se l’icona NON viene visualizzata, premere MODE. Q u a n d o s i r a g g i u n g e l ’... -
Page 142: Visualizzazione Dei Valori Storici Della Pressione
VISUALIZZAZIONE DEI VALORI STORICI IMPOSTAZIONE DELL’ALTITUDINE DELLA PRESSIONE Per migliorare l’accuratezza delle misurazioni della pressione barometrica si consigllia di impostare Accedere alla sezione del barometro, quindi premere l’altitudine sul valore del mare a cui ci si trova. ripetutamente il pulsante HIST per scorrere le misurazioni. -
Page 143: Icone Delle Previsioni Meteorologiche
Il sensore per la rilevazione dei raggi UV UVR128 è fornito in dotazione con il modello BAR966HG, mentre DESCRIZIONE ICONA è disponibile come unità opzionale con il modello BAR916HG. Il sensore UV fornisce le informazioni Sereno (Giorno) seguenti: Parzialmente • Rilevazione dell’indice dei raggi ultravioletti (UVI). - Page 144 Per impostare il conto alla rovescia del tempo di 4. Premere per scegliere 1 delle 4 impostazioni esposizione, è innanzitutto necessario specificare il relative ai tipi di pelle disponibili. Quindi premere tipo di pelle e il fattore di protezione dal sole (SPF) MODE per confermare la selezione e attivare la utilizzato nel modo seguente: modalità...
-
Page 145: Temperatura E Umidità
I dati della temperatura vengono visualizzati nella 1. Premere SEL per accedere alla sezione del parte superiore, mentre quelli dell’umidità nella parte barometro. inferiore. 2. Premere MODE per selezionare la visualizzazione UV. 3. Premere MEM per mostrare le memorizzazioni UVI massima, minima e corrente. -
Page 146: Registrazioni Massime / Minime
rotazione, premere CH o MEM attivando la sezione LIVELLO DI COMFORT temperatura / umidità. La zona di comfort indica quanto è confortevole la situazione climatica, in base alle misurazioni dell’umidità Se si seleziona un sensore che rileva solo i dati NOTA e della temperatura correnti. -
Page 147: Retroilluminazione
CATEOGORIA TEMPERATURA FUNZIONE RESET PERICOLO °C °F Il pulsante RESET è posizionato nel vano batterie Massimo pericolo >54,5 dell’unità principale. Premere RESET dopo ogni >130 sostituzione delle batterie oppure quando l’unità non Pericolo 40,5-54,4 105-130 riesce ad eseguire alcune operazioni, ad esempio Massima 32,2-40,5 90-105... -
Page 148: Risoluzione Dei Problemi
• Non immergere mai l’unità nell’acqua. Ciò potrebbe Impossibile Orologio Disabilitare la causare scosse elettriche e danneggiare il prodotto. modificare funzione di • Non sottoporre l’unità a forza eccessiva, urti o l’orologio radiocontrollo oscillazioni di temperatura o umidità. Impossibile 1. Cambaire le •... -
Page 149: Specifiche
Umidità relativa SPECIFICHE Intervallo da 25% a 95% Dimensioni unità principale Risoluzione B X P X A 195 x 26 x 192 mm Situazione ottimale da 40% a 70% (7,6 x 0,8 x 7,5 pollici) Memoria Min / max Peso 578 grammi (20,4 once) senza batteria Dimensioni unità... -
Page 150: Informazioni Su Oregon Scientific
Orologio radiocontrollato INFORMAZIONI SU OREGON SCIENTIFIC Sincronizzazione Automatica o disabilitata Per avere maggiori informazioni sui nuovi prodotti Display orologio HH:MM:SS Oregon Scientific, come le fotocamere digitali, i lettori Formato dell’ora 12 ore AM / PM MP3, i computer didattici per ragazzi, gli orologi con (Formato MSF) proiezione dell’ora, le stazioni barometriche, gli orologi... -
Page 151: Dichiarazione Di Conformità
DICHIARAZIONE DI CONFORMITÁ Con la presente Oregon Scientific dichiara che questo Stazione meteorologica senza fili con orologio marcatempo internazionale modello BAR916HG è conforme ai requisiti essenziali ed alle altre disposizioni pertinenti stabilite dalla direttiva 1999/5/CE. Una copia firmata e datata della Dichiarazione di Conformità... - Page 152 Draadloos Weerstation met Wereldtijd Klok ............. 14 Alarmen ..............19 Wereldtijd Klok Dagelijks Alarm Instellen ........19 Model: BAR916HG Pre-Alarm Instellen ..........19 HANDLEIDING Alarm Activeren ........... 20 INHOUD Snooze ..............20 Introductie ..............3 Barometer ............... 20 Product Overzicht ............. 4 Barometerscherm Bekijken ........
- Page 153 Reset Systeem ............26 Veiligheid En Onderhoud ........26 Waarschuwingen ............ 26 Problemen Oplossen ..........26 Specificaties ............27 Over Oregon Scientific .......... 29 EG-Verklaring van gelijkvormigheid ..... 29...
-
Page 154: Introductie
INTRODUCTIE Dank u dat u voor het Oregon Scientific Draadloze Weerstation met Wereldtijd Klok (BAR916HG) heeft gekozen. Dit krachtige product houdt voor u de tijd, het weer, de temperatuur en vochtigheid binnen en buiten, en luchtdruktrends op verschillende hoogtes bij, en dat allemaal in één apparaat dat u heel gemakkelijk vanaf... -
Page 155: Product Overzicht
PRODUCT OVERZICHT VOORKANT 1. SNOOZE / LIGHT: Activeer 8-minuten snoozefunctie, of backlight 2. LCD-Scherm 3. SEL: Schermen wisselen 4. MODE: Instellingen / Scherm Aanpassen : Instelling omhoog / activeer radiogestuurde klok : Instelling omlaag / deactiveer radiogestuurde klok 7. MEM: Bekijk huidige, maximum en minimum temperatuur / vochtigheid / UV-metingen 8. -
Page 156: Achterkant
ACHTERKANT TAFELSTANDAARD EN MUURBEVESTIGING Om het apparaat op een tafel neer te zetten, Draait u de zekeringsknop (op de achterkant van het apparaat) zodat de twee delen los van elkaar komen. Plaats het apparaat vervolgens zoals hier onder weergegeven. Om het apparaat aan de muur te hangen, draait u de zekeringsknop (op de achterkant van het apparaat) 1. -
Page 157: Lcd-Scherm
LCD-SCHERM 1. Weersvoorspellingsscherm: Geanimeerde weersvoorspelling. 2. Temperature / Humidity / Comfort Zone Area: Metingen en trendlijnen; comfortzone; sensor kanaalnummer. 3. UVI / Barometer Area: UV-niveau staafdiagram van luchtdruk; UV-Index en luchtdrukmetingen. 4. Clock / Alarm / Calendar Area: Radiogestuurde klok met wereldtijd;... - Page 158 Weersvoorspellingsscherm: Temperatuur / Vochtigheid / Comfortzonescherm 1. Geselecteerde scherm icoon 1. Batterijwisselicoon voor apparaat 2. Temperatuurtrend 2. Weergave Weer 3. Kanaalnummer (1-5) / receptiestatus 4. Batterijwisselicoon voor buitensensor 5. Vochtigheidstrend 6. MAX / MIN temperatuur 7. Temperatuur - °C / °F 8.
- Page 159 UVI / Barometerscherm Klok / Alarm / Kalenderscherm 1. Pre-Alarm is ingesteld 2. Pre-Alarm weergave / Pre-Alarm instelling 1. Luchtdruk wordt weergegeven 3. Kanaal met RF klokreceptie is gekozen 2. UV wordt weergegeven 4. RF klok receptieicoon 3. Batterijwisselicoon voor UV-sensor 5.
-
Page 160: Buitensensor (Rtgr328N)
BUITENSENSOR (RTGR328N) 1. Signaal receptie 2. Kanaalnummer 1. LCD-Scherm 3. Batterijwisselicoon 2. StatusindicatorLED 4. Tijd 3. Ventilatie gat 5. Temperatuur (°C of °F) 6. Vochtigheid % 7. Temperatuur / Vochtigheid STARTEN BATTERIJEN: Meegeleverde batterijen: 1. Muurbevestiging • Apparaat 4 x UM-3 (AA) 1,5V 2. -
Page 161: Instellingen Aanpassen
INSTELLINGEN AANPASSEN Om de batterijen in het apparaat te plaatsen. 1. Druk op SEL te wisselen tussen verschillende Gebruik geen oplaadbare batterijen: schermen . geeft het geselecteerde scherm aan. 2. De meeste schermen hebben aparte weergave NB U wordt aangeraden alkalinebatterijen in dit opties (bijvoorbeeld, Klok / Alarm of Barometer / product te gebruiken voor langere prestaties. -
Page 162: Instellen Thermo / Hygro Sensor (Rtgr328N)
THWR288. (Extra sensoren zijn apart verkrijgbaar. Om de standaard uit te klappen: Neem contact op met uw plaatselijke verkooppunt voor meer informatie.) De RTGR328N Sensor verzamelt gegevens over temperatuur en vochtigheid, en ontvangt signalen van officiële Tijdsregistratieorganistaties voor de radiogestuurde klok. INSTELLEN THERMO / HYGRO Voor de beste resultaten: SENSOR (RTGR328N) -
Page 163: Sensor Gegevens Verzending
U kunt het best verschillende plekken uitproberen om gedurende 2 seconden ingedrukt. de beste voor uw sensor te vinden. Om een UV sensor te detecteren, drukt u op SEL om naar het UVI / Barometerscherm te gaan. Wordt SENSOR GEGEVENS VERZENDING weergegeven naast het scherm. -
Page 164: Radiogestuurde Klok
RADIOGESTUURDE KLOK Het apparaat heeft geen contact meer met de sensor maar de tijd De tijd en datum worden automatisch ingesteld met is ingesteld. behulp van de atoomklokken in Frankfurt (Duitsland) en Rugby (Engeland) tenzij u deze optie uitschakelt. Het apparaat heeft geen contact De signalen worden ontvangen door de buitensensor meer met de sensor en de tijd is (RTGR328N) als deze zich binnen 1500 km van een... -
Page 165: Klok Instellen
Druk op MODE om tussen verschillende weergave- RF klok uit: opties te kiezen. Wanneer geen stad voor wereldtijd is ingesteld, kunt u kiezen tussen: KLOK INSTELLEN • Klok met seconden en datum • Klok met dag en datum U hoeft dit enkel te doen als u de radiogestuurde optie heeft uitgezet, of als u te ver van een RF signaal bent. - Page 166 TIJDSVERSCHIL LANDNAAM DST PERIODE STADCODE (GMT = 0) Addis Abeba, Ethiopie Geen Zomertijd Adelaide, Australie Van laatste zondag in oktober tot laatste zondag in maart Auckland, New Zeeland Van 1e zondag in oktober tot 3e zondag in maart Ankara, Turkije Van laatste zondag in maart tot laatste zondag in oktober Algiers, Algerije Geen Zomertijd...
- Page 167 Kopenhagen, Denemarken Van laatste zondag in maart tot laatste zondag in oktober Kaapstad, Zuid-Afrika Geen zomertijd Dhaka, Bangladesh Geen zomertijd Damast, Syrie Van 1 april tot 1 oktober New Delhi, India Geen zomertijd Detroit MI, VS Van 1e zondag in april tot laatste zondag in oktober Dublin, Ierland Van laatste zondag in maart tot laatste zondag in oktober Frankfort, Duitsland...
- Page 168 Madrid, Spanje Van laatste zondag in maart tot laatste zondag in oktober Melbourne, Australie Van laatste zondag in oktober tot laatste zondag in maart Mexico City, Mexico Van 1e zondag in april tot laatste zondag in oktober Managua, Nicaragua Geen zomertijd Miami FL, USA Van 1e zondag in april tot laatste zondag in oktober Milaan, Italie...
- Page 169 Sjanghai, China Geen zomertijd Singapore, Singapore Geen zomertijd San Jose, Costa Rica Geen zomertijd San Juan, Puerto Rico Geen zomertijd Salt Lake City UT, USA Van 1e zondag in april tot laatste zondag in oktober Sofia, Bulgarije Van laatste zondag in maart tot laatste zondag in oktober Sao Paulo, Brazilie Van 2e zondag in oktober tot 3e zondag in februari Stockholm, Zweden...
-
Page 170: Alarmen
Bijvoorbeeld, wanneer U het weksignaal instelt op ALARMEN 7:00 AM en het Pre - Weksignaal op 45 minuten, Dit product heeft 2 weksignalen: Het Dagelijks dan zal het Pre - Weksignaal afgaan om 6:15 indien Weksignaal en het Pre - Weksignaal voor sneeuwweer. de buitentemperatuur bij de Kanaal 1 Sensor 2°C of Het Dagelijks Weksignaal kan zo ingesteld worden om lager is. -
Page 171: Alarm Activeren
Indien NIET verschijnt, druk dan op MODE. ALARM ACTIVEREN Navigeer naar het Klok Veld, druk vervolgens op Barometrische data wordt weergegeven in 2 velden om te schakelen naar Dagelijks Weksignaal of Pre onderaan het scherm. Het bovenste veld toont een 24- - Weksignaal weergave. -
Page 172: Weergave Staafdiagram
1. Ga naar het Barometer Veld. 2. Hou HIST 2 seconden ingedrukt. 3. Druk om de hoogte in te stellen in 10-meter verhogingen (-100m tot 2500m). 4. Druk HIST om te bevestigen. WEERSVOORSPELLING Dit product voorspelt de volgende 12 tot 24 uur weer in een straal van 30-50 km (19-31 mijl). -
Page 173: Uv-Meting
MODE om de UV weergave te kiezen. De UVR128 Ultra-Violete Stralingssensor is inbegrepen bij de BAR966HG en is beschikbaar als optionele accessoire voor de BAR916HG. Met de UV-sensor heeft u de volgende informatie binnen handbereik: • 10-uur Ultraviolet Index (UVI) bestand. -
Page 174: Temperatuur En Vochtigheid
2. Druk CH om gebruiker 1-4 te kiezen. en de Aftelling van de Blootstellingtijd te beginnen. De Resterende-Gebruiker-Blootstellingtijd zal 3. Houd MODE 2 seconden ingedrukt om naar de verschijnen en het icoon zal knipperen. Huidtype Instelling Modus voor de gekozen gebruiker te gaan. -
Page 175: Temperatuurs- En Vochtigheidsscherm Bekijken
SENSORKANAAL SELECTEREN • Huidige, minimum en maximum temperaturen en relatieve vochtigheidpercentages. Druk CH om tussen sensoren 1-5 te kiezen. • Comfortniveau indicator en tendenslijn (stijgend,dalend of stabiel). Het huisicoon toont de gekozen draadloze sensor. Data wordt ongeveer elke 60 seconden verzameld en •... -
Page 176: Temperatuurs- En Vochtigheidstrend
HITTLE-INDEX TEMPERATUURS- EN VOCHTIGHEIDSTREND De Warmte Index geeft 4 waarschuwingniveaus weer De tendenslijnen zijn weergegeven naast de temperatuur wanneer de temperatuur hoog is. en vochtigheid peilingen. DANGER TEMPERATURE TENDENS STIJGEND STABIEL DALEND CATEGORY °C °F TEMPERATUUR >54.5 Extreme danger >130 Gevaar 105-130 40.5-54.4... - Page 177 RESET SYSTEEM • Stel het toestel niet bloot aan overdreven krachten, schokken of schommelingen in temperatuur en De RESET knop bevindt zich in het batterijvak van het vochtigheid. apparaat. Druk op de RESET knop als u de batterijen • Kom niet aan de interne onderdelen. vervangt en wanneer de prestaties afwijken van wat u gewend bent (als u bijvoorbeeld geen RF connectie kunt •...
- Page 178 L x B x H 70 x 24,5 x 116 mm Klok Kan niet 1. Controleer (2,76 x 0,96 x 4,57 inches) auto- batterijen Gewicht 108 grams (0,24 lbs) synchron- 2. Druk RESET Zonder batterij iseren 3. Activeer de radiogestuurde klok handmatig Temperatuur Temp...
- Page 179 Resolutie 1 mb (0.03 inHg) Sluimer 8-minuten sluimer Hoogte -100 tot 2500 metres (-328 tot 2734 voet) Stroom Weergave Zonnig (dag / nacht), Het apparaat gedeeltelijk bewolkt Batterijen 4 x UM-3 (AA) 1,5V (dag / nacht), bewolkt, regenachtig, sneeuw Thermo / Hygro Buitensensor Batterijen 2 x UM-3 (AA) 1,5V Draadloos Toestel (RTGR328N)
- Page 180 Hierbij verklaart Oregon Scientific dat het toestel Draadloos Weerstation met Wereldtijd Klok model meer te weten over uw nieuwe product en andere BAR916HG in overeenstemming is met de essentiële Oregon Scientific producten zoals digitale fototoestellen, eisen en de andere relevante bepalingen van richtlijn gezondheids- en fitnessuitrusting en weerstations.
- Page 181 Estação Meteorológica Sem Fio Ajuste do Relógio ..........14 Mudança da Tela do Relógio ........ 14 com Relógio de Hora Mundial Relógio de Hora Mundial ........15 Modelo: BAR916HG MANUAL DO USUÁRIO Alarmes ..............20 Ajuste do alarme diário ........20 CONTEÚDO Ajuste do pré-alarme ..........
- Page 182 Luz de fundo ............27 Reinicialização do sistema ........27 Segurança e cuidados ........... 27 Avisos ..............27 Solução de problemas ........... 28 Especificações ............29 Sobre a Oregon Scientific ........30 Declaração de conformidade-EC ......31...
-
Page 183: Modelo: Bar916Hg
• Unidade principal • Sensor remoto (RTGR328N) • Sensor UV opcional (UVR128) • Pilhas BAR916HG --- Unidade Principal BAR916HG + Sensor Remoto RTGR328N NOTA A unidade principal é compatível com os seguintes sensores: THGR228N, THGR328N, THR228N, THR328N, THWR288. Sensores adicionais são vendidos separadamente. -
Page 184: Visão Geral Do Produto
VISÃO GERAL DO PRODUTO VISTA FRONTAL 1. SNOOZE / LIGHT: Ativar a função Snooze de 8 minutos ou a luz de fundo 2. Tela LCD 3. SEL: Alternar áreas 4. MODE: Alterar configurações / tela : Aumentar o ajuste / ativar relógio rádio- controlado : Diminuir o ajuste / desativar relógio rádio- controlado... -
Page 185: Vista Traseira
VISTA TRASEIRA APOIO PARA MESA E MONTAGEM EM PAREDE Para colocar o aparelho sobre uma mesa, gire a trava (localizada na parte posterior da unidade), a fim de separar as duas partes da unidade principal. A seguir, posicione o aparelho como indicado abaixo. Para fixar o aparelho numa parede, gire a trava 1. -
Page 186: Tela Lcd
TELA LCD 1. Weather Forecast Area: Área da previsão do tempo com ícones animados 2. Temperature / Humidity / Comfort Zone Area: Leituras e linhas de tendência; zona de conforto, no do canal do sensor 3. IUV / Barometer Area: Nível UV e gráfico de barra da pressão barométrica;... - Page 187 Área de Previsão do Tempo Área de Temperatura / Umidade / Zona de Conforto 1. Ícone da área selecionada 1. Indicador de pilha fraca da unidade principal 2. Tendência da temperatura 2. Indicador meteorológico 3. No do canal (1-5) / estado da recepção 4.
- Page 188 Área do IUV / Barômetro Área do Relógio / Alarme / Calendário 1. Pré-Alarme ajustado 2. Exibição / ajuste do Pré-Alarme 1. Pressão barométrica é indicada 3. Canal com recepção do relógio RF está bloqueado 2. UV é indicado 4. Ícone de recepção do relógio RF 3.
-
Page 189: Sensor Remoto (Rtgr328N)
SENSOR REMOTO (RTGR328N) 1. Recepção de sinal 2. Número do canal 1. Tela de cristal líquido 3. Ícone de pilha fraca 2. Indicador de estado LED 4. Hora 3. Canais de ventilação 5. Temperatura (ºC ou ºF) 6. Umidade (em %) 7. -
Page 190: Alteração Dos Ajustes
Para instalar as pilhas na unidade principal: 2. A maioria das áreas apresenta opções de exibição alternativas (por exemplo, Relógio / Alarme ou Barômetro / IUV). Pressione MODE para alternar as opções ou para alternar entre relógio e alarme. NOTA Não utilize pilhas recarregáveis. 3. -
Page 191: Configuração Do Sensor Termo / Higro (Rtgr328N)
O sensor RTGR328N recolhe as leituras da temperatura Para abrir o suporte: e umidade, bem como sinais das organizações oficiais de hora para o relógio rádio-controlado. CONFIGURAÇÃO DO SENSOR TERMO / HIGRO (RTGR328N) 1. Abra o compartimento de pilhas com uma pequena chave de fenda. -
Page 192: Transmissão Dos Dados Do Sensor
pressionado simultaneamente MEM e CH durante 2 Pode ser necessário experimentar vários locais a fim segundos. de obter o melhor resultado Para fazer a busca de um sensor UV, pressione SEL TRANSMISSÃO DOS DADOS DO SENSOR SEL para navegar até a Área do IUV / Baromêtro. Os dados são enviados do(s) sensor(es) a cada 60 será... -
Page 193: Relógio Rádio-Controlado
Como estes sinais funcionam juntamente: RELÓGIO RÁDIO-CONTROLADO SIGNIFICADO ÍCONE A hora e data são automaticamente atualizadas por A unidade fez contato com o sinais rádio-controlados das organizações oficiais de sensor e sincronizou a hora. hora em Frankfurt (Alemanha) e Rugby (Inglaterra), a menos que esta função seja desativada. -
Page 194: Ajuste Do Relógio
mundial, formato da hora (12 / 24h), hora, minuto, ano, a função, navegue até a Área do Relógio / Alarme e formato data / mês, mês, data e idioma de exibição.4. depois pressione e mantenha pressionado por 2 segundos. 4. Pressione para alterar o ajuste. -
Page 195: Relógio De Hora Mundial
RELÓGIO DE HORA MUNDIAL Este relógio vem com a função de Hora Mundial; assim, é possível verificar a hora correspondente de diferentes lugares no mundo instantaneamente, com o Horário de Verão (DST) ajustado automaticamente. Os nomes das cidades estão abreviados em 3 letras; por exemplo, FRA é... - Page 196 CÓDIGO COMPENSAÇÃ O NOME DO PAÍS PERÍODO DST DA CIDADE HORÁRIA (GMT = 0) Addis Ababa, Ethiopia Sem DST Adelaide, Australia Desde o último Domingo em Outubro até ao ultimo Domingo em Março Auckland, New Zealand Desde o 1º. Domingo em Outubro até ao 3o. Domingo em Março Ankara, Turkey Desde o último Domingo em Março até...
- Page 197 Copenhagen, Denmark Cape Desde o último Domingo em Março até ao último Domingo em Outubro Town, South Africa Sem DST Dhaka, Bangladesh Sem DST Damascus, Syria Desde 1 de Abril até 1 de Outubro New Delhi, India Sem DST Detroit MI, USA Desde o 1º.
- Page 198 Madrid, Spain Desde o último Domingo em Março até ao último Domingo em Outubro Melbourne, Australia Desde o último Domingo em Outubro até ao último Domingo em Março Mexico City, Mexico Desde o 1º. Domingo em Abril até ao último Domingo em Outubro Managua, Nicaragua No DST Miami FL, USA...
- Page 199 San Francisco CA, USA Desde o 1º. Domingo em Abril até ao último Domingo em Outubro Shanghai, China Sem DST Singapore, Singapore Sem DST San Jose, Costa Rica Sem DST San Juan, Puerto Rico Sem DST Salt Lake City UT, USA Desde o 1º.
-
Page 200: Alarmes
Por exemplo, se você ajustar o alarme para despertar ALARMES às 7:00 h da manhã e o Pré-alarme para despertar 45 minutos antes, o Pré-alarme despertará às 6:15 h, desde Este produto tem dois alarmes: O Alarme Diário e um Pré-alarme para tempo com neve. -
Page 201: Ativação Do Alarme
ATIVAÇÃO DO ALARME EXIBIÇÃO DA ÁREA DO BARÔMETRO Pressione SEL para navegar até a Área do Navegue até a Área do Relógio e pressione Barômetro. para alternar para a exibição do Alarme Diário ou do Pré-alarme. Pressione . para ativar ou desativar o alarme. -
Page 202: Tela Do Gráfico De Barras
Navegue até a Área do Barômetro. Depois pressione AJUSTE DA ALTITUDE HIST várias vezes para rolar a lista de medições. O Ajuste a altitude para que corresponda à distância em número exibido na caixa HR indica a quanto tempo foi relação ao nível do mar (acima ou abaixo dele) em efetuada cada medição (por exemplo: 2 horas atrás, 3 que você... -
Page 203: Ícones De Previsão De Tempo
O Sensor de Radiação Ultra-Violeta UVR128 acompanha DESCRIÇÃO ÍCONE o aparelho BAR966HG e está disponível como item opcional para o BAR916HG. O sensor UV fornece a Claro (Dia) seguinte informação na ponta dos dedos: • Registro do Índice de Ultravioleta (UVI) de 10 horas. - Page 204 Pele e Fator Proteção Solar (SPF), conforme mostrado FATOR DE PROTEÇÃO SOLAR a seguir: 1 - 11 Proteção baixa 1. Pressione SEL para navegar até a Área do 12 - 29 Proteção moderada Barômetro; depois pressione MODE para selecionar 30 - 50 Proteção alta a tela de UV.
-
Page 205: Temperatura E Umidade
3. Pressione MEM para exibir as leituras máxima, Os dados de temperatura são exibidos na parte superior; mínima e atual de UVI. os dados de umidade são exibidos na parte inferior. 4. Pressione e mantenha pressionado MEM durante 2 segundos para limpar a memória do UVI. NOTA Antes de tentar ajustar os recursos extras, é... -
Page 206: Registros Mínimo E Máximo
NOTA Se você selecionar um sensor que coleta ZONA TEMPERATURA UMIDADE somente dados de temperatura, a umidade não será ÚMIDO Qualquer uma >70% exibida. 20-25°C AGRADÁVEL 40-70% (68-77°F) REGISTROS MÍNIMO E MÁXIMO SECO Qualquer uma <40% • Pressione MEM várias vezes para exibir os registros atual, mínimo e máximo do sensor selecionado. - Page 207 Este produto foi projetado para oferecer muitos anos de funcionamento correto, desde que manuseado LUZ DE FUNDO adequadamente. A Oregon Scientific não se responsabiliza por utilizações do aparelho divergentes Pressione SNOOZE / LIGHT para ativar a luz de fundo do especificado nas instruções do usuário, nem por durante 8 segundos.
- Page 208 SOLUÇÃO DE PROBLEMAS • Remova as pilhas quando for necessário armazenar o produto por um longo período. PROBLEMA SINTOMA SOLUÇÃO • Não arranhe a tela de cristal líquido. Leituras Barômetro Ajuste a altitude e estranhas a unidade NOTA As especificações técnicas deste produto e Data / mês Calendário Altere o idioma...
- Page 209 (68 °F a 77 °F) ESPECIFICAÇÕES Memória Min / Max Dimensões da Unidade Principal C x L x A 195 x 26 x 192 mm Umidade relativa (7,6 x 0,8 x 7,5 polegadas) Faixa 25% a 95% Peso 578 gr (20,4 onças) Resolução sem pilha Zona de conforto...
- Page 210 Unidade °C a °F SOBRE A OREGON SCIENTIFIC Visite nosso site (www.oregonscientific.com.br) para aprender mais sobre nossos outros produtos, tais como Relógio rádio-controlado Câmeras Digitais; Produtos de Aprendizagem; Relógios Sincronização Automático ou desativado de Projeção; Equipamentos de Esporte e Saúde;...
- Page 211 Oregon Scientific declara que este Estação Meteorológica Sem Fio com Relógio de Hora Mundial modelo BAR916HG está conforme com os requisitos essenciais e outras provisões da Directiva 1999/5/CE. PAÍSES SUJEITOS À NORMA R&TTE Todos os países da União Européia, Suíça CH...
- Page 212 TRÅDLÖS VÄDERSTATION MED Ändra Klockans Display ........14 Världsklocka ............14 VÄRLDSTIDSKLOCKA Alarm ............... 19 Modell: BAR916HG Alarminställning ............ 19 BRUKSANVISNING Inställning av Föralarm ......... 19 INNEHÅLL Aktivera Alarm ............20 Introduktion ............... 3 Snooze ..............20 Produktöversikt ............4 Barometer ..............
- Page 213 Bakgrundsbelysning ..........25 Återställning av Produkten ........25 Säkerhet och Underhåll ......... 25 Varningsmeddelanden ........... 26 Felsökning ............... 26 Specifikationer ............27 Om Oregon Scientific ..........28 Försäkran Om Överensstämmelse ....... 29...
-
Page 214: Introduktion
INTRODUKTION Tack för ditt val av en Oregon Scientific Trådlös Väderstation med världsklocka (BAR916HG). Denna kraftfulla utrustning knyter samman tidtagning, väderrapportering, inomhus- och utomhustemperatur, luftfuktighetsmätning, barometertrend och höjdjusteringar till ett komplett verktyg som lämpar sig till hemmet. I denna förpackning hittar du: •... -
Page 215: Produktöversikt
PRODUKTÖVERSIKT VY FRAMSIDA 1. SNOOZE / LIGHT: Aktiverar 8-minuters snooze eller bakgrundsbelysning 2. LCD display 3. SEL: Växlar områden 4. MODE: Ändra display / inställningar : Öka inställning / aktivera radiokontrollerad klocka : Minska inställning / inaktivera radiokontrollerad klocka 7. MEM: Visa aktuell, högsta och lägsta temperatur / luftfuktighet / UV värden 8. -
Page 216: Vy Baksida
VY BAKSIDA BORDSSTÄLL OCH VÄGGMONTERING För att ställa enheten på ett bord, vrid på låsknappen (på baksidan av enheten) så att de 2 delarna kan separeras. Positionera därefter enheten enligt figuren nedan. För att montera enheten på en vägg, vrid på låsknappen 1. -
Page 217: Lcd Display
LCD DISPLAY 1. Väderprognosområde Animerad väderprognos 2. Temperatur / Luftfuktighet / Komfortområde: Värden och trendlinjer; Komfortzoner; Kanalnummer för sensor 3. UVI / Barometerområde: UV-nivå och stapeldiagram för barometertryck; UV Index och barometervärden 4. Klocka / Alarm / Datumområde: Radiokontrollerad klocka med världstid; alarm; datum... - Page 218 Väderprognosområde Temperatur / Luftfuktighet / Komfortområde 1. Ikon för låg batterinivå i huvudenheten 1. Ikon för valt område 2. Väderdisplay 2. Temperaturtrend 3. Kanalnummer (1-5) / mottagningsstatus 4. Ikon för låg batterinivå i sensorn 5. Luftfuktighetstrend 6. MAX / MIN temperatur 7.
- Page 219 UVI / Barometerområde Klocka / Alarm / Kalenderområde 1. Föralarm inställt 2. Föralarmsdisplay / Föralarmsinställning 3. Kanal med RF klockmottagning är låst 1. Barometertrycket visas 4. Ikon för RF radiomottagning 2. UV visas 5. Dagligt alarm inställt 3. Ikon för låg batterinivå i UV sensorn 6.
-
Page 220: Att Komma Igång
TRÅDLÖS SENSOR (RTGR328N) 1. Signalmottagning 2. Kanalnummer 1. LCD display 3. Ikon för låg batterinivå 2. LED indikator 4. Tid 3. Ventilationskanal 5. Temp (°C eller °F) 6. Luftfuktighet % 7. Temp / Luftfuktighet ATT KOMMA IGÅNG BATTERIER 1. Väggmontering 2. -
Page 221: Ändra Inställningar
Att installera huvudenhetens batterier: 2. De flesta områdena har ett alternativt displayval (t.ex. Klocka / Alarm eller Barometer / UVI). Tryck MODE för att ändra val eller för att växla mellan klocka och alarm. NOTERING Använd inte laddningsbara batterier. 3. Tryck och håll inne MODE i 2 sekunder för att gå in visas vid låg batterinivå. -
Page 222: Ställ In Termo- / Hygrometer (Rtgr328N)
RTGR328N-sensorn samlar in temperatur- och luftfuktig Att fälla ut stativet: hetsinformation och signaler från officiella tidkontrollorg anisationer åt den radiokontrollerade klockan. STÄLL IN TERMO- / HYGROMETER (RTGR328N) 1. Öppna batterifacket med en liten Phillips skruvmejsel. För bästa resultat: 2. Sätt i batterierna. •... -
Page 223: Sensordataöverföring
NOTERING Om fjärrenheten fortfarande inte kan SENSORDATAÖVERFÖRING hittas, kontrollera batterierna. Sänds från sensorn var 60:e sekund. Mottagningsikonen som visas i temperatur- och luftfuktighetsområdet visar statusen. KLOCKA OCH DATUM IKON BESKRIVNING Denna produkt inhämtar tid och datum m h a Huvudenheten söker radiosignaler som mottagits av fjärrenheten efter fjärrenheter. -
Page 224: Klockan
Den initiala mottagningen tar 2-10 minuter och är NOTERING För att göra en manuell sökning av initierad så fort du ställt in enheten och även när RESET klocksignal, tryck och håll inne SEARCH på sensorn tryckts in. Förutom att visa lokal tid och datum kan du (RTGR328N) i 2 sekunder. -
Page 225: Ställ In Klockan
När Världsstadstiden inte är inställd kan du växla STÄLL IN KLOCKAN mellan, Du behöver endast göra detta om du har inaktiverat • Klocka med sekunder och datum. klockfunktionen (t.ex. om du är för långt ifrån eller inte • Klocka med dag och datum. kan mottaga en signal). - Page 226 TIDSSKILLNAD LANDSNAMN STADSKOD DST-PERIOD (GMT = 0) Addis Abeba, Etiopien Ej DST Adelaide, Australien Från sista söndagen i oktober till sista söndagen i mars Auckland, Nya Zeeland Från första söndagen i oktober till tredje söndagen i mars Ankara, Turkiet Från sista söndagen i mars till sista söndagen i oktober Alger, Algeriet Ej DST Amsterdam, Holland...
- Page 227 Köpenhamn, Danmark Från sista söndagen i mars till sista söndagen i oktober Kapstaden, Sydafrika Ej DST Dhaka, Bangladesh Ej DST Damaskus, Syrien Från första april till första oktober New Delhi, Indien Ej DST Detroit MI, USA Från första söndagen i april till sista söndagen i oktober Dublin, Irland Från sista söndagen i mars till sista söndagen i oktober Frankfurt, Tyskland...
- Page 228 Madrid, Spanien Från sista söndagen i mars till sista söndagen i oktober Melbourne, Australien Från sista söndagen i mars till sista söndagen i oktober Mexico City, Mexico Ej DST Managua, Nicaragua Från första söndagen i april till sista söndagen i oktober Miami FL, USA Ej DST Milano, Italien...
- Page 229 San Francisco CA, USA Från första söndagen i april till sista söndagen i oktober Shanghai, Kina Ej DST Singapore, Singapore Ej DST San Jose, Costa Rica Ej DST San Juan, Puerto Rico Ej DST Salt Lake City UT, USA Från första söndagen i april till sista söndagen i oktober Sofia, Bulgarien Från sista söndagen i mars till sista söndagen i oktober Sao Paulo, Brasilien...
-
Page 230: Alarm
Om du t.ex. sätter alarmet till 7:00 AM och föralarmet ALARM till 45 minuter, kommer föralarmet att gå igång 6:15 AM förutsatt att utomhustemperaturen är 2°C eller under. Denna produkt har 2 alarm: Det dagliga alarmet och ett för-alarm för snöoväder. Det dagliga alarmet kan ställas in så... -
Page 231: Aktivera Alarm
Barometertrycksdata visas i 2 områden i den nedre AKTIVERA ALARM delen av displayen. Det övre området visar ett 24- Gå till Klockområdet, tryck därefter för att växla timmars stapeldiagram. till dagligt eller föralarm. Tryck eller för att aktivera eller avaktivera alarmet. Det undre området visar aktuella och historikvärden. -
Page 232: Stapeldiagramsdisplay
3. Tryck eller för att ställa in höjden i 10- meterssteg (-100m till 2500m). 4. Tryck HIST för att bekräfta. VÄDERPROGNOS Denna produkt förutspår vädret för de kommande 12 till 24 timmarna inom en 30-50 km (19-31 miles) radie. Väderprognosen baseras på trenden för lufttrycket. STAPELDIAGRAMSDISPLAY Stapeldiagrammet visar atmosfäriska tryckförändringar för de senaste 24 timmarna. -
Page 233: Uv-Mätning
1. Tryck SEL för att gå till Barometerområdet, tryck därefter MODE för att välja UV-displayen. UV-MÄTNING UVR128 Ultraviolett Strålningssensor följer med BAR966HG och finns som tillval till BAR916HG. UV-sensorn ger dig följande information: • 10-timmars Ultraviolett Index (UVI). • Automatisk beräkning av accepterad UV exponeringstid... -
Page 234: Temperatur Och Luftfuktighet
3. Tryck och håll inne MODE i 2 sekunder för att gå 7. När nedräkningstimern har nått “0” kommer ett in i inställningsläget för Hudtyp för vald användare. alarm att ljuda i 2 minuter. Tryck på valfri knapp för att stoppa alarmet. ikonen kommer att blinka SKINN- i 2 minuter även om du har stoppat alarmljudet. -
Page 235: Visa Temperatur Och Luftfuktighetsområdet
VISA TEMPERATUR OCH NOTERING Om du använder en sensor som endast mäter temperatur kommer inte luftfuktigheten att LUFTFUKTIGHETSOMRÅDET visas. Tr y c k S E L f ö r a t t g å t i l l Te m p e r a t u r o c h Luftfuktighetsområdet. -
Page 236: Heat Index
3. Tryck CH för att välja önskad kanal. TEMPERATUR LUFTFUKTIGHET WET (FUKTIGT) Vilken som helst >70% NOTERING Om temperaturen är under 26°C / 20-25 °C 40-70% 80°F eller om önskad kanal inte fungerar, kommer (68-77 °F) (BEHAGLIGT) Värmeindex att visa “NA”. Vilken som helst <40% DRY (TORRT) BAKGRUNDSBELYSNING... -
Page 237: Felsökning
VARNINGSMEDDELANDEN FELSÖKNING Denna produkt är designad för att ge dig många års PROBLEM SYMPTOM ÅTGÄRD glädje om den hanteras på ett korrekt sätt. Oregon Barometer Ställ in höjd / enhet Konstig Scientific är inte ansvariga om några avsteg från avläsning instruktionsmanualen gällande användningen av produkten görs eller om icke godkända förändringar eller Konstig... -
Page 238: Specifikationer
Upplösning SPECIFIKATIONER Komfort 40% à 70% Dimensioner för huvudenheten Minne Min / max L x B x H 195 x 26 x 192 mm Barometer (7,6 x 0,8 x 7,5 cm) Enhet mb / hPa eller inHg Vikt 578 gram Upplösning 1 mb (0.03 inHg) (20,4 lbs) -
Page 239: Om Oregon Scientific
24 timmars (DCF format) OM OREGON SCIENTIFIC Datum DD / MM eller MM / DD Besök vår hemsida (www.oregonscientific.se) för Veckodag på 1 av 5 språk att se mer av våra produkter såsom digitalkameror; (E, T, F, I, S) MP3 spelare; projektionsklockor; hälsoprodukter;... -
Page 240: Försäkran Om Överensstämmelse
FÖRSÄKRAN OM ÖVERENSSTÄMMELSE Härmed intygar Oregon Scientific att denna Trådlös väderstation med världstidsklocka modell BAR916HG står I överensstämmelse med de väsentliga egenskapskrav och övriga relevanta bestämmelser som framgår av direktiv 1999/5/EG. LÄNDER SOM OMFATTAS RTTE-DIREKTIVET Alla länder inom EU, Schweiz CH...
Need help?
Do you have a question about the BAR916HG and is the answer not in the manual?
Questions and answers