
Related Manuals for Janome 2222


Summary of Contents for Janome 2222
- Page 1 Janome 2222 Instruction Manual Janome 2222 Instruction Manual MANUAL DE INSTRUCCIONES MANUEL D’INSTRUCTIONS www.toews.com 2222 Owners Manual/ User Guide...
- Page 2 The design and specifications are subject to change without a prior notice. Please note that on disposal, this product must be safely recycled in accordance with relevant National legislation relating to electrical/electronic products. If in doubt please contact your retailer for guidance. (European Union only) www.toews.com 2222 Owners Manual/ User Guide...
- Page 3 Rogamos tenga en cuenta que para la destruccion y/o reciclado de este producto debe seguir las normas de la legislacion nacional relativa a productos electricos y/o electronicos. En caso de duda Pregunte a su distribuidor. (Sólo Unión Europea) www.toews.com 2222 Owners Manual/ User Guide...
- Page 4 Selon la législation nationale ce produit doit être recyclé en toute sécurité en accord avec les règles prévues pour les appareils électriques ou électroniques. En cas de doute contactez votre revendeur de machine à coudre. (union européenne seulement) www.toews.com 2222 Owners Manual/ User Guide...
-
Page 5: Table Of Contents
Corded Buttonhole ........... 38 Zipper Application ............ 40 Blind Stitch Hemming ..........42 Rolled Hem .............. 44 Stretch Stitch Patterns ..........46 Smocking ..............46 Applique ..............48 Decorative Satin Stitch Patterns ......48 www.toews.com 2222 Owners Manual/ User Guide... - Page 6 Aplicación de cremalleras ......... 41 Dobladillo invisible ............. 43 Dobladillos enrollados ..........45 Patrones de puntadas elásticas ........ 47 Fruncido decorativo ..........47 Aplicaciones .............. 49 Patrones decorativos de puntadas de raso ....49 www.toews.com 2222 Owners Manual/ User Guide...
- Page 7 Les boutonnières automatiques ......35-37 Les boutonnières gansées ........39 Installation des fermeture-éclair ....... 41 Ourlet invisible ............43 Ourleur présente ............45 Points stretch décoratifs ........... 47 Smocks ..............47 Appliqué ..............49 Points décoratifs ............49 www.toews.com 2222 Owners Manual/ User Guide...
-
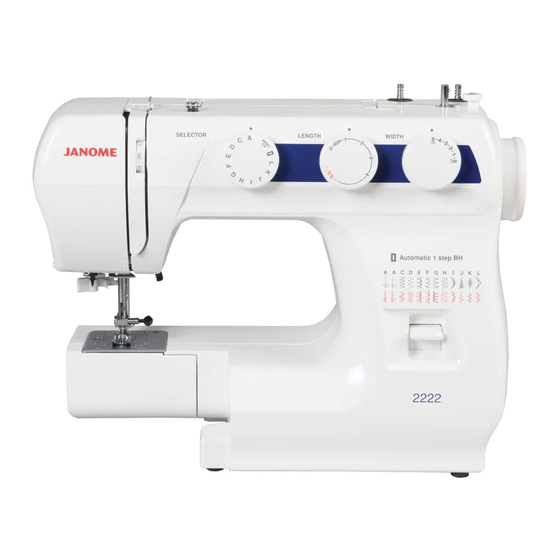
Page 8: Section 1. Essential Parts
!7 Foot holder !8 Needle clamp screw !9 Needle @0 Presser foot @1 Carrying handle @2 Handwheel @3 Power switch @4 Machine socket @5 Free-arm @6 Buttonhole lever @7 Presser foot lifter @3 @4 www.toews.com 2222 Owners Manual/ User Guide... -
Page 9: Sección 1. Componentes Principales
@4 Enchufe de máquina @4 4 Preise de la machine @5 Brazo libre @5 Bras libre @6 Elevador del prensatelas @6 Levier du pied pppresseur @7 Palanca de elevación del prensatelas @7 Relève-pied presseur www.toews.com 2222 Owners Manual/ User Guide... -
Page 10: Standard Accessories
Hem guide e Automatic buttonhole foot r Hemmer foot t Satin stitch foot y Overcasting foot u Bobbins i Needle set o Seam ripper/Buttonhole opener !0 Small screwdriver !1 Large screwdriver !2 Oil www.toews.com 2222 Owners Manual/ User Guide... -
Page 11: Accessorios Estandares
Pied de surjet u Bobinas u Canettes i Juego de agujas i Jeu d’aiguitles o Cortador/Abreojales o Découd-vite/Ouvre-boutonnière !0 Destornillador (pequeño) !0 Petit tournevis !1 Destornillador (grande) !1 Gros tournevis !2 Aceite !2 Huile www.toews.com 2222 Owners Manual/ User Guide... -
Page 12: Section 2. Getting Ready To Sew
Foot Controller Model YC-482J-EC or TJC-150 is used with this sewing machine. Controlling Sewing Speed Sewing speed can be varied by the foot control. The harder you press on the foot control, the faster the machine runs. www.toews.com 2222 Owners Manual/ User Guide... -
Page 13: Seccion 2. Preparacion De La Maquina Para Coser
On change la vitesse de couture à l’aide de la pédale de control con la planta del pie, a más presión, más de contrôle. Plus vous appuyez sur la pédale, plus la velocidad. machine va vite. www.toews.com 2222 Owners Manual/ User Guide... -
Page 14: Extension Table
The presser foot lifter raises and lowers the presser foot. You can raise it about 1/4” (0.6 cm) higher than the normal up position for easy removal of the presser foot, or to help place heavy fabric under the foot. www.toews.com 2222 Owners Manual/ User Guide... -
Page 15: Mesa Supletoria
à telas gruesas o como ayuda para quitar el passer un tissu épais sous le pied. prensatelas. www.toews.com 2222 Owners Manual/ User Guide... -
Page 16: Changing Presser Foot
Lever c To raise the feed dogs, push the lever in the direction of the arrow, as illustrated, and turn handwheel towards you. Feed dogs must be up for normal sewing. www.toews.com 2222 Owners Manual/ User Guide... -
Page 17: Cambio De Prensatelas
Gire el vers vous. Les griffes doivent etre relevées volante hacia Ud. Los dientes del transporte pendant la couture normale. deben estar subidos para las costuras normales. www.toews.com 2222 Owners Manual/ User Guide... -
Page 18: Changing Needle
50 to 80 Cotton Percale 50 to 60 Synthetic Cotton Covered Polyester Heavy Denim, Tweed, 50 silk weight Gabardine, Suiting, 40 to 50 Cotton Drapery and Uphol- 40 to 50 Synthetic stery Fabric Cotton Covered Polyester www.toews.com 2222 Owners Manual/ User Guide... -
Page 19: Cambio De Aguja
Fil de coton 40 à 50 fuertes de abrigo y (40-50), nilón y gabardine, tissu de Fil de polyester ó acolchados. algodón recubierlo manteau et de renforcé avec coton pesados de poliester rermbourrage 40 à 50 (40-50). www.toews.com 2222 Owners Manual/ User Guide... -
Page 20: Reverse Stitch Control
Raise the needle by turning the handwheel toward you. Take out the bobbin case by holding the latch. w Latch When inserting the bobbin case, place the horn into the recess of the hook race. e Horn www.toews.com 2222 Owners Manual/ User Guide... -
Page 21: Control De Puntada Reversa
Cuando introduzca la caja de bobina, encaje el Pour replacer la boîte à canettes, positionner le doigt saliente en el rebaje de la pista de la lanzadera. de position dans l’encoche de la coursière. e Saliente e Doigt de position www.toews.com 2222 Owners Manual/ User Guide... -
Page 22: Winding The Bobbin
Draw the thread through the slot of the case. c Continue to draw the thread under the tension spring and through the opening. Pull out about 4˝ (10 cm) of thread. q Tension spring www.toews.com 2222 Owners Manual/ User Guide... -
Page 23: Embobinado De La Canilla
Tirez le fil sous le ressort de tension et faites-le y a través de la abertura. Deje sobresalir passer par le trou. Tirez environ 10 cm (4˝) de fil. q Ressort de tension aproximadamente 10 cm (4˝) de hilo. q Resorte tensor www.toews.com 2222 Owners Manual/ User Guide... -
Page 24: Threading The Machine
Release the knob slowly while holding the thread end r with your hand. A loop of the thread is pulled up through the needle eye. q Knob w Hook e Guide r Thread end www.toews.com 2222 Owners Manual/ User Guide... -
Page 25: Enhebrado Del Hilo De La Aguja
Tirador est tirée à travers le chas de l’aiguille. w Enhebrador q Bouton e Guía w Crochet r El extremo del hilo e Guide r L’extrémité du fil www.toews.com 2222 Owners Manual/ User Guide... -
Page 26: Drawing Up Bobbin Thread
Needle thread tension is too loose When the needle thread (top thread) will appear on the wrong side (bottom side) of the fabric, tighten the needle thread tension by moving the dial to a higher number. www.toews.com 2222 Owners Manual/ User Guide... -
Page 27: Extracción Del Hilo De La Canilla
El hilo de la aguja (hilo superior) aparecerá en el numéro plus haut. revés (lado inferior) de la tela. Apriete la tensión del hilo de la aguja moviendo el botón selector a un número más alto. www.toews.com 2222 Owners Manual/ User Guide... -
Page 28: Adjusting Bobbin Thread Tension
Turn the stitch width dial to set the desired stitch width at the setting mark . The higher the number, the wider the stitch width Setting mark Note: Raise the needle above the fabric, when you turn the stitch width dial. www.toews.com 2222 Owners Manual/ User Guide... -
Page 29: Ajuste De La Tensión Del Hilo De La Canilla
Indice de régulation Nota: Remarque: Levante la aguja de la tela cuando gire la perilla de Levez l’aiguille sur le tissu lorsque vous tournerez le ancho de puntada. bouton sélecteur de dimension du point. www.toews.com 2222 Owners Manual/ User Guide... -
Page 30: Section 3. Basic Sewing Straight Stitch Sewing
The lines are 1/8˝ (0.3 cm) apart, and are engraved at 3/8˝, 4/8˝, 5/8˝ and 6/8˝. The lines in millimeters are 5 mm apart, and are engraved at 10 mm, 15 mm and 20 mm. www.toews.com 2222 Owners Manual/ User Guide... -
Page 31: Sección 3. Operaciones Básicas De Costura Costura De Puntada Recta
5 mm. Celles-ci 6/8˝, lineas grabadas. Las lineas en milimetros estan sont gravées à 10 mm, 15 mm, et 20 mm. grabadas por 10 mm, 15 mm, y 20 mm, de ancho entre si. www.toews.com 2222 Owners Manual/ User Guide... -
Page 32: Variable Needle Position
Simple zigzag stitching is used for finishing raw seam edges (overcasting) on most woven fabrics to prevent fabric from unraveling. This is the fastest way to finish an edge. Place the fabric edge against the black guide on the foot. Sew. www.toews.com 2222 Owners Manual/ User Guide... -
Page 33: Posición Variable De La Aguja
Es la manera más rápida de rematar un borde. Placer le bord du tissu contre le guide noir du pied. Coloque el borde de la tela contra la guía negra del Coudre. pie. Cosa. www.toews.com 2222 Owners Manual/ User Guide... -
Page 34: Tricot Stitch
Place your fabric to allow a 1.6 cm (5/8˝) seam. Trim the seam allowance after sewing. Be careful not to cut the stitches. www.toews.com 2222 Owners Manual/ User Guide... -
Page 35: Puntada De Múltiple Zig-Zag
1,6 cm (5/8˝). Recorte el margen de la costura después de coser. Coupez ensuite le bord de la couture. Tenga cuidado de no cortar las puntadas. Faites attention de ne pas couper les points. www.toews.com 2222 Owners Manual/ User Guide... -
Page 36: Straight Stretch
Thread tension: 2–6 r Stitch length: S.S. r Stitch width: 2–5 Sew on stretch fabrics in any area that you might use a zigzag stitch. This stitch is also used as a decorative topstitch. www.toews.com 2222 Owners Manual/ User Guide... -
Page 37: Puntada Recta Triple
Utilisez ce point sur les tissus extensibles où le point que vaya a usar puntadas en zig-zag. Esta puntada zig-zag pourrait ètre utilisé. Ce point peut aussi être de costura es usada también como puntada utilisé comme surpiqûres dècoratives. decorativa. www.toews.com 2222 Owners Manual/ User Guide... -
Page 38: Button Sewing
Bring the needle thread to the wrong side (bottom side) and knot. After button sewing is completed, raise the feed dogs for normal sewing. www.toews.com 2222 Owners Manual/ User Guide... -
Page 39: Costura De Botones
Después de que el botón sea cosido, levante los couture normale. dientes de transporte para coser normalmente. www.toews.com 2222 Owners Manual/ User Guide... -
Page 40: Automatic Buttonhole
Make sure there is no gap between the slider and spring holder, otherwise the left and right length will be different. u Slider i Spring holder o There should be no gap. !0 Sewing gap www.toews.com 2222 Owners Manual/ User Guide... -
Page 41: Ojal Automático
Le cas échéant, la longueur !0 Separación de costura à droite et à gauche sera différente. u Glisseur i Support du ressort o Aucun écart ne devrait exister !0 Ecart de couture www.toews.com 2222 Owners Manual/ User Guide... - Page 42 !4 Buttonhole lever • Adjusting buttonhole stitch density Turn the stitch length dial to the right for a coarser density. Turn the stitch length dial to the left for a tighter density. www.toews.com 2222 Owners Manual/ User Guide...
- Page 43 à droite pour obtenir moins de densité. Gire la perilla de longitud de puntada hacia la Tourner le cadran de réglage de la longueur du point izquierda para aumentar la densidad. à gauche pour obtenir plus de densité. www.toews.com 2222 Owners Manual/ User Guide...
-
Page 44: Corded Buttonhole
Remove the fabric from the machine and cut the sewing threads. Pull the left end of the filler cord to tighten it. Thread the end through a darning needle, draw to the bottom side of the fabric and cut. www.toews.com 2222 Owners Manual/ User Guide... -
Page 45: Ojale Acordonado
Enhebre el extremo del cordón en una aguja de serrer. Faire passer l’extrémité par le chas d’une zurcir, páselo a la parte inferior de la tela y córtelo. aiguille à repriser, tirer vers le bas et couper. www.toews.com 2222 Owners Manual/ User Guide... -
Page 46: Zipper Application
Turn the fabric and sew the other side of the zipper in the same way as you did the left side. www.toews.com 2222 Owners Manual/ User Guide... -
Page 47: Aplicación De Cremalleras
Inverser le tissu et coudre l’autre moitié de la fermeture Gire la tela y cosa el otro lado de la cremallera de la éclair, de la même façon que pour le côté gauche. misma forma que cosió el lado izquierdo. www.toews.com 2222 Owners Manual/ User Guide... -
Page 48: Blind Stitch Hemming
Open the fold flat. t Right side of the fabric * If the needle drops far left, the stitches will show on the right side of the fabric. www.toews.com 2222 Owners Manual/ User Guide... -
Page 49: Dobladillo Invisible
Endroit du tissu. Si l’aiguille descend trop à gauche, les points Si la aguja baja muy a la izquierda, las puntadas seront visibles à l’endroit du tissu. se verán por el derecho de la tela. www.toews.com 2222 Owners Manual/ User Guide... -
Page 50: Rolled Hem
Insert the folded portion of the fabric into the curl of the foot. Lower the foot and sew while litting up the edge to keep it feeding smoothly and evenly. www.toews.com 2222 Owners Manual/ User Guide... -
Page 51: Dobladillos Enrollados
2222 Owners Manual/ User Guide... -
Page 52: Stretch Stitch Patterns
Knot the threads along one edge. Pull the bobbin threads and distribute the gathers evenly. Secure the threads at the other end. Sew the decorative stitch between the gathering stitches. Pull out the gathering stitches. q 3/8˝ (1 cm) www.toews.com 2222 Owners Manual/ User Guide... -
Page 53: Patrones De Puntadas Elásticas
Rétablissez la tension du fil à sa position initiale. Cousez des rangées de points de smock entre les points de fronçage. Une fois terminé, retirez les points de fronçage. q 1 cm www.toews.com 2222 Owners Manual/ User Guide... -
Page 54: Applique
Presser foot: Satin stitch foot e Thread tension: 1–4 r Stitch length: 0.5–1 t Stitch width: For a delicate appearance on fabric such as chiffon, use a single layer with a tear-away backing, if necessary. www.toews.com 2222 Owners Manual/ User Guide... -
Page 55: Aplicaciones
Pour obtenir un aspect raffiné sur les tissus tels que use una sola capa con un forro removible, si es la mousseline, utilisez une seule épaisseur avec un necesario. renfort à déchirer si nécessaire. www.toews.com 2222 Owners Manual/ User Guide... -
Page 56: Cleaning The Bobbin Case And The Hook
Remove the needle and the presser foot. Remove the needle plate setscrew and remove the needle plate. q Setscrew With a brush, clean out dust and lint clogging the feed dog teeth. Reset the needle plate. www.toews.com 2222 Owners Manual/ User Guide... -
Page 57: Desmontaje Y Montaje Pista De La Lanzadera
Con un cepillo, limpie el polvo y la pelusa que Nettoyer avec une brosse pour débarasser les griffes obstruyan los dientes del corretelas. Vuelva montar la de la poussière et des débris de fil. Remonter la pla- placa de aguja. que à aiguille. www.toews.com 2222 Owners Manual/ User Guide... -
Page 58: Sewing Light
Oil behind the shuttle hook area Open the hook cover. Remove the shuttle race ring and shuttle. Oil the point as indicated in the illustration. e Hook cover r Shuttle race ring t Shuttle www.toews.com 2222 Owners Manual/ User Guide... -
Page 59: Luz Para Coser
Retire la portabobina la cubierta de dessin. corredera y la lanzadera. e Couvercle à crochet e Tapa de la lanzadera r Anneau de la cage du crochet r Anillo de la pista de la lanzadera t Crochet t Lanzadera www.toews.com 2222 Owners Manual/ User Guide... -
Page 60: Troubleshooting
1. The stitch is not balanced. Page 22 distorted. Noisy operation 1. There is thread caught in the hook race. Page 50 2. Lint has built up in the shuttle or the shuttle race. Page 50 www.toews.com 2222 Owners Manual/ User Guide... - Page 61 Página 23 distorsionados. La máquina hace 1. Se ha enganchado el hilo en el garfio. Página 51 ruido al coser. 2. Se han acumulado las pelusas en el portacanillas o en el garfio. Página 51 www.toews.com 2222 Owners Manual/ User Guide...
-
Page 62: En Cas De Problème
1. Du fil est bloqué dans la piste du crochet. Page 51 est bruyant. 2. De la charpoie est accumulée dans le support de la canette ou Page 51 dans la piste du crochet. www.toews.com 2222 Owners Manual/ User Guide... - Page 63 Janome 2222 Instruction Manual www.toews.com 2222 Owners Manual/ User Guide...
- Page 64 Janome 2222 Instruction Manual www.toews.com 2222 Owners Manual/ User Guide 306-800-773(E/S/F)
Need help?
Do you have a question about the 2222 and is the answer not in the manual?
Questions and answers