
Related Manuals for Digital Projection LIGHTNING 30/40/45-1080p


Summary of Contents for Digital Projection LIGHTNING 30/40/45-1080p
- Page 1 LIGHTNING 30/40/45-1080p LIGHTNING 40/45-1080p Ultra Contrast LIGHTNING 40/45-1080p 3D LIGHTNING 40/45-1080p 3D-Ultra Contrast Super High Brightness Digital Video Projector 16:9 widescreen display User Manual 108-721B...
- Page 2 Digital Projection User Manual LIGHTNING 1080p, 1080p 3D/UC Declaration of Conformity Directives covered by this Declaration 2004/108/EC Electromagnetic Compatibility Directive. 2006/95/EC Low Voltage Equipment Directive. Products covered by this Declaration Large screen video projector type The CE mark was first applied in:...
- Page 3 Digital Projection User Manual LIGHTNING 1080p, 1080p 3D/UC Declaration of Conformity Directives covered by this Declaration 2004/108/EC Electromagnetic Compatibility Directive. 2006/95/EC Low Voltage Equipment Directive. Products covered by this Declaration Large screen video projector type The CE mark was first applied in:...
- Page 4 Digital Projection User Manual LIGHTNING 1080p, 1080p 3D/UC...
- Page 5 Product revision • Because we at Digital Projection continually strive to improve our products, we may change specifications and designs, and add new features without prior notice. Projectors built prior to this revision of the User Manual may therefore not include all the features described.
- Page 6 Handle the power cable carefully and avoid sharp bends. Do not use a damaged power cable. There are no user-serviceable parts inside the lamp module. The whole module should be replaced and returned to Digital Projection for re- furbishment. Take care when removing the lamp module, as it is heavy (>10kg).
- Page 7 Digital Projection User Manual Important Information LIGHTNING 1080p, 1080p 3D/UC Installation precautions Notes Connect the LAN cable only to a computer LAN connection. Other similar connectors may have a dangerously high voltage source. The projector must be installed only by suitably qualified personnel, in accordance with local building codes.
- Page 8 Electronic Equipment. Our products are designed with reuse, recycling and recovery of all components in mind. To this end, at end of life, your projector may be returned to Digital Projection Ltd or its agent so that the environmental impact can be minimised.
- Page 9 Digital Projection User Manual Important Information LIGHTNING 1080p, 1080p 3D/UC Digital Projection Contact details Notes Digital Projection Limited, Greenside Way, Middleton, Manchester M24 1XX, UK. Registered in England No. 2207264, Registered Office: as above +44 (0) 161 947 3300 +44 (0) 161 684 7674 Email enquiries@digitalprojection.co.uk, service@digitalprojection.co.uk...
- Page 10 Important Information Digital Projection User Manual LIGHTNING 1080p, 1080p 3D/UC Page x Rev B. January 2010...
- Page 11 ..................viii ..............................viii Noise ..........................viii RF Interference ..........viii European Waste Electrical and Electronic Equipment (WEEE) Directive Digital Projection Contact details ......................ix 1. Introduction What’s in the box? ..........................1.2 Key features of the projector ......................1.3 Getting to know the projector ......................
-
Page 12: Table Of Contents
Table of Contents Digital Projection User Manual LIGHTNING 1080p, 1080p 3D/UC Fitting the lens ........................... 2.14 Shifting the image ..........................2.15 Mounting the projector ........................2.16 ......................2.16 Adjustment for table mounting ......................2.16 Adjusting the rigging frame Stacking projectors .......................... - Page 13 Digital Projection User Manual Table of Contents LIGHTNING 1080p, 1080p 3D/UC The remote control ........................... 4.10 ............................4.10 Layout ............................4.10 Timeout Using the control keys ........................4.11 .............................4.11 Power ............................4.11 Shutter ...........................4.11 On-Screen-Display .............................4.11 Focus ..............................4.11 Zoom ..............................4.11 Shift ........................4.12 Auto-detect input mode ..........................
- Page 14 ..........................4.54 ........................4.54 Projector Information .......................... 4.54 Source Information ......................4.55 Digital Projection Information Controlling the projector when Input 8 is being used ............. 4.56 ..................4.56 Differences between Input 8 and Inputs 1-7 ..................... 4.56 Input and processing architecture ....................
- Page 15 Digital Projection User Manual Table of Contents LIGHTNING 1080p, 1080p 3D/UC 5. Userware Introduction ............................5.3 ........................... 5.3 Applet version ........................... 5.4 Standalone version Show page ............................5.5 ............................5.5 On / Off ........................5.5 Shutter Open / Closed ........................... 5.5 Freeze / Un-Freeze ...........................
- Page 16 Table of Contents Digital Projection User Manual LIGHTNING 1080p, 1080p 3D/UC 3D page ............................... 5.18 ............................5.18 3D Enable .......................... 5.18 Frame Dominance ..........................5.18 3D Sync Source ............................5.18 Dark Time ............................. 5.18 Sync Delay Global Colour page .......................... 5.19 ........................
- Page 17 Digital Projection User Manual Table of Contents LIGHTNING 1080p, 1080p 3D/UC 7. Appendix Troubleshooting ..........................7.2 Specifications ............................7.4 ............................ 7.4 Part numbers ............................. 7.4 Optical ............................7.5 Electrical ............................7.5 Physical ............................7.6 Lens Data Dimensions ............................7.8 Input modes supported ........................
- Page 18 Table of Contents Digital Projection User Manual LIGHTNING 1080p, 1080p 3D/UC Page xviii Rev B. January 2010...
- Page 19 1. Introduction Contents What’s in the box? ..........................1.2 Key features of the projector ......................1.3 Getting to know the projector ......................1.4 ......................1.4 Chassis – lamp, lens and filter ..........................1.5 Lamp-hours meter ....................1.6 Rear panel – connection and control ............................
-
Page 20: What's In The Box
1. Introduction Digital Projection User Manual LIGHTNING 1080p, 1080p 3D/UC What’s in the box? Notes • Make sure your box contains everything listed. If any pieces are missing, contact your dealer. Lenses are optional. Order lenses from your Digital •... -
Page 21: Key Features Of The Projector
LIGHTNING 1080p, 1080p 3D/UC Key features of the projector Notes Congratulations on your purchase of the Digital Projection LIGHTNING 1080p projector. Digital Projection International, Texas Instruments’ first DLP™ partner and the original innovator of the 3-chip DLP™ projector, proudly introduces our third- generation LIGHTNING series —... -
Page 22: Getting To Know The Projector
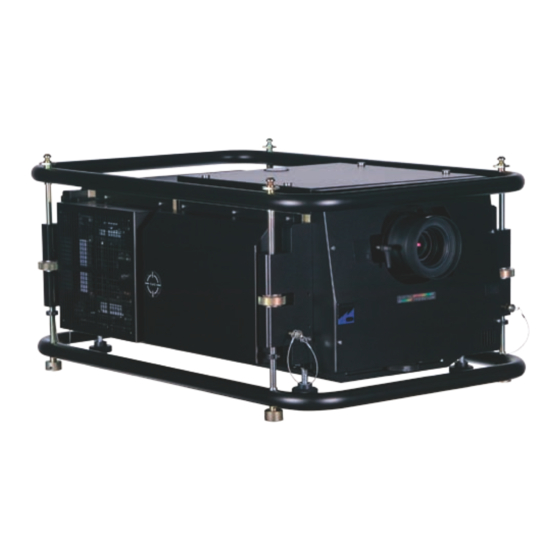
1. Introduction Digital Projection User Manual LIGHTNING 1080p, 1080p 3D/UC Getting to know the projector Notes Chassis – lamp, lens and filter For information about how to change the lamp or the filter, see section 5. Maintenance. For more detailed information about lenses, see section 2. -
Page 23: Lamp-Hours Meter
Digital Projection User Manual 1. Introduction LIGHTNING 1080p, 1080p 3D/UC Lamp-hours meter Notes There are two types of Lamp-hours meter, depending on the lamp module that has been fitted, as shown below. Mercury meter LCD meter display button The LCD Lamp-hours meter has two modes of operation: •... -
Page 24: Rear Panel - Connection And Control
1. Introduction Digital Projection User Manual LIGHTNING 1080p, 1080p 3D/UC Rear panel – connection and control Notes Control Rigging connections frame For information about how to connect the projector, see Control panel Connecting the projector in section 2. Installation, and Connections in section Frame 6. - Page 25 2. Installation Contents Screen requirements ......................... 2.3 ............................2.3 Aspect ratio ......................2.3 Fitting the image to the DMD ....................... 2.3 Images displayed full width ......................2.3 Images displayed full height ........................2.4 Diagonal screen sizes ......................2.5 Fitting the image to the screen ....................
- Page 26 2. Installation Digital Projection User Manual LIGHTNING 1080p, 1080p 3D/UC ......................2.23 Control connection examples ..........................2.23 LAN connection ......................... 2.23 RS232 connection ........................... 2.24 Power connection ........................... 2.24 USA power input ....................... 2.24 Rest of World power input Page 2.2...
-
Page 27: Installation
Digital Projection User Manual 2. Installation LIGHTNING 1080p, 1080p 3D/UC Screen requirements Notes Aspect ratio The images are shown here scaled automatically by the Fitting the image to the DMD projector. If the source image supplied to the projector is smaller than 1920 x 1080 pixels, then the image will not fill the DMD. -
Page 28: Diagonal Screen Sizes
2. Installation Digital Projection User Manual LIGHTNING 1080p, 1080p 3D/UC Diagonal screen sizes Notes Screen sizes are sometimes specified by their diagonal size (D) in inches. When dealing with large screens and projection distances at different aspect ratios, it is more convenient to measure screen width (W) and height (H). -
Page 29: Fitting The Image To The Screen
Digital Projection User Manual 2. Installation LIGHTNING 1080p, 1080p 3D/UC Fitting the image to the screen Notes It is important that your screen is of sufficient height and width to display images at all the aspect ratios you are planning to use. -
Page 30: Positioning The Screen And Projector
2. Installation Digital Projection User Manual LIGHTNING 1080p, 1080p 3D/UC Positioning the screen and projector Notes For optimum viewing, the screen should be a flat surface perpendicular to the floor. The bottom of the screen should be 1.2m (4 feet) above the floor and the front row The projector should be of the audience should not have to look up more than 30°... -
Page 31: Choosing A Lens
Digital Projection User Manual 2. Installation LIGHTNING 1080p, 1080p 3D/UC Choosing a lens Notes A number of lenses are available for use with the projector. Which lens you choose will depend on the screen size, image aspect ratio, projection distance and light The High Brightness lenses are output. -
Page 32: Choosing A Lens Using The Lens Charts
2. Installation Digital Projection User Manual LIGHTNING 1080p, 1080p 3D/UC Choosing a lens using the lens charts Notes Use the charts on this page and on the following pages to choose which lens best suits your application. This chart has a TRF of 1.0, for use with the following images: Full width images, including 2.35:1, 1.85:1 and 16:9 (native resolution) -
Page 33: Full Height Image 1.66:1 (Vista)
Digital Projection User Manual 2. Installation LIGHTNING 1080p, 1080p 3D/UC Lens charts continued Notes Full height image 1.66:1 (Vista) This chart has a TRF of 1.07, Use the chart below to choose which lens best suits your application. for use with the following... - Page 34 2. Installation Digital Projection User Manual LIGHTNING 1080p, 1080p 3D/UC Lens charts continued Notes Full height image 1.6:1 This chart has a TRF of 1.11, for Use the chart below to choose which lens best suits your application. use with the following images: if you need to be more precise, then use the calculations on the page immediately following the lens charts.
- Page 35 Digital Projection User Manual 2. Installation LIGHTNING 1080p, 1080p 3D/UC Lens charts continued Notes Full height image 4:3 This chart has a TRF of 1.33, Use the chart below to choose which lens best suits your application. for use with the following...
-
Page 36: Choosing A Lens By Calculation
2. Installation Digital Projection User Manual LIGHTNING 1080p, 1080p 3D/UC Choosing a lens by calculation Notes For any screen size not listed above, or if you need to be more precise, then use the calculations below. The Throw ratio for a particular •... -
Page 37: Useful Lens Calculations
Digital Projection User Manual 2. Installation LIGHTNING 1080p, 1080p 3D/UC Useful lens calculations Notes The Throw ratio for a particular The following lens calculations may be useful: lens is fixed, but assumes that the image fills the width of the DMD. -
Page 38: Fitting The Lens
2. Installation Digital Projection User Manual LIGHTNING 1080p, 1080p 3D/UC Fitting the lens Notes • Turn the lens release lever anti-clockwise so that it is pointing upwards, to open Each time a new lens is the lock. fitted to the projector, the calibration procedure •... -
Page 39: Shifting The Image
Digital Projection User Manual 2. Installation LIGHTNING 1080p, 1080p 3D/UC Shifting the image Notes For more information on using The normal position for the projector is at the centre of the screen. However, you the Lens shift feature, see can set the projector above or below the centre, or to one side, and adjust the image section 4. -
Page 40: Mounting The Projector
2. Installation Digital Projection User Manual LIGHTNING 1080p, 1080p 3D/UC Mounting the projector Notes The projector is designed to be suspended from a lighting truss by its rigging BEFORE INSTALLING THE frame. However, the four adjustable feet under the chassis allow the projector to be... -
Page 41: Yaw Adjustment
Digital Projection User Manual 2. Installation LIGHTNING 1080p, 1080p 3D/UC Yaw adjustment Notes The yaw handle uses a ratchet to move the front of the projector from left to right. To change the direction of movement, push the direction lever on the handle up or down. -
Page 42: Stacking Projectors
2. Installation Digital Projection User Manual LIGHTNING 1080p, 1080p 3D/UC Stacking projectors Notes The rigging frame is capable of supporting the weight of up to three other projectors, using the built-in frame couplings. The projectors can be stacked on top of each other, or suspended below each other. -
Page 43: Connecting The Projector
Digital Projection User Manual 2. Installation LIGHTNING 1080p, 1080p 3D/UC Connecting the projector Notes Side input connection panel Control Rear input connection panel connection panel Signal Inputs The following inputs are available: 3. DVI For more information on 4. SDI selecting an input source, see section 4. -
Page 44: Input Format, Dvi Input 3
2. Installation Digital Projection User Manual LIGHTNING 1080p, 1080p 3D/UC Input format, DVI input 3 Notes Single DVI-D Sources upto 1920x1080 resolution; 24- 60Hz; 8bits per colour. For important information about Input formats, DVI input 8 how to control the projector... -
Page 45: Dvi Input Connection Examples
Digital Projection User Manual 2. Installation LIGHTNING 1080p, 1080p 3D/UC DVI Input connection examples Notes Projector Input 3 Single DVI video source Input 8 MAIN Single or Dual DVI video source Dual DVI: high bandwidth/frame rate Projector Input 8 MAIN... -
Page 46: 3D Connection Examples
2. Installation Digital Projection User Manual LIGHTNING 1080p, 1080p 3D/UC 3D connection examples Notes 3D sources up to 60Hz, requiring frame doubling and left/right interleaving Projector Video Inputs 1-7 Sync in Sync 3D server Sync Z screen or 3D glasses 3D sources up to 120Hz, not requiring frame doubling There is no scaler on input 8. -
Page 47: Control Connection Examples
Digital Projection User Manual 2. Installation LIGHTNING 1080p, 1080p 3D/UC Control connection examples Notes LAN connection All of the projector’s features can be controlled via a LAN connection, using a For more information about pin standard internet browser package such as Internet Explorer. -
Page 48: Power Connection
2. Installation Digital Projection User Manual LIGHTNING 1080p, 1080p 3D/UC Power connection Notes USA power input Make sure the main power switch is off before connecting the power cable. Firmly push in the Hubbell connector, then turn clockwise to lock. -
Page 49: Getting Started
3. Getting started Contents Switching the projector on ....................... 3.2 Selecting an input or test pattern ....................3.2 ..............................3.2 Input ............................3.2 Test pattern Adjusting the lens ..........................3.3 .............................. 3.3 Focus ............................... 3.3 Zoom ..............................3.3 Shift Adjusting the projected image ...................... -
Page 50: Switching The Projector On
3. Getting started Digital Projection User Manual LIGHTNING 1080p, 1080p 3D/UC Switching the projector on Notes • Connect the power cable between the mains supply and the projector. For more information about • Push the main power switch upwards to switch the power ON. -
Page 51: Adjusting The Lens
Digital Projection User Manual 3. Getting started LIGHTNING 1080p, 1080p 3D/UC Adjusting the lens Notes Focus Each time a new lens is fitted to the projector, • Press followed by to adjust the focus. the calibration procedure must be carried out. See Setup menu, in Section 4. -
Page 52: Adjusting The Projected Image
For important information about how to control the projector when Input 8 is being used, see the final pages of Section 4. 3. Getting started Digital Projection User Manual LIGHTNING 1080p, 1080p 3D/UC Adjusting the projected image Notes Picture settings •... - Page 53 4. Controlling the projector Contents Overview ............................... 4.5 ........................4.5 Controlling the projector ........................4.6 Input modes and settings ........................4.6 Input mode detection ......................4.6 Mode library and mode history ..........................4.7 Input presets Indicators .............................. 4.8 ........................4.8 Input status indicators The control panel ..........................
- Page 54 For important information about how to control the projector when Input 8 is being used, see the final pages of Section 4. 4. Controlling the projector Digital Projection User Manual LIGHTNING 1080p, 1080p 3D/UC Using the menus ..........................4.16 ..................... 4.16 Navigating menus and submenus ..........................
- Page 55 For important information about how to control the projector when Input 8 is being used, see the final pages of Section 4. Digital Projection User Manual 4. Controlling the projector LIGHTNING 1080p, 1080p 3D/UC Setup menu ............................4.33 ............................4.34 Projector ..........................
- Page 56 ..........................4.54 ........................4.54 Projector Information .......................... 4.54 Source Information ......................4.55 Digital Projection Information Controlling the projector when Input 8 is being used ............. 4.56 ..................4.56 Differences between Input 8 and Inputs 1-7 ..................... 4.56 Input and processing architecture ....................
-
Page 57: Overview
For important information about how to control the projector when Input 8 is being used, see the final pages of Section 4. Digital Projection User Manual 4. Controlling the projector LIGHTNING 1080p, 1080p 3D/UC Overview Notes Controlling the projector The projector can be controlled from: •... -
Page 58: Input Modes And Settings
For important information about how to control the projector when Input 8 is being used, see the final pages of Section 4. 4. Controlling the projector Digital Projection User Manual LIGHTNING 1080p, 1080p 3D/UC Input modes and settings Notes Input mode detection... -
Page 59: Input Presets
For important information about how to control the projector when Input 8 is being used, see the final pages of Section 4. Digital Projection User Manual 4. Controlling the projector LIGHTNING 1080p, 1080p 3D/UC Any subsequent changes that you make to the modal settings will be saved in the Notes mode history, with the input mode. -
Page 60: Indicators
For important information about how to control the projector when Input 8 is being used, see the final pages of Section 4. 4. Controlling the projector Digital Projection User Manual LIGHTNING 1080p, 1080p 3D/UC Indicators Notes Input status indicators 1. RGB1 4. -
Page 61: The Control Panel
For important information about how to control the projector when Input 8 is being used, see the final pages of Section 4. Digital Projection User Manual 4. Controlling the projector LIGHTNING 1080p, 1080p 3D/UC The control panel Notes Many features are controlled... -
Page 62: The Remote Control
For important information about how to control the projector when Input 8 is being used, see the final pages of Section 4. 4. Controlling the projector Digital Projection User Manual LIGHTNING 1080p, 1080p 3D/UC The remote control Notes Many features are controlled... -
Page 63: Using The Control Keys
For important information about how to control the projector when Input 8 is being used, see the final pages of Section 4. Digital Projection User Manual 4. Controlling the projector LIGHTNING 1080p, 1080p 3D/UC Using the control keys Notes Power •... -
Page 64: Auto-Detect Input Mode
For important information about how to control the projector when Input 8 is being used, see the final pages of Section 4. 4. Controlling the projector Digital Projection User Manual LIGHTNING 1080p, 1080p 3D/UC Auto-detect input mode Notes • Press... -
Page 65: Input Presets
For important information about how to control the projector when Input 8 is being used, see the final pages of Section 4. Digital Projection User Manual 4. Controlling the projector LIGHTNING 1080p, 1080p 3D/UC Input Presets Notes Recall • To recall a set of modal and lens settings that have been saved, press and hold , whilst pressing the lettered key A –... -
Page 66: Red, Green And Blue
For important information about how to control the projector when Input 8 is being used, see the final pages of Section 4. 4. Controlling the projector Digital Projection User Manual LIGHTNING 1080p, 1080p 3D/UC Red, Green and Blue Notes •... -
Page 67: Magnify And Pan
For important information about how to control the projector when Input 8 is being used, see the final pages of Section 4. Digital Projection User Manual 4. Controlling the projector LIGHTNING 1080p, 1080p 3D/UC Magnify and pan Notes The magnify feature utilises a •... -
Page 68: Using The Menus
For important information about how to control the projector when Input 8 is being used, see the final pages of Section 4. 4. Controlling the projector Digital Projection User Manual LIGHTNING 1080p, 1080p 3D/UC Using the menus Notes Some menu controls can be... - Page 69 For important information about how to control the projector when Input 8 is being used, see the final pages of Section 4. Digital Projection User Manual 4. Controlling the projector LIGHTNING 1080p, 1080p 3D/UC Notes • Press to open the menu. The blue highlight moves to the first item in the menu, which may be submenu, for example the Projector Setup submenu.
-
Page 70: Menu Controls
For important information about how to control the projector when Input 8 is being used, see the final pages of Section 4. 4. Controlling the projector Digital Projection User Manual LIGHTNING 1080p, 1080p 3D/UC Menu controls Notes Some menus have controls, as shown in the examples below. -
Page 71: Input Menu
For important information about how to control the projector when Input 8 is being used, see the final pages of Section 4. Digital Projection User Manual 4. Controlling the projector LIGHTNING 1080p, 1080p 3D/UC Input menu Notes Some menu controls can be... -
Page 72: Presets
For important information about how to control the projector when Input 8 is being used, see the final pages of Section 4. 4. Controlling the projector Digital Projection User Manual LIGHTNING 1080p, 1080p 3D/UC Input menu continued Notes Presets Some menu controls can be accessed directly using the Sixteen sets of parameters can be saved and recalled (A –... -
Page 73: Save Presets
For important information about how to control the projector when Input 8 is being used, see the final pages of Section 4. Digital Projection User Manual 4. Controlling the projector LIGHTNING 1080p, 1080p 3D/UC Input menu continued Notes Save Presets... -
Page 74: Delete Presets
For important information about how to control the projector when Input 8 is being used, see the final pages of Section 4. 4. Controlling the projector Digital Projection User Manual LIGHTNING 1080p, 1080p 3D/UC Input menu continued Notes Delete Presets •... -
Page 75: Picture Menu
For important information about how to control the projector when Input 8 is being used, see the final pages of Section 4. Digital Projection User Manual 4. Controlling the projector LIGHTNING 1080p, 1080p 3D/UC Picture menu Notes Some menu controls can be... -
Page 76: Gamma Correction
For important information about how to control the projector when Input 8 is being used, see the final pages of Section 4. 4. Controlling the projector Digital Projection User Manual LIGHTNING 1080p, 1080p 3D/UC Picture menu continued Notes Gamma Correction Video recordings are often supplied with a gamma adjustment applied. -
Page 77: Aspect Ratio
For important information about how to control the projector when Input 8 is being used, see the final pages of Section 4. Digital Projection User Manual 4. Controlling the projector LIGHTNING 1080p, 1080p 3D/UC Picture menu continued Notes Aspect Ratio •... -
Page 78: Geometry Menu
For important information about how to control the projector when Input 8 is being used, see the final pages of Section 4. 4. Controlling the projector Digital Projection User Manual LIGHTNING 1080p, 1080p 3D/UC Geometry menu Notes Some menu controls can be... -
Page 79: User Horizontal Aspect Ratio
For important information about how to control the projector when Input 8 is being used, see the final pages of Section 4. Digital Projection User Manual 4. Controlling the projector LIGHTNING 1080p, 1080p 3D/UC Geometry menu continued Notes User Horizontal Aspect Ratio •... -
Page 80: Resolution
For important information about how to control the projector when Input 8 is being used, see the final pages of Section 4. 4. Controlling the projector Digital Projection User Manual LIGHTNING 1080p, 1080p 3D/UC Geometry menu continued Notes Resolution •... -
Page 81: Blanking
For important information about how to control the projector when Input 8 is being used, see the final pages of Section 4. Digital Projection User Manual 4. Controlling the projector LIGHTNING 1080p, 1080p 3D/UC Geometry menu continued Notes When Input Detection is set to Custom: •... -
Page 82: Colour Menu
For important information about how to control the projector when Input 8 is being used, see the final pages of Section 4. 4. Controlling the projector Digital Projection User Manual LIGHTNING 1080p, 1080p 3D/UC Colour menu Notes To return to the main menu, press up to three times. -
Page 83: Colour Mode
For important information about how to control the projector when Input 8 is being used, see the final pages of Section 4. Digital Projection User Manual 4. Controlling the projector LIGHTNING 1080p, 1080p 3D/UC Colour menu continued Notes Colour Mode •... -
Page 84: Trim
For important information about how to control the projector when Input 8 is being used, see the final pages of Section 4. 4. Controlling the projector Digital Projection User Manual LIGHTNING 1080p, 1080p 3D/UC Colour menu continued Notes Trim •... -
Page 85: Setup Menu
For important information about how to control the projector when Input 8 is being used, see the final pages of Section 4. Digital Projection User Manual 4. Controlling the projector LIGHTNING 1080p, 1080p 3D/UC Setup menu Notes To return to the main menu, press up to three times. -
Page 86: Projector
For important information about how to control the projector when Input 8 is being used, see the final pages of Section 4. 4. Controlling the projector Digital Projection User Manual LIGHTNING 1080p, 1080p 3D/UC Setup menu, continued Notes Projector •... - Page 87 For important information about how to control the projector when Input 8 is being used, see the final pages of Section 4. Digital Projection User Manual 4. Controlling the projector LIGHTNING 1080p, 1080p 3D/UC Setup menu, Projector continued Notes Keystone Used to correct for distortion caused by the projector being mounted higher or lower than the screen.
- Page 88 For important information about how to control the projector when Input 8 is being used, see the final pages of Section 4. 4. Controlling the projector Digital Projection User Manual LIGHTNING 1080p, 1080p 3D/UC Setup menu, Projector continued Notes Test Pattern •...
- Page 89 For important information about how to control the projector when Input 8 is being used, see the final pages of Section 4. Digital Projection User Manual 4. Controlling the projector LIGHTNING 1080p, 1080p 3D/UC Setup menu, Projector continued Notes FastFrame Used to reduce the artifacts and image blur typically associated with rapidly moving images, by increasing the time the display is blanked between frames (dark time).
-
Page 90: Global Colourimetry
For important information about how to control the projector when Input 8 is being used, see the final pages of Section 4. 4. Controlling the projector Digital Projection User Manual LIGHTNING 1080p, 1080p 3D/UC Setup menu continued Notes Global Colourimetry •... -
Page 91: Rgb Lift
For important information about how to control the projector when Input 8 is being used, see the final pages of Section 4. Digital Projection User Manual 4. Controlling the projector LIGHTNING 1080p, 1080p 3D/UC Setup menu, Global Colourimetry continued Notes Colour Mode •... -
Page 92: Lamp
For important information about how to control the projector when Input 8 is being used, see the final pages of Section 4. 4. Controlling the projector Digital Projection User Manual LIGHTNING 1080p, 1080p 3D/UC Setup menu, continued Notes Lamp •... -
Page 93: Lamp Power
For important information about how to control the projector when Input 8 is being used, see the final pages of Section 4. Digital Projection User Manual 4. Controlling the projector LIGHTNING 1080p, 1080p 3D/UC Setup menu, Lamp continued Notes Lamp Power •... -
Page 94: On Screen Display
For important information about how to control the projector when Input 8 is being used, see the final pages of Section 4. 4. Controlling the projector Digital Projection User Manual LIGHTNING 1080p, 1080p 3D/UC Setup menu continued Notes On Screen Display •... -
Page 95: Password
For important information about how to control the projector when Input 8 is being used, see the final pages of Section 4. Digital Projection User Manual 4. Controlling the projector LIGHTNING 1080p, 1080p 3D/UC Setup menu continued Notes Password Entry to the password protected area is available to authorised service personel only. -
Page 96: Communication
For important information about how to control the projector when Input 8 is being used, see the final pages of Section 4. 4. Controlling the projector Digital Projection User Manual LIGHTNING 1080p, 1080p 3D/UC Setup menu continued Notes Communication •... -
Page 97: Network
For important information about how to control the projector when Input 8 is being used, see the final pages of Section 4. Digital Projection User Manual 4. Controlling the projector LIGHTNING 1080p, 1080p 3D/UC Setup menu continued Notes Network •... -
Page 98: Dhcp
For important information about how to control the projector when Input 8 is being used, see the final pages of Section 4. 4. Controlling the projector Digital Projection User Manual LIGHTNING 1080p, 1080p 3D/UC Setup menu, Network continued Notes DHCP •... -
Page 99: Subnet Mask
For important information about how to control the projector when Input 8 is being used, see the final pages of Section 4. Digital Projection User Manual 4. Controlling the projector LIGHTNING 1080p, 1080p 3D/UC Setup menu, Network continued Notes Subnet Mask •... -
Page 100: Gateway Mask
For important information about how to control the projector when Input 8 is being used, see the final pages of Section 4. 4. Controlling the projector Digital Projection User Manual LIGHTNING 1080p, 1080p 3D/UC Setup menu, Network continued Notes Gateway Mask •... -
Page 101: Wifi Channel
For important information about how to control the projector when Input 8 is being used, see the final pages of Section 4. Digital Projection User Manual 4. Controlling the projector LIGHTNING 1080p, 1080p 3D/UC Setup menu, Network continued Notes Wifi Channel •... - Page 102 For important information about how to control the projector when Input 8 is being used, see the final pages of Section 4. 4. Controlling the projector Digital Projection User Manual LIGHTNING 1080p, 1080p 3D/UC Setup menu, continued Notes 3D may not be present on some •...
- Page 103 For important information about how to control the projector when Input 8 is being used, see the final pages of Section 4. Digital Projection User Manual 4. Controlling the projector LIGHTNING 1080p, 1080p 3D/UC Setup menu, 3D continued Notes Frame Dominance Set the frame dominance to suit the incoming 3D video frame sequence.
-
Page 104: Sync Source
For important information about how to control the projector when Input 8 is being used, see the final pages of Section 4. 4. Controlling the projector Digital Projection User Manual LIGHTNING 1080p, 1080p 3D/UC Setup menu, 3D continued Notes Sync Source •... -
Page 105: Restore Defaults
For important information about how to control the projector when Input 8 is being used, see the final pages of Section 4. Digital Projection User Manual 4. Controlling the projector LIGHTNING 1080p, 1080p 3D/UC Setup menu, continued Notes Restore Defaults •... -
Page 106: Information Menu
For important information about how to control the projector when Input 8 is being used, see the final pages of Section 4. 4. Controlling the projector Digital Projection User Manual LIGHTNING 1080p, 1080p 3D/UC Information menu Notes To return to the main menu, press up to three times. -
Page 107: Digital Projection Information
4. Controlling the projector LIGHTNING 1080p, 1080p 3D/UC Information menu continued Notes Digital Projection Information • Press to select Digital Projection. When using the menus, press to hide or Press to see the DP Information screen. reveal the On-Screen-Display. Information Menu DP Contact Information Rev B. -
Page 108: Controlling The Projector When Input 8 Is Being Used
4. Controlling the projector Digital Projection User Manual LIGHTNING 1080p, 1080p 3D/UC Controlling the projector when Input 8 is being Notes used Input 8 and 3D may not be Differences between Input 8 and Inputs 1-7 present on some models Input 8 has been designed to offer the user access to a very high bandwidth digital video path, free of the limitations inherent to standard image processing techniques. -
Page 109: Setting Up Input 8 Using The Userware
Digital Projection User Manual 4. Controlling the projector LIGHTNING 1080p, 1080p 3D/UC Notes Setting up Input 8 using the Userware It is recommended that when Input 8 is being used, the projector is controlled from a personal computer via a LAN connection, using the Userware Applet as described in the next section. - Page 110 4. Controlling the projector Digital Projection User Manual LIGHTNING 1080p, 1080p 3D/UC Page 4.58 Rev B. January 2010...
- Page 111 5. Userware Contents Introduction ............................5.3 ........................... 5.3 Applet version ............................ 5.3 Disconnect ............................. 5.3 Reconnect ........................... 5.4 Standalone version ............................ 5.4 Disconnect ............................. 5.4 Reconnect Show page ............................5.5 ............................5.5 On / Off ........................5.5 Shutter Open / Closed ...........................
- Page 112 For important information about how to control the projector when Input 8 is being used, see the final pages of Section 4. 5. Userware Digital Projection User Manual LIGHTNING 1080p, 1080p 3D/UC MCGD page ............................5.14 ....................5.14 The MCGD measurement procedure ..........................
-
Page 113: Userware
There are two versions of the Userware: the Applet version, stored on the projector software must be installed on and the Standalone version, supplied on disk or from the Digital Projection website. your browser. This software can be downloaded, free of charge Applet version from www.java.com. -
Page 114: Standalone Version
Notes • To install the Userware, simply copy the file (from the CD, or downloaded from the Digital Projection website), to a folder on the computer. To use the Titan Userware the • Double click on the filename to start the software. -
Page 115: Show Page
For important information about how to control the projector when Input 8 is being used, see the final pages of Section 4. Digital Projection User Manual 5. Userware LIGHTNING 1080p, 1080p 3D/UC Show page Notes The Show page is the first to display when the browser connects to the projector. -
Page 116: Input Presets
For important information about how to control the projector when Input 8 is being used, see the final pages of Section 4. 5. Userware Digital Projection User Manual LIGHTNING 1080p, 1080p 3D/UC Show page continued Notes Input Presets For more information about... -
Page 117: Orientation
For important information about how to control the projector when Input 8 is being used, see the final pages of Section 4. Digital Projection User Manual 5. Userware LIGHTNING 1080p, 1080p 3D/UC Show page continued Notes Orientation • Click on Orientation to select one of the following from the drop down menu:... -
Page 118: Test Pattern
For important information about how to control the projector when Input 8 is being used, see the final pages of Section 4. 5. Userware Digital Projection User Manual LIGHTNING 1080p, 1080p 3D/UC Show page continued Notes Test Pattern • Click on Test Pattern to select from the drop down menu:... -
Page 119: Lens Page
For important information about how to control the projector when Input 8 is being used, see the final pages of Section 4. Digital Projection User Manual 5. Userware LIGHTNING 1080p, 1080p 3D/UC Lens page Notes • To see the Lens page, click on Lens. -
Page 120: Image Page
For important information about how to control the projector when Input 8 is being used, see the final pages of Section 4. 5. Userware Digital Projection User Manual LIGHTNING 1080p, 1080p 3D/UC Image page Notes • To see the Image page, click on Image. -
Page 121: Colour Space
For important information about how to control the projector when Input 8 is being used, see the final pages of Section 4. Digital Projection User Manual 5. Userware LIGHTNING 1080p, 1080p 3D/UC Image page continued Notes Colour Space • Click on Colour Space to select one of the following from the drop down menu:... -
Page 122: Gamma
For important information about how to control the projector when Input 8 is being used, see the final pages of Section 4. 5. Userware Digital Projection User Manual LIGHTNING 1080p, 1080p 3D/UC Image page continued Notes Gamma • Click on Gamma Correction to select from the drop down menu:... -
Page 123: Screen Page
For important information about how to control the projector when Input 8 is being used, see the final pages of Section 4. Digital Projection User Manual 5. Userware LIGHTNING 1080p, 1080p 3D/UC Screen page Notes • To see the Screen page, click on Screen. -
Page 124: Mcgd Page
For important information about how to control the projector when Input 8 is being used, see the final pages of Section 4. 5. Userware Digital Projection User Manual LIGHTNING 1080p, 1080p 3D/UC MCGD page Notes MCGD - Measured Colour Gamut Data - can be used to correct for a number of... -
Page 125: Mcgd Values
For important information about how to control the projector when Input 8 is being used, see the final pages of Section 4. Digital Projection User Manual 5. Userware LIGHTNING 1080p, 1080p 3D/UC MCGD page continued Notes • To see the MCGD page, click on MCGD . -
Page 126: Tcgd Page
For important information about how to control the projector when Input 8 is being used, see the final pages of Section 4. 5. Userware Digital Projection User Manual LIGHTNING 1080p, 1080p 3D/UC TCGD page Notes TCGD - Target Colour Gamut Data - can be used to match the display to a pre-... -
Page 127: Update Graph
For important information about how to control the projector when Input 8 is being used, see the final pages of Section 4. Digital Projection User Manual 5. Userware LIGHTNING 1080p, 1080p 3D/UC TCGD page continued Notes Update Graph • Click on Update Graph to show the effects of the new color gamut graphically. -
Page 128: 3D Enable
For important information about how to control the projector when Input 8 is being used, see the final pages of Section 4. 5. Userware Digital Projection User Manual LIGHTNING 1080p, 1080p 3D/UC 3D page Notes • To see the 3D page, click on 3D. -
Page 129: Global Colour Page
For important information about how to control the projector when Input 8 is being used, see the final pages of Section 4. Digital Projection User Manual 5. Userware LIGHTNING 1080p, 1080p 3D/UC Global Colour page Notes • To see the Global page, click on Global. -
Page 130: Modal Colour Page
For important information about how to control the projector when Input 8 is being used, see the final pages of Section 4. 5. Userware Digital Projection User Manual LIGHTNING 1080p, 1080p 3D/UC Modal Colour page Notes • To see the Modal Colour page, click on Modal. -
Page 131: Lift And Gain Sliders
For important information about how to control the projector when Input 8 is being used, see the final pages of Section 4. Digital Projection User Manual 5. Userware LIGHTNING 1080p, 1080p 3D/UC Modal Colour page continued Notes Lift and Gain sliders •... -
Page 132: Information Page
To see the Information page, click on Info. Projector Information • Click on Projector Information to see the following information about the projector and the Userware: Digital Projection • Click on Digital Projection to see the following contact information: Page 5.22 Rev B. January 2010... -
Page 133: Fastframe Page
For important information about how to control the projector when Input 8 is being used, see the final pages of Section 4. Digital Projection User Manual 5. Userware LIGHTNING 1080p, 1080p 3D/UC FastFrame page Notes • To see the FastFrame page, click on F-Frame. -
Page 134: System Page
For important information about how to control the projector when Input 8 is being used, see the final pages of Section 4. 5. Userware Digital Projection User Manual LIGHTNING 1080p, 1080p 3D/UC System page Notes • To see the System page, click on System. -
Page 135: Discover Page
For important information about how to control the projector when Input 8 is being used, see the final pages of Section 4. Digital Projection User Manual 5. Userware LIGHTNING 1080p, 1080p 3D/UC Discover page Notes • To see the Discover page, click on Discover. -
Page 136: Refresh
For important information about how to control the projector when Input 8 is being used, see the final pages of Section 4. 5. Userware Digital Projection User Manual LIGHTNING 1080p, 1080p 3D/UC Refresh Notes • Click on Refresh to search the network for other projectors. - Page 137 6. Maintenance Contents Changing the lamp ..........................6.2 ......................6.3 Reading the lamp-hours meter ....................... 6.4 Removing the lamp module ......................6.4 Fitting the new lamp module Changing the filter ..........................6.5 Cleaning ..............................6.6 ............................6.6 Projector ..............................6.6 Lens ...........................
-
Page 138: Changing The Lamp
Give the catch half a turn anti-clockwise with a flat bladed tool, to release the catch. There are no user-serviceable parts inside the lamp module. The whole module should be replaced and returned to Digital Projection for re- furbishment. Door catch A tool is required to release the door catch. -
Page 139: Reading The Lamp-Hours Meter
Digital Projection User Manual 6. Maintenance LIGHTNING 1080p, 1080p 3D/UC Reading the lamp-hours meter Notes There are two types of Lamp-hours meter, depending on the lamp module that has been fitted, as shown below. Mercury meter LCD meter display button The LCD Lamp-hours meter has two modes of operation: •... -
Page 140: Removing The Lamp Module
6. Maintenance Digital Projection User Manual LIGHTNING 1080p, 1080p 3D/UC Removing the lamp module Notes • Press POWER on the remote control or keypad, and hold for about 3 seconds, until the power indicator on the control panel shows amber. -
Page 141: Changing The Filter
Digital Projection User Manual 6. Maintenance LIGHTNING 1080p, 1080p 3D/UC Changing the filter Notes • Press POWER on the remote control or keypad, and hold for about 3 seconds, until the power indicator on the control panel shows amber. Always allow the lamp to cool The lamp will switch off several seconds later. -
Page 142: Cleaning
6. Maintenance Digital Projection User Manual LIGHTNING 1080p, 1080p 3D/UC Cleaning Notes Turn the projector off before cleaning. Always allow the lamp to cool for 5 minutes before: Projector - disconnecting the power - moving the projector Clean the cabinet periodically with a damp cloth. If heavily soiled, use a mild - changing the lamp detergent. - Page 143 7. Appendix Contents Troubleshooting ..........................7.2 Specifications ............................7.4 ............................ 7.4 Part numbers ............................. 7.4 Optical ............................7.5 Electrical ............................7.5 Physical ............................7.6 Lens Data Dimensions ............................7.8 Input modes supported ........................7.9 Input connections ..........................7.10 ..........................7.10 1.
-
Page 144: Appendix
7. Appendix Digital Projection User Manual LIGHTNING 1080p, 1080p 3D/UC Troubleshooting Problem Possible solutions The projector will not power up. Check that the mains plug is plugged in and that the mains supply is switched on. Check any external fuses or breakers. - Page 145 Check that the address setting on the remote control is set either to zero, or to the same as the projector. See section 4. Controlling the projector, Communication menu In the event that this troubleshooting guide has not solved the problem, then contact your Digital Projection dealer or service centre. Rev B. January 2010 Page 7.3...
-
Page 146: Specifications
7. Appendix Digital Projection User Manual LIGHTNING 1080p, 1080p 3D/UC Specifications Part numbers Projector China Rest of World 30-1080p 108-659 108-661 108-660 40-1080p 108-662 108-664 108-663 40-1080p 3D 109-350 109-352 109-351 40-1080p Ultra Contrast 108-718 109-993 110-090 40-1080p 3D-Ultra Contrast... -
Page 147: Electrical
Digital Projection User Manual 7. Appendix LIGHTNING 1080p, 1080p 3D/UC Lamp power 30-1080p: 3.0kW 40-1080p, 45-1080p: 3.6kW Lamp life (typical) 30-1080p: 750 hours per lamp 40-1080p, 45-1080p: 500 hours per lamp Brightness 30-1080p: 15,000 ANSI lumens (±10%) 40-1080p: 20,000 ANSI lumens (±10%) 40-1080p 3D: 20,000 ANSI lumens (±10%) -
Page 148: Lens Data
7. Appendix Digital Projection User Manual LIGHTNING 1080p, 1080p 3D/UC Lens Data Optical 105-607 ~ 107-195 105-608 105-609 109-236 ~ 109-359 105-610 ~ 107-196 throw ratio 0.67 : 1 fixed 1.12 : 1 fixed 1.12 : 1 fixed 1.16 - 1.49 :1 zoom 1.39 - 1.87 : 1 zoom... - Page 149 Digital Projection User Manual 7. Appendix LIGHTNING 1080p, 1080p 3D/UC Optical 105-611 ~ 107-197 105-612 ~ 107-198 105-613 ~ 107-199 109-235 ~ 109-358 throw ratio 1.87 - 2.56 : 1 zoom 2.56 - 4.16 : 1 zoom 4.16 - 6.96 : 1 zoom 6.92 - 10.36 : 1 zoom full DMD image width 1.87 : 1...
-
Page 150: Dimensions
7. Appendix Digital Projection User Manual LIGHTNING 1080p, 1080p 3D/UC Dimensions All dimensions in mm Page 7.8 Rev B. January 2010... -
Page 151: Input Modes Supported
Digital Projection User Manual 7. Appendix LIGHTNING 1080p, 1080p 3D/UC Input modes supported RGB colourspace only Signal Resolution Refresh Total Horizontal Rate number Frequency ( Hz ) of lines (kHz) SDTV 480i 720 x 480 15.73 ü ü ü ü... -
Page 152: Input Connections
7. Appendix Digital Projection User Manual LIGHTNING 1080p, 1080p 3D/UC Input connections Notes 1. RGB1 input 5 x 75 ohm BNC Used for computer, progressive video and analog HD video. RGsB RGBS RGBHV YCrCb To select the sync format for... -
Page 153: Dvi-D Single Input
Digital Projection User Manual 7. Appendix LIGHTNING 1080p, 1080p 3D/UC 3. DVI-D Single input Notes 24 way D-type connector TMDS Data 2- pin view of female connector TMDS Data 2+ TMDS Data 2 Shield unused unused DDC Clock DDC Data... -
Page 154: Sdi Input
7. Appendix Digital Projection User Manual LIGHTNING 1080p, 1080p 3D/UC 4. SDI input Notes 1 x 75 ohm BNC SMPTE 292 / HD-SDI signals are very high speed digital signals which require better quality coaxial cable than conventional analogue video. The data rate is 1.5 Gigabits per second. -
Page 155: Dvi-D Single/Dual/Twin Input
Digital Projection User Manual 7. Appendix LIGHTNING 1080p, 1080p 3D/UC 8. DVI-D Single/Dual/Twin input Notes 24 way D-type connector TMDS Data 2- For important information about pin view of female connector how to control the projector TMDS Data 2+ when Input 8 is being used, see TMDS Data 2/4 Shield the final pages of Section 4. -
Page 156: Control Connections
7. Appendix Digital Projection User Manual LIGHTNING 1080p, 1080p 3D/UC Control connections Notes Wired Remote control connection Note that plugging in the remote 3.5mm mini jack Sleeve control cable will disable the infra-red. Power Ring Signal Sleeve Ground Ring LAN connection... -
Page 157: 3D Sync
Digital Projection User Manual 7. Appendix LIGHTNING 1080p, 1080p 3D/UC 3D sync Notes unused Sync OUT 3D Sync OUT is switched pin view of female connector between 0V and 3.3V 3D may not be present on some unused models unused... -
Page 158: Remote Communications Protocol
Operation commands and Enhanced commands, contact Message Structure Digital Projection at one of the addresses printed near the front The data type for all data is raw hexadecimal, and all data larger than 1 byte is of this manual, and ask for a formatted little endian i.e. -
Page 159: Operation Messages
Digital Projection User Manual 7. Appendix LIGHTNING 1080p, 1080p 3D/UC Operation Messages Operation messages are constructed using the following format: Header Type Size Oper’n Operation Reserved type 2 bytes 1 byte 2 bytes 2 bytes 1 byte 2 bytes 2 bytes... -
Page 160: Enhanced Messages
7. Appendix Digital Projection User Manual LIGHTNING 1080p, 1080p 3D/UC Enhanced Messages Enhanced messages are constructed using the following format: Header Type Size Data type Data length (n) 2 bytes 1 byte 2 bytes 2 bytes 2 bytes 2 bytes... -
Page 161: Operation Command Examples
Digital Projection User Manual 7. Appendix LIGHTNING 1080p, 1080p 3D/UC Operation Command examples Notes All operation commands are located at bytes 9 &10. All values are located at bytes 17 & 18 unless otherwise indicated Spaces in example messages are for visual clarity and should... -
Page 162: Source (3702)
7. Appendix Digital Projection User Manual LIGHTNING 1080p, 1080p 3D/UC Source (3702) Notes Projector source select Value Spaces in example messages are for visual clarity and should RGB1 not be sent as part of the message. RGB2 In the example messages the CRC is set to 5858h. -
Page 163: Brightness (E502)
Digital Projection User Manual 7. Appendix LIGHTNING 1080p, 1080p 3D/UC Brightness (E502) Notes Adjusts Brightness -128 — +127 (00h - FFh) Range: Spaces in example messages are for visual clarity and should Centre (0): 128 (80h) not be sent as part of the message. -
Page 164: Contrast (E602)
7. Appendix Digital Projection User Manual LIGHTNING 1080p, 1080p 3D/UC Contrast (E602) Notes Adjusts Contrast -128 — +127 (00h - FFh) Range: Spaces in example messages are for visual clarity and should Centre (0): 128 (80h) not be sent as part of the message. -
Page 165: Shutter (Cf02)
Digital Projection User Manual 7. Appendix LIGHTNING 1080p, 1080p 3D/UC Shutter (CF02) Notes Closes and opens shutter Target Value Spaces in example messages (Set) (Get) are for visual clarity and should not be sent as part of the Shutter Close message. -
Page 166: Quick Reference Chart
7. Appendix Digital Projection User Manual LIGHTNING 1080p, 1080p 3D/UC Quick Reference chart Page 7.24 Rev B. January 2010... - Page 167 Digital Projection User Manual LIGHTNING 1080p, 1080p 3D/UC...
- Page 168 Digital Projection User Manual LIGHTNING 1080p, 1080p 3D/UC...
Need help?
Do you have a question about the LIGHTNING 30/40/45-1080p and is the answer not in the manual?
Questions and answers