Table of Contents
Advertisement
Advertisement
Table of Contents

Related Manuals for Gigaset r630h pro


Summary of Contents for Gigaset r630h pro
-
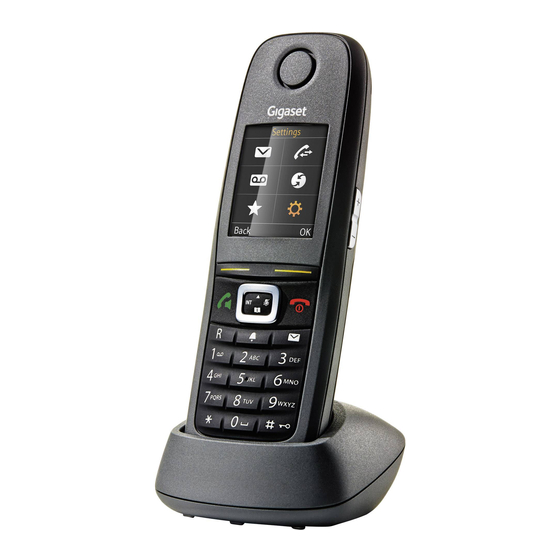
Page 3: Overview Of Handset
Overview of handset Overview of handset ¢ ¢ 1 LED light / Visual call signal page 31, page 31) 2 Display in idle status ¢ 3 Status bar ( page 36) Icons display current settings and operating status of the phone ¢... -
Page 4: Table Of Contents
Contents Contents Overview of handset ..............1 Safety precautions . -
Page 5: Safety Precautions
Do not use the devices in environments with a potential explosion hazard (e.g. paint shops). If you give your Gigaset to a third party, make sure you also give them the user guide. Remove faulty devices from use or have them repaired by our Service team, as these could inter- fere with other wireless services. - Page 6 Safety precautions Please note Emergency numbers cannot be dialled if the keypad/display lock is activated!
-
Page 7: Getting Started
Never expose the telephone to the effects of heat sources, direct sunlight or other electrical devices. Protect your Gigaset from moisture, dust, corrosive liquids and fumes. Pay attention to the range of the base. This is up to 50 m inside buildings and up to 300 m in unobstructed outdoor areas. - Page 8 The display is protected by a plastic film. Please remove the protective film! Inserting the batteries and closing the battery cover Caution Use only rechargeable batteries recommended by Gigaset Communications GmbH ¢ page 43) , as this could otherwise result in significant health risks and personal injury. For example, the outer casing of the batteries could be destroyed or the batteries could explode.
- Page 9 Charging the batteries The batteries are supplied partially charged. Please charge completely before use. (The batteries are fully charged when the power icon disappears from the display.)
- Page 10 Getting started Changing the display language You can also change the display language via the menu: Ï ¤ ¤ ¤ q Language ¤ ¤ q Select language ¤ Select or, if you do not understand the language currently set, go to: ¤...
- Page 11 Getting started Registering the handset The registration process depends on the base. You must Registration initiate registration on the handset and on the base. Both Ð must be carried out within 60 secs. ¤ On the base: Press and hold (min. 3 secs) the Registration/ paging key.
- Page 12 Getting started Setting the date and time Set the date/time so that the correct date and time can be assigned to incoming calls, and so that you can use the alarm. ¤ Press the key Time below the display screen to open the input field.
- Page 13 Getting started Date/Time ‰ Display shows: Saved. You will hear a confirmation tone. Saved 07:15 You will automatically return to idle status. INT 1 14 Oct Your phone is now ready for use. Calls Spot LED...
- Page 14 Getting started What would you like to do next? After successfully setting up the phone, you can make calls straight away, customise your Gigaset according to your requirements or firstly familiarise yourself with the operation. Setting ringtones ¢ Assign specific tunes to internal and external calls, reminders ( page 23), wake-up calls ¢...
-
Page 15: Understanding The Operating Steps In The User Guide
Understanding the operating steps in the user guide Understanding the operating steps in the user guide The keys on your Gigaset handset are set out in these operating instructions as follows: c / v / a Answer call key / Menu key / End call key... -
Page 16: Getting To Know Your Phone
Getting to know your phone Getting to know your phone Switching the handset on/off ¤ Press and hold the End call key a in idle status to switch the handset on or off. Locking/unlocking the keypad The keypad lock prevents any accidental use of the phone. If you press a key when the keypad is locked, a message is displayed. - Page 17 Getting to know your phone Side keys ø / ÷ Press these keys on the right-hand side of the handset to set the volume for the earpiece, ringtone, handsfree mode, alarm clock, appointments and the headset depending on the situation. Display keys The display keys have a function preset by default in idle status, but the keys can be re-assigned ¢...
- Page 18 Getting to know your phone Submenus The functions in the submenus are displayed as lists. Example To access a function: Settings ¤ Scroll to the function using the control key q and press Date/Time Returning to the previous menu level: Briefly press the display Audio Settings key Back or End call key a.
- Page 19 Getting to know your phone Entering numbers and text If several number and/or text fields are displayed (e.g. New Entry First Name and Surname in a phonebook entry), the field is automatically activated. The following fields must be activated by navigating with the control key q. A field is First Name: activated when a cursor is blinking inside it.
-
Page 20: Making Calls
Making calls Making calls Making an external call ¤ Enter number, briefly press the Answer call key c. ¤ Press and hold the Answer call key c, enter number. You can cancel the dialling process with the End call key a. Dialling with the redial list The redial list contains the 20 numbers last dialled with the handset. - Page 21 Making calls Dialling with the phonebook ¤ q Select entry. ¤ ¤ If multiple numbers are entered: Select the number with r and press the Answer call key c or OK. ¤ The number is dialled. One touch call You can set up your phone so that you can dial a specific number when you press any key on the keyboard.
- Page 22 Making calls Adjusting the loudspeaker volume Ï Accessing the settings via the menu: ¤ ¤ ¤ ¤ ¤ ¤ q Audio Settings Handset Volume ¤ Earpiece: r Volume can be set at 5 levels for the earpiece and headset. ¤ Speaker: r Set the volume at 5 levels.
-
Page 23: Adjusting The Telephone Settings
Adjusting the telephone settings Adjusting the telephone settings The handset and base station are preconfigured, but you can change the settings to suit your individual requirements. The settings can be changed via the menu Settings whilst on a call or in idle status. Changing the display language Ï... - Page 24 Adjusting the telephone settings Setting the display backlight The display backlight is always lit when the handset is not in the base/charging cradle or when a key is pressed. Any digit keys pressed appear on the display for pre-dialling. Ï You can also activate/deactivate the display backlight for idle status: ¤...
- Page 25 Adjusting the telephone settings Setting the handset ringtones Setting the ringtone volume Example Ï ¤ ¤ ¤ q Audio Settings ¤ Volume ¤ q Ringtones (Handset) ¤ ¤ ¤ Volume ¤ For internal calls For internal calls and alarms: r Volume can be set at 5 levels or crescendo and alarms: ‡...
- Page 26 Adjusting the telephone settings Activating/deactivating advisory tones Your handset uses advisory tones to tell you about different activities and statuses. These advisory tones can be activated/deactivated independently of each other. Ï ¤ ¤ ¤ ¤ ¤ ¤ q Audio Settings q Advisory Tones ¤...
- Page 27 Adjusting the telephone settings Quick access to numbers and functions The digit keys Q and 2 up to O can be assigned to a number from the phonebook. The left and right display keys have a function preset by default, but the keys can be re-assigned ¢...
-
Page 28: Restoring Phone To Default Setting
Restoring phone to default setting Restoring phone to default setting You can reset individual modifications to handset settings. The following are not affected by the reset: Date / time, Registration of handsets to the base and the current selection of the base, Entries in the calendar and phonebook, Redial list. -
Page 29: Multiple Handsets
Multiple handsets Multiple handsets Making internal calls Internal calls to other handsets registered to the same base are free of charge. ¤ ¤ u (press briefly) < The list of handsets is opened. Your own handset is marked ¤ Select the handset or Call all (group call) from the list if required. Holding down u immediately starts a call on all registered handsets. -
Page 30: Phonebook (Address Book)
Phonebook (Address book) Phonebook (Address book) In a phonebook entry, you can store first names and surnames, up to three numbers, an anniversary with a reminder, and caller melody. You can create the directory (with up to 200 entries) individually for each of your handsets. You ¢... - Page 31 Phonebook (Address book) Displaying the number of entries that are available in the directory ¤ ¤ ¤ ¤ q Available Memory Open phonebook. Options Selecting a phonebook entry, searching in the phonebook ¤ Open phonebook. ¤ Scroll to the name you are searching for using q. Holding down q scrolls continuously upwards or downwards through the phonebook.
-
Page 32: Call List
Call list Transferring a displayed number to the phonebook ¤ The number is displayed or highlighted. ¤ ¤ q Copy to Directory. ¤ Ó Press display key or Options ¤ ¤ ¤ ¤ r Select number type. <New Entry> ¤ ¤... -
Page 33: Sound Profiles
Sound profiles Sound profiles You can call up the 3 sound profiles that are adapted for your handset to your surroundings consecutively by using the C key. The profile is switched immediately without a prompt. By default, Profile Personal is activated. ¤... -
Page 34: Calendar
Calendar Calendar You can remind yourself of up to 30 appointments. May 2013 In the calendar, the current day is outlined in white; on days Mo Tu We Th Fr Sa Su with appointments, the numbers are displayed in colour. 01 02 03 04 05 When a day is selected, it will be highlighted. -
Page 35: Alarm Clock
Alarm clock Displaying missed appointments/anniversaries The following appointments and anniversaries are stored in the Missed Alarms list: The appointment/anniversary call was not acknowledged. The appointment/anniversary was signalled during a phone call. The handset was switched off at the time of the appointment/anniversary. The last 10 entries are stored. -
Page 36: Baby Monitor
Baby monitor Deactivating the alarm call/repeating after a pause (snooze mode) Prerequisite: One alarm call sounds. ¤ Deactivating until the next alarm call: Press OFF. ¤ Snooze mode: Press Snooze or any key. The wake-up call is deactivated and then repeated after 5 minutes. Press nothing. - Page 37 Baby monitor Activating/deactivating and setting the Baby monitor activated baby monitor É ¤ ¤ ¤ ¤ q Baby Monitor ¤ Activation: r On/Off 07:15 ¤ Á Setting the baby monitor: INT 1 14 Oct Send alarm to: r Internal (at least 2 handsets are registered)/ External Baby Monitor If Internal is selected:...
-
Page 38: Display Icons
Display icons Display icons Icons in the status bar The following icons are displayed in the status bar depending on the settings and the operating status of your telephone: Icon Meaning Icon Meaning Signal strength (No Radiation off ) Battery charge status: Ð... - Page 39 Display icons Display key icons The following icons indicate the current function of the display keys according to the operating situation: Icon Action Icon Action Ò ö Last number redial Opening phonebook Ñ Ó Deleting text Copy number to the phonebook Display icons for signalling of Connection No connection...
-
Page 40: Menu Tree
Menu tree Menu tree Opening the main menu: Press v whilst the telephone is in idle status. Note Not all functions described in this user guide are available in all countries or with all network providers. Ê Call Lists (depending on base) Ì... -
Page 41: Service (Customer Care)
Questions? For rapid assistance, refer to this user guide or visit www.gigasetpro.com. The trade outlet will be happy to help with further questions relating to your Gigaset R630H PRO. Questions and answers If you have any queries about the use of your telephone, suggested solutions are available on our web-site at ¤... - Page 42 (with the exception of Switzerland) is subject to national approval. Country-specific requirements have been taken into consideration. We, Gigaset Communications GmbH, declare that this device meets the essential requirements and other relevant regulations laid down in Directive 1999/5/EC. A copy of the Declaration of Conformity is available at this Internet address:...
-
Page 43: Environment
Environment Our environmental mission statement We, Gigaset Communications GmbH, bear social responsibility and are actively committed to a better world. Our ideas, technologies and actions serve people, society and the environment. The aim of our global activity is to secure sustainable life resources for humanity. We are com- mitted to a responsibility for our products that comprises their entire life cycle. -
Page 44: Appendix
Appendix Disposal Batteries should not be disposed of in general household waste. Observe the local waste dis- posal regulations, details of which can be obtained from your local authority. All electrical and electronic products should be disposed of separately from the municipal waste stream via designated collection facilities appointed by the government or the local authorities. - Page 45 Capacity: 800 mAh Handset operating times/charging times The operating time of your Gigaset depends on the capacity and age of the battery and the way it is used. (All times are maximum possible times). Standby time (hours) * 310 *...
- Page 46 Appendix Character charts Standard characters 9x 10x Press the relevant key the number of times indicated. ä á à â ã ç ë é è ê ï í ì î ö ñ ó ò ô õ ß ü ú ù û...
-
Page 47: Index
Index Index Call waiting ..external during an internal call ..internal during an external call Calling ......external Address book, see Phonebook . - Page 48 Index ......... . . Display icons speaker volume .
- Page 49 Index ......Language On/off key ......
- Page 50 Index ..........Safety precautions Technical data .
- Page 51 A31008-M2553-R161-1-7619...
Need help?
Do you have a question about the r630h pro and is the answer not in the manual?
Questions and answers