Table of Contents
Advertisement
Quick Links
Advertisement
Table of Contents

Related Manuals for LG L45C


Summary of Contents for LG L45C
- Page 1 User Manual L45C...
- Page 2 Body-worn Operation This device was tested for typical body-worn operations with the back of the phone kept 0.79 inches (2cm) from the body. To comply with FCC RF exposure requirements, a minimum separation distance of 0.79 inches (2cm) must be maintained between the user’s body and the back of the phone, including the antenna, whether extended or retracted.
-
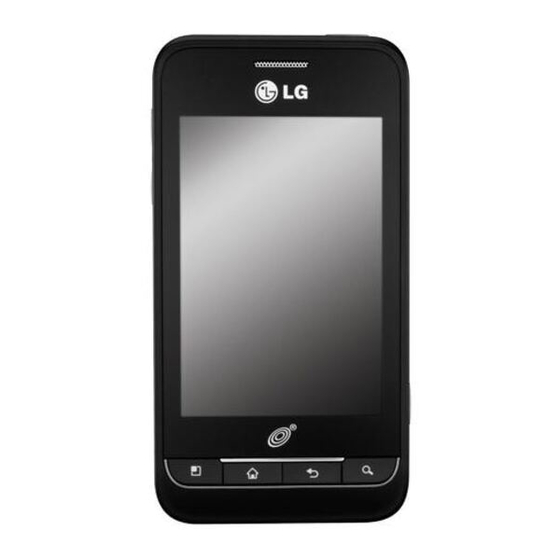
Page 3: Phone Overview
NOTES Do not block the sensor or near sensor to avoid problems with the touch operations. ● The use of a film cover produced by manufacturers other than LG can cause a ● disturbance in touch operation, the display, etc. - Page 4 The Basics Menu Key Opens an Options menu such as add, wallpaper, search, notification, and settings that would affect the device’s screen or applications. Home Key Returns to the Home screen. If you’re already viewing one of the Home screen extension panes, it navigates you to the central Home screen pane.
- Page 5 The Basics 3.5mm Headset Jack Allows you to plug in an optional headset for convenient, hands-free conversations. You can also plug in headphones to listen to music. Camera Lens Use for taking pictures and recording videos. Keep clean for optimal performance. Back Cover Encloses the battery compartment.
- Page 6 The Basics Installing the Battery and microSD Card NOTE It is important to fully charge the battery before initial use of the phone. Installing the battery The phone comes with a rechargeable battery. Keep the battery charged while not in use in order to maximize talk, use, and standby time. The battery charge level is shown at the top right corner of the screen.
- Page 7 The Basics Inserting a microSD card Turn the power off. Remove the battery cover (as demonstrated in the previous instructions). Locate the microSD card slot at the left edge of the phone (microSD is inscribed near the slot opening). Position the microSD card with the label side facing up and slide it into place until it is fully inserted and locked in place.
-
Page 8: Charging The Phone
Improper handling of the Accessory/Charger Port, as well as the use of an incompatible charger, may cause damage to your phone and void the warranty. 1. Connect the USB cable into the wall/USB charger. When connecting, as shown below, the LG logo on the USB cable should face toward you. Wall/USB USB Cable Charger 2. -
Page 9: Optimizing Battery Life
The Basics Optimizing Battery Life You can extend your battery’s life between charges by turning off features that run in the background. You can also monitor how applications and system resources consume battery power. Tips to extend the life of your battery # Turn off radio communications that you aren’t using. -
Page 10: Setup Wizard
The Basics # Touch an application in the Battery use screen to see the details about its power consumption. Different applications offer different kinds of information, and they may even include options to modify the settings so you can reduce power consumption by that application. -
Page 11: Turning The Phone On And Off
The Basics Turning the Phone On and Off Turning the phone on # Press and hold the Power/Lock Key for a couple of seconds until the screen turns on. Turning the phone off 1. Press and hold the Power/Lock Key until the pop-up menu appears. -
Page 12: Setting Up Your Device
The Basics Setting Up Your Device When you turn on your wireless device for the first time, you have the option to quickly set up various accounts. Simply follow the on-screen instructions to complete the initial setup of your wireless device. To set up your device, follow the steps below: 1. - Page 13 The Basics Setting up your Google Account 1. At the setup screen, touch Create or Sign in. 2. Enter your username and password and any other necessary information if creating an account. NOTE Press the Back Key to close the keyboard. 3.
-
Page 14: Viewing The Display Screen
The Basics Viewing the Display Screen The Status Bar appears at the top of the screen. It displays icons indicating that you’ve received notifications (on the left) and icons indicating the device’s status (on the right), along with the current time. Notification icons Status icons If you have more notifications than can fit in the Status Bar, a plus icon... - Page 15 The Basics Status Bar – Status Icons Speakerphone On – Indicates that Speakerphone is on. No microSD – Indicates that no microSD card is installed. Vibrate Mode – Indicates that the ringer volume is set to vibrate and any sounds are silenced. Ringer Silenced –...
- Page 16 The Basics Status Bar – Status Icons New Gmail Message – Indicates a new Gmail message. New Text or Multimedia Message – Indicates you have received a new text or multimedia message. New Email – Indicates a new Email message. Problem With Text Or Multimedia Message Delivery –...
- Page 17 The Basics Call In Progress Using Bluetooth Headset –Indicates that a call is in progress using the Bluetooth headset. Call Being Forwarded – Indicates that a call is being forwarded. Call On Hold – Indicates that a call is on hold. Missed Call –...
-
Page 18: Getting To Know The Home Screen
The Basics Getting to Know the Home Screen The Home screen is your starting point to access all the features on your phone. It displays application shortcuts, icons, widgets, and other features. Status Bar Shows device status information, including the time, signal strength, battery status, and notification icons. - Page 19 The Basics Home Screen Pane Indicator The dots indicate which Home screen pane you are viewing. Touchscreen Your touchscreen provides an excellent way to interact with and use your Android phone. With the touch of your finger, you can download and use available applications, make menu selections, and access data saved to your phone.
- Page 20 The Basics Double-tap Double-tap to zoom a web page or a map. For example, quickly double-tap a section of a web page to zoom that section to fit the width of the screen. You can also double-tap to control the zoom in Maps and in other applications.
-
Page 21: Text Input Methods
The Basics Text Input Methods On-screen Keyboard You can easily enter text using the on-screen keyboard. The on-screen keyboard displays automatically when you need to enter text. To manually display the keyboard, simply touch a text field where you want to enter text. Touch for Voice Search. - Page 22 The Basics Applications: How to View, Open and Switch All of the applications on your phone, including any applications that you downloaded and installed from Android Market or other sources, are grouped together on the Apps screen, which you access from your Home screen.
- Page 23 The Basics Customizing the Apps screen The AS680 includes a wide variety of applications and you can download even more applications to your device. You can customize these items on the Apps screen for faster access (less scrolling required) to the applications you use most often.
- Page 24 The Basics Adding a category 1. From the Home screen, touch the Apps Key 2. Press the Menu Key and touch Manage category > Add. 3. Enter the category name, then touch Save. NOTE You can also touch Delete to delete categories or Reset to reset the categories back to default.
- Page 25 The Basics Switching between multiple applications 1. Press and hold the Home Key A screen with the icons of applications that you’ve used recently will appear. 2. Touch the application icon you want to open or press the Back Key to return to the current screen.
-
Page 26: Working With Menus
The Basics Working with Menus There are two kinds of Android menus: Options menus and Context menus. Options menus Options menus contain tools that apply to the activities of the current screen or application, not to any specific item on the screen. To open the available Options menu, press the Menu Key . -
Page 27: Managing Notifications
The Basics When you touch and hold certain items on a screen, a Context menu opens. Managing Notifications Notification icons report the arrival of new messages, calendar events, alarms, as well as ongoing events, such as when you are in a call. When you receive a notification, the notification icon will be displayed in the Status Bar. - Page 28 The Basics Touch a notification to open it. To respond to a notification 1. Open the Notifications panel. Your current notifications are listed in the panel, each with a brief description. 2. Touch a notification to view it. The Notifications panel will close and the application that corresponds to your response will open.
-
Page 29: Searching Your Phone And The Web
The Basics Searching Your Phone and the Web You can search for information on your phone and on the web by using the Google search application. Some applications, such as Gmail, Contacts, and Browser have the ability to search contents within those specific applications. You can conduct the search by typing in the search terms or saying what you’re looking for. -
Page 30: Locking The Screen
The Basics 2. Enter the text you’re searching for in the Quick Search Box. As you type, search results from your phone, previous search terms, and web search suggestions appear. Touch an item to activate that search result. You can use the Search preferences to configure some aspects of Google web search (for example, whether it makes suggestions below the Quick Search Box as you type), and what phone features you want to include in searches. - Page 31 The Basics 3. Touch Pattern, PIN, or Password. Pattern: The first time you set an unlock pattern, you will see a tutorial with instructions on how to create it. Read the tutorial and touch Next (twice). Draw your pattern (connect at least 4 dots) and touch Continue. Then redraw your pattern and touch Confirm.
-
Page 32: Customizing The Home Screen
The Basics NOTES You have 5 opportunities to enter your unlock pattern, PIN or password. If you used ● all the 5 opportunities, you can try again after 30 seconds. When you can’t recall your unlock pattern: ● - If you’ve created a Google Account on the phone, touch Forgot pattern?. Then you are required to sign in with your Google Account to unlock your phone. - Page 33 The Basics Shortcuts Add shortcuts to applications, Bookmark(a bookmarked web page), Contact (you could choose only one person as favorite contact on HomeScreen from phone book list), a destination in a music playlist, and more. The shortcuts available depend on the applications you have installed. Folders Add a folder where you can organize other Home screen shortcuts and icons, or folders that contain all your contacts, contacts with phone numbers, or starred contacts.
-
Page 34: Connecting Quickly With Your Contacts
The Basics To rename a folder 1. Touch the folder icon to open it. 2. Touch and hold the folder window’s title bar. 3. Enter the new folder name. 4. Touch the OK button. Connecting Quickly With Your Contacts As you build up your list of contacts on your phone, you can use Quick Contact for Android to quickly chat, email, text message, place a call, or to locate your contacts. -
Page 35: Connecting To Mobile Networks
Connecting to Networks and Devices Connecting to Mobile Networks When you buy your phone and sign up for service, your phone is configured to use your provider’s mobile networks for voice calls and for transmitting data. Different locations may have different mobile networks available. Initially, your phone is configured to use the fastest mobile network available for data. -
Page 36: Connecting To Wi-Fi Networks
Connecting to Networks and Devices Connecting to Wi-Fi Networks Wi-Fi is a wireless networking technology that can provide Internet access at distances of up to 100 meters, depending on the Wi-Fi router and your surroundings. To use Wi-Fi on your phone, you must connect to a wireless access point, or “hotspot.”... - Page 37 Connecting to Networks and Devices To receive notifications when open networks are in range By default, when Wi-Fi is on, you receive notifications in the Status Bar when your phone detects an open Wi-Fi network. 1. Turn on Wi-Fi, if it’s not already on. 2.
- Page 38 USB Autorun is a feature that allows your AS680 to connect to a PC using a USB cable and set it up on a PC without a physical CD-ROM. # Automatically installs the LG USB Modem driver. # Allows the phone to be used as Mass storage when a microSD card is present in the AS680.
-
Page 39: Modem Mode
Connecting to Networks and Devices Modem Mode Autorun may automatically use Modem mode in certain circumstances. # Autorun automatically switches to Modem mode if the connection fails while syncing or connecting. Always ask You can choose to be asked to confirm the USB connection when connecting to a computer. -
Page 40: Microsd Card Settings
microSD Card microSD Card Unmounting and removing the microSD Card To safely remove the microSD card from your device, first you need to unmount the microSD card before removing it from the phone. WARNING! On the Android OS 2.2, you can download applications from Android Market and can store them on the microSD card as well as on the device. - Page 41 microSD Card Formatting the microSD Card Formatting a microSD card permanently removes all files stored on the card. 1. Touch the Apps Key > Settings > Storage. 2. Touch Unmount SD card to release the microSD card from device use. NOTE A warning message may be displayed if applications will stop when you unmount the microSD card.
-
Page 42: Placing And Ending Calls
Calls Placing and Ending Calls You can place calls using the Phone application. Calls can be manually dialed using the Phone tab. You can also dial from your phone’s memory using the Call log tab, the Contacts tab, or the Groups tab. To open the Phone application # From the Home screen, touch the Phone Key in the Quick Keys... -
Page 43: Airplane Mode
Calls You can use other phone features while the call is underway. If you ● open another application, the Call icon appears in the Status Bar for the duration of the call. Press the Volume Keys to adjust the call volume. ●... - Page 44 Calls Unlocked Screen Locked Screen Touch the Answer button to answer the Slide up to call. answer the call. To decline a call and divert it to voicemail # If the screen is unlocked, simply touch the Ignore button # If the screen is locked, slide the Ignore button to the left.
-
Page 45: Working With The Call Log
Calls Working with the Call Log The Call log is a list of all the calls you’ve dialed, received, or missed. It offers a convenient way to redial a number, return a call, or add a number to your Contacts. To open the Call log # Touch the Phone Key (from the Quick Keys bar) and then the Call... -
Page 46: Calling Your Contacts
Calls To take other actions on a Call log entry # Touch a Call log entry to open a screen from where you can call the contact, send the contact a message, add the number to your Contacts list, and learn more about the original call. # Touch and hold a Call log entry to open a Context menu where you can call the contact, view contact information, edit the number before you redial, and more. -
Page 47: Voice Dialer
Calls 2. Touch Favorites and then touch the contact you want to call. 3. Touch the contact’s phone number you want to call. Voice Dialer You can use the Voice Dialer application to place a phone call by speaking the name of a contact or a phone number. To place a call by speaking 1. - Page 48 Calls To mute the microphone during a call # Touch the Mute button. The Mute button lights up to indicate that the microphone is muted. The Mute button will appear in the Status Bar to remind you that the microphone is turned off. When viewing the in-call screen, you can unmute the microphone by touching the Mute button again.
-
Page 49: Managing Multiple Calls
Calls Managing Multiple Calls Contact your wireless service provider to learn whether they support services for multiple calls including call waiting and conference calls. To merge current calls # Touch the Merge button Touch to Merge calls. The current call will be placed on hold and you will be connected with the other call. -
Page 50: Listening To Your Voicemail
Calls Listening to Your Voicemail When you have a new voicemail message, the Voicemail notification icon appears in the Status Bar. If you have not set up your voicemail number, or if you need to change it, you can do that in the Call settings. To listen to your Voicemail # Open the Notifications panel and touch New voicemail. - Page 51 Browser The Browser application allows you to access the internet from your Wireless device. Access and selections within this feature are dependent upon your service provider. For specific information on Browser access through your phone, contact your service provider. Internet Learn to access and bookmark your favorite web pages.
- Page 52 # To bookmark the current web page, touch Bookmarks > Add. Enter the name for the bookmark and touch OK. # When a web page finishes loading, the RSS Indicator will appear if an RSS feed is available. Press the Menu Key and touch More >...
- Page 53 # To customize the Browser settings, press the Menu Key and touch Settings. Bookmark your favorite web pages If you know the web address of the web page, you can manually add a bookmark. To add a bookmark: 1. Touch the Apps Key >...
-
Page 54: Changing Browser Settings
Changing Browser settings You can configure a number of Browser settings, including several that you can use to manage your privacy. # To open the Browser settings screen, press the Menu Key touch Settings at the bottom of the screen. Page content settings Text size Opens a dialog box where you can increase or decrease the size of the text that Browser uses when displaying webpages. - Page 55 Enable JavaScript Uncheckmark to prevent JavaScript from running on webpages. Many webpages function correctly only if they can run JavaScript features on your phone. Enable plug-ins Opens a dialog box to select when to enable plug-ins. Open in background Checkmark to open new windows in the background when you touch and hold a link then touch Open in new window.
- Page 56 Security settings Remember passwords Checkmark to allow the Browser to save user names and passwords for websites. Clear passwords Allows you to clear all saved passwords. Show security warnings Checkmark to show a warning if there is a problem with a site’s security. Advanced settings Website settings Allows you to manage advanced settings for individual websites.
- Page 57 Maps To search for a location 1. Touch the Apps Key > Maps 2. Touch the search box at the top of the screen. 3. In the search box, enter the place you’re looking for. You can enter an address, a city, or a type of business or establishment. For example, “theater in New York”.
- Page 58 Communication Contacts The Contacts application allows you to store names, phone numbers and other information in your phone’s memory. Using Your Contacts Use the Contacts application to add, view, and communicate with your friends and acquaintances. To open your Contacts application # Touch the Apps Key >...
- Page 59 Communication To view details about a contact 1. Open your Contacts application. 2. Touch the contact whose details you want to view. 3. The Contact Info tab displays by default. Touch an icon to call, message, or open other applications. # The Dial icon places a call to the number.
-
Page 60: Adding Contacts
Communication Adding Contacts You can add contacts on your phone and synchronize them with the contacts in your Google Account, Microsoft Exchange account, or other accounts that support syncing contacts. Since your contacts can come from a variety of sources, the Contacts application attempts to join new information with existing similar contact entries, to create a single entry. -
Page 61: Importing, Exporting, And Sharing Contacts
Communication Importing, Exporting, and Sharing Contacts If you have contacts stored in vCard format on a microSD card you can import them into your Contacts application on your phone. You can also export contacts in vCard format onto a microSD card. Export to back them up to a computer or other device or so you can send a contact via email. -
Page 62: Adding A Contact To Your Favorites
Communication To share a contact You can share a contact with someone by sending it to them as a vCard file. 1. Open the Contacts application. 2. Touch the contact you want to share to view its details. 3. Press the Menu Key and touch Share. -
Page 63: Searching For A Contact
Communication Searching for a Contact It’s easy to search for a contact by name. To search for a contact 1. Open the Contacts application. 2. Touch the search box or press the Search Key 3. Start entering the name of the contact you’re searching for. As you type, contacts with matching names will appear below the search box. - Page 64 Communication To edit contact details 1. Open the Contacts application. 2. Touch and hold the contact whose details you want to edit. In the Context menu that opens, touch Edit contact. 3. Edit the contact information. 4. Touch the Save button to save the changes. To change a contact’s default phone number The default phone number is used when you initiate a call or send a text message using the Context menu (by touching and holding a contact).
- Page 65 Communication To set a ringtone for a contact 1. Open the Contacts application. 2. Touch the name of a contact in the list to view its details. 3. Press the Menu Key and touch Options. 4. Touch Ringtone and touch a ringtone to select it. 5.
- Page 66 Communication To connect by using Quick Contact for Android 1. Touch a contact’s picture to open Quick Contact for Android. Quick Contact for Android communication icons Touch a contact's picture. 2. Touch the icon corresponding to the type of communication you want to start.
- Page 67 Communication To call a contact’s default number 1. Open the Contacts application. 2. Touch and hold the contact you want to call. 3. Touch Call contact in the menu that opens. To send a text or multimedia message to a contact’s default number 1.
-
Page 68: Joining Contacts
Communication To change which groups are displayed 1. Open the Contacts application. 2. Press the Menu Key and touch More > Display options. 3. Touch an account to open its list of available groups. 4. Touch each group whose contacts you want to view in your Contacts application. -
Page 69: Separating Contact Information
Communication Separating Contact Information Each contact entry on your phone may contain ‘joined’ information from a variety of sources. If contact information from different sources was joined in error, you can separate the information back into individual contact entries on your phone. To separate contact information 1. -
Page 70: Reading Your Messages
Communication The Accounts screen The Accounts screen lists all your accounts. # Open the Email application. If you’re not on the Account screen, press the Menu Key and touch Accounts. Each folder and account on the Accounts screen displays the number of unread messages in green, or will display the number of messages in Starred, Drafts and Outbox in gray. -
Page 71: Responding To A Message
Communication Responding to a Message There are many options how you can respond to a received email message. You can reply to it, forward it, or even just delete it. To reply to or forward a message # While reading a message, touch Reply or Reply all (available at the bottom of the screen). -
Page 72: Visual Voicemail
Communication Visual Voice Mail Visual Voice Mail allows the management of voicemail directly from the device rather than accessing voicemail via traditional methods. Visual Voice Mail displays a list of messages and allows the user to choose which message to listen to or delete, without having to dial into their mailbox and listen to voice instructions, or prior messages. - Page 73 Communication 4. After entering the password, you are allowed to see voicemail list in your Inbox. While viewing the voicemail list, you can select an entry (see step 5). For additional options, press the Menu Key and touch New, Delete, Save as, Set as Heard, Sort by, or More (Saved messages, Refresh, Settings).
- Page 74 Communication 6. If you decide to reply with a voicemail or forward it, record a message. The buttons at the bottom of the screen allow you to play, stop, or cancel the message. NOTE To send a voice message to a number in your Contacts list, use the To: field to search for If you’d like to cancel your Visual Voicemail Subscription, press the Menu and touch More >...
- Page 75 Communication Gmail Gmail is Different Gmail is web-based: Your messages are stored on-line, on Google servers but you can read, write, and organize messages by using the Gmail application on your phone or by using a web browser on a computer. Because your mail is stored on Google servers, you can search your entire message history, backed by the speed and power of Google search.
-
Page 76: Opening Gmail And Your Inbox
Communication Gmail is for Gmail: Of course you can use Gmail to send email to any email address, and anyone can send email to you at your Gmail address. But if you want to read messages from another email service provider (using your AOL, Yahoo!, or other email account), you must use the Email application. - Page 77 Communication # While viewing a list of labeled conversations, press the Menu Key and touch More > Go to inbox. To switch accounts Gmail displays conversations and messages from one Google Account at a time. If you have more than one account, you can open the Accounts screen to view how many unread messages you have in each account and to switch accounts.
- Page 78 Communication The Google Talk online status will appear next to the name of the sender of each message if the sender has a Google Account. Touch the contact’s picture to open Quick Contact. While reading messages in a conversation, you can use the buttons at the bottom of the screen to archive the entire conversation or delete it.
-
Page 79: Composing And Sending A Message
Communication 2. Touch the contact name to open that message. While reading a message you can press the Menu Key and touch Mark unread to return a read message to the unread state. For example, to remind yourself to read it again later. Composing and Sending a Message You can compose and send a message to people or groups with Gmail addresses or other email addresses. -
Page 80: Replying To Or Forwarding A Message
Communication 4. Press the Menu Key and touch Add Cc/Bcc to copy (normal or blind status) recipients, if necessary. 5. Enter a subject for the message in the Subject field. 6. Continue into the next field to enter your email message. 7. -
Page 81: Working With Conversations In Batches
Communication 3. Touch Send to send your message. Working with Conversations in Batches You can archive, label, delete, or perform other actions on a batch of conversations at once, in your Inbox or in another label. 1. From the Inbox, or a folder with another label, touch the checkbox for all the messages you want to include in the batch. -
Page 82: Starring A Message
Communication To label a conversation 1. While reading a conversation’s messages, press the Menu Key touch Change labels. 2. In the dialog box that opens, checkmark the label(s) you want to assign to the conversation and touch the OK button. To label a batch of conversations at once You can assign or change the label(s) of one or more conversations at once. -
Page 83: Viewing Conversations By Label
Communication Viewing Conversations by Label You can view a list of the conversations that have the same label, including conversations with starred messages. 1. While viewing your Inbox, or a folder with another label, press the Menu and touch Go to labels. 2. -
Page 84: Synchronizing Your Messages
Communication Synchronizing Your Messages The Gmail service has the resources to store all the messages you’ve ever sent or received; your phone does not. To save space, Gmail downloads only some of your messages to your phone. Use the Settings application to control how and when applications synchronize their data. -
Page 85: Appending A Signature To Your Messages
Communication Appending a Signature to Your Messages You can add information to every email you send, such as your name, contact information, or even “Sent from my Android phone”. 1. Touch the Apps Key > Gmail 2. Press the Menu Key and touch More >... - Page 86 Communication General settings Priority Inbox Checkmark to make Priority Inbox your default inbox for this account. Signature Allows you to add a signature or other information to outgoing email. Confirm actions Allows you to choose which actions will display a dialog box asking you to confirm whenever you want to archive, delete, or send a message.
-
Page 87: Opening Messaging
Communication Messaging Opening Messaging To open Messaging # Press the Home Key , then touch the Messaging Key in the Quick Keys bar. The Messaging screen will open, where you can create a new message or open an ongoing message thread. # Touch New message to start a new text or multimedia message. - Page 88 Communication To send a text message 1. On the Messaging screen, touch New message. 2. Enter a mobile phone number in the To field. As you enter the mobile phone number, matching contacts appear. You can touch a suggested recipient or continue entering the phone number. 3.
- Page 89 Communication To create and send a multimedia message 1. On the Messaging screen, touch New message. 2. Enter a mobile phone number or email address in the To field. As you type, matching contacts appear. You can touch a suggested contact or continue typing.
-
Page 90: Changing Messaging Settings
Communication To respond to messages you receive If you’re working in a message window, messages that you receive from that contact are displayed. Otherwise, you receive a new message notification and a new message icon appears in the Status Bar. When you touch the new message notification, the Message screen opens where you can reply to the message. - Page 91 Communication Callback number Opens a dialog box to view or edit the callback number sent with your messages. Checkmark appears after dialog box is closed. Text message (SMS) settings Delivery reports Checkmark this setting to allow your phone to receive delivery reports for the messages you send.
- Page 92 Communication CMAS settings Settings for the Commercial Mobile Alert System. Presidential alert Checkmark this setting to allow presidential alerts to be always presented. Extreme alert Checkmark this setting to allow Extreme alerts to be always presented. Severe alert Checkmark this setting to allow Severe alerts to be always presented.
- Page 93 Communication Talk To open Google Talk and sign in # Touch the Apps Key > Talk When you first open Google Talk, your Friends list will be displayed. This list includes all of the friends you’ve added by using Google Talk on the web or on the phone.
-
Page 94: Chatting With Friends
Communication Chatting with Friends To chat with a friend 1. Touch the Apps Key > Talk If you’re already chatting with someone, you can press the Menu Key and touch Friends list to return to the Friends list. 2. Touch the friend you want to chat with. 3. - Page 95 Communication To accept an invitation to chat When a friend sends you a Google Talk message, you will receive a notification. The friend’s name in the Friends list turns white and displays the message. # Touch the name of the person in your Friends list. # Open the Notifications panel then touch the chat notification.
-
Page 96: Changing And Monitoring Online Status
Communication To chat on or off-the-record Your Google Talk messages are stored, so you can review them later and even search for them, in the Chats folder in Gmail. If you’d rather not store the messages in a chat, you can chat off-the-record. # While chatting, press the Menu Key and touch Chat off record. - Page 97 Communication In addition to the standard status settings described in the table below, you can also select a message that you’ve entered previously. You can also press the Menu Key and touch Clear custom messages to erase them and start over. Your status and any message you’ve entered appear in your friends’...
- Page 98 Communication Managing Your Friends List Your Google Talk Friends list contains the friends you’ve invited to become friends or whose invitations you’ve accepted in Google Talk. Friends can invite each other to chat in Google Talk and see each others’ online status in Google Talk and other applications, such as in Gmail.
-
Page 99: Changing Google Talk Settings
Communication # In the Friends list, press the Menu Key and touch All friends. To switch back to just the friends with whom you chat most frequently, touch Most popular in the menu. To add a friend to the ‘Most popular’ group You can set a friend to always appear in your Most popular Friends list. - Page 100 Communication displayed next to your name in other people’s Friends lists. To configure notifications for new Google Talk messages 1. From the Friends list, press the Menu Key and touch Settings. 2. Checkmark IM notifications to receive a notification in the Status Bar when a new chat message arrives.
- Page 101 Communication The Phone application The phone features of your device include many ways to make calls. # Press the Home Key and then touch the Phone Key in the Quick Keys bar at the bottom of the screen. The Phone application has four tabs across the top of the screen: Phone, Call log, Contacts, and Groups.
- Page 102 Communication Groups This tab displays your contacts by group for each account type you have set up, starting with Favorites, followed by a list of recent frequent contact. From here you can call or contact any of the entries based on the saved information or manage your list.
- Page 103 Entertainment Camera To open the Camera application, touch the Apps Key > Camera Getting to know the viewfinder Scene mode – Adjust for better image capture in different environments. Choose from Auto, Portrait, Landscape, Sports, Night, and Sunset. Brightness – Defines and controls of the amount of light entering the lens. Slide the brightness indicator along the bar, toward “-”...
- Page 104 Entertainment Photo options You can make adjustments to optimize your shot. The following options are available: Image size: 3M (2048x1536), 2M (1600x1200), 1M (1280x960), VGA ● (640x480), QVGA (320x240). ISO: Controls the camera’s sensitivity to light. Choose from Auto, 400, ●...
- Page 105 Entertainment Using the focus mode You can select from the following focus options: Auto Sets the camera to focus automatically. Macro Sets the camera to be able to take extreme close-ups. If you are trying to take a close-up shot but the focus box remains red, try turning the Macro mode on.
- Page 106 Entertainment The following options are available after taking a photo: Share Touch to share your photo using Bluetooth, Email, Gmail, Messaging, Picasa or any other application you’ve downloaded that supports this feature. Set as Touch to use the image as a Contact icon or Wallpaper. Rename Touch to edit the name of the selected picture.
-
Page 107: Video Camera
Entertainment Video Camera To open the Video Camera, touch the Apps Key > Camera . Slide the Camera mode icon down for Video mode. Getting to know the viewfinder Resolution – Allows you to choose from VGA (640x480), QVGA (320x240) and QCIF (176x144). - Page 108 Entertainment Recording a quick video 1. Open the Camera application. 2. Slide the Camera mode icon down to change to Video mode. The Camera mode icon changes to and the Capture button changes to 3. The Video camera’s viewfinder will appear on the screen. 4.
-
Page 109: Your Photos And Videos
Entertainment Your Photos and Videos Adjusting the volume when viewing a video To adjust the volume of a video while it is playing, use the Volume Keys on the left side of the phone. Setting a photo as wallpaper 1. Touch the photo you want to set as wallpaper to open it. 2. -
Page 110: Working With Albums
Entertainment # Touch an album to open it and view its contents. The pictures and videos in the album are displayed in chronological order (except from Camera). # Touch a picture or video in an album to view it. # Return to the main Gallery screen at any time by touching at the top left of the screen. - Page 111 Entertainment # The date of the images in view is displayed, so you can scroll by date. # You can also scroll through an album by swiping the screen left or right. To change how the contents of an album are displayed You can view the images and videos in your albums in a chronological grid (except from Camera) or in stacks, sorted by the date and the location where they were taken.
- Page 112 Entertainment To Work with Batches of Pictures or Videos In addition to working with whole albums and with individual pictures, you can select one or more pictures or videos in an album to work on them in batches. For example, to send a few pictures from an album to a friend. 1.
-
Page 113: Working With Pictures
Entertainment To delete an album You can delete an album and its contents from your microSD card. 1. Touch the Apps Key > Gallery 2. Press the Menu Key 3. Checkmark or uncheckmark the album(s) you want to delete. 4. Touch Delete at the bottom center of the screen. Touch Confirm Delete in the pop-up menu. - Page 114 Entertainment To watch a slideshow of your pictures # While viewing a picture, touch the screen to view the control buttons then touch Slideshow. # Touch the screen, or press the Back Key , to end the slideshow. To rotate a picture 1.
- Page 115 Entertainment To crop a picture You can crop and save pictures that are stored on your microSD card. 1. Touch the picture you want to crop then touch Menu at the bottom of the screen. 2. Touch More. 3. Touch Crop. The cropping box appears on top of the picture.
-
Page 116: Working With Videos
Entertainment To share a picture You can share a picture by sending it to friends or posting it in a Picasa web album. 1. Touch the picture you want to share then touch Menu at the bottom of the screen. 2. - Page 117 Entertainment To share a video You can share your videos in a variety of ways, including sending it by email or multimedia message (MMS), or via a Bluetooth device. You even have the option to share your videos publicly by uploading it to the YouTube website.
-
Page 118: Opening Android Market And Finding Applications
Entertainment Market Opening Android Market and Finding Applications Open Android Market to browse and search for free and paid applications. To open the Android Market application # Touch the Apps Key > Market When you open the Android Market application for the first time, you must read and accept the terms of service to continue. - Page 119 Entertainment To browse for applications You can browse applications by category and sort them in different ways. 1. On the Android Market homepage, touch a top-level category. These are displayed as tab buttons near the top of the screen and include Apps and Games.
-
Page 120: Downloading And Installing Applications
Entertainment To open a screen with details about an application # At any time while browsing Android Market, touch an application to open its details screen. The Application details screens include a description, ratings, comments, and related information about the application. From this screen, you can download, install, uninstall, and rate the application, and more. - Page 121 Entertainment 2. Press the Menu Key and touch Security to preview the functions and data the application can access on your phone if you install it. If you’re not comfortable with the access the application requires, don’t continue. 3. Touch Free (for free applications) or Buy (for paid applications). If the application requires access to your data or control of any functions on your phone, Market tells you what the application can access.
- Page 122 Entertainment If you have another Android phone, you can download a paid application to that phone using the same Android Market account, at no additional charge. To create a Google Checkout account You must have a Google Checkout account associated with your Google Account to purchase items from Android Market.
- Page 123 ), AMR, MIDI, and OGG Vorbis. NOTE The LG USB driver needs to be installed on your PC before connecting your phone to transfer music. To copy music files onto the phone’s microSD card 1. Connect the phone to your computer with a USB cable. If the default connection mode is not set to Mass Storage, open the Notifications...
-
Page 124: Opening Music And Working With Your Library
Entertainment Opening Music and Working with Your Library After you’ve copied some music onto your microSD card you can open the Music application and view your library of music files, sorted in one of four ways. To open Music and view your music library # Touch the Apps Key >... -
Page 125: Playing Music
Entertainment To delete a song from the microSD card You can delete music from the storage card. # Touch and hold a song in a library list. In the Context menu that opens, touch Delete. # On the Playback screen, press the Menu Key and touch Delete. - Page 126 Entertainment You can return to the Playback screen from most other screens in the Music application by touching the currently playing song at the bottom of the screen. You can return to the Playback screen from any other application by opening the Notifications panel and touching the ongoing music notification.
- Page 127 Entertainment To control playback volume In addition to the techniques for setting media volume, you can control the volume of music in the Music application. # Press the phone’s up/down Volume Keys. A panel opens to show the current media volume. Some headsets include their own volume controls or ways to pause and resume playback or to skip tracks.
-
Page 128: Working With Playlists
Entertainment To use a song as a ringtone You can use a song as your phone ringtone, in place of one of the ringtones that come with the phone. # Touch and hold a song in a Library list. In the Context menu that opens, touch Use as ringtone. - Page 129 Entertainment To add a song to a playlist 1. While viewing a list of tracks in the Library, touch and hold a song to display a Context menu. 2. Touch Add to playlist. 3. Touch the name of the playlist to add the song to. You can also add the song that is playing in the Playback screen to a playlist by pressing the Menu Key and touching Add to playlist.
-
Page 130: Video Player
Entertainment Video player You can play a wide variety of videos using the Video player. The video player supports the following file formats: 3gp, 3g2, mp4, wmv (Codec: MPEG4, H.263, H.264, VC-1). phone. To open the Video player application 1. Touch the Apps Key >... -
Page 131: Opening Youtube And Watching Videos
Entertainment YouTube Opening YouTube and Watching Videos You can browse, search for, view, upload, and rank YouTube videos on your phone with the YouTube application. To open the YouTube application # Touch the Apps Key > YouTube Touch a video to watch it or touch to take other actions on the video. - Page 132 Entertainment # Press the Menu Key for the following options: Home, Browse, Search, My Channel, Upload, and Settings. For details about these features, visit the YouTube website. To search for videos 1. At the top of the main YouTube screen, touch or press the Search 2.
-
Page 133: Voice Recorder
Entertainment Voice Recorder The Voice Recorder application records audible files for you to use in a variety of ways. Use them simply to remind you about something you don’t want to forget (like a grocery list) or record sound effects that you can attach to a message or set as a ringtone for calls. -
Page 134: Viewing Your Calendar And Events
Tools Calendar Viewing Your Calendar and Events Open the Calendar application to view events you’ve created or that others have invited you to. When you first set up your phone, you configured it to use an existing Google Account or you created a new account. The first time you open the Calendar application on your phone, it displays any existing calendar events from your Google Account on the web. -
Page 135: Working In Agenda View
Tools Working in Agenda View Agenda view is a list of your events in chronological order. All-day and multi-day events are listed at the start of each day. To switch to Agenda view # Press the Menu Key and touch Agenda. To learn more about events in Agenda view # Touch an event. -
Page 136: Working In Day View
Tools Working in Day View Day view displays a chart of the events of one day, in a table of one-hour rows. The current time will be highlighted. All-day and multi-day events are displayed at the top. Part of the title of each event is displayed in the rows that correspond to when it occurs. -
Page 137: Working In Week View
Tools Working in Week View Week view displays a chart of the events of one week. All-day and multi-day events are displayed at the top. To switch to Week view # Press the Menu Key and touch Week. To learn more about events in Week view # Touch an event to view its details. -
Page 138: Working In Month View
Tools Working in Month View Month view displays a chart of the events of the month. Segments of each day with scheduled events are blue in the day’s vertical bar. To switch to Month view # Press the Menu Key and touch Month. -
Page 139: Viewing Event Details
Tools Viewing Event Details You can view more information about an event in a number of ways, depending on the current view. To view information about an event # In Agenda, Day, or Week view, touch an event to view its details. # In Month view, touch a day to display the events below the calendar. -
Page 140: Editing Or Deleting An Event
Tools You can also touch and hold a spot in Day, Week, or Month view. In the Context menu that opens, touch New event to open the Event details screen with that day and time already entered. 2. Add details about the event. Enter a name, time, and optional additional details about the event. -
Page 141: Setting An Event Reminder
Tools 4. Touch the Done button to save the event. To delete an event There are a number of ways to delete an event. # In Agenda view, touch an event to view its details. Then press the Menu Key and touch Delete event >... - Page 142 Tools Calculator Allows you to perform simple mathematical calculations. To open and use the Calculator # Touch the Apps Key > Calculator # Enter numbers and arithmetic operators on the Basic panel. # Drag the Basic panel to the left to open the Advanced panel. You can also press the Menu Key and touch Advanced panel.
- Page 143 Tools Clock You use the Clock application to access the Alarm, Slideshow, Music, and Home functions. To open the Clock application # Touch the Apps Key > Clock Touch to dim the screen. Displays the battery charge level when the phone is plugged into a charger. Touch to play music while the Clock is displayed.
- Page 144 Tools To set an alarm You can set an alarm by modifying an existing alarm or by adding a new one. 1. Open the Clock application, then touch the Alarm icon at the bottom of the screen. 2. Touch Add alarm or touch an existing alarm to modify the time or attributes as needed.
-
Page 145: Alarm Settings
Tools Alarms screen The Alarms screen allows you to add new alarms as well as display your list of all added alarms. Activating and deactivating alarms Added alarms can be quickly activated or deactivated with a simple touch. Next to each alarm time is an alarm clock icon. - Page 146 Tools Polaris Viewer Polaris Viewer 3.0 is a professional Mobile Office Solution which enables users to conveniently view various types of office documents including Word, Excel, PDF, and PowerPoint file extensions anywhere, anytime, using their mobile device. Viewing Files Mobile users now have the convenience of being able to view many types of documents on their mobile device, including Microsoft Office documents and Adobe PDF.
-
Page 147: Opening Settings
Settings Settings Opening Settings The Settings application contains most of the tools for customizing and configuring your phone. All of the settings in the Settings application are described in this section. To open Settings # From the Home screen, press the Menu Key and touch Settings # Touch the Apps Key >... -
Page 148: Fcc Hearing-Aid Compatibility (Hac) Regulations For Wireless Devices
Safety HAC statement This phone has been tested and rated for use with hearing aids for some of the wireless technologies that it uses. However, there may be some newer Additional information on Specific Absorption Rates (SAR) can be found wireless technologies used in this phone that have not been tested yet for use on the Cellular Telecommunications Industry Association (CTIA) website at with hearing aids. - Page 149 Safety M-Ratings: Phones rated M3 or M4 meet FCC requirements and are likely to generate less interference to hearing devices than phones that are not labeled. M4 is the better/higher of the two ratings. Hearing devices may also be rated. Your hearing device manufacturer or hearing health professional may help you find this rating.
Need help?
Do you have a question about the L45C and is the answer not in the manual?
Questions and answers