Table of Contents
Advertisement
Quick Links
Operating Instructions
Functional Manual
LCD Projector
PT-AT6000E
Model No.
Thank you for purchasing this Panasonic product.
■ Before operating this product, please read the instructions (Basic Guide / Functional Manual) carefully and
save this manual for future use.
■ Before using your projector, be sure to read "Read this first!" (
pages 6 to 13).
ENGLISH
TQBJ0467
Advertisement
Table of Contents

Related Manuals for Panasonic PT-AT6000E


Summary of Contents for Panasonic PT-AT6000E
- Page 1 LCD Projector PT-AT6000E Model No. Thank you for purchasing this Panasonic product. ■ Before operating this product, please read the instructions (Basic Guide / Functional Manual) carefully and save this manual for future use. ■ Before using your projector, be sure to read “Read this first!” ( ...
- Page 2 Trademarks • Apple and iPhone are the trademarks of Apple Inc. registered in the United States and other countries. • VGA and XGA are trademarks of International Business Machines Corporation. • SVGA is a registered trademark of the Video Electronics Standards Association. •...
- Page 3 Features of the Projector Features of the Projector Quick Steps Quick Steps Real Live 3D Experience See the relevant page for details. 1. Set up your projector Equipped with 3D (3D motion remaster, 3D double-speed page 21) drive technology, and 2D to 3D conversion technology) that help enjoy diverse content in high picture quality.
-
Page 4: Table Of Contents
Contents Be sure to read “Read this first!”. ( pages 6 to 13) Remote control operation ....... 32 Important Information Managing the lens control settings ......32 Read this first! .............6 Selecting the picture mode ...........32 Precautions for use ......... 14 Adjusting the picture .............32 Cautions when transporting..........14 Loading a saved setting ..........33... - Page 5 Contents [CLOCK PHASE] ............60 [HIGH ALTITUDE MODE] ..........80 [ASPECT] ..............61 [LAMP POWER] ............81 [WSS] ................63 [FUNCTION BUTTON] ..........81 [OVER SCAN] ...............63 [VIERA LINK SETTINGS] ..........81 [KEYSTONE] ..............63 [OTHER FUNCTIONS] ..........83 [AUTO SETUP] .............63 [TEST PATTERN] ............83 [3D SETTINGS] menu ........64 [LAMP RUNTIME] ............83 [INITIALIZE ALL] ............84 [SCREEN SIZE] ............64...
-
Page 6: Read This First
Read this first! Read this first! WARNING: THIS APPARATUS MUST BE EARTHED. WARNING: To prevent damage which may result in fire or shock hazard, do not expose this appliance to rain or moisture. Machine Noise Information Ordinance 3. GSGV, January 18, 1991: The sound pressure level at the operator position is equal or less than 70 dB (A) according to ISO 7779. - Page 7 Read this first! IMPORTANT: THE MOULDED PLUG (U.K. only) FOR YOUR SAFETY, PLEASE READ THE FOLLOWING TEXT CAREFULLY. This appliance is supplied with a moulded three pin mains plug for your safety and convenience. A 13 amp fuse is fitted in this plug. Should the fuse need to be replaced, please ensure that the replacement fuse has a rating of 13 amps and that it is approved by ASTA or BSI to BS1362.
- Page 8 Read this first! WARNING: „ POWER The wall outlet or the circuit breaker shall be installed near the equipment and shall be easily accessible when problems occur. If the following problems occur, cut off the power supply immediately. Continued use of the projector in these conditions will result in fire or electric shock. z If foreign objects or water get inside the projector, cut off the power supply.
- Page 9 If liquid enters inside of the projector, consult your dealer. z Particular attention must be paid to children. Use the ceiling mount bracket specified by Panasonic. Defects in the ceiling mount bracket will result in falling accidents. z Attach the supplied safety cable to the ceiling mount bracket to prevent the projector from falling down.
- Page 10 Read this first! WARNING: „ ACCESSORIES Do not use or handle the batteries improperly, and refer to the following. Failure to observe this will cause burns, batteries to leak, overheat, explode or catch fire. z Do not use unspecified batteries. z Do not disassemble dry cell batteries.
- Page 11 Read this first! CAUTION: „ POWER When disconnecting the power cord, be sure to hold the power plug and power connector. If the power cord itself is pulled, the lead will become damaged, and fire, short-circuits or serious electric shocks will result. When not using the projector for an extended period of time, disconnect the power plug from the wall outlet and remove the batteries from the remote control.
- Page 12 This may occur due to pressure through use over a long period and may lead to poor health. Charge rechargeable 3D Eyewear by connecting it to the USB port of a Panasonic TV that supports 3D video or a Panasonic-certified charger using the charging cable included with the 3D Eyewear.
- Page 13 Read this first! end of Read this first To remove the battery Remote Control Battery 1. Press the guide and lift the cover. 2. Remove the batteries. ENGLISH - 13...
-
Page 14: Precautions For Use
Precautions for use Precautions for use ■ Be sure to use the projector after removing the packaging material, such as the fastening tapes and protective sheet. Take proper care when disposing of the removed packaging material. Cautions when transporting z Ensure that the supplied lens cover is attached when transporting. z Hold the bottom of the projector when transporting. - Page 15 Precautions for use ■ When using an infrared communications device If you use infrared communication devices (such as infrared cordless headphones or an infrared wireless mic), communication problems (such as noise) may occur. Therefore, use such devices in a location far away enough from the projector so as to have no effect, or install the receiver of the device in a location that is not struck by light from the projector.
-
Page 16: Cautions On Use
The lamp contains mercury. When disposing of used lamp units, contact your local authorities or dealer for correct methods of disposal. Pursuant to at the directive 2004/108/EC, article 9(2) Panasonic Testing Centre Panasonic Service Europe, a division of Panasonic Marketing Europe GmbH Winsbergring 15, 22525 Hamburg, F.R. Germany 16 - ENGLISH... -
Page 17: Accessories
TY-EW3D3ME *1*2 *1: If you do not have a Panasonic 3D TV, use a charger that has a USB2.0 port for charging your Eyewear. The recommended charger is Apple USB Power Adapter for iPhone. *2: The code at the end of the model number of 3D Eyewear may differ depending on the country of purchase. -
Page 18: About Your Projector
About your projector About your projector Remote control ■ Top Remote control signal transmitter Send remote control signal. Point at the remote control receiver part on the projector when using. ■ Front Adjust the zoom and focus. With the <MAIN POWER> switch of the Display the [PICTURE] menu or projector turned <ON>, switch between [ADVANCED MENU] menu. -
Page 19: Projector Body
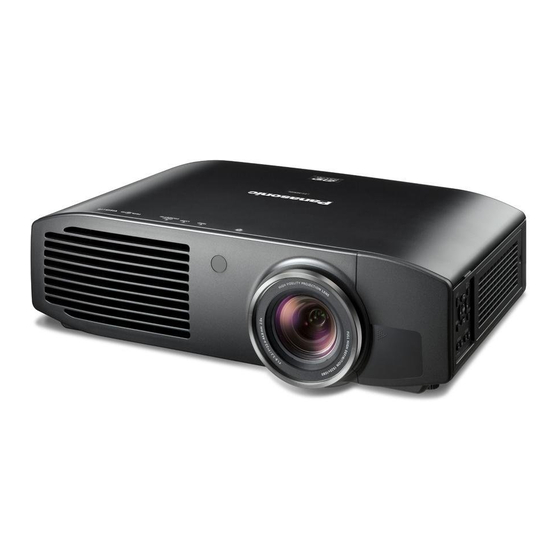
About your projector Projector body ■ Top and front view Color sensor window However, this projector is not equipped with a color sensor. Temperature indicator Lamp indicator Power indicator Air exhaust port Remote control signal receiver Air intake port / Air filter cover Projection lens Control panel... - Page 20 About your projector ■ Back and bottom view Security slot The security slot is compatible with the Air intake port Kensington MicroSaver Security System. Connecting terminals AC IN Connect the power cord included. Main power Front adjustable Switch the projector on/off. feet Screw up/down to adjust the projection...
-
Page 21: Setting Up
Setting up Setting up Projection method You can use any of the following 4 projection methods. Select a projection method suitable for the position of the projector. For projection method settings, see [PROJECTION METHOD] in the [OPTION] menu. ( page 78) ■... -
Page 22: Projection Related
Setting up Projection related Install the projector with reference to the figure below and the projection distance. You can adjust the display size and display position according to the screen size and screen position. Projection screen Screen Screen L (LW - LT) Projection distance (m) Screen height (m) Screen width (m) -
Page 23: Front Adjustable Feet And Throwing Angle
Setting up Projection screen size 16:9 in 2.35:1 size Minimum distance Maximum distance Height position Screen Diagonal (SD) (LW) (LT) 1.27 m (50") 1.16 m (3' 10") 2.37 m (7' 9") -0.25 to 0.75 m 1.52 m (60") 1.40 m (4' 7") 2.85 m (9' 4") -
Page 24: Lens Shift And Positioning
Setting up Lens shift and positioning If the projector is not positioned right in front of the center of the screen, you can adjust the projected image position by moving the lens shift dials within the shift range of the lens. ■... - Page 25 Setting up ■ Projector location range The setting position can be adjusted within the following range. See “Projection related” regarding adjustment of the projection screen height (SH) and width (SW). ( page 22) ● Projector setting range when the screen position is fixed Projector Projector setting range (center of lens)
-
Page 26: Connections
Connections Connections Before connecting to the projector z Read and follow the operating and connecting instructions of each peripheral device. z The peripheral devices must be turned off. z If not provided or sold separately with each peripheral device, obtain the connection cables required for system connection in accordance with the device to be connected. -
Page 27: Connecting Example: Hdmi In/Computer In
Connections Connecting example: HDMI IN/COMPUTER IN Computer cable HDMI cable (commercially available) (commercially available) To RGB output To HDMI output Computer Blu-ray player Note z Use an HDMI High Speed cable that conforms to HDMI standards. If a cable that does not meet HDMI standards is used, video may be interrupted or may not be displayed. -
Page 28: Switching The Projector On/Off
Switching the projector on/off Switching the projector on/off Power cord Use the power cord included to prevent removal of the power cord and make sure it is fully inserted into the projector. Make sure the <MAIN POWER> switch is on the <OFF> side before connecting the power cord. Use the power cord included and ensure that it is fully inserted. -
Page 29: Switching On The Projector
Switching the projector on/off Switching on the projector Check external device connections before switching the projector on. Power indicator 1) Connect the power cord to the projector. Attention z Using the projector while the lens cover is attached 2) Connect the power plug to an outlet. causes the device to heat up and can result in a fire. -
Page 30: Switching Off The Power
Switching the projector on/off Switching off the power Carefully check the status of the power indicator before operating. Power indicator 1) - 3) 1) Press the power < / | > button. 4) Press the <OFF> side of the <MAIN POWER>... -
Page 31: Projecting An Image
( page 32) Remove the lens shift cover. z Panasonic recommends that focus adjustment be made z For details, see “Opening the lens shift cover”. after 30 minutes or more have elapsed since picture ... -
Page 32: Remote Control Operation
Remote control operation Remote control operation Selecting the picture mode You can switch to your desired picture mode settings. Press The settings change as follows each time the button is pressed. [NORMAL] [DYNAMIC] [REC709] [GAME] [CINEMA2] [CINEMA1] [D-CINEMA] Note z You can also switch the picture mode settings using the You can operate the projector with the remote control on-screen menu. -
Page 33: Loading A Saved Setting
Remote control operation Loading a saved setting Checks that the waveform for each of the [FULL Y- (brightness), R- (red), G- (green), and SCAN] B- (blue) values for the whole image is Displays the [MEMORY LOAD] menu. within the recommended range. Press Checks that the waveform for each of the Y- (brightness), R- (red), G- (green), and... -
Page 34: Submenu
Remote control operation It may take time for the video to change after switching Submenu input. When the VIERA Link control is enabled, the function Attention menus of external devices can be displayed. z Input a signal noted in the “List of compatible signals”. ... -
Page 35: Viewing 3D Images
[WEAK]. If an external 3D IR Transmitter (optional 3D for viewing. accessory) is connected, set the corresponding [TRIGGER 1/2 SETTING] to [3D SHUTTER OUT]. To enjoy stereoscopic 3D images, Panasonic 3D page 79) Eyewear (optional accessory) is necessary. 3D z When 3D Eyewear is used indoors with fluorescent lights Eyewear is not included with this projector. -
Page 36: Communication Range Of A 3D Ir Transmitter And 3D Eyewear
Rechargeable 3D Eyewear cannot be charged with under the following conditions: this projector. If you do not have a Panasonic 3D TV, - When the distance between the projector and the screen is use a charger that has a USB2.0 port for charging your 6 m (19'8"). -
Page 37: Menu Navigation
Menu navigation Menu navigation Press the ▲▼ buttons to select the Navigating through the menu submenu item you wish to alter, then press the to switch settings/adjust. ■ Operating procedure z For items where the setting is switched or that have a bar scale, the menu screen disappears and only the selected item (individual adjustment screen) is Press... -
Page 38: Menu List
Menu navigation ■ [POSITION] Menu list ● S-VIDEO IN/VIDEO IN The on-screen menu is used for settings and adjustments on this projector. Default Submenu items Page See “Navigating through the menu” for details of on- setting screen menu operation. ( ... - Page 39 Menu navigation ■ [LANGUAGE] ■ [LENS CONTROL] Language Default Submenu items Page setting [DEUTSCH] [ZOOM/FOCUS] — [FRANÇAIS] [LENS MEMORY LOAD] — [ESPAÑOL] [LENS MEMORY SAVE] — [ITALIANO] [LENS MEMORY EDIT] — [PORTUGUÊS] [AUTO SWITCHING] — [SVENSKA] [H-AREA POSITION] [NORSK] [V-AREA POSITION] [DANSK] [LEFT MASKING AREA] [POLSKI]...
-
Page 40: [Picture] Menu
[PICTURE] menu [PICTURE] menu [CONTRAST] Select [PICTURE] from the main menu of “Navigating through the menu” ( page 37), You can adjust the contrast of the colors. and choose an item from the submenu. z After selecting an item, adjust the image with the buttons. -
Page 41: [Colour Temperature]
[PICTURE] menu Select item with the ▲▼ buttons, and [COLOUR TEMPERATURE] adjust with the buttons. z Pressing the ▲▼ buttons on the screen during You can adjust the color temperature if the white adjustment switches to the [H-SHARPNESS] or areas of the projected image are bluish or reddish. [V-SHARPNESS] adjustment screen. - Page 42 [PICTURE] menu ■ [MONITOR POSITION] z [AUTO ADJUST] adjusts based on the 0% and 100% standard signal within the screen, so correct adjustment You can set the display position of the input waveform cannot be performed if standard signals are not displayed during the FULL SCAN display.
- Page 43 [PICTURE] menu Adjust [FULL SCAN(Y)] / [SINGLE LINE Adjust [FULL SCAN(B)] / [SINGLE LINE SCAN(Y)]. SCAN(B)]. z Set on [PICTURE] and use the buttons to z Set on [ADVANCED MENU] and use the adjust [BRIGHTNESS] and then [CONTRAST]. buttons to adjust [BRIGHTNESS B] and then [CONTRAST B].
-
Page 44: [Split Adjust]
[PICTURE] menu [SPLIT ADJUST] Note z By selecting the [SPLIT ADJUST MODE] with the ▲▼ buttons and switching [NORMAL] to [REVERSE], the You can perform image adjustment for some screen displayed on the left during split screen display [PICTURE] menu items while displaying a certain can be reversed and adjusted. -
Page 45: [Advanced Menu]
[PICTURE] menu Note [ADVANCED MENU] z You cannot adjust menu items that are displayed in grey during split adjustment. You can perform more detailed image adjustment z The [KEYSTONE] of [POSITION] becomes inactive manually. during split adjustment. Press the <ENTER> button z When a 3D signal is being input (including converting 2D z The [ADVANCED MENU] menu is displayed. - Page 46 [PICTURE] menu Press the ▲▼ buttons to select [START z If you select [R: 0.00 G: 0.00 B: 0.00] under [GAMMA PRESET], and then press the <ENTER> ADJUSTMENT], and press the <ENTER> button, the [GAMMA PRESET] menu is displayed. button. Press the ▲▼...
- Page 47 [PICTURE] menu b. Adjusting the input level (only [Y]) Display the currently selected z Press the <SUB MENU> button to set the point number. The number is in [OPERATION MODE] to [INPUT ADJUSTMENT]. the order of 1 to 15 starting from POINT See the operation guide to check if the current the lower input level.
- Page 48 [PICTURE] menu c. Adjusting the output level d. Matching the output level to the reference point z In the screen displayed in 4), press the ▲ ▼ z If you press the ▲▼ buttons, you can adjust buttons to place the cursor on [REFERENCE the output level of the currently selected point.
- Page 49 [PICTURE] menu Example) When the data for gamma preset value Note +0.40 and gamma preset value 0.00 is combined z If you change the output level of the reference point from ADVANCED ADJUST the preset value, a confirmation screen is displayed when 1.
- Page 50 [PICTURE] menu ●Initialize the gamma adjustment results ●Adjusting the gamma (when [SIMPLE] is selected for [ADJUSTMENT MODE]) GAMMA ADJUSTMENT Press the ◄► buttons to select [SIMPLE]. PICTURE ADJUSTMENT MODE ADVANCED1 GAMMA HIGH POSITION GAMMA MID GAMMA ADJUSTMENT GAMMA LOW PICTURE ADJUSTMENT MODE SIMPLE LANGUAGE...
- Page 51 [PICTURE] menu ■ [CONTRAST] ■ [MPEG NR] You can adjust color temperatures centering mainly on You can eliminate the noise that occurs upon projection for white. videos that use MPEG compression. R (RED), G (GREEN), B (BLUE) Weaken Strengthen z Setting range: 0 to +3 Default [ADVANCED MENU] menu items Attention...
- Page 52 [PICTURE] menu ■ [COLOUR MANAGEMENT] Press the <ENTER> button. z [CURSOR] menu (B) and the color selected (C) For the selected [PICTURE MODE], you can adjust a are displayed. selected color individually with [CURSOR] mode or adjust the six color components (Red, Green, Blue, Cyan, CURSOR Magenta, Yellow) with [RGBCMY] mode.
- Page 53 [PICTURE] menu z Adjusting the selected color (when Press the ▲▼ buttons to select a menu item and the ◄► buttons to adjust each [RGBCMY] is selected for [ADJUSTMENT item level. MODE]) Select the color from 6 different color types ([RED], Adjust the vividness of the [GREEN], [BLUE], [CYAN], [MAGENTA], [YELLOW]) and color.
- Page 54 [PICTURE] menu z Managing the stored logs created through the z Managing the stored logs created through the [CURSOR] mode [RGBCMY] mode ADJUSTMENT MODE : CURSOR ADJUSTMENT MODE : RGBCMY PICTURE MODE : NORMAL PICTURE MODE : NORMAL COLOUR TINT BRIGHTNESS COLOUR TINT BRIGHTNESS POINT1 POINT2...
- Page 55 [PICTURE] menu ●Saving a log setting as a profile ●Deleting a profile Save a log setting as a profile. Press the ▲▼ buttons to select [PROFILE You can save up to six profiles. DELETE] and press the <ENTER> button. Press the ▲▼ buttons to select [PROFILE z The [PROFILE DELETE] menu is displayed.
- Page 56 [PICTURE] menu ●Changing a profile name ●Loading saved profiles Select a saved profile (color adjustment result). The Press the ▲▼ buttons to select [PROFILE adjustment values set in the profile are applied to the NAME CHANGE] and press the <ENTER> [PICTURE MODE] menu and recorded.
- Page 57 [PICTURE] menu ■ [CINEMA REALITY] ■ [TV-SYSTEM] You can switch the automatic image synchronizer on/off for [Only during VIDEO or S-VIDEO signal input] 24 frames a second images, such as movies. The projector automatically detects the input signal but if an unstable signal is input, set the system manually.
-
Page 58: [Picture Memory]
[PICTURE] menu ■ [RGB/YC [RGB/YP [PICTURE MEMORY] Set this to [AUTO] under normal conditions. If images are not displayed correctly when this is set to [AUTO], set Press the <ENTER> button. either [RGB] or [YC ], [YP ] in accordance with the z The [PICTURE MEMORY] menu is displayed. -
Page 59: Signal Mode
[PICTURE] menu ■ [MEMORY NAME CHANGE] Press the ▲▼◄► buttons to select [OK]. You can edit the memory name settings. Press the <ENTER> button. MEMORY NAME CHANGE Note PICTURE MEMORY1 MEMORY2 z Press the <ENTER> button without entering any text to POSITION MEMORY3 keep the default name ([MEMORY1-16]). -
Page 60: [Position] Menu
[POSITION] menu [POSITION] menu [DOT CLOCK] Select [POSITION] from the main menu in “Navigating through the menu” ( page 37) and This reduces noise that occurs when projecting choose an item from the submenu. striped patterns. z After selecting an item, use the to adjust the screen position. -
Page 61: [Aspect]
[POSITION] menu ■ COMPONENT signal (YC [ASPECT] COMPUTER (RGB) signal You can switch the image aspect ratio manually when [1 080/60i, 1 080/50i, 1 080/60p, 1 080/50p, needed. 1 080/24p, 720/60p, 720/50p input] Aspect ratio depends on signals. [16:9] [S16:9] [H-FIT] Switch settings Switch settings... - Page 62 [POSITION] menu Aspect Screen Aspect Screen Input signal Input signal [ZOOM] Enlarges while preserving original ratio. The projected video may be clipped in [4:3] some cases, but Projects at 4:3. Projection screen Projection screen the video can be accurately reproduced. Use the ▲...
-
Page 63: [Wss]
[POSITION] menu [WSS] Note z You can correct the distortion ± 30 degrees from the vertical plane. However, if there is overcorrection, the In the European broadcasting system, if the input image quality may deteriorate and become blurry. For a signal contains an identification signal, WSS better quality image, installing the projector with minimum automatically switches the aspect ratio to the required... -
Page 64: [3D Settings] Menu
[3D SETTINGS] menu [3D SETTINGS] menu [3D INPUT FORMAT] Either press the <3D> button on the remote control or select [3D SETTINGS] from the In the case that 3D video is not displayed in 3D main menu in “Navigating through the menu” correctly, set the 3D format of the projector to the ... - Page 65 [3D SETTINGS] menu Note z If a setting other than [AUTO] is selected when the input is switched to HDMI, [3D INPUT FORMAT] is changed to [AUTO] when actions such as turning the power of/on, switching input, or switching the signal are performed on the connected device.
-
Page 66: [Left/Right Swap]
[3D SETTINGS] menu ■ Adjustment method [LEFT/RIGHT SWAP] Press the ▲▼ buttons and select the Switch to [SWAPPED] if you feel discomfort when item for adjusting the right eye video. watching a 3D video with 3D Eyewear. z The video for the left eye and for the right eye are shown on the left and the right. - Page 67 [3D SETTINGS] menu ■ [3D WAVEFORM MONITOR] ■ [PICTURE BALANCE MEMORY] For easy balance adjustment, use a video device that Press the <ENTER> button. supports 3D and displays the video output (brightness) z [PICTURE BALANCE MEMORY] menu is level of the 3D video for the left and right eye respectively. displayed.
- Page 68 [3D SETTINGS] menu ●[PICTURE BALANCE MEMORY DELETE] Press the ▲▼◄► buttons to specify the location of the required character to enter You can delete the details saved using [PICTURE and press the <ENTER> button. BALANCE MEMORY SAVE]. z You can enter up to 16 characters. z Select [ALL DELETE] and press the <ENTER>...
-
Page 69: [2D To 3D]
[3D SETTINGS] menu ●[PICTURE BALANCE MEMORY NAME [2D TO 3D] CHANGE] 2D video is quasi converted to 3D video and shown. You can edit the memory name of details saved using Select from [MODE1] to [MODE5] based on [PICTURE BALANCE MEMORY SAVE]. preference. -
Page 70: [3D Eyewear Brightness]
[3D SETTINGS] menu [3D EYEWEAR BRIGHTNESS] [3D IR TRANSMITTER] This enables adjusting the brightness for the 3D This controls the 3D IR Transmitter embedded in this Eyewear. projector. Switch settings Switch settings Switch settings Switch settings [OFF] [WEAK] [LIGHT] [DARK] [STRONG] [MEDIUM] [NORMAL]... -
Page 71: [3D Viewing Monitor]
[3D SETTINGS] menu The lines on the parallax adjustment monitor in [3D VIEWING MONITOR] [Mode1] display the following content: In the 3D video the depth of field effects in front of and White Default display for video without into the screen are adjusted while confirming on the (dashed line) parallax monitor display. -
Page 72: [3D Motion Remaster]
[3D SETTINGS] menu The gauge display of the one-dimensional display on Note the parallax adjustment monitor of [Mode2] or [Mode3] z In [Mode2] and [Mode3], the display position can be indicates the following content: moved left and right with the ◄ ► buttons. z In [Mode3], the detection level of the parallax can be Displays the maximum value of the into Blue gauge... -
Page 73: [Lens Control] Menu
[LENS CONTROL] menu [LENS CONTROL] menu Note Select [LENS CONTROL] from the main menu z The [ZOOM/FOCUS] test pattern displayed on last use is of “Navigating through the menu” ( page 37), displayed first. and choose an item from the submenu. z If the projector or the screen is angled, the top and z After selecting an item, adjust the screen position bottom edges of the image will become out of focus. -
Page 74: [Lens Memory Save]
[LENS CONTROL] menu [LENS MEMORY SAVE] Note z Press the <ENTER> button without entering any text to keep the default name ([LENS MEMORY1-6]). This enables saving zoom and focus adjustment z This lens memory function is not 100% guaranteed to position, horizontal video position, vertical video reproduce adjustments. -
Page 75: [Auto Switching]
[LENS CONTROL] menu ■ [LENS MEMORY NAME CHANGE] [AUTO SWITCHING] Press the ▲▼ buttons to select the This function automatically identifies wide signal memory name to be changed. 16:9/4:3 and automatically recalls memory settings that have been set for each screen size. LENS MEMORY NAME CHANGE *1 : Wide signals are 2.35:1, 2.40:1, 2.50:1, 2.55:1 aspect LENS MEMORY1... -
Page 76: [H-Area Position]
[LENS CONTROL] menu [H-AREA POSITION] [RIGHT MASKING AREA] You can move the frame area horizontally, such as You can place a blank (mask) area in the right side edge on aligning the right or left frame edge to the screen the screen. -
Page 77: [Option] Menu
[OPTION] menu [OPTION] menu ■ [OSD DESIGN] Select [OPTION] from the main menu of Set the color of the on-screen menu. “Navigating through the menu” ( page 37), and choose an item from the submenu. z Select item and use the ◄ ► buttons to switch the Switch settings Switch settings settings. -
Page 78: [Startup Logo]
[OPTION] menu [STARTUP LOGO] [FRAME RESPONSE] You can switch the Panasonic logo that is displayed Switch this setting when a progressive signal is when starting up the projector on/off. input and you wish to reduce the time taken from the signal being input to the video being displayed on the screen. -
Page 79: [Trigger 1/2 Setting]
[OPTION] menu Press the ▲▼◄► buttons to select [TRIGGER 1/2 SETTING] the input/output function and press the <ENTER> button. You can set the function for each trigger terminal. The trigger terminals for this projector are used as z Function settings both the input/output terminal for the trigger function Unable to transmit the and the output terminal for the external 3D IR... -
Page 80: [Sleep]
[OPTION] menu • [BLANK] [SLEEP] When [BLANK] is activated, output is 12 V. If the setting is released, output is 0 V. Set the time for the power to be automatically turned • [RS-232C COMMAND LINK] off. Receives commands ( page 103) from external device and outputs 12 V. -
Page 81: [Lamp Power]
[OPTION] menu [LAMP POWER] [VIERA LINK SETTINGS] Switch the lamp intensity according to the usage Configure VIERA Link. environment of the projector and its intended use. Press the <ENTER> button. z The [VIERA LINK SETTINGS] confirmation message is displayed. Switch settings Switch settings VIERA LINK SETTINGS PICTURE... - Page 82 [OPTION] menu ■ [POWER ON LINK] ■ [STANDBY POWER SAVE] Specify whether or not to switch the power of the projector Specify whether or not to switch the mode of external on when it is in standby by operating external devices. devices to the mode with minimum power consumption when the projector is set to standby.
-
Page 83: [Other Functions]
[OPTION] menu ■ INPUT SELECT [OTHER FUNCTIONS] The input can be switched directly. Press the <ENTER> button. HDMI signal from the device z The [OTHER FUNCTIONS] menu is displayed. [HDMI 1/2/3 IN] connected to HDMI IN 1/HDMI IN 2/HDMI IN 3. OTHER FUNCTIONS RGB signal and PICTURE... -
Page 84: [Initialize All]
[OPTION] menu [INITIALIZE ALL] Return all settings to factory defaults. When you perform this operation, the projector is set to the standby state for initialization. Press the ▲▼ buttons to select [INITIALIZE ALL], and press and hold the <ENTER> button for three seconds or more. -
Page 85: Temp And Lamp Indicators
TEMP and LAMP Indicators TEMP and LAMP Indicators Managing the indicated problems If a problem should occur with the projector, the lamp indicator <LAMP> and/or temperature indicator <TEMP> will illuminate or flash. Check the indicator status and deal with problems as follows. Attention z When switching off power to deal with problems, ensure that you follow the procedure in “Switching off the power”. - Page 86 TEMP and LAMP Indicators ■ Lamp indicator <LAMP> Indicator Illuminated red Flashing red status Time to replace the lamp unit. Illuminates when the lamp unit has reached its maximum usage Lamp circuit failure, abnormal function or lamp unit Problem period of 3 800 hours (when [LAMP POWER] is damaged.
-
Page 87: Care And Replacement
Care and replacement Care and replacement ■ Air filter unit Before cleaning the projector / If too much dust accumulates in the air filter the internal replacing components temperature of the projector cannot be maintained at the normal level. A confirmation message is displayed on the screen, and at the same time <TEMP>... - Page 88 Care and replacement Attach the air filter unit to the projector. z Attach the air filter unit to the projector using the reverse of the procedure in 2). * Insert the air filter unit into the projector in the direction of the arrow engraved into the air filter frame ( until it clicks into place.
-
Page 89: Component Replacement
Care and replacement Component replacement ■ Air filter and electrostatic filter The air filter should be replaced when cleaning is ineffective. A replacement air filter / electrostatic filter is available separately (service component). Contact your dealer for the optional air filter and electrostatic filter. Also, please replace the air filter and electrostatic filter when replacing the lamp unit. - Page 90 Care and replacement ■ When to replace the lamp unit The lamp unit is a consumable component. Brightness decreases according to duration of usage, so periodical replacement of the lamp unit is necessary. A rough estimate for the usage period is 4 000 hours, but depending on the characteristics of individual lamps, usage conditions, periods of continuous use, and environmental conditions etc., the lamp may cease to illuminate prior to reaching 4 000 hours of use.
- Page 91 Care and replacement ■ Lamp unit replacement procedure Use a Philips screwdriver to unscrew the lamp cover fixing screw (one) until it becomes loose, and then remove the Attention lamp cover. z Once a lamp unit has exceeded its lifespan of 4 000 * Slowly remove the lamp cover from the projector.
- Page 92 Care and replacement 11) Remove the air filter cover. Catches z Using a Phillips screwdriver to turn the fixing screw Air filter frame of the air filter cover until loose and remove the cover. Air filter cover fixing Air filter (black) screw Electrostatic filter (white)
- Page 93 Care and replacement 20) Press the <MENU> button to display the menu screen and select [OPTION] with the ▲▼ buttons. 21) Press the <ENTER> button and select [LAMP RUNTIME] with the ▲▼ buttons. 22) Hold the <ENTER> button down for 3 seconds.
-
Page 94: Troubleshooting
Troubleshooting Troubleshooting Re-confirm these points. See the relevant page for details. Problem Cause Page z The power cord may not be connected. z The <MAIN POWER> switch is turned <OFF>. Power does not turn z The wall outlet may not be supplying electricity. —... -
Page 95: Ceiling Mount Bracket Safeguards
Ceiling mount bracket safeguards Ceiling mount bracket safeguards z When mounting the projector on the ceiling, use the Panasonic specified ceiling mount bracket (model no.: ET-PKA110H (for high ceilings) and ET-PKA110S (for low ceilings)). z Installation work of the ceiling mount bracket should only be carried by a qualified technician. -
Page 96: Using Viera Link
When connecting the projector and a “VIERA Link” compatible device, connect to the HDMI 1/2/3 input terminal. z With regards to Panasonic products other than this projector, check the manual for the device to be connected regarding description for “VIERA Link”. -
Page 97: Viera Link "Hdavi Control
As such, its operation with other manufacturers’ equipment that supports HDMI CEC cannot be guaranteed. z Please refer to individual manuals for other manufacturers’ equipment supporting Link function. z About applicable Panasonic equipment, consult your local Panasonic dealer. ENGLISH - 97... - Page 98 Using VIERA Link ■ Using [VIERA LINK MENU] Use the menu of the device. z You can use the controls of the projector as You can control some functions of the connected device well as the buttons on the remote control. (The with the controls or remote control of this projector.
- Page 99 The image or sound may not be available for the first few seconds after the input mode is switched. z HDAVI Control 5 is the latest Panasonic standard (current as of September, 2012) for HDAVI Control compatible devices.
-
Page 100: Technical Information
*2 : VESA CVT-RB (Reduced Blanking) compatible. Note z The number of display dots for the PT-AT6000E display is 1 920 x 1 080. A signal with a different resolution will be projected after converting the resolution to match the projector display. -
Page 101: Supported 3D Video Signal List
Technical information Supported 3D video signal list When [3D INPUT FORMAT] is set to [AUTO], the 3D signals supported by this projector are the HDMI signals in the table below. Format of 3D video signals Mode FRAME PACKING SIDE BY SIDE TOP AND BOTTOM 750 (720)/60p ○*... -
Page 102: Serial Terminal
Technical information Serial terminal The serial port on the connector panel of the projector conforms to the RS-232C interface specification, so the projector can be controlled by a personal computer connected to this port. ■ Connection D-sub 9 pin (male) Serial terminal (female) Computer ■... - Page 103 Technical information ■ Cable specifications (When connected to a personal computer) Projector PC (DTE) ■ Control commands Commands available when controlling this projector from a computer are as follows. <Operation commands> Command Control contents Remarks POWER ON In standby mode, all commands other than the PON command are ignored. The PON command is ignored during lamp on control.
- Page 104 Technical information Command Control contents Remarks KEYSTONE Displays the individual adjustment screen of [KEYSTONE]. Displays the individual adjustment screen of the [ADVANCED] menu operated immediately ADVANCED MENU before this operation. Operates AUTO SETUP. AUTO SETUP COMPUTER IN (RGB) signals only (exc. movie based signals) ...
- Page 105 Technical information <Inquiry commands> Command Control contents Parameter Power status 000 = OFF 001 = ON CP1 = COMPONENT IN SVD = S-VIDEO IN INPUT signal status VID = VIDEO IN HD1 = HDMI 1 IN HD2 = HDMI 2 IN HD3 = HDMI 3 IN RG1 = COMPUTER IN NOR = NORMAL DYN = DYNAMIC 709 = REC709 DCN = D-CINEMA PICTURE MODE...
-
Page 106: Specifications
Specifications Specifications The following table describes the specifications of the projector. Power supply AC 100-240 V 50 Hz/60 Hz Less than 310 W Power consumption During standby (when fan is stopped): 0.08 W Amps 3.8 A - 1.5 A Panel size (diagonal) 18.7 mm (0.74") Aspect ratio 16 : 9... - Page 107 Specifications S-VIDEO IN 1 set, Mini DIN 4p Y: 1.0 V [p-p], C: 0.286 V [p-p], 75 Ω VIDEO IN 1 set, RCA pin jack 1.0 V [p-p], 75 Ω 1 set, D-sub HD 15-pin (female) (RGB signal) R.G.B. 0.7 V [p-p], 75 Ω G.SYNC 1.0 V [p-p], 75 Ω...
-
Page 108: Dimensions
Specifications Dimensions Unit: mm (5 1/2") (18 1/2") 108 - ENGLISH... -
Page 109: Index
Index Index Numbers HIGH ALTITUDE MODE ......80 RGB/YC ..........58 H-POSITION ..........60 RGB/YP ..........58 2D TO 3D ..........69 RIGHT MASKING AREA ......76 3D Eyewear ..........36 3D EYEWEAR BRIGHTNESS ....70 INPUT GUIDE .......... 77 3D INPUT FORMAT ......... - Page 110 Note for the battery symbol (bottom two symbol examples): This symbol might be used in combination with a chemical symbol. In this case it complies with the requirement set by the Directive for the chemical involved. Web Site : http://panasonic.net/avc/projector/ © Panasonic Corporation 2012 M0912KM0 -KI...
Need help?
Do you have a question about the PT-AT6000E and is the answer not in the manual?
Questions and answers