
Related Manuals for Shoprider 888WNLM


Summary of Contents for Shoprider 888WNLM
- Page 1 Mid-wheel Powerchair USER MANUAL Models: 6Runner 10” (888WNLM) 6Runner 14” (888WNLL) 6Runner 10” (888WNLM) 6Runner 14” (888WNLL)
-
Page 2: Table Of Contents
ELECTROMAGNETIC INTERFERENCE FROM RADIO WAVES ....5 POWERED CHAIR ELECTROMAGNETIC INTERFERENCE (EMI) SAFETY INSTRUCTIONS ............... 6-7 FEATURE GUIDE ................8-9 GETTING TO KNOW YOUR SHOPRIDER…………………………………… 10-11 ............12 THE JOYSTICK CONTROLLER (VSI) LOCKING / UNLOCKING THE JOY STICK CONTROLLER……………………............14 DRIVE/FREEWHEEL MECHANISM DRIVING YOUR POWERCHAIR ............. -
Page 3: Introduction
This manual contains important information regarding the safe use of your Shoprider Powerchair. Please read this manual carefully and thoroughly before using your Powerchair and make sure you understand all the instructions. -
Page 4: Emi Warning
EMI WARNING Electromagnetic Interference (EMI) from Radio Wave Sources Powered electric chairs may be susceptible to electromagnetic interference, which is a kind of interfering electromagnetic energy (EM) emitted from sources such as radio stations, TV stations, amateur radio (HAM) transmitters, two-way radios and cellular phones. -
Page 5: Powered Chair Electromagnetic Interference (Emi)
Powered Chair Electromagnetic Interference (EMI) Because EM energy rapidly becomes more intense the closer one moves to the transmitting antenna (source), the EM fields from hand- held radio sources (transceivers) are of special concern. It is possible to unintentionally bring high levels of EM energy very close to the Powerchair’s control system while using these devices. -
Page 6: Safety Instructions
Safety Instructions Please use your Powerchair to enhance your active lifestyle. With increased mobility, please observe a few rules to ensure safe operation of your Powerchair. So please… Do not drive the Powerchair without reading this manual. Do not exceed the safe climbing maximum angle (Fig. 6-7). Do not use the joystick in an erratic manner when going up or down an incline. - Page 7 Important Notes The Shoprider Powerchair is designed to assist in your individual mobility needs. Any usage outside of the guidelines in this manual may result in damage to the chair or injury to the user or third party.
-
Page 8: Feature Guide
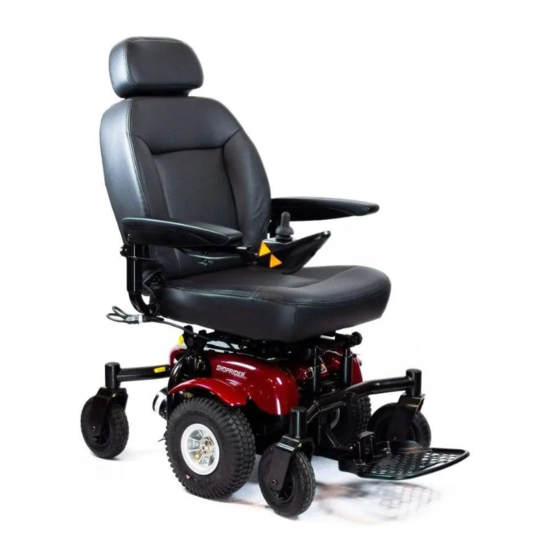
Feature Guide 6Runner – 888WNLL Figure 1 Figure 1 Removable Armrests with Width, Height & Angle Adjustment (Flips Up for Easy Sideways Transfer) Programmable VSI Joystick Controller with Adjustable speed & Battery Life Indicator. Charging Port Deluxe Reclining Captain Seat Adjustable Length, Height, Angle Foot Plate Front Castor Assy (7”... - Page 9 Feature Guide 6Runner – 888WNLM Figure 2 Figure 1 Removable Armrests with Width, Height & Angle Adjustment (Flips Up for Easy Sideways Transfer) VSI Joystick Controller with Adjustable speed & Battery Life Indicator Charging Port Deluxe Reclining Captain Seat Standard Angle Adjustable Foot Plate Front Castor Assy (7”...
-
Page 10: Getting To Know Your Shoprider
Getting to Know Your Shoprider Powerchair The Seat and Arm Assemblies The seat is built for comfort, style, and stability. Your seat comes with a reclining back for comfort. The flip-up arm-rests are especially built for easy side access for getting in and out of your 6Runner, with the greatest of ease. - Page 11 Seat Height Adjustment And Easy Battery Access 1. Tightening knob that allows for the seat to be removed if needed, if not, there is a pivot point that allows for the seat to move up and away from the base. 2.
-
Page 12: The Joystick Controller (Vsi)
8. Charging Port: This is the primary charging port for the 6Runner. When using this charging port only plug into this port with the qualified Shoprider charger certified by the original manufacturer of the Powerchair. This port should not be used as a power supply for any other electrical devices. -
Page 13: Locking / Unlocking The Joy Stick Controller
Locking/Unlocking the VSI Joystick ****PLEASE NOTE**** LOCK MODE: The VSI controller may be programmed to have a lock mode function enabled to prevent unauthorized use. The locking method is achieved through a sequence of key presses and joystick movements, as detailed below. To lock Powerchair controller: ... -
Page 14: Drive/Freewheel Mechanism
*** DO NOT PUT INTO DRIVE MODE WHILE MOTORS ARE SPINNING **** 6Runner – 888WNLM & 888WNLL The drive/freewheel levers are found toward the rear of the Powerchair, both have yellow colored handles. These levers will allow you to disengage the drive mechanism (When the levers are pulled out away from the unit) the Powerchair is in freewheel mode. -
Page 15: Driving Your Powerchair
Driving Your Shoprider Powerchair Ramps, Slopes and Cambers The indoor/outdoor Powerchair has the ability to negotiate ramps, slopes and cambers of a low to medium gradient. It is of the utmost importance that the following points are observed: 1. Never attempt to go up or down an incline which has a rough, wet or slippery surface (loose gravel, tree roots, wet grass, polished floor, etc.) - Page 16 Caring for Your Shoprider 6Runner Powerchair First Time Use Prior to using your Powerchair for the first time, you must charge the batteries fully (refer to Battery Charging Procedures). Charging may take up to 12 hours. Charging the batteries completely prior to first time use will benefit battery efficiency and battery life.
-
Page 17: Batteries And Battery Charging
Batteries & Battery Charging Batteries The Shoprider 6Runner Powerchairs are designed to operate on two 12 volt/36Ah or 75Ah sealed lead acid aka SLA (AGM or gel-cell type) maintenance free batteries. The life of the batteries may be affected by temperature, terrain, weight of user, driving methods, and care of batteries. -
Page 18: Caring For Your Powerchair
6Runner 888WNLM, 888WNLL How to Charge Your Unit 1) Plug the A/C power cord into the wall. Plug the male three-pin charger plug into the female 3-pin receiver located on the bottom of the VSI. Turn the switch on if applicable (8Amp charger only) The battery charger’s light indicator is as follows:... -
Page 19: Troubleshooting
8 Bars flash your Shoprider Provider. Possible joystick fault. Be sure joystick is at center when 7 Bars flash controller is turned on. Call your Shoprider Provider. 6 Bars flash Battery charger connected. Unplug charger. Right-hand motor wiring fault. Check connections. Call 5 Bars flash your Shoprider Provider. -
Page 20: Specifications
1.34 hpx2 (Reference Only) As a part of our ongoing product improvement initiative, Shoprider reserves the right to change specifications and design without prior notice. All specifications and dimensions are approximate. Includes the anti-tip wheel. The actual driving range varies with the factors shown below:... -
Page 21: Quarterly Inspection
QUARTERLY INSPECTION For your own safety, quarterly inspection and service on the product has to be performed and signed by an authorized provider. Maintenance records (below) should be kept at all times. The manufacturer / distributor / vendor will be indemnified from any product liability claim if the above maintenance / service requirement are not met. -
Page 22: Disclaimer
Warranty is only valid when genuine Shoprider parts are used. All modifications on the Powerchair, unless approved and authorized by Shoprider will automatically invalidate the warranties. -
Page 23: Notes
Model Name- Provider Stamp Serial No.:________________________ Shoprider Mobility Products, Inc. www.shoprider.com 800-743-0772 5/4/2007...
Need help?
Do you have a question about the 888WNLM and is the answer not in the manual?
Questions and answers