Advertisement
Available languages
Available languages
Quick Links
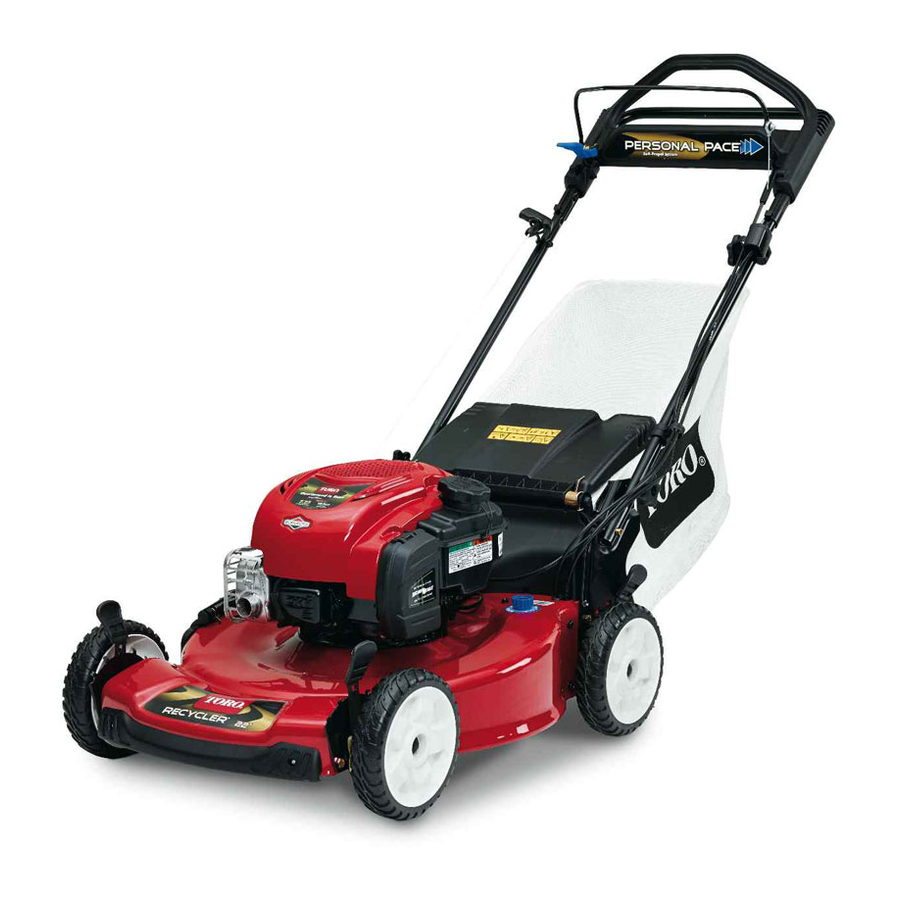
22in Recycler
Model No. 20066—Serial No. 280000001 and Up
Model No. 20067—Serial No. 280000001 and Up
Model No. 20089—Serial No. 280000001 and Up
Introduction
Read this information carefully to learn how to operate
and maintain your product properly and to avoid injury
and product damage. You are responsible for operating
the product properly and safely.
You may contact Toro directly at www.Toro.com for
product and accessory information, help finding a
dealer, or to register your product.
Whenever you need service, genuine Toro parts, or
additional information, contact an Authorized Service
Dealer or Toro Customer Service and have the model
and serial numbers of your product ready. Figure 1
identifies the location of the model and serial numbers
on the product.
Figure 1
1. Model and serial number plate
Write the product model and serial numbers in the space
below:
Model No.
Serial No.
This manual identifies potential hazards and has
safety messages identified by the safety alert symbol
(Figure 2), which signals a hazard that may cause serious
© 2008—The Toro® Company
8111 Lyndale Avenue South
Bloomington, MN 55420
Lawn Mower
®
injury or death if you do not follow the recommended
precautions.
1. Safety alert symbol
This manual uses 2 words to highlight information.
Important calls attention to special mechanical
information and Note emphasizes general information
worthy of special attention.
The engine exhaust from this product
contains chemicals known to the State of
California to cause cancer, birth defects,
Important: This engine is not equipped with a
spark arrester muffler. It is a violation of California
Public Resource Code Section 4442 to use or operate
the engine on any forest-covered, brush-covered, or
grass-covered land. Other states or federal areas
may have similar laws.
This spark ignition system complies with Canadian
ICES-002.
The enclosed
for information regarding the US Environmental
Protection Agency (EPA) and the California
Emission Control Regulation of emission systems,
maintenance, and warranty. Replacements may be
ordered through the engine manufacturer.
For models with stated engine horsepower, the gross
horsepower of the engine was laboratory rated by the
engine manufacturer in accordance with SAE J1940.
As configured to meet safety, emission, and operating
Register at www.Toro.com.
Form No. 3360-519 Rev A
Operator's Manual
Figure 2
Warning
CALIFORNIA
Proposition 65 Warning
or other reproductive harm.
Engine Owner's Manual
Original Instructions (EN)
is supplied
Printed in the USA
All Rights Reserved
Advertisement

Related Manuals for Toro 20066


Summary of Contents for Toro 20066
- Page 1 Important calls attention to special mechanical additional information, contact an Authorized Service information and Note emphasizes general information Dealer or Toro Customer Service and have the model worthy of special attention. and serial numbers of your product ready. Figure 1...
- Page 2 requirements, the actual engine horsepower on this class • Never leave a running machine unattended. of lawn mower will be significantly lower. • Stop the engine and wait until the blade comes to a complete stop before cleaning the machine, Safety removing grass catcher, or unclogging the discharge guard.
- Page 3 Children Tragic accidents can occur if the operator is not alert to Exhaust contains carbon monoxide, an the presence of children. Children are often attracted to odorless, deadly poison that can kill you. the machine and the mowing activity. Never assume that children will remain where you last saw them.
- Page 4 Safety and Instructional Decals Important: Safety and instruction decals are located near areas of potential danger. Replace damaged decals. Manufacturer’s Mark 1. Indicates the blade is identified as a part from the original machine manufacturer. 94-8072 104-7403 104-7402 Models 20067 and 20113 only Models 20067 and 20113 only 104-7953 Electric-start models only...
- Page 5 112-8759 1. Warning—read the 4. Cutting/dismemberment Operator’s Manual. hazard of hand or foot, 115-2896 mower blade—stay away Model 20089 only from moving parts. 2. Thrown object 5. Cutting/dismemberment hazard—keep bystanders hazard of hand or foot, a safe distance from the mower blade—do not machine.
- Page 6 Setup Important: Remove and discard the protective plastic sheet that covers the engine. 1. Unfolding the Handle Procedure Folding or unfolding the handle improperly can damage the cables, causing an unsafe operating Figure 5 condition. • Do not damage the cables when folding or unfolding the handle.
- Page 7 4. Charging the Battery 30W detergent oil with an API service classification of SF, SG, SH, SJ, SL, or higher.) 3. Install the dipstick securely. Procedure Important: Change the engine oil after the first Electric-start models only 5 operating hours ;...
- Page 8 Figure 10 1. Grass bag 3. Battery charger (electric-start models Figure 11 only) 2. Side discharge chute Checking the Engine Oil Level Operation Service Interval: Before each use or daily 1. Remove the dipstick, wipe it clean, and fully install Filling the Fuel Tank the dipstick (Figure 12).
- Page 9 Adjusting the Cutting Height Adjusting the cutting height may bring you into contact with the moving blade, causing serious injury. • Stop the engine and wait for all moving parts to stop. • Do not put your fingers under the housing when adjusting the cutting height. If the engine has been running, the muffler will be hot and can severely burn you.
- Page 10 Starting the Engine 1. Hold the blade control bar against the handle (Figure 14). Figure 16 Note: If the mower still does not start, contact an Authorized Service Dealer. Using the Self-propel Drive To operate the self-propel drive, simply walk with your Figure 14 hands on the upper handle and your elbows at your 1.
- Page 11 Check the grass bag frequently. If it is damaged, install a new Toro replacement bag. If the side discharge chute is on the mower, remove it and lock the side discharge door (refer to Removing the Side Discharge Chute) before bagging the clippings.
- Page 12 Side-discharging the Clippings Use the side discharge for cutting very tall grass. If the bag is on the mower, remove it before side-discharging the clippings. The blade is sharp; contacting the blade can result in serious personal injury. Stop the engine and wait for all moving parts to stop before leaving the operating position.
- Page 13 • For best performance, install a new blade before the cutting season begins. • Replace the blade when necessary with a Toro replacement blade. Cutting Grass • Cut only about a third of the grass blade at a time.
- Page 14 • Be aware of a potential fire hazard in very dry – Set the cutting height on the front wheels one conditions, follow all local fire warnings, and keep notch lower than the rear wheels. For example, the mower free of dry grass and leaf debris. set the front wheels at 2 inches (51 mm) and the rear wheels at 2-3/8 inches (60 mm).
- Page 15 Preparing for Maintenance Replacing the Air Filter 1. Stop the engine and wait for all moving parts to stop. Service Interval: Every 25 hours 2. Disconnect the spark plug wire from the spark plug 1. Use a screw driver to open the air filter cover and hook it onto the retaining post (Figure 23) (Figure 24).
- Page 16 Charging the Battery Service Interval: Every 25 hours Electric-start models only Warning CALIFORNIA Proposition 65 Warning Battery posts, terminals, and related accessories contain lead and lead compounds, chemicals known to the State of California to cause cancer and reproductive harm. Wash hands after handling.
- Page 17 Lubricating the Wheel Gears Service Interval: Yearly 1. Remove the wheel bolts on the rear wheels and remove the rear wheels. 2. Apply a lubricating oil to the inner and outer sides of the gear as shown in Figure 29. Figure 30 4.
- Page 18 Cleaning the Mower ratchet or wrench and tighten the bolt securely. This bolt is very difficult to overtighten. Service Interval: Before each use or daily Adjusting the Self-propel Drive Cable The mower may dislodge material from under Whenever you install a new self-propel cable or if the mower housing.
- Page 19 Folding the Handle Storage Store the mower in a cool, clean, dry place. Folding or unfolding the handle improperly can Preparing the Mower for damage the cables, causing an unsafe operating Storage condition. • Do not damage the cables when folding or unfolding the handle.
- Page 20 Instructions for Obtaining Warranty Service If you think that your Toro Product contains a defect in materials or workmanship, or if a normal, able-bodied adult can no longer start your product’s engine in one or two pulls, follow this procedure 1.
- Page 21 Servicio Técnico Autorizado o con Asistencia al Cliente información general que merece una atención especial. Toro, y tenga a mano los números de modelo y serie de su producto. Figura 1 identifica la ubicación de los números de modelo y serie en el producto.
- Page 22 En los casos en que se indica la potencia en cv del • No utilice la máquina si usted está descalzo o lleva motor, la potencia bruta del motor fue calculada en el sandalias. Lleve siempre calzado fuerte. laboratorio por el fabricante del motor, con arreglo a lo •...
- Page 23 pueden causar caídas y resbalones. La hierba alta • Retire un equipo con motor de gasolina del camión puede ocultar obstáculos. o del remolque y repóstelo en el suelo. Si esto no es posible, reposte el equipo desde un recipiente •...
- Page 24 • Las cuchillas del cortacésped están muy afiladas. • No cambie los ajustes del regulador del motor ni Envuelva la cuchilla o lleve guantes, y extreme las haga funcionar el motor a una velocidad excesiva. precauciones al manejar las cuchillas. •...
- Page 25 112-8759 1. Advertencia – Lea el 4. Peligro de Manual del operador. corte/desmembramiento 115-2896 de mano o pie por la Modelo 20089 solamente cuchilla del cortacésped – no se acerque a las piezas en movimiento. 2. Peligro de objetos 5. Peligro de arrojados –...
- Page 26 Montaje Importante: Retire y deseche la hoja protectora de plástico que cubre el motor. 1. Cómo desplegar el manillar Procedimiento Si pliega o despliega el manillar de forma incorrecta, pueden dañarse los cables, creando Figura 5 unas condiciones de operación inseguras. •...
- Page 27 4. Cómo cargar la batería máxima: 0,59 l (20 onzas), tipo: SAE 30W, aceite detergente con clasificación de servicio API SF, SG, SH, SJ, SL o superior.) Procedimiento 3. Vuelva a colocar la varilla firmemente. Modelos de arranque eléctrico solamente Importante: Cambie el aceite del motor Consulte Cómo cargar la batería en la sección de...
- Page 28 El producto Figura 10 1. Bolsa de recortes 3. Cargador de la batería (modelos de arranque eléctrico solamente) 2. Conducto de descarga lateral Figura 9 1. Palanca de altura de corte 7. Varilla/tapón de llenado de aceite 2. Tapón del depósito de 8.
- Page 29 Verificación del nivel de aceite Operación del motor Cómo llenar el depósito de Intervalo de mantenimiento: Cada vez que se utilice combustible o diariamente 1. Retire la varilla, límpiela, y vuelva a colocarla (Figura 12). La gasolina es altamente inflamable y explosiva. Un incendio o una explosión provocado(a) por la gasolina puede causarle quemaduras a usted y a otras personas.
- Page 30 Ajuste de la altura de corte Al ajustar la altura de corte, usted podría tocar la cuchilla en movimiento, lo que podría causarle graves lesiones. • Pare el motor y espere a que se detengan todas las piezas en movimiento. •...
- Page 31 Cómo arrancar el motor 1. Sujete la barra de control de la cuchilla contra el manillar (Figura 14). Figura 16 Nota: Si el cortacésped todavía no arranca, póngase en contacto con el Servicio Técnico Autorizado. Uso de la transmisión autopropulsada Figura 14 Para activar el sistema de autopropulsión, simplemente 1.
- Page 32 Compruebe frecuentemente la bolsa de recortes. Si está dañada, instale una bolsa de recambio Toro nueva. Si el conducto de descarga lateral está instalado en el cortacésped, retírelo y cierre con llave la puerta de descarga lateral (consulte Cómo retirar el conducto de...
- Page 33 Descarga lateral de los recortes Utilice la descarga lateral al cortar hierba muy alta. Si la bolsa está instalada en el cortacésped, retírela antes de proceder a la descarga lateral de los recortes. La cuchilla está muy afilada; cualquier contacto con la cuchilla puede causar lesiones personales graves.
- Page 34 • Sustituya la cuchilla cuando sea preciso por una cuchilla de repuesto Toro. Cómo cortar la hierba • Corte solamente un tercio de la hoja de hierba cada vez. No corte con un ajuste inferior a 51 mm (2 pulg.) a menos que la hierba sea escasa, o a finales...
- Page 35 • Siegue solamente hierba u hojas secas. La hierba – Caminar más despacio mientras siega. mojada y las hojas mojadas tienden a pegarse al – Elevar la altura de corte del cortacésped. suelo, y pueden atascar el cortacésped o hacer que se –...
- Page 36 Preparación para el Cambio del filtro de aire mantenimiento Intervalo de mantenimiento: Cada 25 horas 1. Pare el motor y espere a que se detengan todas las 1. Utilice un destornillador para abrir la tapa del filtro piezas en movimiento. de aire (Figura 24).
- Page 37 Cómo cargar la batería Intervalo de mantenimiento: Cada 25 horas Modelos de arranque eléctrico solamente Advertencia CALIFORNIA Advertencia de la Propuesta 65 Los bornes, terminales y otros accesorios de la batería contienen plomo y compuestos de plomo, productos químicos reconocidos por el Estado de California como causantes de cáncer y daños reproductivos.
- Page 38 Lubricación de los engranajes 3. Utilice un bloque de madera para inmovilizar la cuchilla (Figura 30). de las ruedas Intervalo de mantenimiento: Cada año 1. Retire los pernos de las ruedas traseras y retire las ruedas traseras. 2. Aplique aceite lubricante al interior y al exterior de los engranajes (ver Figura 29).
- Page 39 Limpieza del cortacésped Importante: Un perno apretado a 82 Nm (60 pies-libra) queda muy firme. Mientras sujeta Intervalo de mantenimiento: Cada vez que se utilice la cuchilla con un bloque de madera, aplique o diariamente toda su fuerza a la llave y apriete el perno firmemente.
- Page 40 Almacenamiento una zona sin calefacción. Si es necesario almacenar el cortacésped en un lugar con calefacción, debe cargar la batería cada 90 días (modelos de arranque Almacene el cortacésped en un lugar fresco, limpio y eléctrico solamente). seco. Cómo plegar el manillar Preparación del cortacésped para el almacenamiento Si pliega o despliega el manillar de forma...
- Page 41 Después del almacenamiento 1. Retire la bujía y haga girar el motor rápidamente usando el arrancador para eliminar el exceso de aceite del cilindro. 2. Instale la bujía y apriétela con una llave dinamométrica a 20 Nm (15 pies-libra). 3. Cargue la batería durante 24 horas (modelos de arranque eléctrico solamente).
- Page 42 Notas:...
- Page 43 Notas:...
- Page 44 Instrucciones para obtener asistencia bajo la garantía Si usted cree que su Producto Toro tiene un defecto de materiales o mano de obra, o si un adulto de capacidad normal ya no puede arrancar el motor de su producto con uno o dos intentos, siga este procedimiento 1.
Need help?
Do you have a question about the 20066 and is the answer not in the manual?
Questions and answers