Advertisement
Quick Links
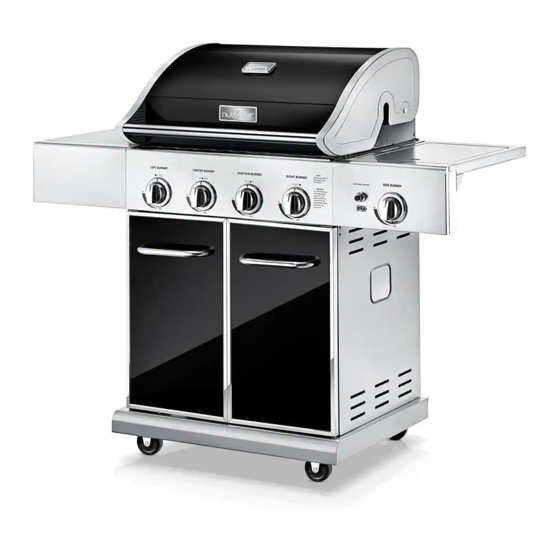
NCGRIL2
Stainless Steel 4-Burner Propane Gas Grill
with Side Burner, 52,000 BTU Grilling Capacity
TABLE OF CONTENTS
For Your Safety
YOU MUST READ THIS OWNER'S GUIDE BEFORE
OPERATING YOUR GAS GRILL.
DANGER
2
DANGER: Indicates an imminently hazardous situation which,
3
if not avoided, will result in death or serious injury.
4
WARNING
5
WARNING: Indicates an potentially hazardous situation
which, if not avoided, could result in death or serious injury.
6
CAUTION
7
CAUTION: Indicates a potentially hazardous situation or
17
unsafe practice which, if not avoided, may result in minor or
moderate injury.
19
35
DANGER
If you smell gas:
1. Shut o gas to the appliance.
2. Extinguish any open ame.
3. Open lid.
4. If odor continues, keep away from the appliance and
immediately call your gas supplier or your re department.
WARNING
1. Do not store or use gasoline or other ammable liquids or
vapors in the vicinity of this or any other appliance.
2. An LP cylinder not connected for use shall not be stored in the
vicinity of this or any other appliance.
Questions? Issues?
We are here to help!
Phone: (1) 718-535-1800
Email: jb@pyleusa.com
Advertisement

Related Manuals for NUTRICHEF NCGRIL2


Summary of Contents for NUTRICHEF NCGRIL2
-
Page 1: Table Of Contents
NCGRIL2 Stainless Steel 4-Burner Propane Gas Grill with Side Burner, 52,000 BTU Grilling Capacity YOU MUST READ THIS OWNER’S GUIDE BEFORE TABLE OF CONTENTS OPERATING YOUR GAS GRILL. DANGER For Your Safety DANGER: Indicates an imminently hazardous situation which, Installation Safety Precautions if not avoided, will result in death or serious injury. -
Page 2: Installation Safety Precautions
Installation Safety Precautions • Please read this User’s Manual in its entirety before using the grill. • Failure to follow the provided instruction can result in seriously bodily injury and/or property damage. • Some parts of this grill may have sharp edges. Please wear suitable protective gloves. •... -
Page 3: Parts Diagram
PARTS DIAGRAM 39 38 BEFORE ASSEMBLY NOTICE: Once you have unpacked the grill according to the STOP SHEET instructions, check all grill parts against the pictures on this and the following two pages. If you parts are missing or damaged, visit the web page: www.NutrichefKitchen.com www.NutrichefKitchen.com... -
Page 4: Assembly
BEFORE ASSEMBLY BEFORE ASSEMBLY ASSEMBLY CAREFULLY READ AND PERFORM ALL ASSEMBLY INSTRUCTIONS ON THE FOLLOWING PAGES. Tools Required: • Adjustable wrench (not provided) • Screwdriver (not provided) • 7/16” Combination wrench (not provided) • The following hardware is provided in blister pack for convenient use. - Page 5 Swivel Caster (Part No. 40900213) Standard Caster (Part No. 40900214) Swivel Caster with Brake (Part No. 40900212) 2. Cart • To attach side panels, align side panel leg holes with leg holes on each side of bottom shelf. M6X13 screw Qty: 4 pcs M4X10 screw Qty: 20 pcs...
- Page 6 Hinge Screws 4. Grill Head to Cart • This step requires two people to lift and position grill head onto cart. • If not already done, remove the tie wraps and M4X10 screw M6 compression washer M6X13 screw packing material from regulator hose, side Qty: 4 pcs Qty: 4 pcs Qty: 4 pcs...
- Page 7 6. Attach the Right Side Shelf • Remove the SIDE BURNER TRIVET from the side burner. • Attach the RIGHT FASCIA to the RIGHT SIDE SHELF with M5X10 screw M5 at washer two M5x10mm bolts and two M5 at washers. M6X13 screws Qty: 2 pcs Qty: 2 pcs...
- Page 8 7-a. Fit the Side Burner and Hose Assembly (have someone to assist) a. Unscrew and remove the two front bolts and washers holding the side burner in place. Note: Do not loosen the electrode screw. b. Loosen the side burner from the side shelf. c.
-
Page 9: Warranty
8. Heat Di users, Cooking Grates and Warming Rack • Place heat diffusers over burners. Diffusers will fit in firebox in either direction. Fit tabs in firebox front through slots in di user tips. Fit di user tips over tabs in rebox rear. •... -
Page 10: Use And Care
2. A service technician to clean or maintain this appliance, or to instruct the user in correct appliance installation, operation and maintenance. 3. Service calls to correct appliance installation not performed by Nutrichef authorized service agents, or to repair problems with house fuses, circuit breakers, house wiring, and plumbing or gas supply systems resulting from such installation. - Page 11 LP Tank Removal, Transport And Storage • LP cylinder valve must have: • Type 1 outlet compatible with regulator or grill. • Turn OFF all control knobs and LP tank valve. • Safety relief valve. Turn coupling nut counterclockwise by hand only - do •...
- Page 12 LP Tank Exchange Connecting Regulator To The LP Tank • Many retailers that sell grills offer you the option of 1. LP tank must be properly secured onto grill. replacing your empty LP tank through an exchange (Refer to assembly section.) service.
- Page 13 connection. Correct before proceeding by Contacting us at support@pyleusa.com for replacement parts. 4. Brush soapy solution onto areas where bubbles are shown in picture below: Never remove threaded ori ce at end of valve. Hold coupling nut and regulator as shown for proper connection to LP tank valve.
- Page 14 CAUTION • Apartment Dwellers: Check with management to learn the requirements • Putting out drip fires by closing the lid is not possible. and re codes for using an LP gas grill in your Grills are well ventilated for safety reasons. apartment complex.
- Page 15 Match lighting instruction Turning Grill O Do not lean over grill while lighting. Turn all knobs to OFF position. Turn LP cylinder o . 1. Open lid during lighting. When you are nished grilling, raise the grill lid while 2. Place match into match holder (hanging on the left allowing the grill to fully cool.
- Page 16 CAUTION Re-seasoning – Re-season grates when rust spots appear on grate surface. When re-seasoning grates, SPIDER ALERT! soap may be used with hot water to clean grates. IMPORTANT: Always ensure that the venturi burner After cleaning, dry grates thoroughly with a cloth towel. tubes are clean.
- Page 17 Storing Your Grill VERY IMPORTANT: Burner tubes must reengage valve openings. • Clean cooking grates. See illustrations below. • Store in dry location. • When LP cylinder is connected to grill, store outdoors in a well-ventilated space and out of reach of children. •...
- Page 18 Indirect Cooking Instructions How To Tell If Meat Is Grilled Thoroughly • Always cook with the lid closed. • Meat and poultry cooked on a grill often browns very • Once burners are lit, extinguish an individual burner fast on the outside. Use a meat thermometer to be by turning its knob to OFF.
-
Page 19: Troubleshooting
TROUBLESHOOTING Problem Possible Cause Prevention/Solution Gas leaking from Turn o gas at LP cylinder or at source on natural gas systems. If the hose is cracked cracked/cut/burned • Damaged hose or cut but not burned, simply replace valve/hose/regulator. If the hose is burned, hose. - Page 20 Problem Possible Cause Prevention/Solution • Check for gas in LP cylinder. • Out of gas. •Turn off knobs, wait 30 seconds and light grill. If flames are still low, turn off • Excess flow valve tripped. Sudden drop in gas knobs and LP cylinder valve.
Need help?
Do you have a question about the NCGRIL2 and is the answer not in the manual?
Questions and answers