
Related Manuals for Roto FS Kempton


Summary of Contents for Roto FS Kempton
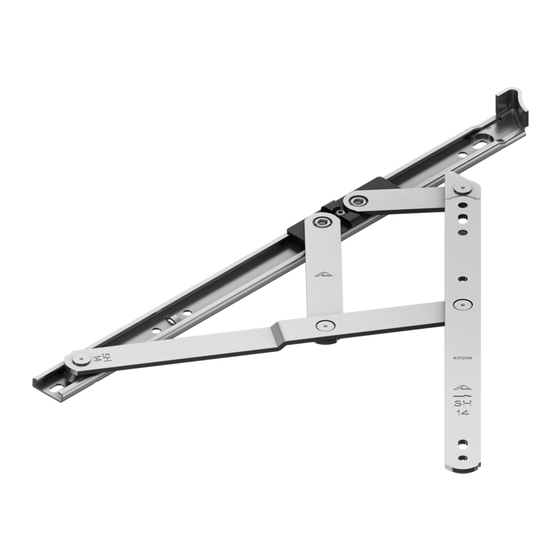
- Page 1 Window and Door Technology Roto FS Kempton Stainless-steel friction stays for outward opening windows Installation, maintenance and operation instructions for aluminium, PVC and timber profiles...
- Page 2 Contact Contact Roto Frank Fenster- und Türtechnologie GmbH Wilhelm-Frank-Platz 1 70771 Leinfelden-Echterdingen Germany Phone +49 711 7598 0 Fax +49 711 7598 253 info@roto-frank.com www.roto-frank.com 2 · 11 / 2020 · IMO_539_EN_v0 Roto FS Kempton Subject to change.
-
Page 3: Table Of Contents
Use............................17 2.5.3 Ambient conditions.......................18 Operation..........................Information on the product................... General hardware characteristics..................21 Opening restrictor......................... Requirements for the frame and sash...................23 Profile assessment........................ Application ranges........................ 3.5.1 Top-Hung selection.......................24 Subject to change. Roto FS Kempton IMO_539_EN_v0 · 11 / 2020 · 3... - Page 4 Profile related packer......................Screw connections....................... Top-Hung..........................5.6.1 Drilling and routing dimensions.................... 44 5.6.1.1 Calculation of first drilling position..................44 5.6.1.2 Drilling dimensions....................... 45 5.6.2 Frame............................ 46 5.6.2.1 Friction stay...........................46 4 · 11 / 2020 · IMO_539_EN_v0 Roto FS Kempton Subject to change.
- Page 5 5.8.3.2 Frame component.........................70 5.8.3.3 Joining the sash and frame components................71 5.8.4 Anti-jemmy device........................ 72 5.8.4.1 Sash component........................72 5.8.4.2 Frame component.........................73 5.8.5 Concealed lock........................74 5.8.5.1 Combinations........................74 Subject to change. Roto FS Kempton IMO_539_EN_v0 · 11 / 2020 · 5...
- Page 6 7.3.1 Lubrication points......................... 82 Performance test........................82 Repair............................83 Dismantling......................Hardware components......................Transport....................... Transporting elements and hardware................... Storing the hardware......................Disposal.........................87 10.1 Disposing of packaging......................10.2 Disposing of hardware......................87 6 · 11 / 2020 · IMO_539_EN_v0 Roto FS Kempton Subject to change.
-
Page 7: General Information
The information and instructions contained in this document refer to products belonging to the Roto hardware system named on the front page. All steps must be completed in sequence. The following documents apply in addition to these instructions: Outward opening catalogue: CTL_90 ■... -
Page 8: Symbols
(Cross-)reference Result Unnumbered step Numbered step Numbered second-level step Requirement 1.4 Pictographs Symbol Meaning Sash rebate width Sash rebate height Sash weight Aluminium Timber 8 · 11 / 2020 · IMO_539_EN_v0 Roto FS Kempton Subject to change. -
Page 9: Product Features
1.6 Abbreviations Abbreviation Meaning approx. approximately Catalogue DIN L / R DIN left / right Screw head diameter T&T Tilt&Turn Sash external width Sash external height Rebate clearance Subject to change. Roto FS Kempton IMO_539_EN_v0 · 11 / 2020 · 9... -
Page 10: Target Groups
End users The “end users” target group includes all individuals who use the installed windows and balcony doors. 10 · 11 / 2020 · IMO_539_EN_v0 Roto FS Kempton Subject to change. -
Page 11: Target Groups' Obligation To Give Instructions
The contents of this document are copyright-protected. This content can be used when working with the hardware. Any other use is not permitted without written permission of the manufacturer. Subject to change. Roto FS Kempton IMO_539_EN_v0 · 11 / 2020 · 11... -
Page 12: Limitation Of Liability
The warranty only covers original Roto components. We reserve the right to make technical changes as part of improvement to performance characteristics and further development. - Page 13 Discharge any humidity present in the room air to the outside using condensation dryers. Establish a ventilation plan for more complex construction projects if necessary. Provide adequate ventilation during holiday periods as well. Subject to change. Roto FS Kempton IMO_539_EN_v0 · 11 / 2020 · 13...
-
Page 14: Security
PVC, aluminium or steel, or corresponding combinations of the aforementioned materials. When closing a sash and locking the hardware, the gasket counter force must generally be overcome. 14 · 11 / 2020 · IMO_539_EN_v0 Roto FS Kempton Subject to change. -
Page 15: Misuse
Open window sashes, and windows that are unlocked or placed in venti- lation positions, only have a shielding effect. They do not meet the following requirements: Joint sealing ■ Subject to change. Roto FS Kempton IMO_539_EN_v0 · 11 / 2020 · 15... -
Page 16: Stipulated Use For End Users
Only use hardware combinations that have been approved by the hardware manufacturer. Only use original accessories or those that have been approved by the hardware manufacturer. Note the product-related documentation from page 16 · 11 / 2020 · IMO_539_EN_v0 Roto FS Kempton Subject to change. -
Page 17: Basic Safety Information
Gripping between the sash and frame when closing windows and balcony doors poses the risk of crushing injuries. When closing windows and balcony doors, never grip between the sash and frame and always exercise caution. Subject to change. Roto FS Kempton IMO_539_EN_v0 · 11 / 2020 · 17... -
Page 18: Ambient Conditions
This can lead to corrosion on the hardware and mould growth on the frame or wall. Ambient conditions that are too 18 · 11 / 2020 · IMO_539_EN_v0 Roto FS Kempton Subject to change. -
Page 19: Operation
Avoid exposing the open sash to wind. Close and lock the window and balcony door sash in windy or draughty condi- tions. Subject to change. Roto FS Kempton IMO_539_EN_v0 · 11 / 2020 · 19... - Page 20 (reveal) may pose a risk of minor injuries and cause property damage Refrain from pressing the sash against the edge of an opening (reveal). 20 · 11 / 2020 · IMO_539_EN_v0 Roto FS Kempton Subject to change.
-
Page 21: Information On The Product
HX TH 22 1100 – 1500 100 kg 20° HX TH 24 1200 – 1800 120 kg 20° HX TH 26 1450 – 2500 180 kg 20° Subject to change. Roto FS Kempton IMO_539_EN_v0 · 11 / 2020 · 21... -
Page 22: Opening Restrictor
To help prevent the window moving by itself or to limit the opening width. ■ Operation In daily use, the sash with the RH version of the Roto FS Kempton opening restrictor is opened until the slider hits the end point. INFO Choose a sash opening width that will not cause self-jamming of the sash. -
Page 23: Requirements For The Frame And Sash
INFO Individual profile assessment by Roto customer service is recommended. 3.4 Profile assessment Roto generally recommends carrying out profile assessments in the form of theoretical and practical tests. Roto customer service can assist with this upon request. Subject to change. -
Page 24: Application Ranges
= Use of an opening restrictor (opening width 300 mm) INFO Select the scissor stay size so that the SRH is in the middle of the application range. 24 · 11 / 2020 · IMO_539_EN_v0 Roto FS Kempton Subject to change. - Page 25 This becomes worse the opening angle and as the opening angle and width increase. width increase. Recommended: use of an Recommended: use of an opening restrictor opening restrictor Subject to change. Roto FS Kempton IMO_539_EN_v0 · 11 / 2020 · 25...
-
Page 26: Side-Hung Selection
300 – 650 mm Sash weight 35 kg Depending on the profile system, only a limited installation sequence may be possible and the brake might not be adjustable. 26 · 11 / 2020 · IMO_539_EN_v0 Roto FS Kempton Subject to change. -
Page 27: Hx Th 12
The opening width may need to be limited to reduce the operating forces. Depending on the format and weight, it may be necessary to use an opening restrictor as an additional brake. Subject to change. Roto FS Kempton IMO_539_EN_v0 · 11 / 2020 · 27... -
Page 28: Hx Th 22
Depending on the profile system, only a limited installation sequence may be possible and the brake might not be adjustable. [10] The opening width may need to be limited to reduce the operating forces. 28 · 11 / 2020 · IMO_539_EN_v0 Roto FS Kempton Subject to change. -
Page 29: Side-Hung
≙ 2.5 kg Assumption: sash profile weight is 2 kg/m. Application range Basic security Sash rebate width 300 – 400 mm Sash rebate height max. 1500 mm Subject to change. Roto FS Kempton IMO_539_EN_v0 · 11 / 2020 · 29... -
Page 30: Hx Sh 10
Assumption: sash profile weight is 2 kg/m. Application range Basic security Sash rebate width 350 – 450 mm Sash rebate height max. 1500 mm Sash weight 40 kg Opening angle max. 87° 30 · 11 / 2020 · IMO_539_EN_v0 Roto FS Kempton Subject to change. -
Page 31: Hx Sh 12
Assumption: sash profile weight is 2 kg/m. Application range Basic security Sash rebate width 380 – 570 mm Sash rebate height max. 1500 mm Sash weight 40 kg Opening angle max. 87° Subject to change. Roto FS Kempton IMO_539_EN_v0 · 11 / 2020 · 31... -
Page 32: Hx Sh 14
Assumption: sash profile weight is 2 kg/m. Application range Basic security Sash rebate width 500 – 600 mm Sash rebate height max. 1500 mm Sash weight 40 kg Opening angle max. 87° 32 · 11 / 2020 · IMO_539_EN_v0 Roto FS Kempton Subject to change. - Page 33 Assumption: sash profile weight is 2 kg/m. Application range Basic security Sash rebate width 550 – 750 mm Sash rebate height max. 1500 mm Sash weight 45 kg Opening angle max. 87° Subject to change. Roto FS Kempton IMO_539_EN_v0 · 11 / 2020 · 33...
-
Page 34: Hardware Overviews
Hardware overviews 4 Hardware overviews The hardware overviews on the following pages are a recommendation on the part of Roto Frank Fenster- und Türtechnologie GmbH. The basic page layout in the hardware overviews chapter firstly shows examples of the combination of individual hardware components, and the associated parts list can be seen on the following pages. -
Page 35: Top-Hung
100 kg 20 Piece(s) 823196 HX TH 24 1200 – 1800 120 kg 10 Piece(s) 823197 HX TH 26 1450 – 2500 180 kg 10 Piece(s) 823198 Subject to change. Roto FS Kempton IMO_539_EN_v0 · 11 / 2020 · 35... -
Page 36: Side-Hung
HX SH 14 500 – 600 40 kg 20 Piece(s) 823190 HX SH 16 550 – 750 45 kg 20 Piece(s) 823191 RH opening restrictor 50 Piece(s) 785746 36 · 11 / 2020 · IMO_539_EN_v0 Roto FS Kempton Subject to change. -
Page 37: Installation
5.1 Processing instructions Friction stay Positioning and rebate clearance The Roto FS Kempton friction stays are designed to be installed between two parallel, fixed surfaces with a ■ correct rebate clearance distance. The retraction mechanism of the friction stays must be placed in the inner corner of the frame rebate unless ■... -
Page 38: General Information On Drill Holes
Opening restrictor Positioning and rebate clearance All Roto FS Kempton opening restrictors are designed to be installed between two parallel, fixed surfaces whose ■ dimensions correspond to the specifications in this document. The scissor stay space between the sash and outer frame or upstand must meet the requirements for opening ■... - Page 39 RC = rebate clearance FgD = frame groove insertion depth A = reference surface Standard values HA = 0, no height adjustment HA = 2.0 with height adjustment. Subject to change. Roto FS Kempton IMO_539_EN_v0 · 11 / 2020 · 39...
-
Page 40: Reference Surfaces
Profiles without frame / sash groove: friction stays can be installed directly. Frame profile with groove [1] Friction stay [2] Packer strip [3] Frame groove [A] Reference surface Frame profile without groove [1] Friction stay 40 · 11 / 2020 · IMO_539_EN_v0 Roto FS Kempton Subject to change. - Page 41 [A] Reference surface Sash profile with groove [1] Friction stay [2] Packer strip [3] Sash groove [A] Reference surface Sash profile without groove [1] Friction stay [A] Reference surface Subject to change. Roto FS Kempton IMO_539_EN_v0 · 11 / 2020 · 41...
-
Page 42: Profile Related Packer
Do not over-tighten screws. Note the torque. Choose a torque that will not deform the hardware and profile. Define profile-specific torques on the basis of the demo assembly. Use the recommended screws. Select the length of the screws according to the profiles used. 42 · 11 / 2020 · IMO_539_EN_v0 Roto FS Kempton Subject to change. - Page 43 15.0 Ø5 19.0 Screws made from austenitic steel have greater corrosion resistance and are therefore suitable for use in the indus- trial sector or in coastal regions. Subject to change. Roto FS Kempton IMO_539_EN_v0 · 11 / 2020 · 43...
-
Page 44: Top-Hung
= 35.4 mm + HA 5.2 “General information on drill holes” from page 38 Standard values HA = 0, no height adjustment HA = 2.0 with height adjustment. 44 · 11 / 2020 · IMO_539_EN_v0 Roto FS Kempton Subject to change. -
Page 45: Drilling Dimensions
248.5 473.5 – 240.5 274.5 322.5 521.5 144.5 322.5 302.5 350.5 623.5 172.5 INFO All mounting holes and grooves must be used for optimum implementation and sealing. Subject to change. Roto FS Kempton IMO_539_EN_v0 · 11 / 2020 · 45... -
Page 46: Frame
The two slots must be positioned above one another. 4. Position the friction stay in the open position on the reference surface 5.3 “Reference surfaces” from page 46 · 11 / 2020 · IMO_539_EN_v0 Roto FS Kempton Subject to change. - Page 47 Drilling depth: ≥ 4 mm Adjustment distance: ±2.0 mm INFO Height adjustment is in the neutral position when delivered, see image. 8. Drill all other holes after aligning the sash. Subject to change. Roto FS Kempton IMO_539_EN_v0 · 11 / 2020 · 47...
-
Page 48: Sash
4. Mark the position of the first slot [5] and predrill it. When using packer strips, the first position may be prespecified. 48 · 11 / 2020 · IMO_539_EN_v0 Roto FS Kempton Subject to change. - Page 49 [6] and predrill it 5.2 “General information on drill holes” from page 6. Drill all other holes after aligning the sash. Subject to change. Roto FS Kempton IMO_539_EN_v0 · 11 / 2020 · 49...
-
Page 50: Joining The Sash And Frame
1. Open the friction stays [1] on the frame [2] as far as possible. 2. Position the friction stays parallel on the sash [3] and fasten with screws [4]. Number of screws from page 45 50 · 11 / 2020 · IMO_539_EN_v0 Roto FS Kempton Subject to change. - Page 51 Installation Top-Hung Joining the sash and frame 3. Undo the screws in the slots on the frame. 4. Align the sash and frame so they are parallel. Subject to change. Roto FS Kempton IMO_539_EN_v0 · 11 / 2020 · 51...
- Page 52 Aluminium profile If the screw fixing is created in the sash profile itself, rivet nuts must be inserted and the scissor stay must be fastened with metric screws. 52 · 11 / 2020 · IMO_539_EN_v0 Roto FS Kempton Subject to change.
-
Page 53: Setting The Brake Force
If the opening width is reduced, it may not be possible to adjust the friction brake, depending on the profile. Set the friction brake before installing the internal opening restrictor. Subject to change. Roto FS Kempton IMO_539_EN_v0 · 11 / 2020 · 53... -
Page 54: Adjusting The Variable End Stop
3. Drill holes. 4. Secure with two screws [4]. Insert screws into all screw holes if possible. 54 · 11 / 2020 · IMO_539_EN_v0 Roto FS Kempton Subject to change. -
Page 55: Side-Hung
Profile with frame groove x = 35.4 mm - FgD Profile without frame groove x = 35.4 mm 5.2 “General information on drill holes” from page 38 Subject to change. Roto FS Kempton IMO_539_EN_v0 · 11 / 2020 · 55... -
Page 56: Drilling Dimensions
125.5 – 163.5 153.5 176.5 218.5 37.5 176.5 269.5 218.5 193.5 191.5 214.5 INFO All mounting holes and grooves must be used for optimum implementation and sealing. 56 · 11 / 2020 · IMO_539_EN_v0 Roto FS Kempton Subject to change. -
Page 57: Frame
5.2 “General information on drill holes” from page 38 5.7.1.2 “Drilling dimensions” 5. Refer to the table from page 56 for the position of the second slot [6] Subject to change. Roto FS Kempton IMO_539_EN_v0 · 11 / 2020 · 57... - Page 58 Installation Side-Hung Frame and predrill it 5.2 “General information on drill holes” from page 6. Drill all other holes after aligning the sash. 58 · 11 / 2020 · IMO_539_EN_v0 Roto FS Kempton Subject to change.
-
Page 59: Sash
4. Mark the position of the first slot [5] and predrill it. When using packer strips, the first position may be prespecified. Subject to change. Roto FS Kempton IMO_539_EN_v0 · 11 / 2020 · 59... - Page 60 [6] 5.2 “General information on drill and predrill it holes” from page 6. Drill all other holes after aligning the sash. 60 · 11 / 2020 · IMO_539_EN_v0 Roto FS Kempton Subject to change.
-
Page 61: Joining The Sash And Frame
The figure shows installation on an aluminium profile. The installation process is the same for timber and PVC profiles. 1. Open the friction stay [1] at the bottom of the sash [2]. Subject to change. Roto FS Kempton IMO_539_EN_v0 · 11 / 2020 · 61... - Page 62 3. Open the friction stay at the top of the sash. 4. Position the friction stay on the frame and fasten with screws. 5. Undo the screws in the slot [5] on the sash. 62 · 11 / 2020 · IMO_539_EN_v0 Roto FS Kempton Subject to change.
- Page 63 Aluminium profile If the screw fixing is created in the sash profile itself, rivet nuts must be inserted and the scissor stay must be fastened with metric screws. Subject to change. Roto FS Kempton IMO_539_EN_v0 · 11 / 2020 · 63...
-
Page 64: Setting The Brake Force
Set the friction brake before installing the internal opening restrictor. 5.8 Accessories INFO The figure shows installation on an aluminium profile. The installation process is the same for timber and PVC profiles. 64 · 11 / 2020 · IMO_539_EN_v0 Roto FS Kempton Subject to change. -
Page 65: Rh Opening Restrictor
Top-Hung: install opening restrictors on the right- and left-hand side. Dimensions 34.6 Ø5.5 Ø6.4 Installation 1. Position the opening restrictor [1] on the sash [2]. 2. Fasten with two screws [3]. Subject to change. Roto FS Kempton IMO_539_EN_v0 · 11 / 2020 · 65... -
Page 66: Frame
If excessive force is used to apply the brake, the individual links may bend. Tighten the threaded pin so that the opening restrictor moves evenly. When unscrewing anticlockwise, ensure that the threaded pin does not fall out. 66 · 11 / 2020 · IMO_539_EN_v0 Roto FS Kempton Subject to change. -
Page 67: Rc Opening Restrictor
RC opening restrictor 5.8.2 RC opening restrictor 5.8.2.1 Sash component Dimensions Installation 1. Position the sash component [1] on the sash [2]. 2. Fasten with two screws [3]. Subject to change. Roto FS Kempton IMO_539_EN_v0 · 11 / 2020 · 67... -
Page 68: Frame Component
Installation Accessories RC opening restrictor 5.8.2.2 Frame component Dimensions Installation 1. Position the frame component [1] in the frame [2]. 2. Fasten with two screws [3]. 68 · 11 / 2020 · IMO_539_EN_v0 Roto FS Kempton Subject to change. -
Page 69: Rd Opening Restrictor
5.8.3 RD opening restrictor 5.8.3.1 Sash component Dimensions 44.5 5.15 199.5 Installation 1. Position the opening restrictor [1] on the sash [2]. 2. Fasten with two screws [3]. Subject to change. Roto FS Kempton IMO_539_EN_v0 · 11 / 2020 · 69... -
Page 70: Frame Component
Accessories RD opening restrictor 5.8.3.2 Frame component Dimensions (100) Ø5.5 Installation 1. Position the frame component [1] in the frame [2]. 2. Fasten with two screws [3]. 70 · 11 / 2020 · IMO_539_EN_v0 Roto FS Kempton Subject to change. -
Page 71: Joining The Sash And Frame Components
If excessive force is used to apply the brake, the individual links may bend. Tighten the threaded pin so that the opening restrictor moves evenly. When unscrewing anticlockwise, ensure that the threaded pin does not fall out. Subject to change. Roto FS Kempton IMO_539_EN_v0 · 11 / 2020 · 71... -
Page 72: Anti-Jemmy Device
Accessories Anti-jemmy device 5.8.4 Anti-jemmy device 5.8.4.1 Sash component Dimensions Installation 1. Position the sash component [1] on the sash [2]. 2. Fasten with two screws [3]. 72 · 11 / 2020 · IMO_539_EN_v0 Roto FS Kempton Subject to change. -
Page 73: Frame Component
Installation Accessories Anti-jemmy device 5.8.4.2 Frame component Dimensions Installation 1. Position the frame component [1] in the frame [2]. 2. Fasten with two screws [3]. Subject to change. Roto FS Kempton IMO_539_EN_v0 · 11 / 2020 · 73... -
Page 74: Concealed Lock
For sash component 32.5 Ø5.2 For frame component Ø5.2 Combination 1 16.5 16.5 16.5 Combination 2 16.5 16.5 16.5 With a larger rebate clearance, fit additional packers. 74 · 11 / 2020 · IMO_539_EN_v0 Roto FS Kempton Subject to change. -
Page 75: Sash Component
With a larger rebate clearance, fit additional packers. 5.8.5.2 Sash component 1. Position the sash component [1] on the sash [2]. 2. Fasten with two screws [3]. Subject to change. Roto FS Kempton IMO_539_EN_v0 · 11 / 2020 · 75... -
Page 76: Frame Component
Installation Accessories Concealed lock 5.8.5.3 Frame component 1. Position the frame component [1] on the frame [2]. 2. Fasten with two screws [3]. 76 · 11 / 2020 · IMO_539_EN_v0 Roto FS Kempton Subject to change. -
Page 77: Operation
Handle position Sash position Meaning Sash in closed position. Sash in opening position. 6.1.2 Top-Hung Handle position Sash position Meaning Sash in closed position. Sash in opening position. Subject to change. Roto FS Kempton IMO_539_EN_v0 · 11 / 2020 · 77... -
Page 78: Fault Assistance
– start from the T&T espagno- lette). □ = May be carried out by a specialist company or the end user ■ = Must be carried out by a specialist company 78 · 11 / 2020 · IMO_539_EN_v0 Roto FS Kempton Subject to change. -
Page 79: Rd Comfort Opening Restrictor
3. Turn the release key anticlockwise by 90° and remove it. Locking 1. Push the arm [1] downwards onto the frame component [2] until a click can be heard. Click Subject to change. Roto FS Kempton IMO_539_EN_v0 · 11 / 2020 · 79... -
Page 80: Maintenance
The manufacturer must draw the attention of builders and end consumers to these maintenance instruc- tions. Roto Frank Fenster- und Türtechnologie GmbH recommends the manufacturer conclude a maintenance agreement with their end users. No legal claims can be derived from the following recommendations; their application is to be based on the specific individual case. -
Page 81: Maintenance Intervals
Observe the applicable directives and national laws. Ease of movement can be improved by lubricating or adjusting the hardware. All functional hardware components must be lubricated on a regular basis. Recommended lubricants Roto NX / NT grease ■ Subject to change. Roto FS Kempton... -
Page 82: Lubrication Points
Check closed windows to ensure that they are leakproof. Locking and unlocking torque max. 10 Nm. The test can be performed on the handle. Have malfunctions remedied by a specialist company. 82 · 11 / 2020 · IMO_539_EN_v0 Roto FS Kempton Subject to change. -
Page 83: Repair
■ accordance with the applicable regulations. Do not perform makeshift repairs on worn or damaged components. ■ Only use original or approved spare parts for repairs. ■ Subject to change. Roto FS Kempton IMO_539_EN_v0 · 11 / 2020 · 83... -
Page 84: Dismantling
Unless otherwise stated, dismantling is performed in reverse order to installation. 8.1 Hardware components Removing hardware components 1. Undo all screw connections. 2. Remove the hardware components. 3. Dispose of the hardware components properly. 84 · 11 / 2020 · IMO_539_EN_v0 Roto FS Kempton Subject to change. -
Page 85: Transport
Claims for damages may only be made within the reclamation period. Use the following transportation means for support when transporting, loading and unloading larger scopes of delivery: Subject to change. Roto FS Kempton IMO_539_EN_v0 · 11 / 2020 · 85... -
Page 86: Storing The Hardware
9.2 Storing the hardware Store all hardware components as follows until they are installed: Dry and protected ■ On a level surface ■ Protected against sunlight ■ 86 · 11 / 2020 · IMO_539_EN_v0 Roto FS Kempton Subject to change. -
Page 87: Disposal
Hand over hardware at local waste collection points or recycling centres. Observe the national regulations on the disposal of recyclable materials. Contact the local authorities if necessary. Subject to change. Roto FS Kempton IMO_539_EN_v0 · 11 / 2020 · 87... - Page 88 70771 Leinfelden-Echterdingen Germany Phone +49 (0) 711 7598 0 +49 (0) 711 7598 253 info @ roto-frank.com www.roto-frank.com From a single source: Optimum hardware systems to meet all challenges Roto Window Hardware systems for windows and balcony doors Roto Sliding...
Need help?
Do you have a question about the FS Kempton and is the answer not in the manual?
Questions and answers