Table of Contents
Advertisement
Advertisement
Table of Contents

Related Manuals for Lowry LDH2002

Summary of Contents for Lowry LDH2002
- Page 1 20L Dehumidifier Model Number: LDH2002 220-240V AC 50/60Hz 440W For Customer Services & Spare Parts please call 0345 209 7461 Opening times: Monday - Friday 8am – 8pm & Saturday 9am – 1pm Or visit us at www.productcare.co.uk PLEASE RETAIN...
-
Page 2: Table Of Contents
CONTENTS Page(s) Safety Instructions and Electrical Safety 3 - 4 Feature Diagram Control Panel Diagram Positioning your Dehumidifier Using your Dehumidifier 8 - 12 Emptying your Dehumidifier Cleaning and Care 14 - 15 Troubleshooting Guarantee and Customer Services Spare Parts Connection to the Mains Supply Notes Specification... -
Page 3: Safety Instructions And Electrical Safety
Safety Instructions Important note: Please read this booklet before installing and switching on this appliance. The manufacturer assumes no responsibility for incorrect installation and usage as described in this booklet. • This model uses natural refrigerant gas as part of its cooling system. This gas is known as R134a (tetrafluoroethane) and is environmentally friendly but can be combustible. - Page 4 Safety Instructions • Do not use in the following locations:- Next to a source of fire. An area where oil is likely to splash. An area exposed to direct sunlight. An area where water is likely to splash. Near a bath, shower or a swimming pool. In a greenhouse.
-
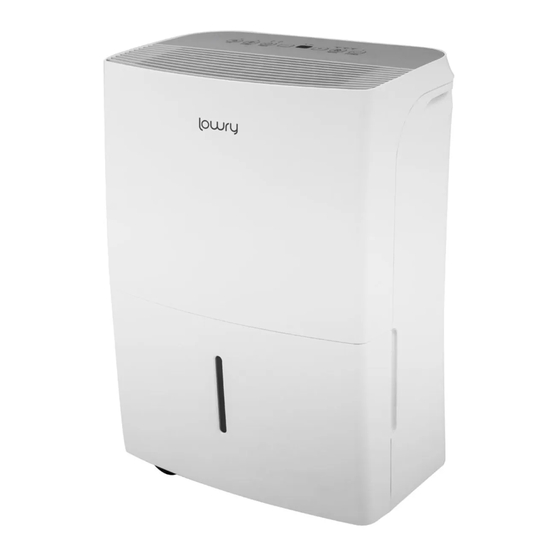
Page 5: Feature Diagram
FEATURE DIAGRAM 1. Control panel 5. Air inlet grille/filter 2. Air outlet grille 6. Power cord storage 3. Water drawer 7. Drain hose outlet 4. Handles For Customer Services & Spare Parts please call 0345 209 7461 Opening times: Monday - Friday 8am – 8pm & Saturday 9am – 1pm Or visit us at www.productcare.co.uk Page 5... -
Page 6: Control Panel Diagram
CONTROL PANEL DIAGRAM Continuous Operation Indicator Smart Dryer Operation Turbo Indicator Dehumidifying Indicator Operation Indicator Timer On/Off Water drawer Ioniser Indicator full Indicator Power Indicator Indicator 1. Power 2. Mode Selection 3. Up Control Pad 4. Display 5. Down Control Pad 6. -
Page 7: Positioning Your Dehumidifier
POSITIONING YOUR DEHUMIDIFIER • This dehumidifier is intended for indoor residential applications only. This dehumidifier should not be used for commercial or industrial applications. • Place the dehumidifier on a smooth, level floor strong enough to support the unit with a full drawer of water. •... -
Page 8: Using Your Dehumidifier
USING YOUR DEHUMIDIFIER When using the dehumidifier for the first time, run the unit in continuous mode for 24 hours Turning the Unit On Remove all packaging and plug the unit into a socket. Ensure the water drawer is correctly positioned and the drain plug is fully inserted into the drain hose outlet on the back of the unit. - Page 9 USING YOUR DEHUMIDIFIER Dryer Mode For maximum extraction rate when drying clothing, use the Dryer Mode. The dryer mode functions like the Continuous Extraction mode but with the additional boost of the Turbo Function. The humidity level is automatically controlled according to the actual room humidity. The unit will run in Drying mode for a maximum of 10 hours, or until the water drawer is full.
- Page 10 USING YOUR DEHUMIDIFIER Setting the Timer Delayed Start The unit must be switched OFF for the Auto Start function to be programmed. With the unit switched off, press the Timer button until the Timer On indicator is illuminated. “0.0” will be displayed. Use the up and down controls to select the desired delayed start time.
- Page 11 USING YOUR DEHUMIDIFIER Other features Auto Shut Off The dehumidifier will shut off automatically under the following conditions: • When the water drawer is full • When the water drawer is removed • When the water drawer is not replaced in the proper position •...
- Page 12 USING YOUR DEHUMIDIFIER Error Codes AS – Humidity Sensor Error. Unplug the unit and plug it back in. if the error continues, call customer service. ES – Temperature Sensor Error – Unplug the unit and plug it back in. If error continues, call customer service.
-
Page 13: Emptying Your Dehumidifier
EMPTYING YOUR DEHUMIDIFIER There are two ways to remove collected water: Collection in the Water Drawer When the water drawer is full, the unit will beep 8 times and will automatically stop running. The Full indicator light will flash and the display will show “P2”. -
Page 14: Cleaning And Care
CLEANING AND CARE Cleaning the Air Filter The air filter is located behind the back of the unit. The Air Inlet Grille/Filter should be checked and cleaned at least every 30 days or more often if necessary. NOTE: DO NOT PUT THE FILTER IN AN AUTOMATIC DISHWASHER To Remove the Air Filter: Push both tabs on the Air Inlet Grille/Filter upwards. - Page 15 CLEANING AND CARE Turn the dehumidifier off and remove the plug from the wall outlet before cleaning. Cleaning the Grille and Case Use water and a mild detergent. Do not use bleach or abrasives. Do not splash water directly onto the main unit. Doing so may cause an electrical shock, cause the insulation to deteriorate, or cause the unit to rust.
-
Page 16: Troubleshooting
TROUBLE SHOOTING Problem What to check • Unit does not start Make sure the dehumidifier’s plug is pushed completely into the socket outlet. • Check the house fuse/circuit breaker box. • Dehumidifier has reached its preset level or drawer is full. •... -
Page 17: Guarantee And Customer Services
GUARANTEE AND CUSTOMER SERVICES At Lowry, we take all our customer feedback seriously. Feel free to contact our Product Care Team, on 0345 209 7461 Monday – Friday: 8am-8pm & Saturday: 9am – 1pm, who will be more than happy to assist you. -
Page 18: Spare Parts
SPARE PARTS To check the availability of the following spare parts, simply contact our friendly Customer Services team using the details provided at the bottom of this page. Air Filter Drain Hose Bung For Customer Services & Spare Parts please call 0345 209 7461 Opening times: Monday - Friday 8am –... -
Page 19: Connection To The Mains Supply
CONNECTION TO THE MAINS SUPPLY This appliance is designed to operate from a mains supply of 220-240V~ 50/60Hz. Check that the voltage marked on the product corresponds with your supply voltage. How to change the fuse 1. Slot the end of a screwdriver into the recess in the fuse holder of the plug. -
Page 20: Notes
NOTES Page 20... -
Page 21: Specification
Specification LDH2002 Model 220 – 240V 50Hz Voltage 440W Power Input 20L day (DB 30 C RH80%) Moisture Removal R134a/120g Refrigerant 24.5cm 35cm 51cm Overall Size (D x W x H) C - 35 Operating Temperature 14.4Kg Weight Page 21... - Page 22 Opening times: Monday - Friday 8am – 8pm & Saturday 9am –1pm Or visit us at www.productcare.co.uk Revision 2 Model: LDH2002 Made by G2S Ltd under license. G2S Limited, Wigan, WN2 4AY This symbol is known as the 'Crossed-out wheelie bin Symbol'.
Need help?
Do you have a question about the LDH2002 and is the answer not in the manual?
Questions and answers