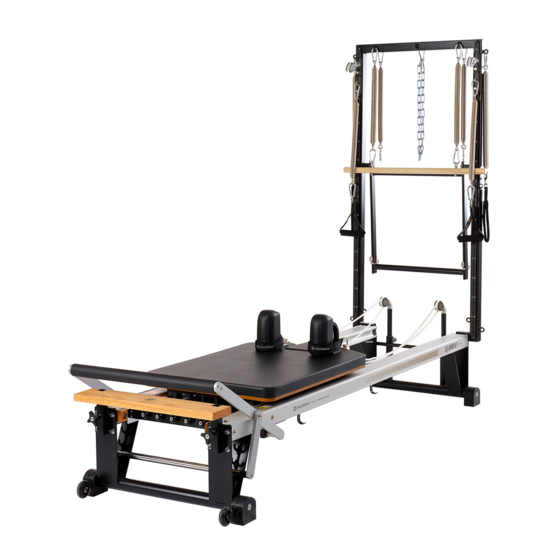
Summary of Contents for STOTT PILATES V2 Max Plus Reformer
Page 1
V2 MAX PLUS ™ REFORMER ◗ V2 MAX PLUS ™ REHAB REFORMER ◗ REHAB REFORMER WITH VERTICAL FRAME Please review this important assembly, safety and warranty information about your new STOTT PILATES Reformer and keep it handy for future reference. ®...
Page 2
The STOTT PILATES Family of Reformers ® STOTT PILATES Reformers are favored among Pilates professionals for their superior adaptability, versatility, craftsmanship and smooth carriage ride. All of our units feature easy adjustments to accommodate different sizes and abilities. The unique spring resistance of this machine helps generate smooth muscular contractions that develop strength without bulk.
To get the most out of your Reformer, to a 1L or 1qt spray bottle of water. A mixture of mild STOTT PILATES offers a full range of instructional soap and water may be used to remove more persistent DVDs and manuals.
Page 4
Part Identification for STOTT PILATES Reformers ® 1 Wooden Standing Platform 26 Rope Retaining Hook [fig. G] FIG A – SPRING 2 Plastic Foot & RETRACTABLE ROPE SYSTEM REHAB 3 1/2” Star Knob 27 Socket Head Cap Screw 4 Easy-Roll Wheel 28 C-channel [fig.
FIG E – TRADITIONAL ROPE SYSTEM CARRIAGE [35] 15 16 BOLT END OF SPRING FIG F – RETRACTABLE ROPE SYSTEM CARRIAGE [35] VERTICAL FRAME RECEPTACLE & STAR KNOB BACK OF REFORMER CLEAT SYSTEM CARRIAGE STOPPING SYSTEM PULLEY BLOCK REQUIRED TOOLS: NOTE: Parts may not be exactly as shown.
Page 6
Part Identification for STOTT PILATES Vertical ® PLUS-STYLE VERTICAL FRAME 50 Vertical Frame [fig. J] 51 Spring Clip 52 Vertical Sliding Track PLUS STYLE 53 Traveling Pulley PLUS STYLE 54 Traveling Pulley Eyehook 55 Pulley Spring 56 Pulley 57 Threaded Bolt...
Page 7
Frames FIG J – TRADITIONAL VERTICAL FRAME TRAVELING PULLEY ON MAX PLUS FRAME LIGHT ARM SPRING WITH FOAM-GRIP HANDLE SPRING CLIP ON PUSH-THRU BAR EXTENSION STRAPS PUSH-THRU SPRING WITH LOCKING SPRING CLIP VERTICAL FRAME RECEPTACLE REQUIRED TOOLS: ONE OPEN END WRENCH SUPPLIED 1/2"...
Page 8
Assembly Instructions 1 Place metal plate of wooden standing platform [1] 2 Place swing arm support [7] in one of the footbar on threaded bolts on front of Reformer and adjustment cradles [6] and fasten to small swing arm fasten with 5/16" lock nuts and washers. bars [31] with socket head cap screws [27].
Page 9
Insert gearbar [9] into the middle gearbar slots [8] Insert shoulder rests [37] into receptacles with with the concave indentations [inset above] facing handles facing pulleybars and closest to outside the wooden standing platform [1]. edges of carriage. Insert pulleybars [47] into receptacles [40] at ]: Insert free end TRADITIONAL ROPE SYSTEM FIG E...
Page 10
Assembly Instructions CONT’D ]: Remove : Reattach double-ended RETRACTABLE ROPE SYSTEM FIG F RETRACTABLE ROPE SYSTEM double-ended swivel spring clips [38], pinch end swivel spring clips and soft Reformer loops [34]. loop of ropes [41] and insert through the front of pulleys [44].
Page 11
: To shorten length slightly, Carefully lift Reformer and slide on plastic foot [2]. RETRACTABLE ROPE SYSTEM pinch ropes [41] between carriage [35] and Ensure they sit flat on floor. self-locking cleats [25] and pull toward carriage. Not necessary on SPX Max models. NOTE: Grasp ropes at retaining hooks [26] and tug to engage cleats.
Do not attempt to repair equipment yourself. ◗ For all other STOTT PILATES Reformers: ◗ Do not allow children to use or be around Place one foot on wooden standing platform.
Page 13
CARRIAGE STOPPER GEARBAR The carriage stopper position determines how close The gearbar position determines the amount of the carriage slides in toward the wooden standing initial tension on the springs. The slot closest to the platform and dictates the body’s range of motion. wooden standing platform is referred to as position The hole closest to the wooden standing platform is #1, the next is position #2, the last is position #3.
Page 14
Safety & Usage CONT’D SPX Max and Rack & Roll Adjustment Block Professional Rehab FOOTBAR HEADREST The footbar can be set at four different heights to The headrest adjusts to three positions: flat, facilitate various Reformer exercises and to accommodate half-raised or fully raised.
Page 15
STORING SHOULDER RESTS STACKING REFORMERS : When stacking, shoulder STOTT PILATES offers two stackable Reformer models. SPX MAX REFORMERS ONLY rests slide conveniently into brackets affixed to the Up to five SPX Max ™ or Rack & Roll Reformers can underside of the rail.
Page 16
Safety & Usage CONT’D Threaded Bolt PUSH-THRU BAR ADJUSTABLE PULLEY SYSTEM : The spring-loaded track system SAFETY CHAIN PLUS STYLE ONLY The Safety Chain must be attached when using the provides adjustability for pulleys and spring hooks push-thru bar with springs from below. Attach safety throughout the range of the vertical frame.
Page 17
Leg Springs Extension Straps Padded Long Spine Straps LEG SPRINGS EXTENSION STRAPS Attach leg springs to traveling spring hooks or The extension straps are valuable in supporting fixed eyehooks at desired height. Ensure spring the knees or legs in various exercises. clips are completely closed and secure.
Page 18
Safety & Usage CONT’D MAT CONVERTER REFORMER BOX OPTIONAL PURCHASE OPTIONAL PURCHASE The addition of a mat converter creates a safe, Reformer boxes are used to facilitate or vary exercises. stable surface for matwork or vertical frame work. There are a range of exercises in the Reformer repertoire that require the use of a box.
Page 19
DOUBLE LOOP STRAPS PADDED PLATFORM EXTENDER OPTIONAL PURCHASE OPTIONAL PURCHASE This accessory extends the wooden standing platform Conveniently switch from arm work to leg work and can accommodate a variety of exercises, providing without having to detach straps. added comfort and safety. It can also be used on the carriage for seated exercises.
Replacement Parts To place an order, visit merrithew.com/replacementparts or email equipment@merrithew.com. FOOTBAR PULLEY BLOCK FIXED & TRAVELING With 1/4" hex key, fasten footbar to the large swing Unscrew threaded bolt [57] that passes through ◗ arm bars with socket head cap screws. With footbar end shaft of pulley block and the left and right arms in place, apply pressure to footbar before tightening of the swivel harness [58].
Page 21
CARRIAGE STOPPER PADDED SHOULDER RESTS Only one is needed per Reformer. Only shoulder rest pads are shipped for NOTE: NOTE: Must be in one of the six positions AT ALL TIMES. replacement. Loosen bolts on handle frames, remove worn pads, replace with new and tighten bolts. Traditional Rope System Retractable Rope System REFORMER ROPES...
REQUIRED TOOLS: Removing Carriage & SPX MAX RACK ROLL MODELS ONLY 1/2" (13 9/16" (14 OR PLIERS Required for replacement of Reformer springs, carriage rollers and ropes. : Remove all springs from vertical To remove carriage, remove pulleybars and place VERTICAL FRAME frame, including roll-down bar and safety chain.
Page 23
REQUIRED TOOLS: Replacing Springs 1/2" (13 7/16" (11 Spring Ball Spring Coils Spring Bolt Fixed Cube Nut Nylon Locknut BALL END OF SPRING BOLT END OF SPRING Removing Springs Remove carriage, see page 22 for full instructions. With 7/16" wrench or pliers, hold fixed cube nut in place.
Page 24
Replacing Springs CONT’D Installing New Springs Determine Replacement Spring Package. Springs are color-coded at the ball end. Red = 100%, Blue = 50%, White = 25% TRADITIONAL SPRING PACKAGE HIGH-PRECISION SPRING PACKAGE arrange as follows: arrange as follows: 100%, 1 100%, 1 50%, 1 Place 50% spring in the center and two 100% springs...
Page 25
Hold fixed cube nut in place with 7/16" wrench. Both nylon locknut and fixed cube nut should Using second 7/16" wrench, tighten nylon locknut. be snug up against spring anchoring bar. NOTE: DO NOT REUSE old nylon locknuts. Repeat steps 1 to 6 for remaining springs. Replace carriage, see page 28 for full instructions.
Page 26
Replacing Retractable Ropes NOTE: Please read full directions before beginning rope replacement. Rope Housing Reel Eyehook Cotter Pin 1 Expose underside of carriage to locate rope housing 2 Remove carriage if necessary, see page 22 reels and cotter pin. for full instructions. This step can be done by either removing NOTE: carriage or turning Reformer onto its side with...
REQUIRED TOOL: ONE FLAT HEAD SCREWDRIVER 7 Place screw and rimmed washer directly in the 8 To determine the direction rope must coil, place center of replacement rope, 1/2" from the end empty reel on square shaft. Rotate reel in each and thread completely through rope.
Page 28
Replacing Carriage Remove carriage stopper. Wipe inside of aluminum rails with a damp cloth to remove dust or dirt. Spray onto cloth first. Avoid spraying liquid directly onto surfaces, rollers or rails. Insert carriage stopper in one of six positions. Write date of installation on the sticker provided Ensure pulleybars are still on either side of with Spring Replacement Package.
Page 29
REQUIRED TOOLS: ONE FLAT HEAD SCREWDRIVER 1/2"(13 9/16"(14 OR PLIERS : Slide vertical frame into : Insert pulleybars into receptacles at VERTICAL FRAME MODELS ALL MODELS receptacles. For plus-style models, position pulley back of Reformer and tighten star knobs. Ensure system facing carriage.
90-DAY UPHOLSTERY FABRIC WARRANTY The vinyl fabric upholstery on your STOTT PILATES Reformer will be replaced if it fails to give normal wear for 90 days after delivery. Proof of damage may be required. This warranty does not cover cuts, burns, stains, soiling, pet damage or damage caused by other unreasonable use.
Page 31
Expand Your Repertoire Choose from a variety of cutting-edge DVD titles Increase your Reformer expertise today – includes all-new programming. Reformer Manuals Your step-by-step guide to STOTT PILATES ® Reformer programming! Contact Us Today: visit merrithew.com or call toll-free North America 1-800-910-0001...
Page 32
IMPORTANT Please keep this manual in a safe place. This is your STOTT PILATES Reformer Serial Number:...
Need help?
Do you have a question about the V2 Max Plus Reformer and is the answer not in the manual?
Questions and answers