Table of Contents
Advertisement
E 2009 Lennox Industries Inc.
Dallas, Texas 75379-9900
This manual provides installation instructions for
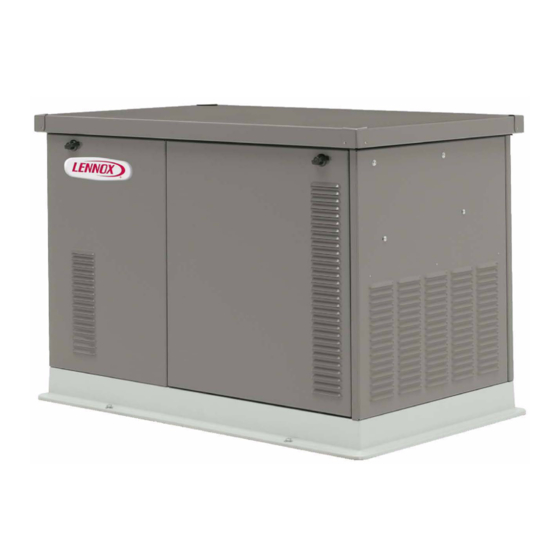
models RGEN12 and RGEN17/18 generator sets.
Refer to XP-6515, Operation Manual, for generator set
operation and maintenance instructions.
The generator set is approved for use in stationary
standby applications in locations served by a reliable
utility power source. Do not install this generator set
indoors.
Have a Lennox dealer who is approved to sell and install
Lennox generator sets (hereinafter referred to as a
Lennox dealer) install the generator set outdoors
according to the instructions in this manual.
generator set installation must comply with the National
Electrical Code (NEC) and local code requirements. If
the generator set is installed in Canada, the installation
must comply with the Canadian Electrical Code (CEC)
and all applicable local codes.
Information in this publication represents data available
at the time of print. The manufacturer reserves the right
to change this publication and the products represented
without notice and without any obligation or liability
whatsoever.
Read this manual and carefully follow all procedures
and safety precautions to ensure proper equipment
operation and to avoid bodily injury. Read and follow the
Safety Precautions and Instructions section.
506087-01
INSTALLATION
INSTRUCTIONS
RGEN12, RGEN17/18
RESIDENTIAL GENERATOR SET
XP-6514
4/09c
Table of Contents
. . . . . . . . . . . . . . . . . . . . . . . . . . . . . . . . . . .
1.1
1.2
. . . . . . . . . . . . . . . . . . . . . . . . . . . . . . . . . . .
1.3
1.4
1.4.1
1.4.2
1.5
1.6
1.6.1
1.6.2
1.7
1.7.1
1.7.2
1.8
1.8.1
1.8.2
1.8.3
1.8.4
The
1.9
1.10
1.11
1.12
1.13
1.14
RETAIN THESE INSTRUCTIONS
FOR FUTURE REFERENCE
Shipping and Packing List
1 -- Generator Set
Check equipment for shipping damage. If you find any
damage, immediately contact the last carrier.
. . . . . . . . . . . . . . .
. . . . . . . . . . . . .
. . . . . . . . . . . . . . . . . . . . . . . . . . .
. . . . . . . . . . . . . . . . . . . . . . . . . . . . . . . . .
. . . . . . . . . . . . . . . . . .
. . . . . . . . . . . . . . . . . . . .
. . . . . . . . . . . . . . . . .
. . . . . . . . . . . . . . . . . . . . . .
. . . . . . . . . . . . . . . . . . . . . . . . . . . .
. . . . . . . . . . . . . . . . . . . . . . .
. . . . . . . . . . . . . . . . . . . . . . . . . . .
. . . . . . . . . . . . . . . . . . . . . . . . .
. . . . . . . . . . . . . . . . . . . . . . . . .
. . . . . . . . . . . . . .
. . . . . . . . . . . . . . . . . . . .
. . . . . . . . . . . . . . . . . . . . . . .
. . . . . . . . . . . . . . .
. . . . . . . . . . . . . . . . . . . . . . . . . . . .
. . . . . . . . . . . . . . . . . . . . . . . .
. . . . . . . . . . . . . . . . . . . . . . . . . . . . . . . . . .
. . . . . . . . . . . . . . . . . . . . . . . . . . . . .
. . . . . . . . . . . . . . . . . . . . . .
. . . . . . . . . . . . . . . . .
. . . . . . . . . . . . . . . . . . . . . . .
. . . . . . . . . . . . . . . . . . .
. . . . . . . . . . . . . . . . . . . .
. . . . . . . . . . . . . . . . . .
. . . . . . . . . . . . . . . . . . . . .
2
3
7
9
9
9
9
9
14
14
14
15
15
16
16
17
. . . . . . . . . . .
18
19
20
20
20
20
21
22
22
24
24
24
. . . . . . . .
27
27
28
32
Advertisement
Table of Contents

Related Manuals for Lennox RGEN17


Summary of Contents for Lennox RGEN17
-
Page 1: Table Of Contents
Electrical Connections ....Have a Lennox dealer who is approved to sell and install 1.8.1 AC Connections ..... . . -
Page 2: Product Identification Information
California Proposition 65 WARNING Engine exhaust from this product contains chemicals known to the State of California to cause cancer, birth defects, or other reproductive harm. Product Identification Information Generator Set Identification Numbers Engine Identification Record the product identification numbers from the Record the product identification information from the generator set nameplate(s). -
Page 3: Safety Precautions And Instructions
Safety Precautions and Instructions IMPORTANT SAFETY INSTRUCTIONS. Accidental Starting WARNING Electromechanical equipment, including generator sets, transfer WARNING switches, switchgear, and accessories, can cause bodily harm and pose life-threatening danger when improperly installed, operated, or maintained. To prevent accidents be Explosion. aware of potential dangers and act Can cause severe injury or death. - Page 4 Battery gases. Explosion can cause Servicing the fuel system. A flash Carbon monoxide symptoms. severe injury or death. Battery gases fire can cause severe injury or death. Carbon monoxide can cause severe can cause an explosion. Do not smoke Do not smoke or permit flames or nausea, fainting, or death.
- Page 5 Hazardous Noise Short circuits. Hazardous CAUTION voltage/current can cause severe injury or death. Short circuits can CAUTION cause bodily injury and/or equipment damage. Do not contact electrical connections with tools or jewelry while making adjustments repairs. Remove all jewelry before servicing the Welding the generator set.
- Page 6 Hot Parts Notice NOTICE WARNING Canadian installations only. standby service connect the output of the generator set to a suitably rated transfer switch in accordance with Canadian Electrical Code, Part 1. Hot engine and exhaust system. Can cause severe injury or death. Do not work on the generator set until it cools.
-
Page 7: Introduction
Introduction See Figure 1 and Figure 2 for generator set component locations. Control detail See control detail ADV-7466- 1. Muffler 13. Oil drain valve 2. Oil check 14. Oil filter 3. Oil fill 15. Exhaust 4. Air cleaner 16. Equipment ground 5. - Page 8 13. Engine starting battery location (battery purchased separately) carburetor heater 14. Oil drain hose 29. Field connections inside junction box if optional terminal 15. Nameplate location (on base) block is not used Figure 2 Generator Set Component Locations, RGEN17/18 XP-6514 4/09...
-
Page 9: Section 1 Installation
Section 1 Installation 1.1 General 1.3 Generator Set Inspection Have a Lennox dealer install the generator set outdoors Complete a thorough inspection of the generator set. according to the instructions in this manual. Do not Check for the following: install this generator set indoors. - Page 10 Figure 1-2 Generator Set Mounting Details and Dimensions, RGEN12, ADV-7466A- Section 1 Installation XP-6514 4/09...
- Page 11 Figure 1-3 Generator Set Clearances, RGEN12, ADV-7466B- XP-6514 4/09 Section 1 Installation...
- Page 12 Figure 1-4 Generator Set Mounting Details and Dimensions, RGEN17/18, ADV-7341A-B Section 1 Installation XP-6514 4/09...
- Page 13 Figure 1-5 Generator Set Clearances, RGEN17/18, ADV-7341B-B XP-6514 4/09 Section 1 Installation...
-
Page 14: Exhaust Requirements
RGEN12 26.9 (950) 1.1 (39.2) 28.0 (990) drawn into a potentially occupied building through windows, air RGEN17/ intake vents, or other openings. 28.0 (989) 1.62 (57.3) 29.6 (1045) The exhaust system is complete for generator sets Figure 1-8 Air Requirements installed outdoors. -
Page 15: Fuel Requirements
LP vapor: 93 MJ/m (2500 Btu/ft. Figure 1-2 or Figure 1-4 shows the location of the fuel Figure 1-12 Fuel Consumption, RGEN17/18 inlet connection. Use flexible sections to prevent fuel line breakage caused by vibration. Hold the fuel solenoid valve with a wrench when tightening the fuel 1.6.2... -
Page 16: Fuel Pipe Size
LP vapor (or vice-versa) in the field while with the chart in Figure 1-13 or Figure 1-14 to find maintaining emissions-standard compliance. A trained required pipe size. technician or a Lennox dealer can convert the fuel system. Contact local LP provider for LP installation information. WARNING Pipe Size Maximum Pipe Length, m (ft.) -
Page 17: Fuel Conversion, Rgen12
1.7.1 Fuel Conversion, RGEN12 5. Remove the hose clamp and fuel hose from the hose fitting in the fuel block. See Figure 1-16. Two fuel connections on the fuel block allow field- conversion between natural gas and LP vapor. The fuel metering valves are factory-set and sealed to comply with applicable emission standards and to provide the Natural gas... -
Page 18: Fuel Conversion, Rgen17/18
16. Check for leaks using a gas leak detector. 17. Run the generator set and check the operation. Procedure to Convert from NG to LP, RGEN17/18 Use the controller to adjust the output and stability if necessary. See Section 1.14 for instructions. -
Page 19: Electrical Connections
1. LP orifice (remove for natural gas) 2. Hose fitting 3. Regulator WARNING Figure 1-20 LP Fuel Orifice, RGEN17/18 8. Disconnect digital spark-advance module (DSAI) leads 65 and N5 for LP. (Connect the leads for natural gas.) See Figure 1-21 and Figure 1-22. -
Page 20: Ac Connections
Have a Lennox dealer or a licensed electrician make the 3. The terminal block includes 120 VAC following electrical connections. The electrical receptacles for the battery charger and optional installation must comply with the National Electrical carburetor heater. Connect utility power to the Code (NEC) and all applicable local codes. -
Page 21: Battery
Battery gases. Explosion can cause severe injury or 1.9 Battery death. Battery gases can cause an explosion. Do not smoke or permit flames or sparks to occur near a battery at any time, particularly when it is charging. Do not dispose of a battery in a WARNING fire. -
Page 22: Accessories
2. Carburetor heater power cord 1.10 Accessories Figure 1-26 RGEN12 Carburetor Heater Location Have accessories installed by a Lennox dealer or a licensed electrician. Follow the installation instructions provided with each kit. Use separate conduit for AC and DC leads to reduce the possibility of electrical interference. - Page 23 4. 120 VAC receptacles for carburetor heater and battery 1. Carburetor heater location charger Figure 1-27 RGEN17/18 Carburetor Heater Location Figure 1-28 RGEN17/18 Carburetor Heater Location (air intake side of generator set) on Engine (bulkhead removed to show heater location) The heater thermostat is installed in the cord.
-
Page 24: Prestart Installation Check
Battery. Check for tight battery connections. Consult Engine type Ec00 RGEN12 the battery manufacturer’s instructions regarding battery care and maintenance. Ec12 RGEN17/18 Communication Cn00 No J1939 communication. Exhaust System. Check for exhaust leaks and setting * Sleep mode enabled blockages. - Page 25 Communication/Sleep Mode Setting (Cn). (Available mode off. Controllers with earlier application code on controllers with application code version 1.13 or versions have communication disabled and the sleep higher.) The communication setting enables or disables mode enabled. The Cn setting is not adjustable on J1939 communication, and also disables or enables the these earlier versions.
- Page 26 E c 0 0 RGEN12 To change the engine type, if necessary. E c 1 2 RGEN17/18 To enter setting and step to the next parameter, communication setting Cn. C n 0 x To change the communication setting, if necessary. See Figure 1-30.
-
Page 27: Voltage And Frequency Adjustments
Have desired value. Refer to the flowcharts in adjustments performed by a Lennox dealer or service Figure 1-34 through Figure 1-36 for instructions to technician. adjust the output voltage. See Figure 1-33 for the approximate change in voltage per step. -
Page 28: Frequency Adjustment
9. Reset the engine speed to the operating frequency Frequency Adjustment Procedure adjusting engine governor speed Note: Refer to the flowcharts in Figure 1-34 through (parameter 4P). Figure 1-36 during the following procedure. 10. Readjust the voltage stability (gain, parameter 2P), 1. - Page 29 Output Voltage and Frequency Adjustment Mode: Display :* x x x x Move the generator set master switch to the RUN position. The generator set engine starts and the controller display shows the engine runtime hours. Hold: Wait about 5 seconds until the display changes from runtime hours to the program version number.
- Page 30 Display : * Continued from Figure 1-34: Press: To enter engine governor speed coarse adjustment mode. (Parameter 4P) To raise or lower the engine speed in large increments. To enter engine governor speed fine adjustment mode. (Parameter 4P) To raise or lower the engine speed in smaller increments.
- Page 31 There are 3 options when the display says SAVE: S A V E Press: To return to the first parameter, coarse voltage adjustment, to check or change settings before saving. See Figure 1-34. To save changes. Y E S To discard changes without saving. “Yes”or “no”...
-
Page 32: Section 2 Wiring Diagrams
Figure 2-1 lists the wiring diagram numbers and locations. Wiring Diagram Description Drawing Number Page Schematic Diagram, RGEN12 ADV-7592 Point-to-Point Wiring Diagram, RGEN12 GM62285 Schematic Diagram, RGEN17/18 ADV-7353 Point-to-Point Wiring Diagram, RGEN17/18 GM52541 Figure 2-1 Wiring Diagrams and Schematics Section 2 Wiring Diagrams XP-6514 4/09... - Page 33 Figure 2-2 Schematic Diagram, Single Phase, RGEN12, ADV-7592 XP-6514 4/09 Section 2 Wiring Diagrams...
- Page 34 Figure 2-3 Point-to-Point Wiring Diagram, Single Phase, RGEN12, GM62285 Section 2 Wiring Diagrams XP-6514 4/09...
- Page 35 Figure 2-4 Schematic Diagram, Single Phase, RGEN17/18, ADV-7353-F XP-6514 4/09 Section 2 Wiring Diagrams...
- Page 36 Figure 2-5 Point-to-Point Wiring Diagram, Single Phase, RGEN17/18, GM52541-E Section 2 Wiring Diagrams XP-6514 4/09...
Need help?
Do you have a question about the RGEN17 and is the answer not in the manual?
Questions and answers