Table of Contents
Advertisement
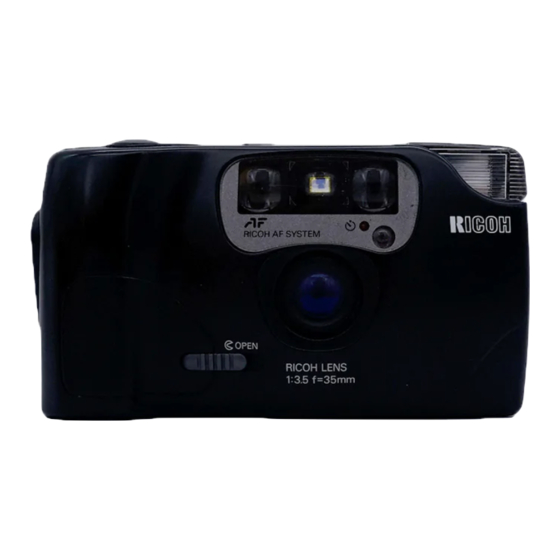
Ricoh Shotmaster
AF Super
This camera manual library is for reference and historical purposes, all rights reserved.
This page is copyright by
, M. Butkus, NJ.
This page may not be sold or distributed without the expressed permission of the producer
I have no connection with Chinon Co., Japan
On-line camera manual library
This is the full text and images from the manual. This may take 3 full minutes for all images to appear.
If they do not all appear. Try clicking the browser "refresh" or "reload button" or right click on the image, choose "view image" then go back. It should now appear.
To print, try printing only 3 or 4 pages at a time.
If you find this manual useful, how about a donation of $3 to:
M. Butkus, 29 Lake Ave., High Bridge, NJ 08829-1701
and send your e-mail address so I can thank you. Most other places would charge you
$7.50 for a electronic copy
or $18.00 for a hard to read Xerox copy.
This will allow me to continue to buy new manuals and pay their shipping costs.
It'll make you feel better, won't it?
If you use Pay Pal, use the link below. Use the above address for a check, M.O. or cash.
Venmo is
@mike-butkus-camera
www.PayPal.me/butkus
Back to main camera manual page
CONTENTS
Locating the controls
3
Using the strap
5
Inserting the battery
6
Advertisement
Table of Contents

Related Manuals for Ricoh SHOTMASTER AF SUPER


Summary of Contents for Ricoh SHOTMASTER AF SUPER
- Page 1 Ricoh Shotmaster AF Super This camera manual library is for reference and historical purposes, all rights reserved. This page is copyright by , M. Butkus, NJ. This page may not be sold or distributed without the expressed permission of the producer I have no connection with Chinon Co., Japan...
-
Page 2: Table Of Contents
Opening the lens shield Checking the battery Loading the film Setting the film speed Holding your camera Viewfinder Auto-focus shooting Pre-focus shooting Rewinding the film (Auto reverse) Flash photography Using the self-timer The feature mode Using the panorama mode Using the night photography mode Using the TV mode Using the continuous shooting mode Using the interval mode... - Page 3 INSERTING THE BATTERY The camera will not operate unless the battery is installed. It is important to make sure that the battery is installed correctly. 1. Push the Battery Compartment Cover Latch by a pen etc. in the direction of the arrow and pull open the cover. (Fig. 3) 2.
-
Page 4: Opening The Lens Shield
OPENING THE LENS SHIELD 1. Open the Lens Shield by sliding the Lens Shield Switch toward the mark of (A (opening). (Fig. 7) * You can only fire the camera when the Lens Shield is completely open. * To avoid tripping the shutter inadvertently and wasting battery power, always keep the Lens Shield closed when you are not taking pictures. -
Page 5: Loading The Film
4) When film advance and rewind cannot be done. 5) When the self-timer does not function. 6) When the battery has been in the camera for 5 years or longer. LOADING THE FILM Always avoid direct sunlight when loading the film. 1. -
Page 6: Setting The Film Speed
4. Press the Back Cover shut so that the Back Cover Latch returns to its original position. The film is automatically advanced until number "1" appears in the LCD Panel. As soon as you close the Back Cover, the LCD Panel will show the following signs. -
Page 7: Holding Your Camera
When using a film without DX code, your camera will automatically set itself to ISO 100. HOLDING YOUR CAMERA 1. Use both hands to steady your camera. (Figs. 19, 20) 2. Be careful not to place your fingers over the lens, flash, or focusing windows. (Fig. -
Page 8: Auto-Focus Shooting
AUTO-FOCUS SHOOTING 1. Set the subject you wish to take within the Auto-Focus Frame in the center of the Viewfinder. (Fig. 23) 2. When you press the Shutter Release Button halfway, the AF monitor will light up. If the AF monitor blinks (When the subject is closer than 0.8 m (2.6 ft.)), you should move back a little as your camera is too close to the subject. -
Page 9: Pre-Focus Shooting
PRE-FOCUS SHOOTING When the main subject you wish to focus on is not within the Auto-Focus Frame, or if the subject is difficult to focus on, then you should use pre-focus shooting. When the subject is not within the Auto-Focus Frame: 1. -
Page 10: Rewinding The Film (Auto Reverse)
REWINDING THE FILM (AUTO REVERSE) 1. After the end of the film has been reached, the film is automatically rewound. 2. The film rewind is indicated by three dashes flashing in sequence from right to left and the counter gives a subtractive reading. (Fig. 28) 3. -
Page 11: Flash Photography
FLASH PHOTOGRAPHY 1. If flash is required, the Flash Unit automatically pops up when the shutter Release Button is pressed halfway and its power source automatically turns on. (Fig. 32) 2. Release the Shutter Release Button completely and wait for the Flash Ready Lamp to become lit. -
Page 12: Using The Self-Timer
USING THE SELF TIMER 1. Press the Self-timer Button. The Self-timer LED on the front of your camera will light for approximately 8 seconds. Then, the LED will blink for about 2 seconds to indicate that the shutter will release soon. After a total 10 seconds have elapsed, the shutter will release. -
Page 13: The Feature Mode
Or you can experiment, and discover pleasantly surprising results. These modes are to stimulate your imagination and creativity. By all means, use this compact Ricoh SHOTMASTER AF SUPER camera to capture the unlimited kinds of images the world has to offer. -
Page 14: Using The Night Photography Mode
* The Flash Unit will not fire even if the Flash Ready Lamp is lit. (Since the flash will not reach the subject anyway, battery power is conserved.) * To cancel the mode, press the Mode Button to set the camera to normal mode (when the LCD Panel displays no mode symbols) or close the Lens Shield. -
Page 15: Using The Tv Mode
USING THE TV MODE Use this mode to shoot the screen of a computer monitor or television. (Refer to sample photo.) 1. Press the Mode Button until the ~ mark is displayed on the LCD Panel. Then, take a picture. (Fig. 43) * The Flash Unit does not pop up under the TV Mode. - Page 16 Combining the Continuous Shooting Mode and the Self-timer: 1. Set your camera to the Continuous Shooting Mode. 2. Press the Self-timer Button. Your camera will wait 10 se coeds, then shoot two sequential frames. 3. Push the Mode Button to cancel the Continuous Shooting Mode. Confirm that the Hi mark disappears on the LCD Panel.
-
Page 17: Using The Interval Mode
USING THE INTERVAL MODE This mode closes the shutter in 60-second intervals. You can enjoy the use of this mode in a variety of applications, such as the wildlife observation of animals or birds where you need to keep a certain distance or the growth records of plants. -
Page 18: Remote Control Socket
(optional) infrared sensor, audio sensor, remote controller, etc.. into this socket. A 50 cm electronic cable release cord, and a 10-meter extension cord, are available from Ricoh as options for use in remote control photography Typical installation 1. -
Page 19: Proper Care Of Your Camera
MAJOR SPECIFICATIONS: RICOH SHOTMASTER AF SUPER Type: 35 mm lens shutter type with automatic focusing Lens: 35 mm f3.5 Ricoh lens 4 elements, 4 groups Focusing: Automatic focusing with pre-focusing facility. Distance measuring (shooting) range: 0.8 m (2.6 ft) - Distance less than 0.8 m (2.6 ft): AF monitor lamp blinks... -
Page 20: Specifications
Film Advance/Rewind: Automatic film advance and rewind. Automatic 1st. frame setting. Automatic film reverse at the end of film. Film Loading: Ricoh Auto-Load system Exposure Counter: Additive, counts down during film reverse LCD Display: Film loaded, film advance, exposure counter, film reverse and reverse completion, battery condition, landscape mode, night scene mode, continuous...
Need help?
Do you have a question about the SHOTMASTER AF SUPER and is the answer not in the manual?
Questions and answers