Advertisement
Quick Links
800-428-8560
midwesthomes4pets.com
3142 S. Cowan Rd.
Muncie, Indiana 47302
Assembly Instructions for Model Number K9644
Assembly Videos and Instruction Manuals can be viewed at midwesthomes4pets.com.
For instructions in Spanish and French, please visit www.midwesthomes4pets.com.
IMPORTANT INFORMATION
Warning: Remove collars, tags, and leads from pet before placing it in the kennel to prevent possible
entanglement. DO NOT leave young animals unsupervised for extended periods of time. MidWest's main concern is
your pet's well-being. If your pet has never been kept in any enclosure, specific training may be necessary for your pet's
safety. A pet, not specifically trained to be restricted, may attempt to escape from this enclosure, which could cause
serious injury to your pet or damage to this product. MidWest will not accept liability or warrant any loss to improper use
of this product by a pet that has not been properly trained.
Warranty Information
Unwrap and remove all parts from the box. Keep the box and packing material until the product is assembled. In case of
return or exchange, failure to return product in similar condition as received could result in limited reimbursement. Please
save sales receipt as proof of purchase for warranty purposes. Check to ensure you have all the parts below. If you discover
any parts are missing, immediately call our toll-free service helpline at 1-800-428-8560 (Monday - Friday 9 a.m. to 4 p.m.
EST) or email us at info@midwesthomes4pets.com.
Helpful Hints
Please take time to read and follow these instructions. To make set-up easier, locate a level area to assemble your
kennel. Remove all components from the carton and arrange them as shown on Page 2. You will need a pair of pliers
and an adjustable wrench to assemble your kennel. We recommend two people assemble the kennel together.
The chain-link fence comes in one continuous 20' piece. It is prone to tangle while attaching, but with two people and
a little patience, the fence can applied with minimal complication. The best practice is to unroll the fence and stretch
it out completely to undo any tangling. Then, using two people, lift, pull, and stretch the chain-link fence around the
perimeter one small section at a time.
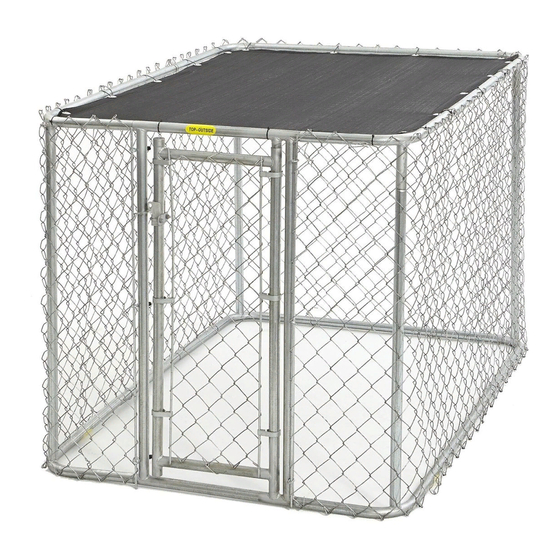
Sunscreen Safety
Your K9 Kennel comes with a Sunscreen. We suggest removing and storing the Sunscreen when not needed to shade your
pet. Do not allow snow or debris to collect on top of the Sunscreen. Occasionally, even rain will collect. Remove it as soon
as possible. Injury to your pet and damage to your Kennel may occur if the load is not removed. Properly cared for, your
Sunscreen will provide years of service and protection for your pet.
1.
Advertisement

Related Manuals for Mid-West kennel K9644


Summary of Contents for Mid-West kennel K9644
- Page 1 800-428-8560 midwesthomes4pets.com 3142 S. Cowan Rd. Muncie, Indiana 47302 Assembly Instructions for Model Number K9644 Assembly Videos and Instruction Manuals can be viewed at midwesthomes4pets.com. For instructions in Spanish and French, please visit www.midwesthomes4pets.com. IMPORTANT INFORMATION Warning: Remove collars, tags, and leads from pet before placing it in the kennel to prevent possible entanglement.
-
Page 2: Parts Identification
PARTS IDENTIFICATION Bottom U-Shaped Rail with short corner pegs (1) Top L-Shaped Rails with long corner pegs (2) Bottom L-Shaped Rails with short corner pegs (2) Top U-Shaped Rail with long corner pegs (1) Long Filler Rails - swaged on both ends (2) Vertical Tension Rods - 5/16th Diameter (2) Medium Filler Rails - swaged on both ends (2) Chain-Link Fence (1) - Page 3 ASSEMBLY INSTRUCTIONS Place the following pieces on the Swaged ground as shown: Bottom U-Shaped Rail (A), the Bottom L-Shaped Rails (B), one Long Filler Rail (C), one Medium Filler Rail (D), one Short Filler Rail (E), the Bottom Gate Rail (F), and the Gate Door (G).
- Page 4 Push the non-swaged ends of the Gate Frame posts (H) onto the Bottom Gate Rail, then connect the Top Gate Rail (I) to the swaged ends of the Gate Frame Posts. Swing the Gate Frame into the upright position. Connect a Top L-Shaped Rail (K) to the Top Gate Rail and the Vertical Corner Post.
- Page 5 Using a Medium Filler Rail (D), connect the Top L-Shaped Rail from step 5 to the other Top L-Shaped Rail (K). Secure the long peg of the L-Shaped Rail on the Vertical Corner Post. Using a Long Filler Rail (C), connect the Top L-Shaped Rail from step 6 to the Top U-Shaped Rail (L).
- Page 6 Using a Short Filler Rail (E), connect the Top L-Shaped Rail from step 7 to the Top Gate Rail. Swaged With the Gate door open, insert the Eyebolts (R), with the eye to the outside of the kennel, through the six holes in the Gate’s frame (three on each side).
- Page 7 Stand one end of the Chain-Link Fence (N) up against the left side of the Gate frame. Starting at the top, thread the Vertical Tension Rod (M) down through the Chain-Link Fence, front/back, front/back, through each diamond, while making sure to pass through the eye of each Eyebolt on the way down.
- Page 8 NOTE: After you have unrolled the Chain-Link Fence completely around the frame, you may find that you have several extra inches of chain link that extends past the last set of Eyebolts. This excess must be removed. Pull the Chain-Link Fence tightly past the Eyebolts to determine where to remove the extra fencing so that the second Tension Rod (M) can be installed in Step 17.
- Page 9 Once all excess fencing has been removed, reinsert the second Tension Rod (M) down through the Chain-link Fence and the Eyebolts on the other side of the gate, as you did in Step 11.
- Page 10 Facing the Kennel door, go to the top left Eyebolt. Push the “eye” firmly against the Gate Frame. Tighten the Nut past the scored area of the bolt’s threads. Move down to the next Eyebolt and repeat. Pulling the Tension Rod against the Gate Frame as you go, proceed around the Gate Frame until all six Eyebolts have been tightened.
- Page 11 Sunscreen Installation Unfold the Sunscreen (O) and, using the Long Plastic Ties (P), loosely attach the sunscreen to the Bent Top Rail of the Kennel at each corner. DO NOT PULL THE TIES TIGHT! After the corners have been attached, loosely affix a Long Plastic Tie at each grommet on the Sunscreen around the perimeter.
-
Page 12: Limited Manufacturer's Warranty
TOLL-FREE SERVICE HELPLINE: If you have any problems or questions with the assembly of your new K9 Kennel call our Service Helpline at: 1-800-428-8560 between 9:00 a.m. and 4:00 p.m. (EST) Monday through Friday. On our web page, www.midwesthomes4pets.com, you will find fully illustrated, printable instructions! You will also find additional product information and tips on training and using MidWest crates.
Need help?
Do you have a question about the kennel K9644 and is the answer not in the manual?
Questions and answers