Table of Contents
Advertisement
Quick Links
Advertisement
Table of Contents

Related Manuals for Brentwood HOME BASE

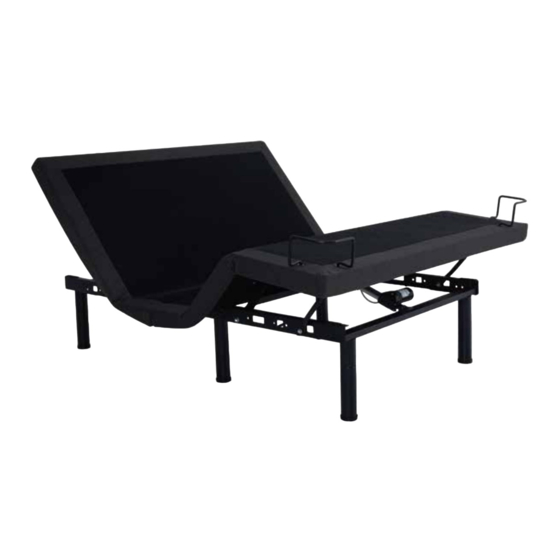
Summary of Contents for Brentwood HOME BASE
- Page 1 BRENTWOOD BASE OWNER’S MANUAL Installation & Operation Serial No.
-
Page 3: Table Of Contents
CONTENTS Safety & Warranty Warnings Parts List Electronics Quick Reference Guide Installa on Guide Remote Control Instruc ons Se ng Programmable Posi ons and Pairing Remote Se ng Preset Posi ons Synchronizing Two Bases To Operate The Beds Separately Again Troubleshoo ng... -
Page 4: Safety & Warranty Warnings
Safety & Warranty Warnings A en on: Read the following informa on before using this product . Failure to use a surge protec on device could compromise safety or cause product malfunc on and could void the electrical por on of your warranty. Electrical surges are by far the biggest cause of problems with electrical circuits. - Page 5 PRODUCT RATINGS: The base li motors are not designed for con nuous use of more than 2 minutes in an 18 minutes period, or approximately 10% duty cycle. Any a empt to circumvent or exceed this ra ng will shorten the life expectancy of the product and may void the warranty. WEIGHT UNITS: The limita on for this adjustable base is 850 lbs.
- Page 6 TO REDUCE THE RISK OF SHOCK, BURNS, FIRE OR INJURY: Make sure the base is in a at posi on and the vibra ng motors are turned o before unplugging the base from the power source. Always unplug the base from the electrical outlet before cleaning or servicing the base . If the cord or plug is damaged, discon nue use of the base. Contact customer service for examina on and repair.
-
Page 7: Parts List
Parts List All electronics and components that need to be installed are located in boxes under the founda on or a ached to the frame. Before discarding the packing materials, ensure that all the parts are accounted for. (2) 9-Volt Ba eries Legs &... -
Page 8: Electronics Quick Reference Guide
Electronics Quick Reference Guide Control Box Head Motor Foot Motor USB Ports... - Page 9 Power Supply Pairing Bu on USB Ports Foot Motor Power Cord Head Motor...
-
Page 10: Installa On Guide
Installation Guide 2. To install all six legs, thread the bolt of the leg to the nut on the base frame, and ghten by hand. DO NOT OVERTIGHTEN. Two people are required to set up the base. NOTE: To avoid damage to the base, always open the carton in the at posi on. - Page 11 5. Carefully ip the base over onto its legs. Head Important: Two people are required to move the base. Do not drag across the oor. Do not rest frame on its side; excessive pressure may damage the legs. 6. Ensure that ba eries are correctly installed. 7.
-
Page 12: Remote Control Instruc Ons
Remote Control Instructions One touch ZG preset posi on One touch An Snore posi on Li s and Lowers Head Li s and Lowers Foot Flash Light on/o Memory Posi ons Flat Bu on... - Page 13 ADJUST ONE TOUCH BUTTONS An Snore Preset Posi on Li s and Lowers Head Zero-G Preset Posi on Flat Bu on Li s and Lowers Foot Memory Posi ons Press and hold the bu on, ash light will be on. -10-...
-
Page 14: Se Ng Programmable Posi Ons And Pairing Remote
Setting Programmable Positions and Pairing Remote SETTING PROGRAMMABLE POSITIONS The adjustable base has a programmable feature that allows you to save custom posi ons. Please read all the instruc ons below before se ng your custom presets on the remote. STEP 1 Adjust the head and foot to your desired posi on. - Page 15 PAIRING REMOTE The original remote that comes in the box is already paired to the base. No further ac on is required. In the event that the remote is not paired with the base, follow the steps below. STEP 1 Make sure the ba eries work ne.
-
Page 16: Se Ng Preset Posi Ons
Setting Preset positions SETTING PRESET POSITIONS The adjustable base has a programmable feature that allows you to modify preset posi ons. Please read all the instruc ons below before se ng your preset posi ons on the remote. STEP 1 Adjust the head and foot to your desired posi on. -
Page 17: Synchronizing Two Bases
Synchronizing Two Bases (for Twin XL and Split sizes only) Step 2: 1. Make sure Remote A was already paired to Base A and Remote B was paired to Base B. If not, please pair them by following the pairing remote instruc ons on page 12. Step 1: 2. - Page 18 Two remotes control two bases simultaneously. For example: 1. If you want to use Remote A to control two bases, slide the On Remote B, press and hold Head Down and Foot side bu on to "O" posi on on Remote A. Up at the same me, within 5 seconds, the Remote 2.
-
Page 19: To Operate The Beds Separately Again
To Operate The Beds Separately Again Step 1: On Remote A, press and hold the Head Down and Foot Up bu ons simultaneously un l the backlit LED lights blink. The Remote A now only controls Base A and the sync toggle no longer func ons. Step 2: Next, on Remote B, press and hold the Head Down and Foot Up bu ons simultaneously un l the backlit LED lights blink. -
Page 20: Troubleshoo Ng
Troubleshooting In the event that the base fails to operate, assess the symptoms and possible solu ons provided in the chart below. SYMPTOMS SOLUTIONS Verify that the power cord is plugged into a working, grounded electrical outlet. Test the Remote control illuminates and appears to be outlet by plugging in another working appliance. - Page 21 Troubleshooting SYMPTOMS SOLUTIONS Check ba eries in wireless remote control, replace with two (2) new AAA ba eries if necessary. Make sure that you are following the duty cycle of the motors (do not operate more than two minutes over a 18-minute period, or approximately 10% duty cycle). Head &...
- Page 22 Troubleshooting SYMPTOMS SOLUTIONS A clicking noise is heard under the base when This is normal. The li motor relays “click” when they are engaged. No ac on is required. raising or lowering. If the vibra on motor overheats, the thermal protec on will turn the motor o . Wait 30 Massage motor overheats or stops.
Need help?
Do you have a question about the HOME BASE and is the answer not in the manual?
Questions and answers