Advertisement
Quick Links
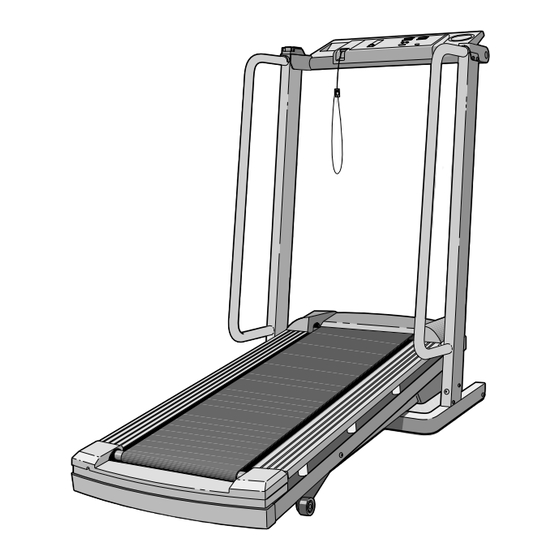
Model No. HRTL2000
Serial No.
Serial Number Decal
QUESTIONS?
As a manufacturer, we are
committed to providing com-
plete customer satisfaction. If
you have questions, or find that
there are missing or damaged
parts, we will guarantee you
complete satisfaction through
direct assistance from our
factory.
TO AVOID UNNECESSARY DE-
LAYS, PLEASE CALL DIRECT
TO OUR TOLL-FREE CUSTOMER
HOT LINE. The trained techni-
cians on our customer hot line
will provide immediate assis-
tance, free of charge to you.
CUSTOMER HOT LINE:
1-800-999-3756
Mon.–Fri., 6 a.m.– 6 p.m. MST
CAUTION
Read all precautions and instruc-
tions in this manual before using
this equipment. Save this
manual for future reference.
USER'S MANUAL
Advertisement

Related Manuals for Healthrider HRTL2000


Summary of Contents for Healthrider HRTL2000
- Page 1 Model No. HRTL2000 Serial No. Serial Number Decal QUESTIONS? As a manufacturer, we are committed to providing com- plete customer satisfaction. If you have questions, or find that there are missing or damaged parts, we will guarantee you complete satisfaction through direct assistance from our factory.
-
Page 2: Table Of Contents
TABLE OF CONTENTS IMPORTANT PRECAUTIONS ..............3 BEFORE YOU BEGIN . -
Page 3: Important Precautions
IMPORTANT PRECAUTIONS WARNING: To reduce the risk of burns, fire, electric shock, or injury to persons, read the following important precautions and information before operating the treadmill. 1. It is the responsibility of the owner to ensure could become caught in the treadmill. Athletic that all users of this treadmill are adequately support clothes are recommended for both informed of all warnings and precautions. -
Page 4: Before You Begin
The model you’re not exercising, the unique HEALTHSTRIDER number of the treadmill is HRTL2000. The serial num- treadmill can be folded up, requiring less than half the ber can be found on a decal attached to the treadmill floor space of other treadmills. -
Page 5: Assembly
ASSEMBLY Assembly requires two people. Set the treadmill in a cleared area and remove all packing materials. Do not dis- pose of the packing materials until assembly is completed. Tools required for assembly: The included allen wrench and your phillips screwdriver and two adjustable wrenches 1. - Page 6 5. Move your right hand to the position shown at the right, and hold the treadmill firmly. Using your left hand, lift the storage latch. Raise the treadmill until the locking pin Storage Latch snaps into the storage latch. Make sure that the locking pin is inside the storage latch, and that the storage latch is fully closed.
-
Page 7: Operation And Adjustment
OPERATION AND ADJUSTMENT THE PERFORMANT LUBE WALKING BELT electric shock. This product is equipped with a cord having an equipment-grounding conductor and a Your treadmill features a walking belt coated with grounding plug. Plug the power cord into a surge PERFORMANT LUBE , a high-performance lubricant. - Page 8 DIAGRAM OF THE CONSOLE Mode Indicators CAL. / FAT CAL. TIME Warm Cool -down Performance FAST SPEED PROFILES Aerobic SPEED DIST. / PULSE Fat Burn Warm-Up & INCLINE Cool-Down Mins. MANUAL SLOW THUMB PULSE RESET/ INSERT PAUSE SELECT START MODE / STOP RESET / SET SPEED...
- Page 9 Press the SELECT MODE button to select the control is set, the greater the speed range will be and desired mode. the faster the walking belt will move during the pro- gram. If the program is too easy or too difficult, adjust When the key is inserted, the console will be in the the speed control to select a new maximum speed MANUAL mode.
- Page 10 • DISTANCE/PULSE Change the incline of the treadmill, if desired. DIST. / PULSE display—Displays the distance you To change the in- have walked or cline, hold down run. Note: If the one of the incline KPH indicator be- buttons until the INCLINE side the SPEED display is lit, the distance will be desired incline is...
-
Page 11: How To Fold And Move The Treadmill
HOW TO FOLD AND MOVE THE TREADMILL HOW TO FOLD THE TREADMILL FOR STORAGE Before folding the treadmill, unplug the power cord. Caution: You must be able to safely lift 45 pounds (20 kg) in order to raise, lower, or move the treadmill. 1. -
Page 12: Trouble-Shooting
2. Hold the treadmill firmly with both hands, and lower the treadmill to the floor. To decrease the possibility of in- jury, bend your legs and keep your back straight. TROUBLE-SHOOTING Most treadmill problems can be solved by following the steps below. Find the symptom that applies, and follow the steps listed. - Page 13 3. SYMPTOM: THE WALKING BELT SLOWS WHEN WALKED ON a. Use only a UL-listed surge protector, rated at 15 amps, with a 14-gauge cord of five feet or less in length. b. If the walking belt still slows when walked on, please call our Customer Service Department, toll-free. 4.
-
Page 14: Conditioning Guidelines
CONDITIONING GUIDELINES TRAINING ZONE (Beats/Min.) WARNING: Before beginning Unconditioned Conditioned this or any exercise program, consult your physician. This is especially important for in- 138-167 133-162 dividuals over the age of 35 or individuals 136-166 132-160 with pre-existing health problems. 135-164 130-158 The pulse sensor is not a medical device. - Page 15 Training Zone Exercise to cool down. This will increase the flexibility of your muscles and will help to prevent post-exercise problems. After warming up, increase the intensity of your exer- cise until your pulse is in your training zone for 20 to Exercise Frequency 60 minutes.
-
Page 16: Ordering Replacement Parts
Friday, 6 a.m. until 6 p.m. Mountain Time (excluding holidays). When ordering parts, please be prepared to give the following information: • The MODEL NUMBER OF THE PRODUCT (HRTL2000). • The NAME OF THE PRODUCT (HEALTHSTRIDER Treadmill). • The SERIAL NUMBER OF THE PRODUCT (see the front cover of this manual). - Page 17 REMOVE THIS PART LIST/EXPLODED REMOVE THIS EXPLODED DRAWING DRAWING FROM THE MANUAL! AND PART LIST FROM THE MANUAL Save this EXPLODED DRAWING and PART LIST for future reference. Note: Specifications are subject to change without notice. For information about ordering replacement parts, see the back cover of the User’s Manual.
- Page 18 PART LIST—Model No. HRTL2000 R0496A Key No. Qty. Description Key No. Qty. Description Crossbar Bracket Screw Incline Leg Wheel Bolt Crossbar Bolt Right Rear Roller Adj. Bolt Crossbar Washer Incline Leg Left Crossbar Bracket Rear Hood Spacer Ground Wire Screw 8”...
Need help?
Do you have a question about the HRTL2000 and is the answer not in the manual?
Questions and answers