Table of Contents
Advertisement
Quick Links
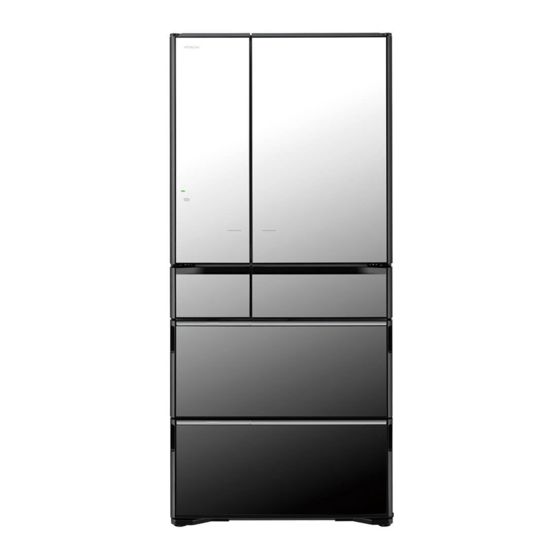
INSTRUCTION MANUAL
REFRIGERATOR-FREEZER
For household use
Model
R-X670GE
Made in Japan
● It takes time to cool for the first time.
It may take more than 4 ~ 24 hours to fully cool.
● Make sure that no food protrudes beyond the storage height limit of each compartment,
and allow clearance between each food in each compartment.
Otherwise, food and/or package may not be stored in each compartment properly, and as a result, the door may not
be closed completely. It may cause the refrigerator not to cool sufficiently and/or not to make ice.
Thank you very much for purchasing a Hitachi Refrigerator.
This refrigerator is designed for home use only.
Do not use this refrigerator for the business use and/or any purpose other
than storing food.
Please read this operation manual carefully and ensure you use the
appliance correctly. In particular, be sure to read the "Safety Suggestions"
section of this operation manual before use.
Please keep this operation manual along with your guarantee card.
Hand over this operation manual together with the refrigerator when the
refrigerator is passed to a third party and used in a different location, or
when it is sent to a recycling plant.
6 doors
Pg.10, 11
Pg. 20, 22
Advertisement
Table of Contents

Related Manuals for Hitachi R-X670GE


Summary of Contents for Hitachi R-X670GE
- Page 1 REFRIGERATOR-FREEZER For household use Model R-X670GE Thank you very much for purchasing a Hitachi Refrigerator. This refrigerator is designed for home use only. Do not use this refrigerator for the business use and/or any purpose other than storing food. Please read this operation manual carefully and ensure you use the appliance correctly.
- Page 2 Tips for using the refrigerator wisely for energy savings 1. Open or close a door less frequently and quickly. Frequent opening and closing leads to waste of energy. 2. Do not overfill the refrigerator. Overfilling the refrigerator prevents a smooth circulation of cool air, precluding even cooling throughout the refrigerator and consuming unnecessary power.
-
Page 3: Table Of Contents
CONTENTS BEFORE USE MAINTENANCE SAFETY SUGGESTIONS ........ MAINTENANCE ..........LEARN NAME & FUNCTION OF EACH PART ... Power plug/The back/floor of the refrigerator ......Name of each compartment/Food stored ....Vacuum Compartment ..........Auto Drawer ............Functions of the Control Panel ......... BEFORE USE .......... -
Page 4: Safety Suggestions
SAFETY SUGGESTIONS Ensure to follow these precautions When using this appliance, failure to follow safety precautions may result in personal harm, harm to other people, and also damage to property. ■ The following pictographs categorize and explain the level ■ How the suggestions should be taken are of possible harm on damage that may occur from ignoring indicated and categorized by the following suggestions resulting in missing the appliances. - Page 5 WARNING Handling the power and power cable ● Be sure to unplug the ● Do not insert or remove the power plug with wet hands. power plug before ・ This may result in electric shock. maintaining the ● This appliance can be used by refrigerator.
- Page 6 ● Handling, service and installation of used this symbol affixed on compressor and flammable refrigerant shall be done by refrigerator should be kept throughout the Hitachi authorized service companies or R600a life of the refrigerator. service personnel only. In case of emergency ●...
- Page 7 CAUTION When moving the refrigerator ● Do not move the refrigerator ● Use the carrying handle when carrying it. by using its wheels as it may Your hands may slip resulting in injury damage the floor. if you hold the refrigerator at other ・...
-
Page 8: Learn Name & Function Of Each Part
LEARN NAME & FUNCTION OF EACH PART Name of each compartment/Food stored Refrigerator compartment Vacuum compartment Pg.14 Pg.16 About 2˚C ~ 6˚C About -1˚C ~ +1˚C Refrigerating food Fresh foods such as meat, fi sh and seafood Yo gur t The vacuum and the platinum catalyst help prevent a reduction in freshness. -
Page 9: Functions Of The Control Panel
Functions of the Control Panel The Control Panel is divided into two sections: Display Section in the upper part and Operation Section in the lower part. The Display and Operation Sections are normally unlit. Touch to light it up. The Operation Section is a touch panel. Touch it to toggle the setting. Notice ●... -
Page 10: Before Use
BEFORE USE Preparation before use Please arrange it as shown below ● The floor should be sturdy and flat. Lay a board with 1cm thickness on the floor if the refrigerator is installed on the carpet, tatami mat, flooring or PVC sheet flooring which may be hollow or discolor. -
Page 11: Transporting Your Refrigerator (Transport For Moving)
Plug the power cord. It is not a problem to plug in the power cord soon after installing the refrigerator. Use a wall outlet exclusively when connecting the power cord. (Alternating current 220 - 240V, rated 10A or more) ● Check that the power plug or the cord is not wedged between the back of the refrigerator and the wall in order to prevent the cord from getting hot. Cooling inside the refrigerator starts. -
Page 12: Auto Door
Refrigerator Refrigerator Compartment Compartment door (left) door (right) Auto Door Lower Freezer Vegetable Compartment ■ Auto Refrigerator Door You can open the door easily by touching the door lightly with your fingers thanks to the Auto Door function. ■ Auto Drawer Auto Drawer function helps you to pull out the case easily even if it is heavy with plentiful foods in. -
Page 13: Using The Auto Refrigerator Door
Using the Auto Refrigerator Door When touching the Open Top view of the refrigerator Top view of the refrigerator Opening one door Open both doors Button for the Auto Refrigerator How to open the on either side at a time Auto Door , the operation sound is Door... -
Page 14: Refrigerator Compartment
REFRIGERATOR COMPARTMENT Refrigerator Compartment LED lamp Swing partition Height adjustable Pocket (fixed) pockets Egg stand Height adjustable pockets Fixed shelf Height adjustable upper/ middle shelf (Glass shelf) Height adjustable lower shelf Double door pockets (left) Double door pockets (right) Refrigerator Compartment Temperature Sensor Cold Air Blowout Port Request... -
Page 15: Adjust The Height Of A Pocket/Shelf
Adjust the height of a pocket/shelf You can adjust the position of the pocket and the shelf depending on size of foods or beverages. For how to remove/attach, see Pg.32 ■ Height adjustable pockets CAUTION Height adjustable upper/middle shelves You can adjust the position of them depending on the ■... -
Page 16: Vacuum Compartment
VACUUM COMPARTMENT Vacuum Compartment Platinum catalyst The platinum catalyst decomposes odor ingredients of meat or fi sh into carbon dioxide to maintain the freshness of foods. Vacuum Pump LED light Brightly lights up the Vacuum Case when a door of the Refrigerator Compartment is opened. -
Page 17: Change The Settings Of The Vacuum Compartment
Change the settings of the Vacuum Compartment Touch button on the Control Panel to turn on the indicator lamp. All indicator lamps turn on, and then the current settings are displayed. Touch button to change the settings as you like. The display switches in sequence as shown below every time the button is touched. -
Page 18: Ice Compartment (Automatic Ice Maker)
Ice Compartment ICE COMPARTMENT (AUTOMATIC ICE MAKER) Control Panel Water Supply Container Ice Making buttons (Approx. 1.0 L) Display Container-full line Add water line Making button Ice Case “ Water Supply ” indicator lamp Ice Storage Space Container-full line AUTOMATIC ICE MAKER Ice Tray Ice scoop Ice Compartment... -
Page 19: Quick Ice Making
The [ “ eco ” operation indicator lamp] is not turned on. Stored ice amount and ice-making time Notice Model R-X670GE ● Limit line of stored ice amount represents the guide line Normal operation About 90 pcs Stored ice... -
Page 20: Freezer Compartment
Upper Freezer FREEZER COMPARTMENT Lower Freezer Using the Upper Freezer Using the Lower Freezer Use it to keep daily foods or partially used food. 3-layer freezer case provides you with large storage space compartment and convenient Upper limit line reach of your freeze food items. It is suitable for storing the food preserved for a long time and the food that melt easily such as ice cream. -
Page 21: Using The Delicious Freezing
Using the Delicious Freezing Just by placing a food item in the Delicious Freezing Space, the sensor detects it and automatically toggles to the cooling operation. It can freeze food more quickly, boosted by the effect of the aluminum tray. Wrap a food item with food plastic film or put it in a freezing bag and then place it on the aluminum tray. -
Page 22: Vegetable Compartment
VEGETABLE COMPARTMENT Vegetable Compartment Platinum catalyst The platinum catalyst decomposes odor ingredients of meat or fi sh and/or ethylene gas from vegetables into carbon dioxide to maintain the freshness of foods. Tall Storage Compartment Upper space Locking handle (Containing platinum catalyst) ※... -
Page 23: To Cool It More [Vegetable Compartment (Max)]
To cool it more [Vegetable Compartment (MAX)] Touch button on the Control Panel to turn on the indicator lamp. All indicator lamps turn on, and then the current settings are displayed. button to turn on “ Veg ” . Touch Food is cooled at temperatures lower than usual (Normally, approx.4˚C to 8˚C, →... -
Page 24: Various Functions
VARIOUS FUNCTIONS Setting “ Energy Saving ” mode Setting the “ Energy Saving ” mode reduces the ability to cool each compartment for energy savings. Likewise, when the door of the Vegetable Compartment is left open for 30 seconds or more, the LED light in the compartment has reduced brightness for energy savings. -
Page 25: Locking The Control Panel
Locking the Control Panel Disenabling operations can prevent erroneous operations or misuse by children. When this indicator lamp (Lock of the Control Panel) is illuminated, any other portion of the Control Panel will not be activated by touching it. Touch button on the Control Panel to turn Notice on the indicator lamp. -
Page 26: Set The Condensation Prevention Heater To Min. (Swing Partition)
VARIOUS FUNCTIONS (CONTINUED) Set the condensation prevention heater to MIN. (Swing partition) Setting the condensation prevention heater to MIN saves energy. Swing partition When dew is formed in the swing partition, set it to the standard. The temperature settings for the swing partition can be adjusted by three levels (1 to 2), and level 2 is the most energy saving. -
Page 27: Fine Adjustment Of The Temperature (Refrigerator Compartment / Freezer Compartment)
Fine adjustment of the temperature (Refrigerator Compartment / Freezer Compartment) Temperature settings for Refrigerator and Freezer Compartments can be more finely adjusted by 11 levels. Open the door of the Lower Freezer Compartment. Touch button on the Control Panel to turn on the indicator lamp. All indicator lamps turn on, and then the current settings are displayed. -
Page 28: Maintenance
MAINTENANCE ● Make sure to unplug the power plug when maintaining the refrigerator. Warning ■ When dirt is found ● Wipe off it immediately. It is recommended to clean the hidden places once a year. Power plug The back/floor of the refrigerator Once or twice a year Once or twice a year Pull the leg cover and... -
Page 29: Auto Drawer
Auto Drawer Clean the auto door unit when food falls onto or is caught in the upper part of the auto door unit and when liquid is deposited on the auto door unit. Unplug the power plug. Warning Remove each case of the Lower Freezer or the ●... -
Page 30: Ice Maker Cleaning
MAINTENANCE (CONTINUED) ● Do not place your hand in the mechanical section Warning of the automatic ice maker. (Rotation of the ice tray may cause injury.) Ice Maker Cleaning When using for the first time When not used for more than one week Wash the Ice Tray or water paths with water. -
Page 31: Water Supply Container/Ice Tray
Water supply container Ice tray Once a week Once or twice a year Remove the water Touch button on the Control supply container, Panel to turn on the indicator lamp. and then the lid. All indicator lamps turn on, and then the current settings are Gasket displayed. -
Page 32: How To Remove/Attach Parts
● Before removing parts, take out all the foods on the parts. Caution ● Do not remove parts except the ones listed here. Please contact with a Hitachi customer service centre for cleaning such parts after removing them. Height adjustable upper and middle shelf Slightly lift up the back... -
Page 33: Ice Case (Ice Compartment)・Upper Freezer Case (Upper Freezer)
・Upper Freezer case Ice Case (Ice Compartment) (Upper Freezer) Draw the door fully and lift up the case towards you. Underside of the case Put the case bottom on the frame and set the case. Frame Slide case and lower freezer case (Lower Freezer) Draw the door fully, and draw the Slide case Lift up the Lower... -
Page 34: Troubleshooting
TROUBLESHOOTING Check the following points before asking repair. Contact your dealer or our customer center if the problem still exists after checking them. When this happens Check Item Action and Reasons Cooling may take more than 24 hours at installation. Place food at appropriate intervals, refrain from opening and closing a door as Not cooled well. -
Page 35: Refrigerator Does Not Cool
When this happens Check Item Action and Reasons Remove caught food, if any, and close the door securely. Pay Does any food or package caught in the door prevent the door from attention to the height of food when placing it in the refrigerator. closing completely? Is food squeezed in? or Is a large amount of food put in at one time? Allow clearance between each food in each compartment. -
Page 36: Abnormal Operating Sound Is Generated
TROUBLESHOOTING (CONTINUED) When this happens Check Item Action and Reasons Another door opens after Another door may open for a moment by the wind pressure because cool Have you shut the door with a bang? air path connects each compartment. closing 1 door. -
Page 37: It Smells Strange
When this happens Check Item Action and Reasons Is there any food etc. caught in the inner part of the Vacuum Remove any food if it is caught in. The handle cannot be Compartment Case or the vacuum compartment gasket? locked. -
Page 38: Vegetable Compartment
TROUBLESHOOTING (CONTINUED) When this happens Check Item Action and Reasons As the Vegetable Compartment is more humid than the other compartments, dew may be found in the case or ceiling of the Vegetable Compartment or on the surface of food, depending on the amount or type of vegetable stored there. -
Page 39: Available Parts
■ If you order any part listed below, specify the model of your refrigerator to a dealer for purchasing genuine parts. Subject Product Name Model Product Model Vacuum state can't be maintained ● It may be damaged, deformed or Vacuum compartment gasket R-X670GE R-XG6700G 311 discolored. -
Page 40: About Non-Cfc Refrigerators
After that, please contact the dealer or Hitachi customer service centre. Biocidal Product Regulation (EU528/2012) Article 58 Information This Product contains biocidal substances. -
Page 41: Storable Weight
22.0kg AFTER-SALES SERVICE Please contact the following Hitachi Service Centre if power cord is damaged or service is required. If some malfunction occurs during operation, unplug the power plug immediately and contact the service centre to have the refrigerator repaired.
Need help?
Do you have a question about the R-X670GE and is the answer not in the manual?
Questions and answers