Advertisement
Available languages
Available languages
Quick Links
ESPAÑOL
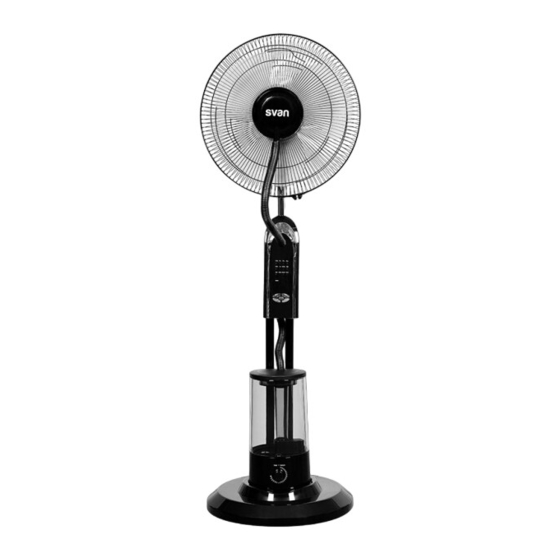
Ventilador Nebulizador/Humificador
INSTRUCCIONES
Por favor lea estas instrucciones antes de usar el producto
INSTRUCCIONES GENERA LES DE SEGURIDAD
Lea detenidamente este manual de instrucciones antes de utilizar el aparato
por primera vez.
1. Para evitar el riesgo de descargas eléctricas, no sumerja el cable, el
enchufe ni cualquier parte de esta unidad en agua u otros líquidos.
2. Es necesario vigilar de cerca la unidad cuando se utiliza cerca de niños.
3. Desenchufe la unidad de la fuente de alimentación cuando no la vaya a
utilizar y antes de limpiarla.
4. No lo utilice si el cable o el enchufe están dañado, o después de que
haya presentado mal funcionamiento, se haya caído o presente algún
tipo de daño. Lleve la unidad al servicio técnico autorizado más cercano
para que lo examinen, reparen o ajusten, según sea necesario.
5. El uso de accesorios no recomendados por el fabricante puede causar
lesiones a las personas.
6. Conecte siempre el enchufe a la unidad y después a la fuente de
alimentación. Para desconectar, coloque los controles en posición
"apagado" y desenchufe la unidad de la fuente de alimentación.
7. No utilice la unidad para ningún fin que no sea el previsto.
8. Nunca utilice la unidad con el cable de alimentación dañado. Si se daña
el cable de alimentación, debe ser sustituido por el fabricante o su
agente de servicio o una persona igualmente calificada para evitar un
peligro.
9. No intente reparar la unidad por su cuenta. Póngase en contacto con
nuestro servicio técnico para que le cambien o le reparen la unidad.
Advertisement

Related Manuals for Svan SVVE16WT


Summary of Contents for Svan SVVE16WT
- Page 1 ESPAÑOL Ventilador Nebulizador/Humificador INSTRUCCIONES Por favor lea estas instrucciones antes de usar el producto INSTRUCCIONES GENERA LES DE SEGURIDAD Lea detenidamente este manual de instrucciones antes de utilizar el aparato por primera vez. 1. Para evitar el riesgo de descargas eléctricas, no sumerja el cable, el enchufe ni cualquier parte de esta unidad en agua u otros líquidos.
- Page 2 Los aparatos de ventilación no deben ser utilizados por niños o personas con capacidades físicas, sensoriales o mentales reducidas, o con falta de experiencia y conocimientos, a menos que hayan recibido instrucciones o supervisión por parte de un adulto responsable. Los menores de 8 años y las personas con capacidades físicas, sensoriales o mentales reducidas, o las personas sin experiencia o conocimientos no deberán utilizar la unidad sin supervisión de un...
- Page 3 DESCRIPCIÓN DE LAS PARTES 1.Protector frontal. 2. Tornillo de fijación de las aspas 3.Aspas 4.Aro de sujeción de los protectores frontal y trasero. 5. Tuerca de fijación de las aspas. 6.Protector trasero 7.Tapa del motor 8.Tubo del motor 9.Tornillo de fijación 10.Tubo de soporte 11.Cubierta de la base 12.Base...
- Page 4 INSTRUCCIONES DEL NEBULIZADOR/HUMIFICADOR El nebulizador/humidificador se usa en la parte inferior del ventilador, también se puede usar independientemente del ventilador. Instalación e instrucciones de nebulizador/humidificador: 1. Abra el embalaje para verificar que todos los componentes del producto están bien, si falta algún objeto o existe alguna rotura, en este caso, por favor vuelva a empaquetarlo y devuélvalo.
- Page 5 200 ml/h, puede ajustarse según el nivel de humedad de su habitación. 7. Cuando no hay agua en el tanque, el dispositivo de seguridad en el interior apaga el circuito de atomización automáticamente, y no pulverizará. Cuando el nivel del agua este bajo, la luz indicadora de agua se ilumina (roja), si va a continuar usándolo, por favor desconéctelo de la corriente y vuelva a llenar con agua el tanque de agua.
- Page 6 Regular el ventilador de alguna de estas formas: * Velocidad alta: la unidad trabajará durante media hora a alta velocidad, después de media hora trabajará a velocidad baja. * Velocidad media: la unidad funcionará durante media hora a velocidad media, media hora más tarde, funcionará a velocidad baja. * Velocidad baja: la unidad trabajará...
- Page 7 los tubos de soporte. Finalmente, las cuatro ruedas deben instalarse en los orificios de alineación en la base, apretando con una llave especial, y luego poniendo la cubierta de la base. 3. Saque el cabezal del ventilador (esta parte se ha instalado antes de salir de fábrica), desatornille los dos botones de ajuste para colocarlo en el tubo de soporte instalado.
- Page 8 dentro ya que provocaría un mal funcionamiento del aparato. 4) Por favor, no desarme el fuselaje o los componentes de la unidad. Mantenimiento del humidificador: Cuando la unidad no se use durante un tiempo prolongado, límpiela y colóquela en el embalaje y manténgala en un lugar seco. MANTENIMIENTO Y LIMPIEZA Desenchufe el ventilador antes de limpiarlo.
- Page 9 NORMAS DE PROTECCIÓN DEL MEDIO AMBIENTE Este aparato no se debe desechar con los residuos domésticos cuando finalice su durabilidad, sino que se debe ofrecer a un centro de reciclaje de aparatos eléctricos y electrónicos domésticos. Este símbolo en el aparato, manual de instrucciones y embalaje le avisa de este aspecto importante.
- Page 10 ENGLISH Mist Fan INSTRUCTION Before using, please read the instruction carefully. GENERAL SAFETY INSRTUCTIONS Read this instruction manual very carefully before operating the fan for the first time. 1. To protect against electric shock do not immerse cord, plugs, or in water or other liquid.
- Page 11 This fan can be used by children aged from 8 years and above and persons with reduced physical, sensory or mental capabilities or lack of experience and knowledge if they have been given supervision or instruction concerning use of the appliance in a safe way and understand the hazards involved.
- Page 12 1.Front Guard. 2. Blade Fastening Screw 3.Fan blade 4.Grill Strap 5.Guard Fastening Screw 6.Rear Guard 7.Motor cover 8.Motor tube 9.Fastening Screw 10.Stand tube 11.Base cover 12.Base INSTRUCTIONS OF COOL HUMIDI FIER This Humidifier is mainly used on the bottom of the fan, also used separately. Installation and Instructions of Humidifier 1.
- Page 13 plate, it should be not placed near direct sunlight and too damp places. 3.Take the Humidifier Water Tank and turn over, follow the “Adding water” arrow to open the cover on Counterclockwise, add clean water. (Pure water be advised). 4.Tighten the Water Tank Cover by Clockwise after filling with water, wipe the water droplets surrounded by water tank and install the Water Tank well.
- Page 14 1)Normal wind: Unit will work at Low-Medium-High speed. 2)Nature wind: Unit will operate under irregular status according to pre-set program, airflow speed can be selected Low-Medium-High.It is more comfortable and mild under nature mode. 3).Sleeping wind: airflow speed can be selected Low-Medium-High; Motor is controlled by computer program so airflow volume will decline slowly as body temperature declines.
- Page 15 INSTRUCTIONS OF ASSEMBLY METHOD 1.Open the fan of the packaging to examine the integrity of parts, as above diagram; 2. First, put the two gaskets into the support tubes, and then insert into the corresponding holes of the base, (such as the A section of installing the base components shown) use the screw with a screw meson to tighten the support tubes.
- Page 16 Clean with soft damp cloth,, clear the dirt, the mist cover must be cleaned carefully. Notices of cleaning: 1) Do not touch the transducer with sharp tools,only clean with soft wet cloth. 2) Don't use the cloth with chemical solvents、gasoline、kerosene、polishing powder to o not touch the transducer with sharp tools,only clean with soft wet cloth wipe the fan appearance.
- Page 17 cloth so as not to change the colour or cause damages. After cleaning, pack them in order. Keep it in the dry place. TECHNICAL DATA: 220V 75W 50Hz GUIDELINES FOR PROTE CTION OF THE ENVIRONMENT This appliance should not be put into the domestic garbage at the end of its durability, but must be offered at a central point for the recycling of electric and electronic domestic appliances.
Need help?
Do you have a question about the SVVE16WT and is the answer not in the manual?
Questions and answers