Advertisement
Quick Links
Parts Included:
1- Table
2- Benches (2)
3- Support Rails (2)
4- Leg Brackets (12)
5- ⁄ " Leg Screws (12)
6- 1 ⁄ " Bracket Bolts(12)
7- Nuts (12)
Tools Required:
Phillips Head Screwdriver- ⁄ " (13mm) Wrench
Step 1:
Open Table and Bench legs.
Step 2:
Flip Table and
Benches over and
attach brackets
to the bottom of
all the legs using the
⁄ " screws. Be sure to
align the brackets with the notches
on the bottom of the legs. Tighten Securely.
Step 3:
Attach the Support Rail to the
Bench Leg Brackets with supplied
Bracket Bolts and Nuts. Repeat on the
other end of the Benches. Tighten all
Bolts and Nuts securely.
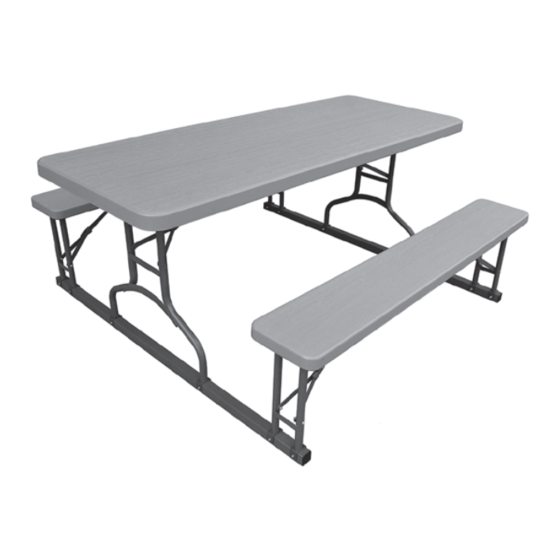
Picnic Table
Assembly Instructions
Step 4:
With a partner, lift the Bench Assembly and align
the holes in the Rails with the holes in the Table
Brackets. Secure the Table to the Rails with the
remaining Bolts and Nuts. Tighten Securely.
Step 5:
Again, with a partner,
lift the completed
Picnic Assembly and
turn it right-side up.
Advertisement

Related Manuals for Lancaster Picnic Table

Summary of Contents for Lancaster Picnic Table
- Page 1 Picnic Table Assembly Instructions Parts Included: 1- Table 2- Benches (2) 3- Support Rails (2) 4- Leg Brackets (12) 5- ⁄ ” Leg Screws (12) 6- 1 ⁄ ” Bracket Bolts(12) 7- Nuts (12) Tools Required: Phillips Head Screwdriver- ⁄ ” (13mm) Wrench Step 1: Open Table and Bench legs.
- Page 2 48” Square Picnic Table Assembly with 78” Overall Footprint Parts Include: 1 - 48” Square Table 2 - Table Legs (4) 3 - Leg Support Rails (4) 4 - 48” Benches (4) 5 - Bench Legs (8) 6 - 6*40 Long Hex Bolts (8) 7 - 6*16 Short Pole Bolts (8) 8 - 6* 5.5 Locknuts (64)
Need help?
Do you have a question about the Picnic Table and is the answer not in the manual?
Questions and answers