Table of Contents
Advertisement
Quick Links
Advertisement
Table of Contents

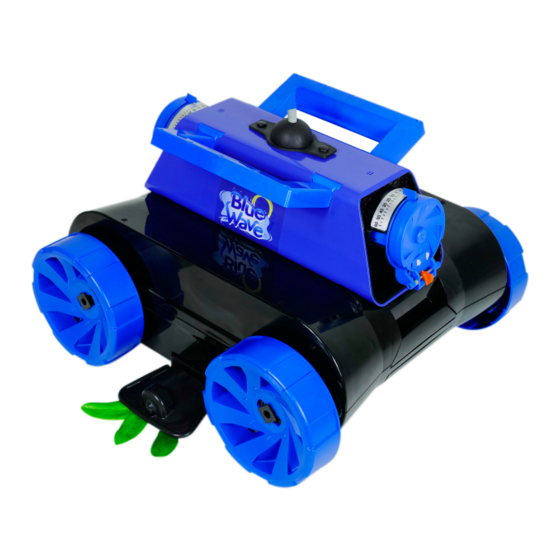
Summary of Contents for Blue Wave Indigo Hybrid x-5
- Page 1 8STREME Instruction Manual...
-
Page 2: Warning And Safety
Warning and Safety!!! Follow instructions bellow and review your local pool safety regulations • Keep the power supply away from pool edge by at least 6 ft • Ensure your electrical outlets are properly grounded and have a Ground Fault Current Interrupter (GFCI) protected. - Page 3 For optimum performance, please ensure your pool is in the following conditions: PH level: 7.0-8.0 Alkalinity: 80 - 160 ppm Calcium Hardness: 150 -400 ppm If the robotic cleaner is not functioning properly or if it is damaged, contact 8streme (USA) at service@8streme.com or call (408) 823-1170...
-
Page 4: Getting Started
Getting Started A. Cord Floaters. Cord floater is a foam tube which is split along the tube length. It helps the cord stay on top of water surface and therefore minimize chance of cord tangling. a. Untie the Velcro strap. b. - Page 5 B. Side suction: This feature can extend the cleaning path of the robot to gather more debris faster. However, DO NOT use these side suction flaps if you have uneven pool bottom or pool liners with pleats i. Turn the pool cleaner upside down with the bottom facing up. ii.
- Page 6 c. Check the polarity and plug the blue connector to blue socket on the square swivel. Plug the black connector to black socket on the square swivel. NOTE: The plug can only be inserted in one direction. Take care to align properly.
- Page 7 ii. Place the robotic cleaner at a spot in the pool farthest from the power supply.From there you can determine how much floating cord you need. Keep any extra floating cord on the deck as explained in section E. iii. Make sure the robot is fully submerged before moving to next step. If needed,roll the cleaner left and right slightly until all air is released.
- Page 8 b. Turn on the power suppl when it is ready to clean. Press down the toggle switch towards ON and the blue LED light turns on. The pool cleaner will run 3 hours and then shut down automatically. c. Press the toggle switch towards OFF to turn the power supply off. d.
- Page 9 Adjusting Direction and Speed Control The cleaning pattern of this robot can be modified by adjusting the output flap and speed control settings 1. Direction adjust: To adjust the direction of the robot, rotate the outlet cover. Note that the direction the robot turns is the opposite of the where the indicator points.
- Page 10 b. Rectangular shaped pools, it is recommended that the flap at both ends do not share the same direction. For best performance have flap at the hinge end of the cleaner be straight and then the flap at the front of the cleaner rotated all the way to the side. c.
-
Page 11: Cleaning The Filter Bag
Cleaning the Filter Bag Pull the tab at the front of cleaner and lift up top shell. Continue to lift up the shell until you hear a "click" and the shell stays in place. 1. Lift up filter basket from the front until you hear a click. - Page 12 (Optiona) I Using and Cleaning Fine Filter Pad 1. To use your optional fine filter pad, take your debris basket out from the cleaner and open it. 2. Unhook the elastic band. Take the fine filter pad and place it to underside of the filter screen frame. Do not place the filter pad folded or compressed.
-
Page 13: Troubleshooting
Troubleshooting Symptom Possible reason(s) Solution(s) • Electrical outlet/ • Check if electrical socket you are using is working by plugging GFCI tripped another know working electrical appliance into the socket • Plug is not and check to see if the GFCI triggered. Reset it if needed. connected properly •... - Page 14 Indicator light and Diagnostics...
- Page 15 Indicator Diagnostic light When the power supply is plugged in to wall outlet and toggle switch is pressed towards ON, this blue LED should stay on indicating power supply functions normally. Otherwise check if the wall outlet has power or replace the power supply. This blue LED will light up when floating cord between power supply and the NO-TWIST swivel is connected properly.
-
Page 16: Replacement Parts
Replacement parts Part Item Part description number ov o • -0 Pump outlet flap assembly. 51432 51400 Pump motor 51440 Pump enclosure. Red Top shell. Black. 51451 51461 Bottom chassis. Black Side wheels, Black. 4pcs as 51171 a set "t� 51471 Quick drain flap.


Need help?
Do you have a question about the Indigo Hybrid x-5 and is the answer not in the manual?
Questions and answers
where to buy replacement parts