Table of Contents
Advertisement
Available languages
Available languages
Quick Links
Model: 68223
By
COMPACT RESIDENTIAL MOTORIZED
HOIST 220 LB CAPACITY
ASSEMBLY INSTRUCTIONS, USE & CARE GUIDE AND WARRANTY
Watch our installation video at proslat.com/pages/instructions
This is the best way to follow and understand the installation process
Questions, problems, missing parts? Before returning to the store, call Proslat/Garage Gator Customer Service
1-888-GATOR-08
8 a.m. – 5 p.m., EST, Monday – Friday / info@proslat.com
PROSLAT.COM
Advertisement
Chapters
Table of Contents

Related Manuals for Proslat GARAGE GATOR 68223


Summary of Contents for Proslat GARAGE GATOR 68223
- Page 1 Watch our installation video at proslat.com/pages/instructions This is the best way to follow and understand the installation process Questions, problems, missing parts? Before returning to the store, call Proslat/Garage Gator Customer Service 1-888-GATOR-08 8 a.m. – 5 p.m., EST, Monday – Friday / info@proslat.com...
-
Page 2: Table Of Contents
Table of Contents Warranty ..................................2 Safety Information ................................3 Hardware and required tools ............................4 Tools required ................................4 Hardware Included............................... 4 Box contains ................................. 5 Components ................................. 5 Pre-installation ................................6 Determine motor mounting location on the ceiling ...................... 6 Installation .................................. -
Page 3: Safety Information
5. Install on a flat level ceiling, or open rafters. Will not operate correctly if installed on an angle. 6. Visually inspect trusses for damage before installing your Garage Gator 68223. WARNING: THIS IS A DO IT YOURSELF (DIY) PROJECT. DO NOT ATTEMPT THIS INSTALLATION WITHOUT A BASIC UNDERSTANDING OF THE CONTENTS IN THESE ASSEMBLY INSTRUCTIONS. -
Page 4: Hardware And Required Tools
Hardware and required tools TOOLS REQUIRED Safety Power drill Step ladder Pliers glasses Adjustable, Phillips Tape in. Ratchet open ended screwdriver measure wrench Utility Pencil Stud finder knife HARDWARE INCLUDED K x 8 L x 4 P x 2 Q x 1 4 in. -
Page 5: Components
Do not attempt installation if parts are damaged or missing. If parts of your hoist are missing or appear damaged call Proslat/Garage Gator customer service at 1 888 GATOR-08, Monday through Friday, 8:00 AM to 5:00 PM Eastern Time. Before calling carefully check the box as parts may be in the packing material. -
Page 6: Pre-Installation
Pre-Installation Watch our installation video at proslat.com/pages/instructions This is the best way to follow and understand the installation process. Determine motor mounting location on the ceiling □ Choose a location in your garage where you would like to install your Hoist – an unobstructed operating space of at least 3 feet by 4 feet is required. -
Page 7: Installation
FAILURE TO PROPERLY INSTALL YOUR MOUNTING PLATE TO EXAMPLE OF BAD ALIGNMENT THE CENTER OF YOUR JOISTS WILL CAUSE YOUR SPACER BAR TO BE OFFSET FROM CENTER OF JOISTS AND MAY CAUSE YOUR HOIST TO FALL FROM CEILING. PROSLAT.COM Please contact 1 888 GATOR-08 for further assistance. -
Page 8: Step 2 - Install The Motor Mounting Plate To The Ceiling
Installation (continued) Install the motor mounting plate to the ceiling □ Using a power drill with a in. drill bit attached, drill six pilot holes into the center of the joists. □ Using the ratchet and ⁄ in. socket (T) fasten 6 of the 4 in. lag bolts (K) into the joists until the motor mounting plate is securely fastened. -
Page 9: Step 3 - Attach The Motor Hoist To The Motor Mounting Plate
WARNING: Slide the motor hoist until the tabs are firmly against the threaded bolts. Do not leave any space between the bolts and the enclosed end of the mounting tabs. PROSLAT.COM Please contact 1 888 GATOR-08 for further assistance. - Page 10 Installation (continued) DEPENDING ON YOUR JOIST SPACING, YOU WILL USE DIFFERENT HOLES ON THE SPACER BARS FOR INSTALLATION. 16 in. joists 24 in. joists 0 in. 0 in. 16 in. 24 in. 32 in. 48 in. 48 in. SPACER CHANNEL PULLEY BAR SPACER CHANNEL PULLEY BAR...
- Page 11 □ Attach the 6 mm nut (Q) to the fixed bolt and tighten with a ratchet or adjustable wrench until the spacer channel bar is securely fastened to the motor hoist. □ Place a lag bolt(s) (K) and using the ratchet fasten the bolt(s) into the joist(s) until the spacer channel bar is securely fastened. 16" PROSLAT.COM Please contact 1 888 GATOR-08 for further assistance.
-
Page 12: Step 5 - Install Straps
Installation (continued) Strap hole Install straps □ Place the straps coming out of the rectangular opening closest to the spacer channel Stopper plate bar (fig. D) over the top of the pulley at the end of the spacer channel pulley bar. (fig. E) □... - Page 13 “ON” position. X 10 Screw into wall Screw into wall Insert supplied key here Power cord cable clamps PROSLAT.COM Please contact 1 888 GATOR-08 for further assistance.
-
Page 14: Step 7 - Assemble The Hook Bar
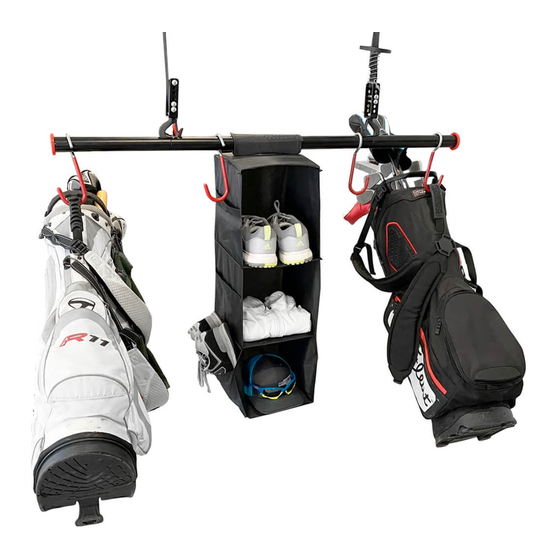
Installation (continued) Assemble the hook bar □ If you are using the lift for golf bags use the long J hooks (I). If you are using it for bicycles use the short J hooks (H). Slide hooks onto the middle bar before attaching your end bars. □... -
Page 15: Step 8 - Level
Adjust the second pin accordingly until your bar is level. PROSLAT.COM Please contact 1 888 GATOR-08 for further assistance. -
Page 16: Step 9 - Using The Key Lock Feature
Using the key lock feature □ To prevent unauthorized use the Garage Gator 68223 is equipped with a key lock feature. □ When the key is turned to the “OFF” position or removed from the hand control switch the unit will not function until the key is reinserted and turned to the “ON”... -
Page 17: Operating Instructions
Operating instructions Contact information Solutions Murales Proslat inc. TO RAISE OR LOWER THE HOOK BAR: 225, boul. Industriel □ Do not stand under the hoist Chateauguay, (Quebec) □ Turn the key in the hand control switch to the “ON” position. - Page 18 Watch our installation video at proslat.com/pages/instructions This is the best way to follow and understand the installation process Questions, problems, missing parts? Before returning to the store, call Proslat/Garage Gator Customer Service 1-888-GATOR-08 8 a.m. – 5 p.m., EST, Monday – Friday / info@proslat.com...
- Page 19 INSTRUCTIONS D'ASSEMBLAGE, GUIDE D'ENTRETIEN ET GARANTIE Visitez proslat.ca pour visionner notre vidéo d'installation C’est la meilleure façon de suivre et de comprendre le processus d’installation. Des questions, des problèmes, des pièces manquantes ? Avant de retourner le produit au magasin, appelez notre service à...
- Page 20 Table des matières Garantie ................................... 2 Informations sur la sécurité ............................3 Quincaillerie et outils requis ............................4 Outils requis ................................. 4 Quincaillerie incluse..............................4 Contenu de l'emballage ..............................5 Composantes ................................5 Pré-installation ................................6 Déterminez l'emplacement du moteur au plafond ....................... 6 Installation ..................................
-
Page 21: Informations Sur La Sécurité
BON JUGEMENT ET VOTRE PRISE DE DÉCISION. SI, POUR UNE RAISON QUELCONQUE, VOUS ESTIMEZ QUE LA QUALITÉ DE VOTRE STRUCTURE DE PLAFOND EST EN CAUSE, INTERROMPEZ IMMÉDIATEMENT LE PROCESSUS D'INSTALLATION. UTILISEZ L'ÉLÉVATEUR GARAGE GATOR DE FAÇON APPROPRIÉE ET APPRÉCIEZ VOTRE NOUVEAU GARAGE! PROSLAT.CA Pour assistance, SVP contactez-nous au 1 888 GATOR-08... -
Page 22: Quincaillerie Et Outils Requis
Quincaillerie et outils requis OUTILS REQUIS Perceuse Lunettes Escabeau Pinces électrique de protection Tournevis Ruban Cliquet Clé à molette cruciforme à mesurer Détecteur Couteau Crayon à mine de montant utilitaire QUINCAILLERIE INCLUSE K x 8 L x 4 P x 2 Q x 1 Tire-fond de Noix de... -
Page 23: Contenu De L'emballage
Ne tentez pas l'installation si des pièces sont endommagées ou manquantes. Si des parties de votre élévateur sont manquantes ou semblent endommagées, appelez le service à la clientèle de Proslat au 1-888-691-2944, du lundi au vendredi, de 8 h à 17 h, heure de l'Est. Avant d'appeler, vérifiez soigneusement le carton, car des pièces peuvent se retrouver dans le matériau d'emballage. -
Page 24: Pré-Installation
Pré-Installation Visionnez notre vidéo d'installation au proslat.ca/pages/instructions C’est le meilleur moyen de suivre et de comprendre le processus d’installation. Déterminez l'emplacement du moteur au plafond □ Choisissez l'emplacement dans votre garage où vous souhaitez installer votre élévateur motorisé – un espace libre d'au moins 3 pieds (0,91 m) par 4 pieds (1,22 m) est requis. -
Page 25: Installation
SI VOUS N’INSTALLEZ PAS CORRECTEMENT VOTRE EXEMPLE D'UN MAUVAIS ALIGNEMENT PLAQUE DE MONTAGE AU CENTRE DE VOS SOLIVES, LA BARRE DE LA POULIE SERA DÉCALÉE PAR RAPPORT AU CENTRE DES SOLIVES. PROSLAT.CA Pour assistance, SVP contactez-nous au 1 888 GATOR-08... - Page 26 Installation (suite) Installez la plaque de montage du moteur au plafond □ À l’aide d’une perceuse équipée d’un foret de po, percez six trous pilotes dans le centre des solives. □ À l’aide du cliquet et de la douille de ⁄...
- Page 27 à la plaque de montage du moteur. AVERTISSEMENT: Faites glisser l'élévateur motorisé jusqu'à ce que les languettes soient fermement insérées contre les boulons filetés. Ne laissez aucun espace entre les boulons et l'extrémité des languettes de montage. PROSLAT.CA Pour assistance, SVP contactez-nous au 1 888 GATOR-08...
- Page 28 Installation (suite) EN FONCTION DE L'ESPACEMENT DES SOLIVES, VOUS UTILISEREZ DIFFÉRENTS TROUS SUR LES ENTRETOISES POUR L'INSTALLATION. Solives aux 16 po Solives aux 24 po 0 po 0 po 16 po 24 po 32 po 48 po 48 po BARRE DE LA POULIE BARRE DE LA POULIE 64 po 72 po...
- Page 29 □ Placez un ou plusieurs tire-fonds (K) et fixez-les à l'aide de la clé à cliquet dans la ou les solives jusqu'à ce que la barre soit bien fixée. 16" PROSLAT.CA Pour assistance, SVP contactez-nous au 1 888 GATOR-08...
- Page 30 Installation (suite) Trou de la sangle Installez les courroies □ Placez les sangles sortant de l’ouverture rectangulaire la plus proche de la barre Plaque de buttée d'espacement (fig. D) sur le dessus de la poulie, à l’extrémité de la barre de poulie. (fig.
- Page 31 "ON". X 10 Vissez dans le mur Vissez dans le mur Insérez la clé fournie ici Clips pour câbles d'alimentation PROSLAT.CA Pour assistance, SVP contactez-nous au 1 888 GATOR-08...
- Page 32 Installation (suite) Assemblez la barre de support □ Si vous utilisez l'élévateur pour les sacs de golf, utilisez les longs crochets en J (I). Si vous l'utilisez pour soulever des vélos, utilisez les crochets en J plus courts (H). Faites glisser les crochets sur la barre centrale avant de fixer vos barres d'extrémité. □...
- Page 33 Ajustez la deuxième goupille en conséquence jusqu'à ce que votre barre soit de niveau. PROSLAT.CA Pour assistance, SVP contactez-nous au 1 888 GATOR-08...
- Page 34 Utilisation de la fonction de verrouillage □ Pour éviter toute utilisation non autorisée, l'élévateur Garage Gator 68223 est équipé d’une fonction de verrouillage. □ Lorsque la clé est tournée à la position “OFF” ou retirée de l'interrupteur de la télécommande, l'appareil ne fonctionnera pas tant que la clé...
-
Page 35: Directives D'utilisation
Directives d'utilisation Coordonnées Solutions Murales Proslat inc. POUR ÉLEVER OU ABAISSER LA BARRE DE CROCHET : 225, boul. Industriel □ Ne pas rester sous l'ascenseur Châteauguay, (Québec) □ Tournez la clé dans l'interrupteur de commande manuelle J6J 4Z2, Canada à la position "ON". - Page 36 C’est la meilleure façon de suivre et de comprendre le processus d’installation. Des questions, des problèmes, des pièces manquantes? Avant de retourner au magasin, appelez le service clientèle de Garage Gator 1-888-GATOR-08 de 8 h à 17 h, HNE, du lundi au vendredi / info@proslat.com PROSLAT.CA...
Need help?
Do you have a question about the GARAGE GATOR 68223 and is the answer not in the manual?
Questions and answers