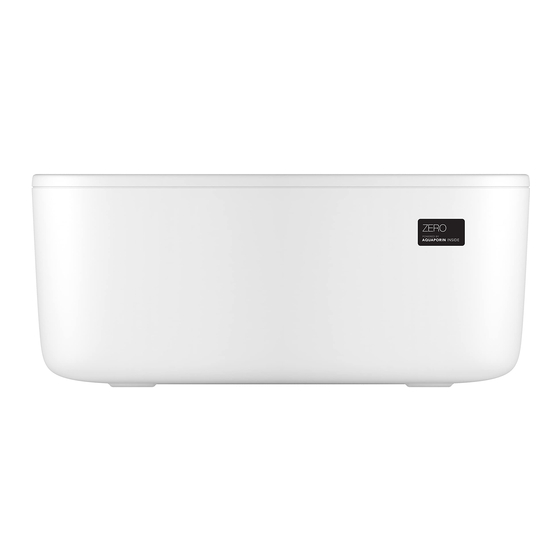
Summary of Contents for Aquaporin ZERO
- Page 1 USE AND INSTALLATION GUIDE See installation video, Q&A and more on aquaporin.com/zero or scan the QR code...
-
Page 2: Table Of Contents
INSTALLATION DRAIN CIRCUIT INSTALL ATION INLET CIRCUIT INSTALL ATION FAUCET INSTALL ATION OUTLET CIRCUIT INSTALL ATION TAP CIRCUIT FUNCTIONS PRE- AND POST-FILTER REPL ACEMENT RO FILTER REPL ACEMENT WARNING: This equipment requires regular maintenance to ensure the treated water’s potability; use it in accordance with the instructions in this user guide. - Page 3 DIMENSIONS 36 cm 14.17 in ZERO | USE AND INSTALLATION GUIDE...
- Page 4 2 pieces 1 piece 1 piece 6.56 ft 3.28 ft 9300734 9300728 9300651 9300733 9300522 Teflon Tape O-ring Gooseneck / Plumber’s 3021 faucet kit Tape 1 piece 1 piece 1 piece 1100223 XO0001BN ZERO | USE AND INSTALLATION GUIDE...
- Page 5 INSTALLATION SCHEME drain Before installation, cover with Teflon Tape / Plumber’s Tape. drain ZERO | USE AND INSTALLATION GUIDE...
-
Page 6: Installation
Before installation, remove the yellow IN and OUT plugs as well as the DRAIN plug. Keep the plugs as they will be reused if the device is relocated. Drain plug extraction 1. Keep the collet pressed down 2. Pull out the plug ZERO | USE AND INSTALLATION GUIDE... -
Page 7: Drain Circuit Installation
DRAIN CIRCUIT INSTALLATION Drain clamp kit assembly Gasket Stem Pipe ¼” Drain elbow ¼” clamp kit 1 piece 1 piece 1 piece ZERO | USE AND INSTALLATION GUIDE... - Page 8 DRAIN CIRCUIT INSTALLATION Drill ø 6 mm / 15/64” ZERO | USE AND INSTALLATION GUIDE...
- Page 9 DRAIN CIRCUIT INSTALLATION drain ZERO | USE AND INSTALLATION GUIDE...
-
Page 10: Inlet Circuit Installation
M/F M adapter female 3/8” connector 1 piece 1 piece 1 piece 1 piece Pipe Stem elbow Teflon Tape 8X6 mm 8 mm / Plumber’s Tape Cut length 1 piece 1 piece to fit ZERO | USE AND INSTALLATION GUIDE... - Page 11 INLET CIRCUIT INSTALLATION Before installation, ensure that the cold water valve is turned off/closed CLOSE PLEASE NOTE! Before installation, cover with Teflon Tape / Plumber’s Tape. ZERO | USE AND INSTALLATION GUIDE...
- Page 12 INLET CIRCUIT INSTALLATION PLEASE NOTE! Before installation, cover with Teflon Tape / Cold water pipe Plumber’s Tape. PLEASE NOTE! Before installation, cover with Teflon Tape / Plumber’s Tape. ZERO | USE AND INSTALLATION GUIDE...
- Page 13 INLET CIRCUIT INSTALLATION ZERO | USE AND INSTALLATION GUIDE...
-
Page 14: Faucet Installation
FAUCET INSTALLATION For the faucet operation instructions, see page 18. Faucet Spacer Rubber Plastic Toothed Fixing nut with gasket washer washer o-ring 1 piece 1+1 pieces 1 piece 1 piece 1 piece 1 piece ZERO | USE AND INSTALLATION GUIDE... - Page 15 FAUCET INSTALLATION Drill ø 12 mm / 15/32” Drill a hole adjacent to your regular faucet. ZERO | USE AND INSTALLATION GUIDE...
-
Page 16: Outlet Circuit Installation
OUTLET CIRCUIT INSTALLATION O-ring Straight Pipe Stem Straight 3021 female 8X6 mm elbow female adapter 8 mm connector 1 piece 1 piece Use the rest 1 piece 1 piece or cut to fit ZERO | USE AND INSTALLATION GUIDE... - Page 17 OUTLET CIRCUIT INSTALLATION ZERO | USE AND INSTALLATION GUIDE...
-
Page 18: Tap Circuit Functions
If the faucet tap is in normal operation a BLUE LED will flash during dispensing. See the filter exchange guide on aquaporin.com/zero for more information. ZERO | USE AND INSTALLATION GUIDE... -
Page 19: Use
IF YOU HEAR A NOISE DURING FIRST USE, PLEASE FOLLOW THIS PROCEDURE: • put ZERO in the vertical position in order to let the air flow out of the system • complete at least 3 cycles of filling and emptying the tank to condition the system •... -
Page 20: Pre- And Post-Filter Replacement
PRE- AND POST-FILTER REPLACEMENT PRE- AND POST-FILTER REPLACEMENT Before replacing the pre- and post-filters, turn the cold water valve off and turn the faucet on until the water flow stops. CLOSE OPEN ZERO | USE AND INSTALLATION GUIDE... - Page 21 PRE- AND POST-FILTER REPLACEMENT Before you insert the pre- and post-filter, wet the O-ring TO REMOVE TO INSERT Turn Turn clockwise counter- clockwise Pull Push ZERO | USE AND INSTALLATION GUIDE...
- Page 22 PRE- AND POST-FILTER REPLACEMENT Replacement Remove filter kit the cap Large o.d. Small o.d. ø 12.75 mm ø 11.50 mm ø 0.5” ø 0.45” Pre-filter Post-filter ZERO | USE AND INSTALLATION GUIDE...
-
Page 23: Filter Replacement
Before replacing the RO filters, turn the cold water valve off and turn the faucet on until the water flow stops. Turn the faucet on until Turn off the cold the water flow stops. water valve ZERO | USE AND INSTALLATION GUIDE... - Page 24 RO FILTER REPLACEMENT Open the lid Remove pre- and post-filter ZERO | USE AND INSTALLATION GUIDE...
- Page 25 Remove the two RO filters by unscrewing them 1/4” Before you insert the new RO filters, make sure the wet the O-rings. And then screw the RO filters in. ZERO | USE AND INSTALLATION GUIDE...
- Page 26 RO FILTER REPLACEMENT Put the internal cover back on. Insert pre- and post-filter again ZERO | USE AND INSTALLATION GUIDE...
- Page 27 RO FILTER REPLACEMENT Put the lid back on Turn on the cold water valve. Turn on the faucet, and let the water flow for 10 minutes. ZERO | USE AND INSTALLATION GUIDE...
- Page 28 Aquaporin A/S Nymøllevej 78 2800 Kongens Lyngby Denmark VAT No.: DK28315694 Tel: +45 82 30 30 82 sales@aquaporin.com aquaporin.com/zero ZERO-User-Manual-Aquaporin | Revised: July 29, 2020 7097036AP...


Need help?
Do you have a question about the ZERO and is the answer not in the manual?
Questions and answers