
Related Manuals for DIBSIES CREATIVE WONDERS TOY BOX


Summary of Contents for DIBSIES CREATIVE WONDERS TOY BOX
- Page 1 CREATIVE WONDERS TOY BOX Assembly Manual Accompanying Assembly Video: www.dibsies.com/cwtb-assembly SCAN FOR VIDEO...
- Page 3 Check this product for damaged hardware, loose joints, missing parts or sharp edges before and after assembly and frequently during use. Do not use if any parts are missing, damaged, or broken. Send email to customersupport@dibsies.com for replacement parts, if needed. Do not substitute parts.
- Page 4 Part E x1 Part F x1 Part G x1 Part H x1 (Back Panel) (Front Panel) (Bottom Panel) (Lid) Part I x2 Part J - x22 Part K - x2 Part L - x8 (Lid Support) (Shorter Screw) (Pivot Pin) (Longer Screw) TOOLS CHECK LIST Ensure you have a Phillips screwdriver available for assembly.
- Page 5 INSTRUCTIONS Step 1 Continued - Assembly of Panels Locate and align Part B Secure Part B Insert two Part D Dowels Locate the Part F panel and two Part Locate Part B and align the holes of Secure Part B by inserting and D dowels.
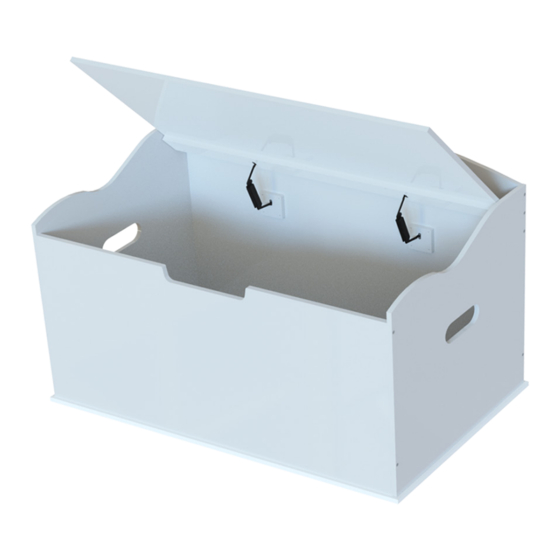
- Page 6 INSTRUCTIONS Step 3 - Attaching Part H (Lid) Insert two Part I pieces Attach Part H to Prepare Part H into Part H the assembly Insert one Part I into the left hole at Locate Part H and two Part I pieces Attach Part H to the assembly by the back of Part H as shown and the (Pivot Pins).
- Page 7 Part K lid support. and close the lid to ensure it works to overtighten. properly. Customer Support For Customer Service Issues please contact us at: customersupport@dibsies.com www.dibsies.com 7014 Fairfield Business Center Dr. Cincinnati, OH 45014 © Dibsies 2020, All Rights Reserved...
Need help?
Do you have a question about the CREATIVE WONDERS TOY BOX and is the answer not in the manual?
Questions and answers