Table of Contents

Subscribe to Our Youtube Channel
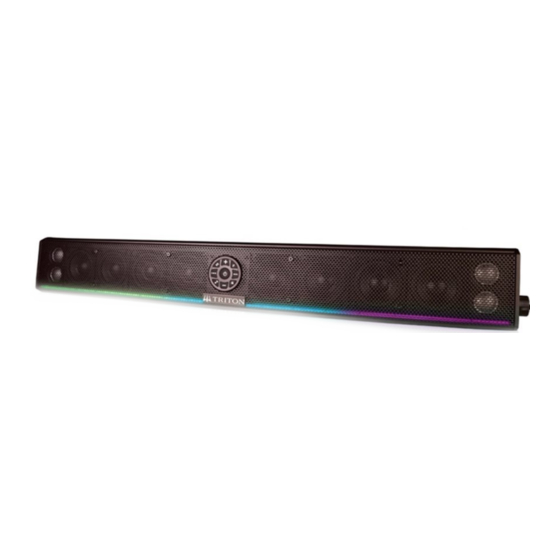
Summary of Contents for Triton SQPS36
- Page 1 SQPS36 SQPS27 SQPS20 AMPLIFIED SOUNDBAR Application Guide Please read through this manual to familiarize yourself with your new speakers. Should your Triton Soundbar ever require service, you will need to have the original dated receipt.
-
Page 2: Technical Features
Congratulations and thank you for purchasing your Triton full-range Bluetooth speaker system. With a focus on quality, innovation, and value, you now own a Bluetooth soundbar of uncompromising design and engineering from a factory that truly believes in the relentless pursuit of perfection. Incorporating the highest quality parts and state-of-the-art materials, these bluetooth speakers display the ultimate balance between high fidelity, performance and long-lasting reliability. - Page 3 SPECIFICATIONS FOR TRITON AMPLIFIED SOUNDBARS (Due to continuing improvements these specifications are subject to change without any notice. Do not attempt to fix or repair this unit. Unauthorized repairs will void the manufacturer’s warranty..) Model SQPS36 SQPS27 SQPS20 RMS Power (watts)
-
Page 4: General Installation Tips
We strongly recommend installation by an authorized Triton dealer. This Owner’s Manual only provides general installation and operation instructions. If you have any reservations about your installation skills, please contact your local Triton dealer for assistance. IMPORTANT: This amplified soundbar is designed for operation in vehicles with 12-volt Negative ground electrical systems only. -
Page 5: Preparing For Installation
Soldering iron Electronic (Rosen not Acid Core) Solder NOTE: The stainless steel hardware supplied with your Triton SQPS soundbar has been chosen to resist rust and corrosion. If the particular hardware supplied will not work for your installation purposes, please be sure to use only appropriate marine grade (stainless steel) mounting hardware. -
Page 6: Mounting The Soundbar
MOUNTING THE SOUNDBAR L-brackets Use the supplied hardware to mount the L bracket to the sound bar at the desired mounting angle. Securely tighten all hardware. The diameter of the hole in the L- bracket is .25 inches. NOTE: we do not supply the hardware to mount the sound bar to the vehicle when using the supplied L Brackets Fig.1 C-clamp bracket... -
Page 7: Mounting Location
FUSE REQUIREMENTS While the wiring harness of your Triton amplified soundbar incorporates a fuse, this does nothing to protect the vehicle from a dangerous short circuit. It is absolutely vital that the main power lead to the amplified soundbar in the system be fused within 18-inches (45cm) of the connection to... -
Page 8: Aux Input
Bolt Ring Connector Ground Wire Fig.4 Recommended Ground Connection for Car & Trucks Note: Remove any paint Star Washer below ring connector Fig.5 Recommended Ground Connection for UTV’s, RV’s, Motorcycles and Boats AUX INPUT Connect the external audio input wire to your soundbar. Turn the soundbar on by the power button, background LED is powered on.Then press Bluetooth button switch to Aux mode,this button Orange light on. - Page 9 CONTROLLER LAYOUT SOUNDBAR CONNECTION PORTS Main Connector Port...
-
Page 10: Controller Operation
2) Go into the Bluetooth settings of your device and search for either the Triton Soundbar signal to pair. Once paired, there will be an audible beep to confirm that the soundbar and your Bluetooth device has paired successfully. - Page 11 LED BLUETOOTH CONTROLLER OPERATION Support system: Android4.4 and above/IOS10.0 and above Smart Bluetooth Controller Connection Tutorial Software Installation First pone APP installation: APP name: LED LAMP 1.The mobile phone scanning two-dimensional code to install the APP; which download the account in the APP store and Google Play account;...
- Page 12 1. Open the app,click LED BLE to enter the Bluetooth control interface. Instructions 1. Color interface: The color interface has two parts: color ring, monochrome.
- Page 13 2. Mode: You can choose the mode you 3. Custom: You can add the colors want, speed adjustment, and brightness you want to add and choose a mode. adjustment. 4. The music interface is divided into music and microphone two parts: where the music needs the phone to play the song to adjust;...
- Page 14 5. Settings: You can set modes like rhythm, RGB sort, code, timing, shake, change skin. in rhythm mode you can design color, rhythm pattern, and sensitivity. 6. Timer: The timer can set the desired time period to open the desired mode, turn off the desired Mode.
-
Page 15: Troubleshooting Tips
TROUBLESHOOTING TIPS (Due to continuing improvements these specifications are subject to change without any notice. Do not attempt to fix or repair this unit. Unauthorized repairs will void the manufacturer’s warranty..) PROBLEM SOLUTION • With a volt meter (VOM) check Red wire should read •...


Need help?
Do you have a question about the SQPS36 and is the answer not in the manual?
Questions and answers