
Related Manuals for Step-Hear CALL-HEAR CH-100

Summary of Contents for Step-Hear CALL-HEAR CH-100
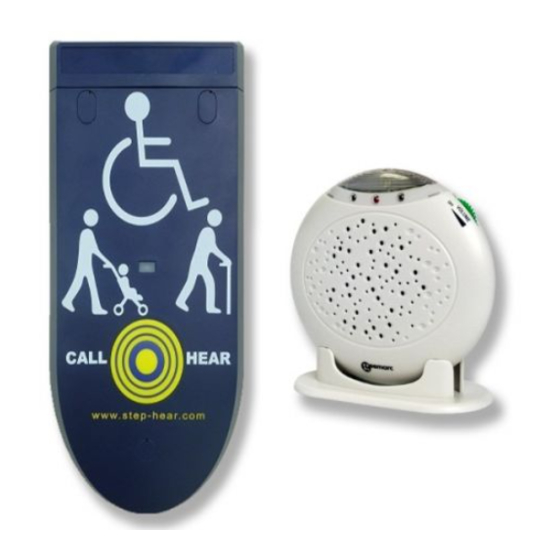
- Page 1 ® CALL UNIT (CH-100/101/104/AC2/AC3) CHIME UNIT- IDU (CH-105-F) Us er Gu ide ALERT AND ASSISTANCE SYSTEM Another quality product from...
-
Page 2: Table Of Contents
CONTENTS CONTENTS INTRODUCTION Unpacking the Call Unit and Indoor Unit (IDU) DESCRIPTION Call-Hear Call unit (CH-100/101/104/AC2/AC3) ™ Call-Hear Indoor unit (CH-105-F) ™ Standard Key (CH-102) Telescopic Key (CH-103) USING CALL-HEAR ™ INSTALLATION Setting up the Call Unit Setting up the Indoor Unit (IDU) Pairing the Call Unit and the Indoor Unit (IDU) ®... -
Page 3: Introduction
INTRODUCTION Congratulations on purchasing your CALL-HEAR ® system. This consists of a Call Unit/s and an Indoor Unit (IDU). The Call Unit is a large, clear, weather resistant transmitter which can be stuck onto an entrance door/glass/window/wall not suitable for iron doors. It is activated and will transmit a signal via a bell push, a key or a combination of the two. -
Page 4: Unit (Idu)
INTRODUCTION Unpacking the Call Unit & Indoor Unit (IDU) On unpacking the Call Unit you will find the following contents in the box: • 1 Call Unit with adhesive tape • 1 23A Battery • 2 Fixing Templates (1 for CH-104-R) •... -
Page 5: Description
DESCRIPTION Call Unit (CH–100/101/104) - Page 6 DESCRIPTION Call-Hear ®...
-
Page 7: Standard Key (Ch-102)
DESCRIPTION Standard Key (CH-102) Telescopic Key (CH- 103) -
Page 8: Using Call-Hear
USING CALL-HEAR Open the two screw covers and undo the two screws (the screw covers must be replaced after the battery has been inserted to ensure that the unit is correctly water resistant). Slide the battery compartment cover open and insert the 23A battery. Ensure correct polarity is observed. -
Page 9: Installation
INSTALLATION Setting up the Call Unit Stick the Call Unit onto a door, window, counter, desk, wall etc (not suitable for iron doors) using the supplied strong adhesive tape. Remove the protective paper from the adhesive tape on the back of the Call unit and stick to the required window. -
Page 10: Setting Up The Indoor Unit (Idu)
INSTALLATION Ensure the Call Unit is placed in a location which is easily accessible and useful for a person in need of assistance. For wheelchair users, the ideal height for the Call Unit is 90cm to 100cm from the ground. Setting up the Indoor Unit (IDU) Open the battery compartment and insert the 4 AA batteries supplied. -
Page 11: Pairing The Call Unit And The Indoor Unit (Idu)
INSTALLATION The Indoor Unit (IDU) can either be placed on the supplied stand or wall mounted. To wall mount the Indoor Unit (IDU), drill two holes and insert two screws 96mm apart. Leave about 5 mm of the screw projecting from the wall. Guide the wall mounting apertures at the back of the unit over the screws and slide the Indoor Unit (IDU) downwards. - Page 12 3. Pairing remote unit CH100 or CH104 Press and hold the pairing/testing button of the IDU and the BELLPUSH of Remote Unit CH100/CH104 at the same time until the IDU beeps and the strobe flashes. The IDU then quits the pairing mode and pairing was successful.
-
Page 13: Using Call-Hear
pairing/testing button for 8 seconds until all LEDs turn off and a beep is sounded to confirm that it is now un- registered. 4. To keep the 1st , 2nd & 3rd call/remote unit, but un- register the 4th call/remote unit, when the 1st LED flashes, press the pairing/testing button four times, all 3 LEDs will flash together, then press and hold the pairing/testing button for 8 seconds until all 3 LEDs turn... - Page 14 USING CALL-HEAR ® For the bell push version Call Unit (CH-100/CH-104) simply push the bell push. This will trigger the Call Unit to send a signal to the Indoor Unit (IDU). While the Call Unit is transmitting a signal, the LED will light up (red). When the Indoor Unit (IDU) receives the signal from the Call Unit, an alarm will be heard and the light at the top of the unit will flash brightly.
-
Page 15: System Configuration
SYSTEM CONFIGURATION The Call-Hear system is extremely flexible and can be ® used in up to four locations i.e. one transmitter can link with up to 4 of the same/or combinations of receivers. – see the example below. The CH-105 will identify which call/remote unit is calling. -
Page 16: Troubleshooting & Safety
TROUBLESHOOTING & SAFETY The Indoor Unit (IDU) will not flash or make a sound • Ensure the batteries are not flat • Ensure the batteries are inserted correctly • Ensure the Call Unit and Indoor Unit (IDU) have been paired correctly •... -
Page 17: Guarantee (Eu)
From the moment your CALL-HEAR product is purchased, ® STEP-HEAR Ltd. guarantee it for the period of one year. During this time, all repairs or replacements (at our discretion) are free of charge. Should you experience a problem then contact our help line or visit our website at www.step-hear.com. -
Page 18: Guarantee (Usa)
Be sure to save your sales receipt as proof of purchase date should you need warranty service. Within a period of one year from purchase date, STEP-HEAR Ltd will ® repair or replace (at our discretion) your CALL-HEAR product at no cost, if a defect in materials or workmanship is found. -
Page 19: Recycling Directives
- Or, hand the old product to the retailer. If you purchase a new one, they should accept it. Thus if you respect these instructions you ensure human health and environmental protection. INFORMATION For product support and help visit our website at www.step-hear.com CH-UG- VER. APR 2013... - Page 20 ® CALL-HEAR Llamada ® (CH-100/101/104/AC2/AC3) CALL-HEAR - IDU (CH-105-F) ® M an ua l del Us ua r io SISTEMA DE ALERTA Y ASISTENCIA Otro producto de calidad de...
- Page 21 CONTENIDO CONTENIDO INTRODUCCIÓN Desempacando la Unidad de Llamada y la Unidad de Interior (IDU) DESCRIPCIÓN ™ Call-Hear Llamada (CH-100/101/104/AC2/AC3) ™ Call-Hear IDU (CH-105-F) Llave Estándar (CH-102) Llave Telescópica (CH-103) & UTILIZANDO CALL-HEAR INSTALACIÓN Montaje de la Unidad de Llamada Montaje de la Unidad Interior (ODU) Alineación de la Unidad de Llamada y de la Unidad Interior (IDU) UTILIZANDO CALL-HEAR...
-
Page 22: Introducción
INTRODUCCIÓN Felicidades por adquirir un sistema CALL-HEAR . Éste ® consiste en una Unidad Llamada por sus siglas en inglés) y UnidadInterior (IDU por sus siglas en inglés). La Llamada es un transmisor de largo alcance, claro e impermeable que puede pegarse a la puerta de entrada/vidrio/ventana/pared, no es apropiado para puertas de hierro. -
Page 23: Y La Unidad De Interior (Idu)
INTRODUCCIÓN Desempaque de la Unidad de Llamada y de la Unidad Interior (IDU) Al desempacar la Unidad de Llamada dentro de la caja encontrará: • 1 Unidad de Llamada con cinta adhesiva • 1 Batería 23A • 2 Plantillas de Fijación (1 para CH-104-R) •... -
Page 24: Descripción
DESCRIPCIÓN Call -Hear Llamada (CH-100/101/104) ®... -
Page 25: Call-Hear ™ Idu (Ch-105-F)
DESCRIPCIÓN Call-Hear ®... -
Page 26: Llave Estándar (Ch-102)
DESCRIPCIÓN Llave Estándar (CH-102) Llave Telescópica (CH-103) -
Page 27: Utilizando Call-Hear
UTILIZANDO CALL-HEAR Quite las cubiertas de los tornillos (las cubiertas deberán ponerse nuevamente cuando se haya insertado la batería nueva para asegurarse de que la unidad sea resistente al agua). Deslice la cubierta del compartimiento de la batería e inserte la batería 23A. Asegúrese de colocarla con la polaridad correcta. -
Page 28: Instalación
INSTALACIÓN Montaje de la Unidad de Llamada Pegue la Unidad de Llamada a una puerta, ventana, pared, mostrador, escritorio, etc., (no apropiado para puertas de hierro). Utilizando la cinta adhesiva que se proporciona para ese propósito. Quite el papel protector de la cinta adhesiva que se encuentra en la parte posterior de la Unidad de Llamada y pegue sobre la superficie requerida. -
Page 29: Montaje De La Unidad Interior (Odu)
INSTALACIÓN Asegúrese de que la Unidad de Llamada se encuentre en una posición que sea de fácil acceso y de utilidad para la persona que necesita ayuda. La altura ideal de la Unidad de Llamada para personas en sillas de ruedas es entre 90cm y 100cm del suelo. - Page 30 INSTALACIÓN La Unidad Interior (IDU) puede colocarse en la base o fijarse en la pared. Para fijar la Unidad Interior (IDU) a la pared, taladre dos orificios e inserte los tornillos a 96mm de distancia. Deje un espacio de 5mm entre los tornillos y la pared. Guíe las aperturas que se encuentran en la parte trasera de la unidad sobre los tornillos y deslice la Unidad Interior (IDU) hacia abajo.
- Page 31 Ahora ya puede emparejar su IDU con hasta 4 unidades a distancia; cada LED representa una unidad a distancia diferente y las tres encendidas al mismo tiempo representan a la cuarta. 3. EMPAREAMIENTO DE LA UNIDAD A DISTANCIA CH100 o CH104 Oprima y sostenga el botón pairing/testing (emparejamiento / prueba) del IDU y el BELLPUSH de la unidad a distancia...
-
Page 32: Utilizando Call-Hear
3. Para mantener la primera unidades de llamada / a distancia y cancelar el registro de la segunda o de la tercero unidad CH- 100/CH-104/CH-101, etc.), cuando titile la primera LED oprima el botón pairing/testing una vez para seleccionar el registro de cuál unidad de llamada / a distancia va a ser cancelado, la LED seleccionada titilará... -
Page 33: Utilizando Call Hear
UTILIZANDO CALL-HEAR O para la Unidad de Llamada con timbre (CH-100/ CH-104), simplemente deberá presionar el timbre. Esto accionará la Unidad de Llamada enviando la señal a la Unidad Interior (IDU). Se prenderá el LED (rojo) cuando la Unidad de Llamada transmita la señal. Cuando la Unidad Interior (IDU) reciba la señal de la Unidad de Llamada se escuchará... -
Page 34: Configuración Del Sistema
CONFIGURACIÓN DEL SISTEMA ™ El sistema Call-Hear es extremadamente flexible y puede utilizarse hasta en cuatro locaciones i.e. un transmisor puede enlazarse hasta con 4 receptores iguales o combinados. - véase el siguiente ejemplo La unidad CH-105 identificará qué unidad de llamada / a distancia está... -
Page 35: Localización Y Corrección De Fallas Yseguridad
LOCALIZACIÓN Y CORRECCIÓN DE FALLAS Y SEGURIDAD La Unidad Interior (IDU) no brilla o emite sonido • Revise que las baterías funcionen • Revise que las baterías estén colocadas correctamente. • Revise que la Unidad de Llamada y la Unidad Interior (IDU) estén correctamente alineadas. -
Page 36: Garantía (Ue)
(a discreción). Si tiene algún problema llame a nuestra línea de ayuda o visite nuestro sitio web en www.step-hear.com. La garantía no cubre accidentes, negligencia o roturas en las partes. Ninguna persona está autorizada para desmantelar o desarmar el equipo, a menos que sea representante de STEP-HEAR. -
Page 37: Garantía (Eua)
Para cualquier servicio en garantía guarde su recibo de compra como comprobante de la fecha de compra. A partir del día de la compra y durante un año y sin costo, STEP-HEAR Ltd reparará o reemplazará (a discreción) cualquier defecto en las partes ™... -
Page 38: Directiva De Reciclado
- O entregue el producto en la tienda donde lo compró. Deberán aceptarlo si usted compra uno nuevo. Respetar estas instrucciones garantiza el bienestar humano y la protección ambiental. INFORMACIÓN Para mayor información y ayuda visite nuestro sitio web en www.step-hear.com CH-UG- VER. APR2013... - Page 39 ® ODU CALL-HEAR ® (CH-100/101/104/AC2/AC3) IDU CALL-HEAR (CH-105-F) ® G u id e Ut ilis ate ur SYSTÈME D'ALERTE ET D'ASSISTANCE Un autre produit de qualité de...
- Page 40 TABLE DES MATIÈRES TABLE DES MATIÈRES INTRODUCTION Déballage de l'unité d'appel et de l'unité d'intérieur (UDI) DESCRIPTION ODU Call-Hear (CH-100/101/104/AC2/AC3) ® IDU Call-Hear (CH-105-F) ® Clé standard (CH-102) Clé télescopique (CH-102) UTILISATION DU CALL-HEAR ® INSTALLATION Préparation de l'unité d'appel Préparation de l'unité...
-
Page 41: Introduction
INTRODUCTION Félicitations à l'achat votre système CALL-HEAR . Il ® comprend une ou des unités d'extérieur (ODU) et un ou plusieurs dispositifs d'intérieur (IDU). L'ODU est un émetteur extérieur de grande dimension, clair, à l'épreuve des intempéries et pouvant être collé sur une porte d'entrée, verre ou fenêtre et aux mur. -
Page 42: Déballage De L'unité D'appel Et De L'unité D'intérieur (Udi)
INTRODUCTION Déballage de l'unité d'appel (ODU) et de l'unité d'intérieur (IDU) Lors du déballage de l'unité d'appel (ODU), vous trouverez le contenu suivant dans la boîte: • 1 Unité d’appel avec ruban adhésif • 1 pile de type 23A • 2 gabarits d'installation (1 pour CH-104-R) •... -
Page 43: Description
DESCRIPTION CALL-HEAR ODU (CH-100/101/104) ®... - Page 44 DESCRIPTION Call-Hear ®...
-
Page 45: Clé Standard (Ch-102)
DESCRIPTION Clé standard (CH-102) Clé télescopique (CH-103) -
Page 46: Utilisation Du Call-Hear
UTILISATION DU CALL-HEAR Ouvrez les deux cache-vis et dévissez les deux vis (les cache-vis doivent être remises en place après que la pile a été insérée pour veiller à ce que l'unité demeure étanche). Ouvrez le compartiment et insérez la pile 23A. -
Page 47: Installation
INSTALLATION Préparation de l'unité d'appel (ODU) Collez l'unité d'appel sur une porte, une fenêtre, aux mur, comptoir, un bureau, etc. (non conçue pour les portes en métal) avec le puissant ruban adhésif fourni. Retirez le papier protecteur du ruban adhésif sur l'arrière de l'unité... -
Page 48: Préparation De L'unité D'intérieur
INSTALLATION Assurez-vous que l'unité d'appel est installée dans un endroit facile d’accès et avantageux pour une personne dans le besoin d'aide. La hauteur idéale pour les utilisateurs de fauteuil roulant est de 90 à 100 cm du sol. Préparation de l'unité d'intérieur (IDU) Ouvrez le compartiment des piles et insérez les 4 piles AA fournies. - Page 49 INSTALLATION L'unité d'intérieur (IDU) peut soit être placé sur son socle ou sur installé sur un mur. Pour installer l'unité d'intérieur sur un mur, percez deux trous et insérez deux vis espacées de 96 mm. Laissez projeter environ 5 mm de la vis hors du mur. Placez les ouvertures à...
- Page 50 Votre IDU est maintenant prête à être jumelée à un maximum de 4 unités distantes, chaque voyant DEL représentant une unité à distance séparée. Les trois voyants DEL allumés simultanément symbolisent la quatrième unité distante. 3. PAIRAGE DE L’UNITÉ DISTANTE CH100 ou CH104 Appuyez simultanément sur le bouton de pairage/test de l’IDU, ainsi que sur le BOUTON DE SONNETTE de l’unité...
-
Page 51: Utilisation Du Call-Hear
3. Pour conserver le pairage dans la première unité d’appel/appareil distant et l’annuler dans le second et le troisième appareil (CH-100/CH-104/CH-101, etc.) ; lorsque le premier voyant DEL commence à clignoter, appuyez une fois sur le bouton de pairage/test pour sélectionner l’unité d’appel/appareil distant, dont le pairage doit être annulé, le voyant DEL choisi se met à... -
Page 52: Utilisation Du Call-Hear
UTILISATION DU CALL-HEAR Ou, pour la version à bouton de sonnerie (CH-100/CH- 104) simplement appuyer sur le bouton. Ce geste déclenche l'unité d'appel et transmet un signal à l'unité d'intérieur (IDU) tandis que l'unité d'appel transmet le signal, le voyant DEL (ambre) s'allume. Lorsque l'unité... -
Page 53: Configuration Du Système
CONFIGURATION DU SYSTÈME Le système Call-Hear est extrêmement flexible et peut ® être utilisé dans un total de quatre endroits; soit un émetteur peut effectuer une liaison avec 4 récepteurs identiques ou de la même combinaison. – voir l'exemple ci-après. -
Page 54: Dépannage Et Sécurité
DÉPANNAGE ET SÉCURITÉ L'unité d'intérieur (IDU) ne clignote pas ou ne sonne pas l'alarme. • S'assurer que les piles ne sont pas à plat • S'assurer que les piles sont insérées correctement • S'assurer que l'unité d'appel et l'unité d'intérieur (IDU) sont jumelées correctement •... -
Page 55: Garantie (Ue)
(à notre discrétion) sont gratuits. Si vous rencontrez un problème, contactez notre ligne d'assistance ou visitez notre site web à www.step-hear.com. La garantie ne couvre pas les accidents, la négligence ou les bris de toutes les parties. Le produit ne doit pas être trafiqué... -
Page 56: Garantie (É.-U.)
Veillez à conserver vos reçus comme preuve de date d'achat si vous avez besoin du service de garantie. Pour une période d'un an suite à la date d'achat, STEP-HEAR Ltd réparera ou remplacera (à sa discrétion) votre produit STEP-HEAR sans frais, s'il s'agit d'un défaut de matériel ou de fabrication. -
Page 57: Directives De Recyclage
En conséquence, si vous respectez ces directives, vous protégez la santé humaine et assurez la protection de l'environnement. RENSEIGNEMENTS Pour le service à la clientèle ou pour obtenir de l'assistance, visitez notre site Web à www.step-hear.com CH-UG- VER. APR2013... - Page 58 ® CALL- HEAR Rufeinheit ® (CH-100/101/104/AC2/AC3) CALL- HEAR Empfangseinheit (CH-105-F) ® Ha nd bu ch ALARM- UND HILFSSYSTEM Ein weiteres Qualitätsprodukt von...
- Page 59 INHALT INHALT EINLEITUNG Auspacken von Rufeinheit und Empfangs- einheit (IDU) BESCHREIBUNG Call-Hear Rufeinheit (CH-100/101/104/AC2/AC3) Call-Hear Empfangseinheit IDU (CH-105-F) Standard-Schlüssel (CH-102) Teleskop-Schlüssel (CH-103) VERWENDUNG VON CALL-HEAR ® INSTALLATION Inbetriebnahme der Rufeinheit Inbetriebnahme der Empfangseinheit (IDU) Verbinden von Rufeinheit und Empfangseinheit (IDU) VERWENDUNG VON CALL-HEAR ®...
-
Page 60: Einleitung
EINLEITUNG Herzlichen Glückwunsch zum Kauf Ihres CALL- ™ HEAR Systems. Das System besteht aus jeweils einer oder mehreren für den Außenbereich geeigneten Rufeinheiten und einer Empfangseinheit (IDU). Die Rufeinheit (IDU) ist ein großer, übersichtlicher, wetterfester Sender für den Außenbereich, der sich an Eingangstüren bzw. -
Page 61: Einheit (Idu)
EINLEITUNG Auspacken vonRufeinheit & Empfangseinheit (IDU) Nachdem Sie die Rufeinheit ausgepackt haben, sollten Sie folgende Teile vor sich haben: • 1 Rufeinheit mit Klebeband • 1 23A-Batterie • 2 Montageschablonen (1 für CH-104-R) • 1 Satz Schrauben & Schraubendreher • 1 Aufkleber für Rückseite •... -
Page 62: Beschreibung
BESCHREIBUNG Call–Hear (CH–100/101/104) ®... - Page 63 BESCHREIBUNG Call-Hear ®...
-
Page 64: Standard-Schlüssel (Ch-102)
BESCHREIBUNG Standard-Schlüssel (CH-102) Teleskop-Schlüssel (CH-103) -
Page 65: Verwendung Von Call-Hear
VERWENDUNG VON CALL-HEAR Entfernen Sie die beiden Schraubenabdeckungen und lösen Sie die zwei Schrauben (Um die Wetterfestigkeit des Geräts zu gewährleisten, müssen die Schraubenabdeckungen nach dem Batteriewechsel wieder angebracht werden.) Schieben Sie den Batteriedeckel zur Seite und setzen Sie die 23A- Batterie ein. -
Page 66: Installation
INSTALLATION Inbetriebnahme der Rufeinheit Befestigen Sie die Rufeinheit mit dem beiliegenden starken Klebeband an einer Tür, einem Fenster, einem Tresen, einem Schreibtisch, an einer Wand o.ä. (nicht für Metalltüren geeignet) Entfernen Sie das Schutzpapier vom Klebeband an der Rückseite der Rufeinheit und platzieren Sie die Einheit an der gewünschten Stelle. -
Page 67: Inbetriebnahme Der Empfangseinheit (Idu)
INSTALLATION Achten Sie darauf, die Rufeinheit so zu installieren, dass sie für hilfsbedürftige Personen einfach zu erreichen ist. Für Rollstuhlfahrer sollte die Rufeinheit idealerweise 90 bis 100cm über dem Boden angebracht werden. Inbetriebnahme der Empfangseinheit (IDU) Öffnen Sie das Batteriefach und setzen Sie die mitgelieferten 4 AA-Batterien ein. - Page 68 INSTALLATION Die Empfangseinheit (IDU) kann entweder im mitgelieferten Tischgestell betrieben oder an einer Wand montiert werden. Bohren Sie zur Wandmontage der Empfangseinheit im Abstand von 96mm zwei Löcher und drehen Sie zwei Schrauben hinein. Schrauben Sie die Schrauben nur soweit ein, dass zwischen Schraubenkopf und Wand etwa 5 mm Abstand bleiben.
- Page 69 Ihre IE kann nun mit bis zu insgesamt vier Ferneinheiten gepaart werden. Jede LED steht für eine andere Ferneinheit, während das Aufleuchten aller drei LED zusammen für die vierte Ferneinheit steht. 3. PAAREN DER FERNEINHEITEN CH100 oder CH104 Drücken und halten Sie die Paaren/Testen-Taste der IE und gleichzeitig die BELLPUSH-Taste der Ferneinheit CH100/CH104, bis die IE Töne abgibt und die Blitzleuchte blinkt.
-
Page 70: Verwendung Von Call-Hear
/Ferneinheit abgemeldet werden soll. Die gewählte LED blinkt nun, während die anderen kontinuierlich leuchten. Drücken und halten Sie dann die Paaren/Testen-Taste acht Sekunden lang, bis alle LEDs erlöschen und ein Ton erzeugt wird, um zu bestätigen, dass sie nun abgemeldet ist. 4. -
Page 71: Verwendung Von Call-Hear
VERWENDUNG VON CALL-HEAR Bei den Modellen mit Klingeltaste (CH-100/CH-104) genügt ein Druck auf die Klingeltaste. Dadurch wird von der Rufeinheit ein Signal an die Empfangseinheit (IDU) gesendet. Während das Signal gesendet wird, leuchtet die LED der Rufeinheit (bernsteinfarben). Sobald die Empfangseinheit (IDU) das Signal der Rufeinheit (IDU) empfängt, wird der akustische Alarm ausgelöst und die Lampe an der Geräteoberseite beginnt hell zu blinken. -
Page 72: Konfiguration Des Systems
KONFIGURATION DES SYSTEMS Das Call-Hear System ist extrem flexibel und kann an ® bis zu vier Stationen betrieben werden, d.h. ein Sender kann mit bis zu vier gleichen oder unterschiedlichen Empfängern verbunden sein – siehe Beispiel unten. Die CH-105 erkennt, welche Ruf-/Ferneinheit ruft. -
Page 73: Fehlerbehebung & Sicherheitshinweise
FEHLERBEHEBUNG & SICHERHEITSHINWEISE Die Empfangseinheit (IDU) blinkt nicht und es ist kein Alarm zu hören. • Überprüfen Sie den Ladezustand der Batterien. • Überprüfen Sie, ob die Batterien richtig eingelegt sind. • Überprüfen Sie, ob Rufeinheit und Empfangseinheit (IDU) richtig verbunden sind. •... -
Page 74: Garantie (Eu)
Austauschgeräte (je nach unserem Ermessen) kostenfrei. Falls Sie ein Problem mit Ihrem Produkt haben, wenden Sie sich an unseren telefonischen Support oder unsere Webseite unter www.step-hear.com. Die Garantie gilt nicht für Schäden durch Unfälle oder Fahrlässigkeit sowie Bruchschäden. Das Produkt darf nur von autorisierten STEP-HEAR -Mitarbeitern modifiziert ®... -
Page 75: Garantie (Usa)
GARANTIE (USA) STEP-HEAR Ltd. garantiert für die Dauer von einem Jahr ab Kaufdatum, dass ® das CALL-HEAR Produkt frei von Material- oder Fertigungsfehlern ist. Falls Sie ein Problem mit Ihrem Produkt haben, wenden Sie sich bitte an unseren Kundenservice. Bitte bewahren Sie für den Fall, dass Sie die Garantie in Anspruch nehmen müssen, Ihren Kaufbeleg als Nachweis des Kaufdatums auf. -
Page 76: Recycling-Hinweise
- Alternativ können Sie das alte Produkt bei Ihrem Händler abgeben. Bei Kauf eines Neugerätes werden Altgeräte in der Regel zurückgenommen. Wenn Sie diese Hinweise berücksichtigen, tragen Sie zum Schutz von Gesundheit und Umwelt bei. INFORMATION Informationen und Hilfe zu unseren Produkten finden Sie auf unserer Webseite www.step-hear.com. CH-UG- VER. APR2013...
Need help?
Do you have a question about the CALL-HEAR CH-100 and is the answer not in the manual?
Questions and answers