Table of Contents
Advertisement
Quick Links
Advertisement
Table of Contents

Related Manuals for J.Sikora Initial


Summary of Contents for J.Sikora Initial
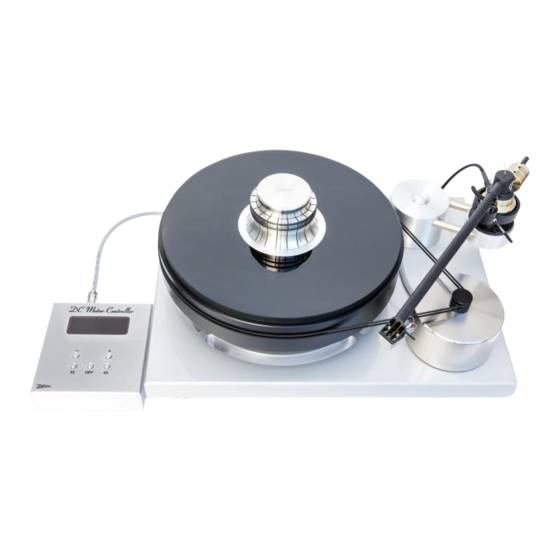
- Page 1 Uncompromising and Extreme Audio Solutions Initial & Initial MAX Turntable Manual...
- Page 2 This manual contains instructions for setting up and using the J.Sikora Initial and Initial MAX turntables. Most of the instructions for setting up the two versions of the Initial tables, are the same. Steps that apply to only one version of the turntable are clearly marked.
-
Page 3: Table Of Contents
1.2. Remove Tall Arm Tower ........................11 1.3. Install Short Arm Tower ........................11 2. Set the Isolation Base (Initial MAX and Add-On Option for Initial) ........ 12 2.1. Place the Isolation Base........................12 2.2. Add Isolation to the Feet ........................13 2.3. - Page 4 11.3. Remove Any Twists on Belt ......................30 11.4. Add Second Belt ..........................30 12. Mount the Drive Belts (Initial MAX and Initial with Optional Secondary Motor) ... 31 12.1. Add First Belt for Secondary (Left Motor) ................... 31 12.2.
- Page 5 18.2.3. Slide Arm Pod ........................47 18.2.4. Slide Arm Tower ........................48 19. Install Second Tonearm (Initial MAX version Only) ............49 20. Tighten Bolts and Screws ....................49 21. Mask the Armboard Bolts....................49 22. Check Level ........................50 III.
-
Page 6: General Information
J.Sikora – Initial and Initial MAX Turntable Manual I. General Information 1. Initial Turntable Weight and Dimensions Total weight: 28 kg (61.7 lbs.) Dimensions [W x D x H]: 440 x 330 x 160 mm (17.4” x 13” x 6.3”) -
Page 7: Initial Turntable Box Contents
1 x microfiber Cloth for cleaning the table (North American models only) 3 Wrenches (North American models only) 1 x set of J.Sikora Monogramed Coasters (3) (North American models only) 1 x precision Bubble Level (North American models only) 1 x pair of white Gloves (North American models only) -
Page 8: Initial Max Weight And Dimensions
J.Sikora – Initial and Initial MAX Turntable Manual 3. Initial MAX Weight and Dimensions Total weight: 52 kg (114.6 lbs.) Dimensions [W x D x H]: 620 x 350 x 280 mm (24.4” x 13.8” x 11”) Tonearm Not Included... -
Page 9: Initial Max Box Contents
The main elements of the Initial turntable are supplied in a single box. The Initial MAX comes with a second box that contains the Isolation Base. All elements of the turntable are packed safely to protect them against damage in transport. -
Page 10: Setting Up Your Table
J.Sikora – Initial and Initial MAX Turntable Manual II. Setting Up Your Table Warning! We strongly suggest getting help from a second person to set up your J.Sikora turntable. The turntable is extremely heavy. Before assembly, be sure that the rack and shelf are level. Carefully check each direction with a spirit level. -
Page 11: Remove Tall Arm Tower
J.Sikora – Initial and Initial MAX Turntable Manual 1.2. Remove Tall Arm Tower The Arm Tower is mounted via a bolt and washer under the Turntable Chassis. Arm Tower Bolt Bolt Holding Arm Tower in Track Insert the largest Wrench into the Bolt. -
Page 12: Set The Isolation Base (Initial Max And Add-On Option For Initial)
J.Sikora – Initial and Initial MAX Turntable Manual Note. If you purchased the Initial (not the Initial MAX) version of the table and did not buy the Isolation Base Option, skip to Step 5 in this section. If you purchased the MAX version of the turntable or the Initial with the Isolation Base Option, please continue on to Step 2. -
Page 13: Add Isolation To The Feet
J.Sikora – Initial and Initial MAX Turntable Manual 2.2. Add Isolation to the Feet You will now build the Isolation portion of the Feet, which are comprised of Aluminum Discs and large Ceramic Ball Bearings. Locate three of the large Ball Bearings. -
Page 14: Level The Isolation Base
J.Sikora – Initial and Initial MAX Turntable Manual 2.3. Level the Isolation Base Even leveled your shelf, sometimes the weight of the Isolation Base can impact the leveling. So, center the included Bubble Level on the plinth to determine if the Base is level in all directions (front to back and side to side). -
Page 15: Add The Second Arm Tower (Initial Max Only)
J.Sikora – Initial and Initial MAX Turntable Manual 3. Add the Second Arm Tower (Initial MAX Only) The MAX version adds the capability to add a second tonearm. If you want to have two tonearms on your table, you will need to install the Second Arm Tower. If you don’t want to add a second tonearm, you can skip this step. -
Page 16: Set The Turntable Chassis (Initial Max Only)
J.Sikora – Initial and Initial MAX Turntable Manual Once you have the Tower pressed into the Plinth’s corner, tighten the Tower’s set screws to secure into place. Secure Tower with Screws Play Video of Adding Arm Tower View setup videos on the product’s Web Page: https://notableaudio.com/initial-turntables/... -
Page 17: Add Isolation To The Feet
J.Sikora – Initial and Initial MAX Turntable Manual 4.2. Add Isolation to the Feet Just like you did for the Isolation Base, the next step is to build another set of Isolation Discs and balls that you will place under the Chassis’ Feet. Please... -
Page 18: Set The Turntable Chassis (Initial Only)
J.Sikora – Initial and Initial MAX Turntable Manual 5. Set the Turntable Chassis (Initial Only) In this step, you will configure and level the the turntable’s Chassis. 5.1. Place the Chassis The Isolation Base is heavy and if you place the Feet directly on your shelf, it could scratch the shelf. -
Page 19: Add Isolation To The Feet
J.Sikora – Initial and Initial MAX Turntable Manual 5.2. Add Isolation to the Feet You will now build the Isolation portion of the Feet, which are comprised of Aluminum Discs and large Ceramic Ball Bearings. Locate three of the large Ball Bearings. -
Page 20: Level The Chassis
J.Sikora – Initial and Initial MAX Turntable Manual 5.3. Level the Chassis Even leveled your shelf, sometimes the weight of the Isolation Base can impact the leveling. Center the included Bubble Level on the Sub-Platter to determine if your table is level in all directions (front to back and side to side). -
Page 21: Oil The Bearing And Spindle (Both Initial And Initial Max)
6. Oil the Bearing and Spindle (Both Initial and Initial MAX) In this step, you will place the main Bearing and apply the J.Sikora Oil the Bearing and Spindle. Warning! The included Bearing Oil can leave stains which are difficult to remove. Carefully follow these instructions. -
Page 22: Place The Ball Bearing
J.Sikora – Initial and Initial MAX Turntable Manual 6.3. Place the Ball Bearing Next, place the small ceramic Ball Bearing in the Spindle’s indentation. You should not wear the gloves for this step. It too difficult to place the Bearing while wearing gloves, and the Bearing Oil will permanently stain the gloves. -
Page 23: Clean Off Excess Oil
Oil that may have gotten on the Chassis. Clean Off Stray Oil 7. Place the Platter (Both Initial and Initial MAX) In this step, you will install the Platter. Warning! The Platter is very heavy and easier to place with two people. -
Page 24: Lower The Platter
Gently Lower Platter 8. Place the Glass Mat (Initial MAX and Add-On Option for Initial) In this step, you will install the Platter’s Mat. Warning! The glass portion can break if it is dropped, struck, or overly-stressed. Damage caused by one of these conditions is not covered by the warranty. -
Page 25: Place The Glass Mat
J.Sikora – Initial and Initial MAX Turntable Manual To install the Aluminum Disc, place it over the spindle with the indent side down. Place Disc 8.2. Place the Glass Mat Next, place the Glass Disc over the Aluminum Disc. Place Glass Mat... -
Page 26: Place The Primary Motor (Initial And Initial Max)
9. Place the Primary Motor (Initial and Initial MAX) Your turntable uses a precision, high-toqure Motor(s). The Initial comes with one Primary Motor and the Inital MAX comes with two identical motors (Primary and Secondary). You may also purchase the Initial with a second Motor as an option. -
Page 27: Space The Primary Motor
7.5 cm. Set Proper Motor Distance 10. Add Secondary Motor (Initial MAX and Initial with Optional Secondary Motor) In this step, you will install the Secondary Motor. 10.1. Place the Secondary Motor onto Motor Stand Place the Secondary Motor so that its pads fit into the Motor Stand’s... -
Page 28: Place The Secondary Motor And Stand
J.Sikora – Initial and Initial MAX Turntable Manual 10.2. Place the Secondary Motor and Stand Place the Secondary Motor on the Isolation Base to the left of the Platter, behind the Motor Controller. The Motor must be placed far enough forward so that the second Armboard does not come in contact with the Motor. -
Page 29: Mount The Drive Belts (Initial Without Optional Secondary Motor Only)
J.Sikora – Initial and Initial MAX Turntable Manual 11. Mount the Drive Belts (Initial without optional Secondary Motor Only) In this step, you will install two Drive Belts for the Motor. 11.1. Add First Belt for Motor The Motor uses two Belts that wrap Upper Belt around the Motor’s Pulleys. -
Page 30: Remove Any Twists On Belt
J.Sikora – Initial and Initial MAX Turntable Manual 11.3. Remove Any Twists on Belt The easiest way to remove any twists is to the slowly rotate the platter with one hand and use the other hand to untwist the Belt. -
Page 31: Mount The Drive Belts (Initial Max And Initial With Optional Secondary Motor)
J.Sikora – Initial and Initial MAX Turntable Manual 12. Mount the Drive Belts (Initial MAX and Initial with Optional Secondary Motor) In this step, you will install four Drive Belts for the two Motors. 12.1. Add First Belt for Secondary (Left Motor) -
Page 32: Remove Any Twists On Belt
J.Sikora – Initial and Initial MAX Turntable Manual 12.3. Remove Any Twists on Belt The easiest way to remove any twists is to the slowly rotate the platter with one hand and untwist the Belt with the other hand. Keep rotating the Platter and removing... -
Page 33: Add Belts For The Primary Motor (Right)
J.Sikora – Initial and Initial MAX Turntable Manual 12.5. Add Belts for the Primary Motor (Right) Repeat this process for the Primary Motor on the right side of the Chassis. Take one of the Belts and stretch it over the platter and into the lower groove of the Pulley. -
Page 34: Mount The Primary Armboard (Initial And Initial Max)
J.Sikora – Initial and Initial MAX Turntable Manual 13. Mount the Primary Armboard (Initial and Initial MAX) In this step, you will install an Armboard onto the turntable’s Primary Arm Tower. 13.1. Familiarize Yourself with the Armboard The Armboard consists of 3 elements:... -
Page 35: Position Primary Armboard
J.Sikora – Initial and Initial MAX Turntable Manual 13.2. Position Primary Armboard To mount the Primary Armboard, position Connection Pod’s Mounting Insert over the bolt hole of the Arm Tower’s Riser. You will attach your tonearm to the Armboard in Step 16. -
Page 36: Mount The Secondary Armboard (Initial Max Only)
Attach Second Armboard add a riser to the arm tower. 15. Connect the Motors and Power Supply (Initial and Initial MAX) In this step, you will attach the Power Supply and Motors to the turntable’s Controller. 15.1. Connect Motor Cable(s) Your J.Sikora turntable comes with a... -
Page 37: Connect Power Supply Cable
J.Sikora – Initial and Initial MAX Turntable Manual The connector on the DIN plug of the Motor’s Umbilical Cable can only fit one way. You must align the guide pin on the Umbilical Cable with the guide groove cut-out on the Motor Power Jack. Do not force the connection. -
Page 38: Mount Your Primary Tonearm (Initial And Initial Max)
J.Sikora – Initial and Initial MAX Turntable Manual 16. Mount Your Primary Tonearm (Initial and Initial MAX) Your turntable is equiped with a unique and highly flexible method for mounting and adjusting tonearms. In this step, you will attach your tonearm to the Armboard. -
Page 39: Mount J.sikora And Kuzma™ Tonearms
J.Sikora – Initial and Initial MAX Turntable Manual 16.2. Mount J.Sikora and Kuzma™ Tonearms All J.Sikora arms and the Kuzma 4- Point™ arm fit directly into the Arm Pod without using any Insert. No Insert Arm Pod with No Insert 16.2.1. -
Page 40: Insert Tonearm
J.Sikora – Initial and Initial MAX Turntable Manual 16.2.2. Insert Tonearm You have two options for securing these types of arms: 1) Use the Arm Pod’s set screw or 2) Use the three screws that come with your arm. 16.2.2.1. -
Page 41: Using The Screw-Down Option Method
J.Sikora – Initial and Initial MAX Turntable Manual 16.2.2.2. Using the Screw-Down Option Method The most secure way to secure a J.Sikora or Kuzma arm is to screw the three bolts supplied with your tonearm into the matching three threaded holes in the Arm Pod. -
Page 42: Mount A Jelco Tonearm Via Large Insert
J.Sikora – Initial and Initial MAX Turntable Manual 16.3. Mount a Jelco Tonearm via Large Insert The Large Insert that comes with your turntable is for tonearms with a diameter of 35 mm, like the Jelco tonearms. Note that the Large Insert has an opening on one side that must be aligned with Arm Pod’s Set Screw. -
Page 43: Mount A Rega And Origin Live Tonearm Via Small Insert
J.Sikora – Initial and Initial MAX Turntable Manual 16.4. Mount a Rega and Origin Live Tonearm via Small Insert The Small Insert is used for tonearms with a diameter of 25 mm. It works with tonearms like Rega and Origin Live that... -
Page 44: Mount Other Tonearms
Now that you have attached your arm to the Armboard and mounted your cartridge, you can position the Armboard to set the proper geometry for your cartridge. Your J.Sikora turntable is extremely flexible in this regard. In this Step, you will configure the location of you tonearm to achieve property geometry. -
Page 45: Set Proper Geometry
J.Sikora – Initial and Initial MAX Turntable Manual 18.2. Set Proper Geometry There are 4 options for obtaning the correct geomtry: 1) rotating the tonearm within the Arm Tower 2) rotating the entire Armboard 3) adjusting the distance of the Arm Pod on the Armboard 4) sliding the entire arm assembly by moving the Arm Tower along its track on the Chassis. -
Page 46: Rotate Armboard
J.Sikora – Initial and Initial MAX Turntable Manual Arm Rotated In 18.2.2. Rotate Armboard To rotate the entire Armboard around the Arm tower, loosen the Bolt holding the Armboard to the Arm Tower. Rotating Arm Pod Arm Rotated Out Arm Rotated In... -
Page 47: Slide Arm Pod
J.Sikora – Initial and Initial MAX Turntable Manual 18.2.3. Slide Arm Pod To slide the Arm Pod in and out along the Armboard’s connection rods, Pod Adjustment loosen the two set screws underneath Set Screws the Arm Pod. Underside of Armboard... -
Page 48: Slide Arm Tower
J.Sikora – Initial and Initial MAX Turntable Manual 18.2.4. Slide Arm Tower In some cases, you will need to move the entire arm assembly (Armboard and and Arm Tower). You can adjust this by sliding the Arm Tower in and and out on the Chassis’... -
Page 49: Install Second Tonearm (Initial Max Version Only)
J.Sikora – Initial and Initial MAX Turntable Manual 19. Install Second Tonearm (Initial MAX version Only) You will use the same general technique as in Step 16 to mount your second tonearm. You will mount the second tonearm on the Armboard on the back-left of the table. -
Page 50: Check Level
J.Sikora – Initial and Initial MAX Turntable Manual 22. Check Level You have worked very hard to optimize the setup of your table. It’s worth a couple more minutes to be sure that your table is level. Use the included Bubble Level to verify that the table has maintained its level. -
Page 51: Using Your Turntable
J.Sikora – Initial and Initial MAX Turntable Manual III. Using Your Turntable Congratulations on a fine job of setting up your table! Now it is time to enjoy it! 1. Powering On / Off Turn on your turntable via the power switch on the back of the Linear Power Supply. -
Page 52: Starting / Stopping The Turntable
J.Sikora – Initial and Initial MAX Turntable Manual 3. Starting / Stopping the Turntable Start and stop the turntable via the Control Unit that is integrated inside the Isolation Base. To start the turntable, press either the 33 or 45 RPM speed selector button. -
Page 53: Maintaining Your Table
3. Oiling the Bearing Replace the J.Sikora bearing oil every 2 years. Remember to be very careful when handling the oil, as it can stain the turntable’s finish. Wipe the old oil off the bearing with a disposable, soft, lint-free cloth. Re- apply new oil with a lint-free applicator. - Page 54 • Shipping damage • Electrical surges or acts of nature 1. If any defects are found in the materials or workmanship of this J.Sikora product within the warranty period, the unit will be repaired or replaced by J.Sikora or its authorized agent.
Need help?
Do you have a question about the Initial and is the answer not in the manual?
Questions and answers