Advertisement
Quick Links
Advertisement

Related Manuals for Smittybilt Overlander Tent

Summary of Contents for Smittybilt Overlander Tent
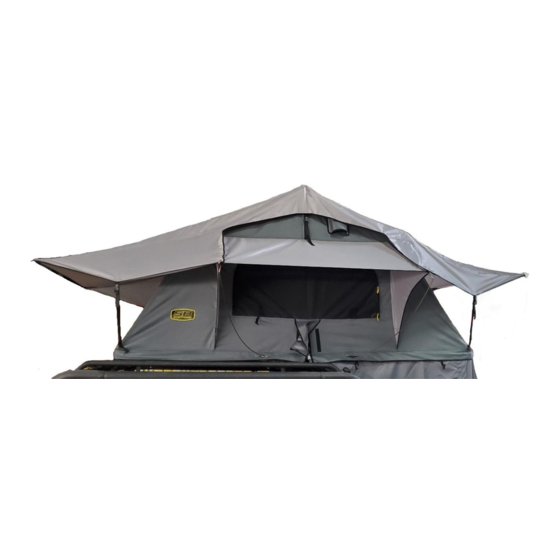
- Page 1 Overlander Tent Install Instructions/ Manual WWW.SMITTYBILT.COM...
- Page 2 However, when the vehicle is parked and you are utilizing your Smittybilt Overlander Tent you are applying a static load which is easier to support and most rack systems can generally handle this static load with ease. Always check with the manufacturer of your vehicle and your roof rack system to determine the applicable weight limitations as they vary from vehicle to vehicle.
- Page 3 Slightly open up tent, open up entrance and remove all parts from the interior of the tent. Attaching the Mounting Rails to the Smittybilt Rooftop Tent Direction of Opening Before you fit your new rooftop tent to your vehicle, you will need to decide whether you wish to have the rooftop tent open to the back or to the side of your vehicle.
- Page 4 Overlander Tent Periodically check torque of all hardware. WWW.SMITTYBILT.COM •“Off the Side” For most medium (such as Jeep Wrangler) or small vehicles opening “off the side” is preferable. The advantages of this orientation are: •Allows for tailgates to operate normally.
- Page 5 Overlander Tent Periodically check torque of all hardware. WWW.SMITTYBILT.COM Mounting Extrusion - Attachment Instructions Step 1: Remove mounting extrusion from the carton (cut as per slide 3 if you intend opening the rooftop tent off the rear of your vehicle.) Step 2: Place the tent on its side on the ground onto a clean surface.
- Page 6 Overlander Tent Periodically check torque of all hardware. WWW.SMITTYBILT.COM Ladder - Attachment Instructions Step 1: Mount the ladder brackets to the base of the tent using M6x40mm bolts. Bolt each ladder bracket to the base of the tent through the pre-drilled holes.
- Page 7 Overlander Tent Periodically check torque of all hardware. WWW.SMITTYBILT.COM Fitting the Rooftop Tent to your Roof Rack or Roof Bars Step 1: With assistance, carefully lift the tent onto the vehicle. Step 2: Place M8 bolt into the slide plate. Slide the plate and bolt into the mounting extrusion.
-
Page 8: Set Up Instructions
Overlander Tent Periodically check torque of all hardware. WWW.SMITTYBILT.COM Set Up Instructions Step 1: Unfasten the cover straps and then remove the cover from the tent. Step 2: Release the hold down Velcro straps on all sides of the tent. Then double check that all are released. - Page 9 Overlander Tent Periodically check torque of all hardware. WWW.SMITTYBILT.COM Fully extend Use ladder as leverage to open tent ladder. Excessive by pushing down force will damage slightly while pulling tent base/floor. straight back. Carefully guide ladder to the ground.
- Page 10 Gen 1 Ladder Adjustment Periodically check torque of all hardware. WWW.SMITTYBILT.COM Gen 1 sliding ladder features several adjustment holes for ladder height adjustment. You may drill additional holes if you need to fine tune or shorten the length of the ladder. Do not drill any adjustment holes below the bottom factory pre-drilled hole as damage will occur.
- Page 11 Gen 1 Ladder Adjustment Periodically check torque of all hardware. WWW.SMITTYBILT.COM Spring loaded locking position Ladder knobs can be pulled up and twisted ¼ turn to lock them in the open position. Turn another ¼ turn to allow them to go back into the spring loaded locking position.
- Page 12 Gen 2 Ladder Adjustment Part# 2583&2683 Periodically check torque WWW.SMITTYBILT.COM of all hardware. Ladder Adjustment Instructions For the most adjustment, press in the top most steps buttons and then collapse ladder. If more or less adjustment is needed. The second thru the eighth step can be adjusted in smaller increments.
- Page 13 Floor Latch Periodically check torque of all hardware. WWW.SMITTYBILT.COM Floor latch Step 1: Open tent fully. Locate hinge latch in the center of the tent on the main hinge. Then swing latch arm over the latch post. You many have to pull down on the tent floor to get latch arm and post to line up correctly.
- Page 14 Overlander Tent Periodically check torque of all hardware. WWW.SMITTYBILT.COM Window/door Rod Install Step 1: Line up the slot on the base of the tent with the predrilled hole. Slide base of rod through slot and into base of tent, make sure rod is installed completely.
- Page 15 Veranda Support XL models Periodically check torque WWW.SMITTYBILT.COM of all hardware. NOTE: Carefully read entire instructions thoroughly before attempting to install this part. Photos are for illustration purposes and actual product may vary. Install remains the same Step 1: Assemble main veranda pole. Short poles will slide onto the main hoop and secure with push pins.
- Page 16 Veranda Support XL models Periodically check torque WWW.SMITTYBILT.COM of all hardware. Fig 3 Fig 4 Fig 5 Step 3: Install the 3 short support tubes. First push the tube thru the sleeve openings in the tent body. Then clip onto the interior pole. Clip other end to main veranda pole assembly.
- Page 17 Veranda Support XL models Periodically check torque WWW.SMITTYBILT.COM of all hardware. Fig 7 shows the orientation of the support poles and main hoop without tent skin. Fig 7 Fig 8 Step 4: Attach guy ropes to veranda and secure with stakes. Fig 9 & 10.
- Page 18 Veranda Support XL models Periodically check torque WWW.SMITTYBILT.COM of all hardware. Fig 9 Fig 10...
- Page 19 XL Gen 2 Tent Periodically check torque of all hardware. WWW.SMITTYBILT.COM XL Gen 2 features easy opening main door. Allows the solid door to be opened and closed without having to open the mesh door. The main zipper will close the mesh door. The interior zipper will close the solid...
- Page 20 XL Gen 2 Veranda Periodically check torque of all hardware. WWW.SMITTYBILT.COM Veranda features three tie down points which are needed to properly tension the veranda. Use guy ropes and stakes at all three locations. Ensure guy ropes are tensioned tight enough to prevent movement of veranda.
- Page 21 XL Gen 2 Tent Rain Fly Periodically check torque of all hardware. WWW.SMITTYBILT.COM Gen 2 Rain Fly has multiple tie down points. All tie down points must be used and properly adjusted when rain fly is in use. Five per side plus 3 at the veranda end on XL models.
- Page 22 Overlander Tent Periodically check torque of all hardware. WWW.SMITTYBILT.COM Storage and Handling Guidelines Cautions - Do not pull down on side retaining Velcro straps when closing the tent. These straps are designed only to hold the tent base together, and are not designed to be used to pull the bases together. When you are closing the tent, hold down the top folded base to compact the tent, then use the velcro straps to secure the bases in this position.
-
Page 23: Care Instructions
Overlander Tent WWW.SMITTYBILT.COM Care Instructions 1. Clean only with cold water and a soft brush - do not use soap or detergent, this will remove the waterproofing compounds. 2. Do not expose to petrol, oil or solvents. 3. New poly/cotton fabric will initially experience some weeping through the seams. This will reduce over time as the fabric cures. - Page 24 Smittybilt at customer’s expense. The determination of whether or not a returned part is defective or subject to coverage under the limited warranties stated herein shall be made at Smittybilt’s sole discretion. Any returns must be made freight pre-paid by consumer.
Need help?
Do you have a question about the Overlander Tent and is the answer not in the manual?
Questions and answers