
Related Manuals for Bettio SCENIKIT SCENICA


Summary of Contents for Bettio SCENIKIT SCENICA
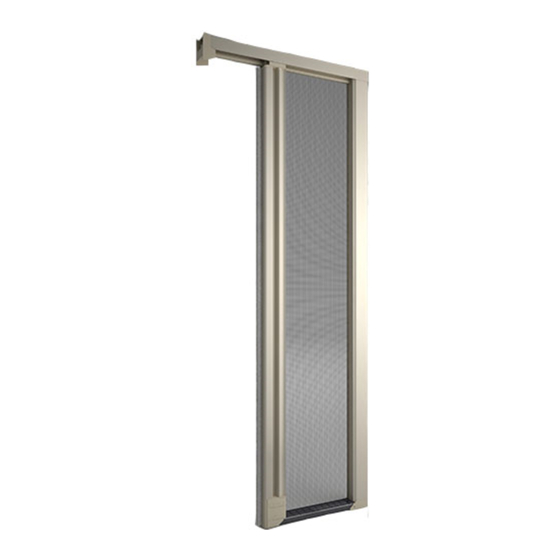
- Page 2 GRAZIE per aver scelto SCENIKIT e BETTIO. ® Incoraggiati dall’entusiasmo della clientela per il modello Scenica ® , Bettio ha messo a punto Scenikit ® , una versione preconfenzionata per il montaggio di serie. Scenikit ® è disponi- bile nelle misure standard 1500x2500 mm. e 2000x2500 mm. in 4 colori sempre a magazzino ed è inoltre munita di un pratico spazzolino antivento.
- Page 3 INDICE CONTENTS INDEX INDEX ® ® ® ® Scenikit ad 1 battente Scenikit one leaf Scenikit 1 battant Scenikit 1 Flügel pg. 4-28 pg. 4-28 pg. 4-28 pg. 4-28 ® ® ® ® Scenikit a 2 battenti Scenikit two leaves Scenikit 2 battants Scenikit...
- Page 4 ® 10. Profilo compensatore 10. Adjuster profile 10. Ausgleichsprofil 10. Profil adaptateur 14. Piastrina di fissaggio KIT1806/77 14. Fixing plate KIT1806/77 14. Befestigungsplatte KIT1806/77 14. Plaque de fixage KIT1806/77 15. Compensatori KIT1801/77 15. Adjusters KIT1801/77 15. Ausgleicher KIT1801/77 15. Régulateurs KIT1801/77 16.
- Page 5 ® Verso il lato cassonetto Towards box side Richtung Kastenseite Vers le caisson Installazione 1 battente 1 leaf installation Installation 1 battant 1 Flügel Installation...
- Page 6 ® Appoggiare sul lato di montaggio del cassonetto. Lean against the box side. Lehnen an die Kastenmontageseite. Appuyer à la côte de montage du caisson. Installazione 1 battente 1 leaf installation Installation 1 battant 1 Flügel Installation...
- Page 7 ® In assenza di appoggio alla parete utilizzare il tappo compensatore If you can’t lean the profiles against the wall, please use the adjuster caps Falls kein Stützpunkt an der Wand ist, benutzen Sie den Abdeckstöpsel Sans appui au mur utiliser le bouchon adaptateur Installazione 1 battente 1 leaf installation...
- Page 8 ® Installazione 1 battente 1 leaf installation Installation 1 battant 1 Flügel Installation...
- Page 9 ® Installazione 1 battente 1 leaf installation Installation 1 battant 1 Flügel Installation...
- Page 10 ® Installazione 1 battente 1 leaf installation Installation 1 battant 1 Flügel Installation...
- Page 11 ® Installazione 1 battente 1 leaf installation Installation 1 battant 1 Flügel Installation...
- Page 12 ® Installazione 1 battente 1 leaf installation Installation 1 battant 1 Flügel Installation...
- Page 13 ® Conservare i pezzi n. 22 e 23 in caso il prodotto debba essere imballato nuovamente. Please, retain pcs. n.22 and 23 in case you have to package again the product. Behalten die Stücke nr.22 und nr.23, wenn der Produkt ein anderes Mal verpacken werden wird. Conserver les pièces nr.22 et nr.23, si le produit doit être emballer une autre fois.
- Page 14 ® Inserire la guida facendo passare la ruota nera nell’apposita sede. Insert the guide by making the black wheel pass inside its own housing. Einfügen die Führungss- chiene durch den Eintritt des Rads in ihrer Stelle. Insérer le guide en faisant passer la roue noire dans la siège correspondante.
- Page 15 ® Assicurarsi che il cordino superiore sia libero di muoversi. Make sure that the upper cord is free to move. Versichern sich, daß die obere Kordel frei zu bewe- gen ist. S’assurer que la corde supérieure est libre de glisser. Installazione 1 battente 1 leaf installation Installation 1 battant...
- Page 16 ® Assicurarsi che il cordi- no grosso sia inserito correttamente nella gola della puleggia. Make sure that the thick cord is in the groove of the pulley. Versichern sich, daß die große Kordel richtig in der Scheibennut einge- fügt ist. S’assurer que la corde grosse est insérée cor- rectement dans le col de...
- Page 17 ® Installazione 1 battente 1 leaf installation Installation 1 battant 1 Flügel Installation...
- Page 18 ® Lasciare almeno 5 cm di cordino in eccesso per eventuali regolazioni. Please, leave at least 5cm of exceeding wire for eventual, further regulations Falls eventuelle Regulierungen lassen wenigstens 5cm der Kordel im Überschuss. Laisser au moins 5 cm de corde en plus pour réglages éventuels.
- Page 19 ® Accompagnare sem- pre la guida durante l’installazione! Caution: hold the rail during the installation! Führen immer die Füh- rungsschiene während der Installation! Accompagner la guide pendant l’installation! Installazione 1 battente 1 leaf installation Installation 1 battant 1 Flügel Installation...
- Page 20 ® Installazione 1 battente 1 leaf installation Installation 1 battant 1 Flügel Installation...
- Page 21 ® Installazione 1 battente 1 leaf installation Installation 1 battant 1 Flügel Installation...
- Page 22 ® Viti per compensazioni: Screws for adjustment: Ausgleichsschrauben: Vis de compensation: < 4mm: 4x16 ≥ 4mm: 4x19,3 (max 6mm) Installazione 1 battente 1 leaf installation Installation 1 battant 1 Flügel Installation...
- Page 23 ® Nella versione ad un battente staccare il pezzo raffigurato nell’immagine. Attenzione! Non staccare nella versione a due battenti! Tear off the piece as per image only in one leaf version. Caution! Do not tear it off in 2 leaves version. Lösen das darstellende Stück nur im 1 Flügel Modell.
- Page 24 ® Installazione 1 battente 1 leaf installation Installation 1 battant 1 Flügel Installation...
- Page 25 Lubricate the sliding rail sides by using the special lubricant for Scenica ® items Bettio. Schmieren die Seiten der beweglichen Schiene mit dem für Bettio Scenica ® Produkte speziellen Schmierspray. Lubrifier les côtés de la coulisse mobile avec le spécial lubrifiant pour produits Scenica ®...
- Page 26 ® Installazione 1 battente 1 leaf installation Installation 1 battant 1 Flügel Installation...
- Page 27 ® Durante il primo svolgimento veri- ficare che la rete non presenti delle pieghe. Se ciò accade regolare la corda come illustrato a pagina 45 prima di svolgere totalmente la rete. When you roll-aside the screen for the first time, please make sure the mesh has no pleats, otherwise adjust the wire as per image at page 45 before roll aside totally the mesh.
- Page 28 ® Installazione 1 battente 1 leaf installation Installation 1 battant 1 Flügel Installation...
- Page 29 Versione a due battenti ® Two leaves version La versione a due battenti è composta da DUE zanzariere ad un battente. Fare riferimento all’indice di pg. 4. The double leaf version is composed of two single leaf screen, please refer to page 4 in the index.
- Page 30 ® Appoggiare su entrambi i lati. Lean against both sides. Lehnen an die zwei Kastenmontageseiten. Appuyer sur les deux côtes. Installazione 2 battenti 2 leaves installation Installazione 2 battenti 2 leaves installation...
- Page 31 ® Seguire le istruzioni da pg.4 a pg. 28 per l’installazione di ogni battente. For the installation of each leaf follow the instructions from page 4 to page 28. Für die Flügelinstallation folgen die Montageanleitung von Seite 4 bis Seite 28. Observer les instructions de pag.
- Page 32 ® Installazione 2 battenti 2 leaves installation Installazione 2 battenti 2 leaves installation...
- Page 33 ® Installazione 2 battenti 2 leaves installation Installazione 2 battenti 2 leaves installation...
- Page 34 ® Installazione 2 battenti 2 leaves installation Installazione 2 battenti 2 leaves installation...
- Page 35 ® Installazione 2 battenti 2 leaves installation Installazione 2 battenti 2 leaves installation...
- Page 36 ® Accessorio complementare. Installazione a discrezione. Additional component. Optional installation. Ergänzende Zubehörteil. Unverbindlich. Accessoire complémentaire. Installation à discrétion. Installazioni opzionali Optional installation Wahlfreie Installation Installation à discrétion...
- Page 37 ® Installazioni opzionali Optional installation Wahlfreie Installation Installation à discrétion...
- Page 38 ® Profilo di riscontro complementare. In caso di installazione assieme al blocco inferiore accorciare il profilo di 25mm. The closing profile is an additional component. In case of installation together with the lower block cut 25mm of the profile. Ergänzendes Seitlichprofil. Wegen der Installation mit dem unteren Sperre, schneiden das Profil 25 mm.
- Page 39 ® Installazioni opzionali Optional installation Wahlfreie Installation Installation à discrétion...
- Page 40 ® Accessorio complementare. Installazione a discrezione. Additional component. Optional installation. Ergänzende Zubehörteil. Unverbindlich. Accessoire complémentaire. Installation à discrétion. Installazioni opzionali Optional installation Wahlfreie Installation Installation à discrétion...
- Page 41 ® Installazioni opzionali Optional installation Wahlfreie Installation Installation à discrétion...
- Page 42 ® Problema 1 Problem 1 Problem 1 Problème 1 Problemi e soluzioni Problems and solutions Probleme und Lösungen Problèmes et solutions...
- Page 43 ® Soluzione 1 Solution 1 Lösung 1 Solution 1 Problemi e soluzioni Problems and solutions Probleme und Lösungen Problèmes et solutions...
- Page 44 ® Problema 2 Problem 2 Problem 2 Problème 2 Problemi e soluzioni Problems and solutions Probleme und Lösungen Problèmes et solutions...
- Page 45 ® Soluzione 2 Solution 2 Lösung 2 Solution 2 Problemi e soluzioni Problems and solutions Probleme und Lösungen Problèmes et solutions...
- Page 46 ® Lasciare almeno 5 cm di cordino in eccesso per eventuali regolazioni. Please, leave at least 5cm of exceeding wire for eventual, further regulations Falls eventuelle Regulierungen lassen wenigstens 5cm der Kordel im Überschuss. Laisser au moins 5 cm de corde en plus pour réglages éventuels.
- Page 47 ® Deve passare almeno un foglio di carta sotto la maniglia. Problematica valida anche per la ver- sione a due battenti. At least a sheet of paper must pass underneath the handlebar. Problem also valid for the two- leaves version. Problema 3 Es muß...
- Page 48 ® Soluzione 3 Solution 3 Lösung 3 Solution 3 Problemi e soluzioni Problems and solutions Probleme und Lösungen Problèmes et solutions...
- Page 49 ® Soluzione 3 min. Solution 3 1-2 mm Lösung 3 Solution 3 Problemi e soluzioni Problems and solutions Probleme und Lösungen Problèmes et solutions...
- Page 50 ® Problema 4 Problem 4 Problem 4 Problème 4 Problemi e soluzioni Problems and solutions Probleme und Lösungen Problèmes et solutions...
- Page 51 ® Nel caso in cui la rete esca accidentalmente dalla sua sede, reinserirla delicatamente con l’aiuto delle mani, prima di riavvolgerla nel cassonetto. If the mesh goes accidentally off rail, insert it again gently by hands before closing the screen. Wenn das Netz zufällig seinen Sitz ver- lässt, wiedereinfügt es zart mit der Hilfe der Hände, bevor im Kasten zu umspu-...
- Page 52 ® Aspirare delicatamente la rete e le parti esposte alla polvere. Vacuum the mesh and the areas exposed to dust. Saugen sanft das Netz und die auf Staub ausgestellten Teile. Aspirer délicatement la toile et les parties exposées à la poussière. Manutenzione Maintenance Wartung...
- Page 53 ® Pulire con un panno umido di soluzione neutra. Clean only with a wet cloth and neutral solution. Reinigung: benutzen Sie ein nasses Tuch mit neutraler Lösung. Nettoyer avec une linge humide à solution neutre. Manutenzione Maintenance Wartung Maintenance...
- Page 54 Bettio. Lubrifier périodiquement les côtés de la coulisse mobile avec le spécial lubrifiant pour produits Scenica ® de Bettio. Schmieren periodisch die Seiten der bewe- glichen Schiene mit dem für Bettio Scenica ® Produkte speziellen Schmierspray. Manutenzione Maintenance Wartung Maintenance...
- Page 55 ® 160cm Per la vostra sicurezza: apporre gli speciali adesivi segnaletici ad una altezza di 160 cm. For your safety: please put the stickers at 160 cm height Für Ihre Sicherheit: an- bringen die Klebstoffe an einer Höhe von 160 Pour votre sécurité: coller les adhésifs à...
-
Page 56: Dichiarazione Di Conformità
EN 13561 La società BETTIO GROUP S.A.S. di Bettio Denis & C. con sede in Via dell’Artigianato n°14, 30020 Marcon (Venezia), nella persona del Sig. Denis Bettio nella sua qualità di Legale Rappresentante espressamente delegato a questo scopo e sotto la sua propria esclusiva responsabilità, D I C H I A R A che la persona autorizzata a costituire il fascicolo tecnico, è... - Page 57 Queste istruzioni sono rivolte a chi utilizza la zanzariera come installatore, manutentore, proprietario o utente. Con questo strumento la BETTIO GROUP SAS intende fornire al Cliente uno strumento di supporto per un uso più consapevole e corretto dei sistemi di zanzariere, al fine di un’ottimizzazione delle loro prestazioni. E’ quindi consigliato per un corretto e vantaggioso utilizzo del sistema tenere disponibili le presenti note ai fini di garantire una rapida consultazione ogni qualvolta le circostanze lo rendano necessario.
-
Page 58: Manutenzione
® Gli operatori devono comportarsi in conformità alle istruzioni di sicurezza ricevute (POS). Nel caso in cui il prodotto debba essere montato ad un piano elevato rispetto a quello di terra, è necessario delimitare e presidiare l’area durante la salita al piano del prodotto in modo che nessuno possa trovarsi sotto l’eventuale carico sospeso. 7. -
Page 59: Garanzia
- Uso di parti di ricambio non originali Bettio Group sas. - Rimozione od occultamento dell’etichetta identificativa Bettio Group sas, per cui la rintracciabilità del prodotto non risulta possibile. Per altre specifiche esclusioni dalla Garanzia, si fa riferimento alle eventuali note specificate dall’Azienda. - Page 60 ® L’imballo contiene le istruzioni di montaggio, d’uso, manutenzione e garanzia: il montatore deve accertarsi che siano consegnate, previa lettura e commento, all’utilizzatore finale. Non lasciare alla portata dei bambini i materiali d’imballo, possono costituire fonte di pericolo per gli stessi. 11.
-
Page 61: Declaration Of Conformity
European Directive 98/37/EC annex II A and 2006/42/EC The company BETTIO GROUP S.A.S. di Bettio Denis & C. with registered office in Via dell’Artigianato No.14, 30020 Marcon (Venezia), as represented by Mr Denis Bettio in his capacity as Legal Representative expressly delegated for this purpose and under his own responsibility, DECLARES that the person authorized to create the technical file is the engineer Mr Franco Zannoner who can be contacted at the Company;... -
Page 62: Operator Requirements
These instructions are intended for those who use the flyscreen such as the installer, maintenance person, owner or user. With this instruction booklet BETTIO GROUP SAS wishes to provide Customers with a tool for better, correct use of installed flyscreens so as to optimize their performance. -
Page 63: Maintenance
® The state of the structure on which the flyscreen will be fixed must be checked on the basis of the dynamic stress that the frame must withstand with the flyscreen fully unwound from the cassette, and that is a wind speed of 130 km/h. With hollow bricks use suitably sized expansion plugs with chemical adhesive. - Page 64 - Use of other than Bettio Group sas original spare parts. - Removal or concealment of the Bettio Group sas identification label making traceability of the product impossible. For other specific exclusions from the Warranty, see any notes specified by the Company. For all and any dispute the sole place of jurisdiction is Venice - Italy.
- Page 65 Company profile. BETTIO, leading producer of insect screen systems seated in Marcon (Venice), born at the beginning of 1990’s with a clear and simple goal: manufacture and sell top quality insect screens. The excellence of our products is a well balanced mix of attention and handicraft technical ability; and a combination of technological innovation, steady R&D process and the contribution of a young, well working and dynamic team.
- Page 66 Per ulteriori informazioni può rivolgersi presso il Suo rivenditore di fiducia. Dear Customer, We remind you that the world of BETTIO insect screens is pretty big and well assorted and includes also many more models for every use and need of Your home. We invite you to deepen your knowledge of our products that offer several solutions also for the installation of flyscreens in window rooms.
- Page 67 Visita il sito Bettio! Visita il sito Bettio! Potrai scaricare i cataloghi più recenti, Potrai scaricare i cataloghi più recenti, i moduli d’ordine e le istruzioni. i moduli d’ordine e le istruzioni. Visionare i modelli di ultimissima generazione, Visionare i modelli di ultimissima generazione, ed essere aggiornato sulle news dell’Azienda, come...
- Page 68 Download viewer at www.i-nigma.com www.bettio.it...
Need help?
Do you have a question about the SCENIKIT SCENICA and is the answer not in the manual?
Questions and answers