
Subscribe to Our Youtube Channel
Related Manuals for Aovo PRO


Summary of Contents for Aovo PRO
- Page 1 Instructions For Use (Please keep and read this manual carefully before using this product) www.aovotoys.com Customer Service Email: support@aovotoys.com...
-
Page 2: Disclaimer & Warning
You agree to use this product only for purposes that are proper and in accordance with local regulations, terms and all applicable polices and guidelines aovo may make available. 2. When using this product, please be sure to strictly abide by the specifica- tion requirements and safety guidelines stated in this document. -
Page 3: Flight Environment
④ Please do a thorough check of the product before each use. Inspect the integrity of the parts, any signs of cracks and wear of the propeller, battery power and effectiveness of the indicator, etc. If after doing a complete check any issues are found, please refrain from using the product until the issue has been resolved. -
Page 4: Operation Requirements
Operation Requirements: ① Please don’t use this product to follow any moving vehicles. ② During the flight, only turn off the motor in case of an emergency. ③ As battery becomes low return the drone back to your starting point. ④... - Page 5 ⑦ It is recommended to only use the USB charging cable that comes with the drone to charge the battery. ⑧ Don't connect the battery directly to wall outlets or car cigarette lighter sockets. ⑨ Don't attempt to disassemble or modify the battery in any way. ⑩...
-
Page 6: Maintenance
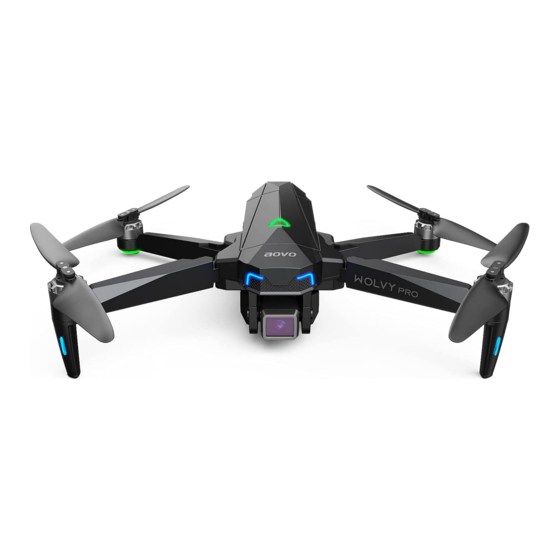
MAINTENANCE ① Clean the product after each use with a clean, soft cloth. ② Avoid prolonged exposure to direct sunlight and avoid buildup of heat on the drone. ③ This device is not waterproof and must not be submerged in water under any circumstance. - Page 7 DRONE’S DETAILS Propeller A Battery Propeller B Propeller B Power Switch HD Camera Propeller A BOTTOM Vision Positioning Lens Lights -06-...
-
Page 8: Controller Details
CONTROLLER DETAILS Controller Functions Antenna Gyroscope calibration Speed Left Joystick Right Joystick Unlock Return to Home Phone Holder - - - - - - - - - - - - - - - - - - - - - - - - - - - - - - - - - - - - - - - - - - - - - - - - - - - - - - - - - - - BACK Record Video Camera Angle... - Page 9 •GPS Mode Switch When turning on the controller, the default mode is the GPS Mode. Turn off GPS by pressing GPS switch. •Return to Home Press the button to start the RTH. The controller emits a “beep-beep” sound every 1.5 seconds as the drone flies back to the recorded Home Point.
-
Page 10: Installation
INSTALLATION Drone Battery Installation: Push the battery into the battery compartment of the drone. Make sure it “clicks” into place indicating the battery is firmly installed. Attention: The battery should be installed firmly. Failure to do so may affect the flight safety of your drone. -
Page 11: Install Tf Card
Install TF Card As shown in the above figure, please push the camera module out and insert the TF card ( needs to be purchased separately ) into TF card slot. A “click” signifies it is inserted correctly. Push the camera module into the specified position of drone. - Page 12 Propellers Installation HEAD The drone will not fly unless the correct propeller is installed on the correct motor shaft. See illustration above. An “A” “B” is printed on the back of each propeller. Lock the propeller to the motor shafts with screws rotating each screw clockwise.
-
Page 13: Phone Holder
Phone Holder ① Separate the Mobile Device Holder by pulling out from controller. ② Adjust the Mobile Device Holder for a tight grasp of your phone. -13-... - Page 14 CHARGING USB Adapter (5V/2.0A) ① Connect the USB cable to a USB socket such as a mobile power supply (Use a power supply with standard output of 5V and current equal to but no greater than 2A). Connect battery with the USB cable. The battery's LED's begin flashing.
-
Page 15: Download App
OPERATION GUIDE Download APP Android APP on Google play Scan the QR code, corresponding to either App Store™ or Google™ Play Store and download the “ W - GPS ” application for free. Required Operating Systems: iOS v8.0 and later / Android v4.3 and later Tips: Please use a smartphone that can support receiving 2.4G and 5G WiFi signals. - Page 16 Check the drone’s status in the ”W - GPS” App. ② Your smartphone will launch a search of the available Wi-Fi networks: W PRO-4K-****** ③ Select the Wi-Fi network: PRO-4K-******. ④ Wait for several seconds until your smartphone connects to the drone's Wi -Fi network.
-
Page 17: Calibrating The Compass
Pairing After a Wi-Fi signal has been established between your smartphone and the drone, turn on the switch on the controller by sliding it to the right. Once the controller emits a "beep" sound it confirms that the drone and controller are now successfully paired. -
Page 18: Gyroscope Calibration
Front lights flash slowly Solid Rear lights Step 2: Now, the APP interface displays the diagram. Hold the drone vertically and rotate the drone in 3 complete circles. When completed, the controller emits a “beep” sound and the drone's LED lights become solid. Attention: ·... - Page 19 Unlocking the Motor Please unlock the motor before take-off. Press the red button “ ” , the motors rotate. ① Unlocking the motor 1) Indoor Mode: The drone default Mode is GPS, however app shows “Equipment connected (Indoor Mode)” change Controller to activate Indoor Mode by long pressing the GPS button on Controller.
-
Page 20: Function Details
One Key Takeoff/Landing ① ② Landing Take-off ① After unlocking the drone, press the “ ” button in the APP interface, then “ ” and the drone will automatically take off Slide right to confirm and hover at 1.5m altitude. Or press the button “ ”... -
Page 21: Return To Home (Rth)
Return to Home (RTH) · The Return to Home function brings the drone back to the Home Point. · The Home Point is the location at which the drone takes off. This location will be recorded as the Home Point. - - - - - - - - - - - - - - - - - - - - - - - - - - - - - - - - - - - - - - - - - - - - - - - - - - - - - - - - - - - Smart RTH If the GPS signal is available and the indicate... - Page 22 Low Voltage RTH ① When the drone's lights flash slowly, the “ ” symbol is displayed on the APP interface, Then the First Low Voltage RTH will be triggered. The controller will emit a “beep-beep-beep” alert every 5 seconds. The drone will return automatically in the following two conditions: (At this time, the drone can only fly within a safe range of its height no more than 20m and its...
- Page 23 ② If the drone’s lights begin to flash rapidly the “ “ symbol will be displayed on the APP interface and the controller will emit a “beep-beep” alert. The Second Low Voltage RTH is automatically triggered. Drone will return automatically. a.
- Page 24 Image Positioning System ① The Image Positioning System consists of a camera ① module, which acquires the position information of the drone through visual images to ensure precise positioning and safe flight of the drone. - - - - - - - - - - - - - - - - - - - - - - - - - - - - - - - - - - - - - - - - - - - - - - - - - - - - - - - - - - - The Image Positioning System is typically used in indoor environment and the altitude lower than 8m.
- Page 25 1. Fly fast at an altitude below 0.5m. 2. Fly over monochrome surfaces (like pure black, pure red, pure red and pure green). 3. Fly over strong light reflective surfaces or surfaces prone to reflection. 4. Fly over water or transparent object surfaces. 5.
-
Page 26: Operation Interface
APP OPERATION INSTRUCTION Operation Interface CAMERA VIEW Follow Surrounding 180° Screen 3D VR Waypoint Rotation flight Home Find Gesture to Lock Music page drone take pictures Satellite Battery Setting Flying Drone record signal Take off Return Function Photo Shutter Video button H: N/A D:N/A V.S:N/A... -
Page 27: Setting Parameters
Setting Parameters Click the “ ” icon to enter the setting interface (as shown in the figure above). You can set a limited flight range: 1. Maximum flight distance: 60~3300 feet / 20~1000 m. 2. Maximum flight altitude: 60~390 feet / 20~120 m. 3. - Page 28 Follow Me When the Follow Me function is enabled, the drone will follow the GPS in your smart phone to follow you wherever you go. 1. Ensure the drone's flight range is within 30m. 2. Click the“ ” icon on the app interface, then click “ ”...
-
Page 29: Waypoint Flight
Waypoint flight It is recommended to enlarge the map if you want to use Waypoint flight. 1. Click the“ ” icon on the app interface, then click " " to enter the Waypoint flight function. 2. Draw a line on the map to create a path (maximum 15 paths). Click “... -
Page 30: Point Of Interest
Point of Interest 1. Click the“ ” icon on the app interface. Click “ ” then “ ”to enter the Point of Interest function. Slide right to confirm 2. The drone will record it’s flight position the moment you enter this function as the point of interest. - Page 31 Take Photo/Video 1. Click the “ ” icon to switch between photo and video mode. 2. When the shutter button is “ ”, click once to take a photo. 3. When the shutter button is “ ”, click once to start recording, and click again to stop recording.
- Page 32 DRONE STATUS INDICATOR Indicator Status Indicator Status Meaning Drone is connected to the controller, The drone's LED lights flash rapidly Compass Horizontal Calibration begins. Compass Horizontal Calibration has completed and begin Compass Vertically The drone's LED lights flash slowly. Calibration. Compass Calibration has completed.
-
Page 33: Specifications
SPECIFICATIONS DRONE Model: PRO Weight: 520 g / 18.4 oz Max Flight Time: Approx 30 minutes Operating Temperature Range: 32° to 104°F Dimensions: 115 x 175 x 80 mm (Folded) 285 x 225 x 80 mm (Unfolded) DRONE BATTERY Capacity: 2500 mAh Voltage: 11.4 V... - Page 34 CAMERA Camera frequency: 5 GHz Video/Photo Resolution: 4K Lens: FOV 90° FPV Distance: 800m (outdoor and unobstructed) Photo: JPEG Video: MP4 MAX Supported TF Cards: 32 GB (Not included) Controllable Range: Pitch: -90° to 0° Operating Temperature Range: 32° to 104°F USB CHARGING CABLE Voltage: 5 V Ampere: >...
-
Page 35: Troubleshooting
TROUBLESHOOTING Problem Solution The drone is in the Gyroscope When the drone is powered on, Calibration Mode. Please place the indicator light keeps flashing the drone on a flat, level surface. rapidly. Place the drone on a flat, level The drone cannot hover after surface and repeat Gyroscope takeoff and tilts to one side. - Page 36 BATTERY WARNING: 1. Failure to follow all the instructions may result in serious injury, irreparable damage to the battery and may cause a fire, smoke or explosion. 2. Always check the battery’s condition before charging or using it. 3. Replace the battery if it has been dropped, or in case of odor, overheat- ing, discolouration, deformation or leakage.
- Page 37 11. Non-rechargeable batteries are not to be recharged. Rechargeable batteries are only to be charged under adult supervision. 12. Different types of batteries or new and used batteries are not to be mixed. 13. Batteries are to be inserted with the correct polarity. 14.
-
Page 38: Controller Operation
Controller Operation Left Joystick Ascend Descend Down Right Left Rotate Right Rotate Left - - - - - - - - - - - - - - - - - - - - - - - - - - - - - - - - - - - - - - - - - - - - - - - - - - - - - - - - - - - Right Joystick Forward Down...
Need help?
Do you have a question about the PRO and is the answer not in the manual?
Questions and answers