Table of Contents
Advertisement
Available languages
Available languages
Quick Links
RJ549 Multi-function Keyboard
User Guide
Guide utilisateur pour le clavier
multifonction RJ-549
RJ549 Multifunktion Keyboard
Bedienungsanleitung
Guida per l'Utente Tastiera
multifunzione RJ549
Teclado multifuncional RJ549
Guía del Usuario
RJ-549
Wielofunkcyjny instrument
klawiszowy
Podręcznik użytkownika
Advertisement
Chapters
Table of Contents

Related Manuals for ROCK JAM RJ549


Summary of Contents for ROCK JAM RJ549
- Page 1 RJ549 Multi-function Keyboard User Guide Guide utilisateur pour le clavier multifonction RJ-549 RJ549 Multifunktion Keyboard Bedienungsanleitung Guida per l’Utente Tastiera multifunzione RJ549 Teclado multifuncional RJ549 Guía del Usuario RJ-549 Wielofunkcyjny instrument klawiszowy Podręcznik użytkownika...
-
Page 3: Do Not Open The Body Of The Electronic Keyboard
Important Information Be sure to follow this information so as not to harm yourself or others, or damage this instrument or other external equipment Power adapter: Please use only the specified DC adapter supplied with the product. An incorrect or faulty adapter can •... -
Page 4: Table Of Contents
Contents Important Information Power adapter Do not open the body of the electronic keyboard: Use of the Electronic Keyboard Maintenance During operation Specifications Controls, Indicators and External Connections Front Panel Back Panel Power AC/DC power adapter Battery operation Jacks and Accessories Using headphones Connecting an Amplifier or Hi-Fi Equipment LED Display... -
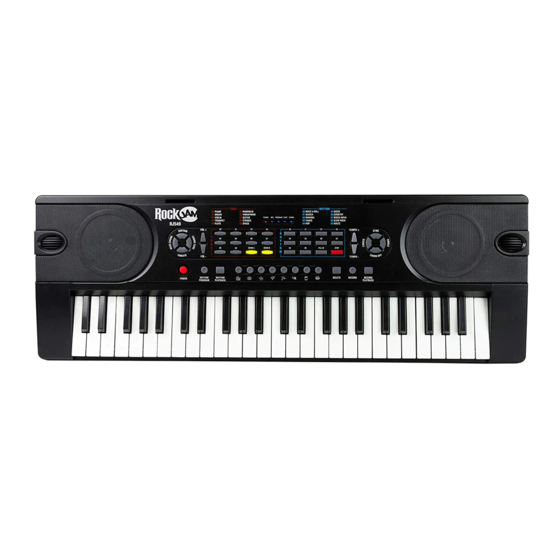
Page 5: Controls, Indicators And External Connections
Controls, Indicators and External Connections Front Panel... -
Page 6: Back Panel
15. Tempo [Slow/Fast] Loudspeaker 16. Multi-Finger Chords Power Switch Vibrato 17. Sync Bass Chord 18. Single Finger Chords 19. Chord Off Sustain Chord Tone 20. Chord Keyboard Volume +/- 21. Rhythm Program 22. Rhythm Playback Tone Selection Demo A 23. Percussion 10. -
Page 7: Power
Power AC/DC power adapter Please use the AC/DC power adapter that came with the electronic keyboard or a power adapter with DC 9V output voltage and 1,000mA output, with a centre positive plug. Connect the DC plug of the pow- er adapter into the DC 9V power socket on the rear of the keyboard and then connect to the outlet. -
Page 8: Connecting An Amplifier Or Hi-Fi Equipment
Connecting an Amplifier or Hi-Fi Equipment This electronic keyboard has a built-in speaker system, but it can be connected to an external amplifier or other Hi-Fi equipment. First turn off the power to the keyboard and any external equipment you want to connect. Next insert one end of a stereo audio cable (not included) into the LINE IN or AUX IN socket on the external equipment and plug the other end into the [PHONES] jack on the rear of the electronic keyboard. -
Page 9: Adjusting The Master Volume
Adjusting the Master Volume The keyboard has 16 levels of volume, from 0 (off) 15(full). To change the volume, touch the [VOLUME +/-] buttons. Pressing both the [VOLUME +/-] buttons at the same time will make the Volume return to the default level (level 12). The volume level will be reset to level 12 after power off and power on. -
Page 10: Effects
Effects The Keyboard has Vibrato and Sustain sound effects. Press once to activate; press again to deactivate. The Vibrato and Sustain effects can be used on keynotes, or on a Demo Song. Percussion The Keyboard has 8 percussion and drum effects. Press the keys to produce a percussive sound. The percussion effects can be used in combination with any other mode. -
Page 11: To Select A Rhythm
To select a Rhythm Press any of the [RHYTHM] buttons to turn on that Rhythm function. With a Rhythm playing, press any other [RHYTHM] button to change to that Rhythm. Press the [STOP] button to stop the Rhythm playing. Press the [FILL IN] button to add a fill to a rhythm that is playing. -
Page 12: Synchronize
Synchronize Press the [SYNC] button to activate the synchronize function. Press any of the 19 keys on the left of the Keyboard to activate the selected Rhythm as you begin to play. Recording Press the [RECORD] button to enter Record Mode. Play a sequence of notes on the Keyboard for a Recording. Press the [RECORD] button again to save the Recording. -
Page 13: Chord Table: Single Finger Chords
Chord Table: Single Finger Chords... -
Page 14: Chord Table: Fingered Chords
Chord Table: Fingered Chords... -
Page 15: Trouble Shooting
Trouble Shooting Possible Reason / Solution Problem A faint noise is heard when turning the power on or This is normal and nothing to worry about. off. After turning the power on to the keyboard there Check the volume is set to the correct setting. Check that was no sound when the keys were pressed. -
Page 16: Fcc Class B Part 15
FCC Class B Part 15 This device complies with Part 15 of the Federal Communications Commission (FCC) Rules. Operation is subject to the following two conditions: This device may not cause harmful interference. • • This device must accept any interference received, including interference that may cause undesired operation. - Page 18 é é é é é â é â è é â à é " é è é #é é â é é é à é é é é é è é é à è à ù é è è é é...
- Page 19 & & & '78 * < & < < > > > " " &...
- Page 21 +0 = à +; %$ à +< :é +> 8é B+ & < %é BB ' B- & > 8é B/ % +A 8é B0 7 ++ É ’ B5 ' +B %é B; 7 é B< % +- 2 D +/ % É...
- Page 22 +B # + AAA " " ># " " Adaptateur Adaptateur d'alimentation d'alimentation Prise sect eur Prise sect eur Fiche CC Fiche CC " " " ! ( F&4H 7%G " Fiche 3,5 mm PHONES Écouteurs...
- Page 23 é " " 'D 7 D ! ( F&4H 7%G " Amplificateur Fiche 3,5 mm PHONES Jack d’entrée audio de l’amplificateur Boîtier du haut-parleur É '78 * é é é ê é ,é é ô F&HN7:G...
- Page 24 :é L " ; K F#H' ,7 E1 G % F#H' ,7 E1 G 0L ' %é D $ +A & & 87,H AA & A0 , A+ H A5 # AB # A; O A- = A< A/ 2 û K2 A>...
- Page 25 & < < F=7,&HEG F=7,&H G "...
- Page 26 %é F:4R=4,G F:4R=4,G F%=H&G F2D'' D G AA : : ( A0 8 A+ , AB : A; C A- = A< % S : ( A/ & A> N & " " F2D O7:G F%D O'7G Q +> %D O'7 "...
- Page 27 +> F:7 H:8G F:7 H:8G " '78 @ F&' RC F87'7=7G F:4R=4, &:HO: ,G < F:4R=4, &:HO: ,G F:4R=4, &' RC %=H&&7:...
- Page 30 è & é é è é î é é #é é #é é $ è é é é é ’ ’ é è é é ’ é K é é é é é é #é é é é é é è...
- Page 31 & " é é ç é î é é 33. 3 : " " " " é :é é é é é é ù é é é é é " BA+B1+>17 K8777L & &8= ' /C O # S , ,B/ + &8= ' W BA+<...
- Page 33 " # $ & ' " %+ " " " % " 0 " & ' . " & ' & ' " & ' & ' & ' & ' & ' 1 " % 1 " % "...
- Page 34 " & ' & ' " " .0 %" < " < < > % < & " + < & ' * " " D $%% " 9< "...
- Page 35 & # %...
- Page 36 " 9< 4 " J7 9@ $%% < FE $%% % I= F9 . ' FF . ' F: 8 % F; 7+ 99 7 F< $ 9F . ' F@ ( 9: 3 FB $ "" !-$!- C1...
- Page 37 " " " & ' " C 1 $ " 9 EEE $ $ " " C 1 C 1 & ' STROMADAPTER STROMADAPTER STECKDOSE STECKDOSE DC-STECKER DC-STECKER DC9-12V DC9-12V , $ = & &+ & ' & ' @ 9 < 1 $ % G- +/ &...
- Page 38 & ' " & ' & $,M ! J8*5! K > % & ' VERSTÄRKERS 3.5 mm Stecker HÖRER AUDIO EINGANGSJACK DESVERSTÄRKERS LAUTSPRECHERBO X # 5 G # 5 G # 5 G = ' # " 4 % # ( # 7 !&...
- Page 39 * " & ' 9@ 7 E G H 9< G J157,? I= K 4 J157,? I= K 4 0 % G % 9FH & ' & " EE & E< ? E9 5 E@ 1 " EF - EA - E: 4 "...
- Page 40 & ' % %+ & ' B 8 % % %+ " F< 4 " J4 ?85IK J4 ?85 K 4 "...
- Page 41 J.*O4*?K4 " J.*O4*?K 4 J 458 K "" J3 77 !K 4 EE . % P Q . E< E9 ? EF . E: 4 E; 8 " EC ( " J !-7 K J3 !- .K 4 9C 4 &...
- Page 42 J O! K 4 9C 4 & ' " 5. K 4 " & 5. K 4 " > " J87$O $ &K 4 " 7 4 K 4 J.*O4*? 8.5-.$?K 4 J.*O4*? 8.5-.$?K 4 "" J.*O4*? 87$O $ &K 4 "...
- Page 43 ! , %...
- Page 45 = 7+ & ' " 0 " 0 & " + & ' " " " & ' " " & ' " 0 " & ' 9E 4+ 9E . ' ;: ! % :F 4 % . ' "...
- Page 46 )33 3 9< H 30 " #35.621 9< & 3 % ) 3 %% 3 % + " " 0 H %+ 3 % + " " " FE9F=9C= , G( " " 8 4 7 ?F; 9,! 1 &+ S"...
- Page 47 ’...
- Page 48 ò ù...
- Page 49 " " " " " " " & & - .* ": ": ": "" "; "& "& "( "' < "'...
- Page 50 " "...
- Page 51 " "( 6 "/ & "5 "8 "9 ;: 6 à ’ ;" >). ;; 3 ;& ": % ;( 3 "" 1% % ;/ 3 "; ;5 ! "& "'...
- Page 52 " ::: ADATTATORE ADATTATORE ALIMENT AZIONE ALIMENTAZIONE PRESA PRESA SPINA CC SPINA CC PRINCIP ALE PRINCIP ALE / E " ( & & ( ? -A 1 @ Presa 3,5 mm CUFFIE CUFFIE...
- Page 53 - .* - .*! < ! 1 ! ? -A 1 @ AMPLIFICATORE Presa 3,5 mm CUFFIE PRESA INPUT AUDIO O AMPLIFICATORE DIFFUSORE 1% % " & $ 1II! ? AJ13@...
- Page 54 "/ : < "( < ?4A $1 >).@ ?4A $1 >).@ < ";= ! "; ": %1$A " & ?%1$A@...
- Page 55 D ": ?61$ A>@ ?61$ A .@...
- Page 56 ?3-L6-$@ ?3-L6-$@ ? 6A @ : 3 , M 2 3 " $ & N 3 , ? ! I 1@ ?*! I13@K "9 ! I 1 "" ! *! I13 "; "9 ? -A3% A**@ -A3%@ ? -A3% 6A 1@...
- Page 57 "9 ?31 A3%@ ?31 A3%@ < ?3-L6-$ 3AI3 $@ ?3-L6-$ 3AI3 $@ ?3-L6-$ &:...
- Page 60 è è è ’ è ’ 4 è è à è è "9 à ": ": " '& &; " & '9 ; . / " // , C 1 <EE $ 'J E ; ’...
- Page 61 '"" " "( ò ) , - ) "( è <3 11= <;:";)"9)1 = D '7 I 4 N $ $;' " R ;:"8...
- Page 62 Teclado multifuncional RJ549 Guía del Usuario...
- Page 63 Información importante Asegúrese de seguir esta información para no hacerse daño ni a usted ni a otras personas, ni dañar este instrumento u otro equipo externo. Adaptador de corriente: • Utilice únicamente el adaptador específico de CC suministrado con el producto. Un adaptador incorrecto o defectuoso puede dañar el teclado electrónico.
- Page 64 Contenido Información importante ................................2 Adaptador de corriente: ..................................2 No abra el cuerpo del teclado electrónico: ............................2 Uso del teclado electrónico: ................................2 Mantenimiento: ....................................2 Durante la operación: ..................................2 Especificaciones: ....................................2 Controles, Indicadores y Conexiones Externas ........................4 Panel Frontal ......................................4 Panel Posterior ....................................5 Potencia ......................................6 Adaptador de corriente CA / CC ..............................6...
-
Page 65: Controles, Indicadores Y Conexiones Externas
Controles, Indicadores y Conexiones Externas Panel Frontal... -
Page 66: Panel Posterior
Altavoz 15. Tempo [Lento / Rápido] Interruptor de Encendido 16. Acordes de Varios Dedos Vibrato 17. Sincronizar Acorde de Bajo 18. Acordes de un Solo Dedo Sustain 19. Acorde Apagado Tono de Acorde 20. Teclado de Acorde Volumen +/- 21. Programa de Ritmo Selección de tonos 22. -
Page 67: Potencia
Potencia Adaptador de corriente CA / CC Utilice el adaptador de alimentación de CA/CC que viene con el teclado electrónico o un adaptador de alimentación con voltaje de salida de CC de 9 V y una salida de 1.000 mA, con un enchufe central positivo. Conecte el enchufe de CC del adaptador de corriente a la toma de corriente CC de 9V en la parte posterior del teclado y luego conéctelo a la toma de corriente. -
Page 68: Conectar Un Amplificador O Equipo De Alta Fidelidad (Hi-Fi)
Conectar un Amplificador o Equipo de Alta Fidelidad (HI-FI) Este teclado electrónico tiene un sistema de altavoces incorporado, pero además se puede conectar a un amplificador externo u otro equipo de alta fidelidad. Primero, apague la alimentación del teclado y de cualquier equipo externo que desee conectar. -
Page 69: Ajuste Del Volumen Principal
Ajuste del Volumen Principal El Teclado tiene 16 niveles de volumen, desde 0 apagado (off) 15 completo (full). Para cambiar el volumen, tocar los botones de [VOLUMEN +/-]. Presionando los botones de [VOLUMEN +/-] en el mismo tiempo hará volver el Volumen al nivel predeterminado (nivel 12). -
Page 70: Efectos
Efectos El Teclado tiene los efectos de Vibrato y Sustain. Presiona una vez para activar; presiona de nuevo para desactivar. Los efectos de Vibrato y Sustain puede ser usadas en las teclas de notas o en las Canción Demo. Percusión El Teclado tiene 8 percusiones y efecto de tambor. -
Page 71: Seleccionar Un Ritmo
Seleccionar un Ritmo Presiona cualquier botón de [RITMO] para activar la función del Ritmo. Con la reproducción de un Ritmo, presiona cualquier otro botón de [RITMO] para cambiar a este Ritmo en concreto. Presiona el botón de [STOP] para parar la reproducción del Ritmo. -
Page 72: Sincronizar
Sincronizar Presiona el botón [SINC] ([SYNC]) para activar la función de sincronizar. Presiona cualquiera de las 19 teclas de la parte izquierda del teclado para activar el Ritmo seleccionado desde el comienzo de la reproducción. Grabación Presiona el botón [GRABACIÓN] ([RECORD]) para activar la Modalidad de Grabación. Reproduce una secuencia de notas en el Teclado para la Grabación. -
Page 73: Tabla De Acordes: Acordes De Un Solo Dedo
Tabla de acordes: Acordes de un Solo Dedo... -
Page 74: Tabla De Acordes: Acordes Dedos
Tabla De Acordes: Acordes Dedos... -
Page 75: Solución De Problemas
Solución de problemas Problema Causa Posible / Solución Se oye un leve ruido al encender o apagar la alimentación. Esto es normal y nada es para preocuparse. Después de encender el teclado, no se ha escuchado Verifica si el volumen está configurado en la configuración ningún sonido cuando se han presionado las teclas. -
Page 76: Clase B Parte 15 De La Cfc
Clase B Parte 15 de la CFC Este dispositivo cumple con la Parte 15 de las Reglas de la Comisión Federal de Comunicaciones (CFC). La operación está sujeta a las siguientes dos condiciones: • Este dispositivo no puede causar interferencias perjudiciales. •... - Page 77 RJ-549 Wielofunkcyjny instrument klawiszowy Podręcznik użytkownika...
-
Page 78: Ważne Informacje
Ważne informacje Pamiętaj, by stosować się do informacji zawartych poniżej, aby nie zrobić krzywdy sobie lub innym, ani nie uszkodzić instrumentu lub innych podłączonych do niego urządzeń. Zasilacz sieciowy: Prosimy używać wyłącznie specjalnego zasilacza AC dołączonego do wyrobu. Niewłaściwy lub •... - Page 79 Spis treści Ważne informacje Zasilacz sieciowy Nie otwieraj obudowy instrumentu Konserwacja Specyfikacja Przełączniki, wskaźniki i gniazda zewnętrzne Panel przedni Panel tylny Zasilanie Transformatorowy zasilacz sieciowy Korzystanie z baterii Gniazda typu jack i akcesoria Korzystanie ze słuchawek Podłączenie wzmacniacza lub sprzętu hi-fi Wyświetlacz LED Obsługa instrumentu klawiszowego Włączanie i wyłączanie...
-
Page 80: Przełączniki, Wskaźniki I Gniazda Zewnętrzne
Przełączniki, wskaźniki i gniazda zewnętrzne Panel przedni... -
Page 81: Panel Tylny
Głośnik 15. Tempo [Wolne/Szybkie] Wyłącznik zasilania 16. Akompaniament akordami Vibrato 17. Synchroniczny start akompaniamentu 18. Akordy grane jednym palcem Wybór akordu basowego 19. Wyłączenie funkcji akordu Wybrzmiewanie 20. Klawiatura Wybór brzmienia 21. Programowanie rytmu akordu 22. Odtwarzanie rytmu Regulacja poziomu dźwięku (+/-) 23. -
Page 82: Zasilanie
Zasilanie Transformatorowy zasilacz sieciowy Prosimy używać specjalnego transformatorowego zasilacza sieciowego dołączonego do instrumentu klawiszowego, lub zasilacza sieciowego o napięciu wyjściowym 9V DC, prądzie wyjściowym 1000 mA, z wtykiem z plusem w środku. Podłącz wtyk prądu stałego (DC) do gniazda DC 9V na tylnej części obudowy instrumentu klawiszowego, a następnie podłącz wtyczkę... -
Page 83: Podłączenie Wzmacniacza Lub Sprzętu Hi-Fi
Podłączenie wzmacniacza lub sprzętu hi-fi Instrument posiada wbudowany zestaw głośników, ale można go również podłączyć do zewnętrznego wzmacniacza lub innego sprzętu hi-fi. Przed podłączeniem jakiegokolwiek urządzenia zewnętrznego wyłącz zasilanie instrumentu. Następnie włóż koniec kabla stereo (brak w zestawie) do gniazda LINE IN lub AUX IN urządzenia zewnętrznego, a drugi koniec do gniazda [PHONES] z tyłu obudowy instrumentu. -
Page 84: Regulacja Ogólnego Poziomu Dźwięku
Regulacja ogólnego poziomu dźwięku Instrument ma siedem ustawień poziomu natężenia dźwięku oznaczonych cyframi od 0 (wyłączony) do 7 (maksymalny). Aby zmienić głośność, dotknij przycisków [VOLUME +/-]. Wciśnięcie obydwu przycisków [MAIN VOLUME +/-] jednocześnie spowoduje powrót ogólnego poziomu dźwięku instrumentu do ustawienia domyślnego (5). -
Page 85: Efekty
Efekty W instrumencie zastosowano dwa efekty dźwiękowe: dźwięk wibrujący (Vibrato) i wybrzmiewanie dźwięku (Sustain). Wciśnij wybrany przycisk, aby włączyć dany efekt. Wciśnij go ponownie, aby wyłączyć. Efekty Vibrato i Sustain mogą być używane podczas gry na klawiaturze, lub w utworach demonstracyjnych. -
Page 86: Wybór Rytmu
Wybór rytmu Wciśnij dowolny przycisk z grupy [RHYTHM], aby włączyć daną funkcję. Podczas odtwarzania podkładu rytmicznego wciśnij dowolny inny przycisk [RHYTHM], aby zmienić rytm. Wciśnij [STOP], aby zatrzymać odtwarzanie rytmu. Aby dodać przejście do odtwarzanego rytmu, wciśnij przycisk [FILL IN]. Rock ‘n’... -
Page 87: Synchronizacja
Synchronizacja Wciśnij przycisk [SYNC], aby włączyć funkcję synchronicznego startu. Wciśnij jeden z 19 klawisz od lewej strony klawiatury, aby rozpocząć grę z wybranym podkładem rytmicznym. Nagrywanie Wciśnij przycisk [RECORD], aby wejść w tryb nagrywania. Zagraj sekwencję nut na klawiaturze, aby je zapisać. -
Page 88: Tabela Akordów: Akordy Grane Jednym Palcem
Tabela akordów: Akordy grane jednym palcem... -
Page 89: Tabela Akordów: Akordy Grane Wieloma Palcami
Tabela akordów: Akordy grane wieloma palcami... -
Page 90: Rozwiązywanie Problemów
Rozwiązywanie problemów Możliwa przyczyna/Rozwiązanie Problem Podczas włączania lub wyłączania zasilania To normalne. Nie ma się czym martwić. słychać jakiś cichy dźwięk. Po włączeniu zasilania instrumentu nie Sprawdź czy ogólny poziom dźwięku jest ustawiony słychać żadnych dźwięków przy naciskaniu właściwie. Sprawdź czy do instrumentu nie są podłączone słuchawki lub inne urządzenie, ponieważ... -
Page 91: Przepisy Fcc (Cześć 15, Klasa B)
Przepisy FCC (Część 15, Klasa B) Niniejsze urządzenie spełnia wymogi określone w Części 15 przepisów Federalnej Komisji Łączności (FCC). Jego eksploatacja podlega następującym warunkom: Urządzenie to nie może powodować szkodliwych zakłóceń. • • Urządzenie musi przyjmować odbierane zakłócenia, w tym zakłócenia mogące powodować niepożądane działanie.
Need help?
Do you have a question about the RJ549 and is the answer not in the manual?
Questions and answers