Table of Contents
Advertisement
Quick Links
Advertisement
Table of Contents

Related Manuals for Electrolux WAGL4E300


Summary of Contents for Electrolux WAGL4E300
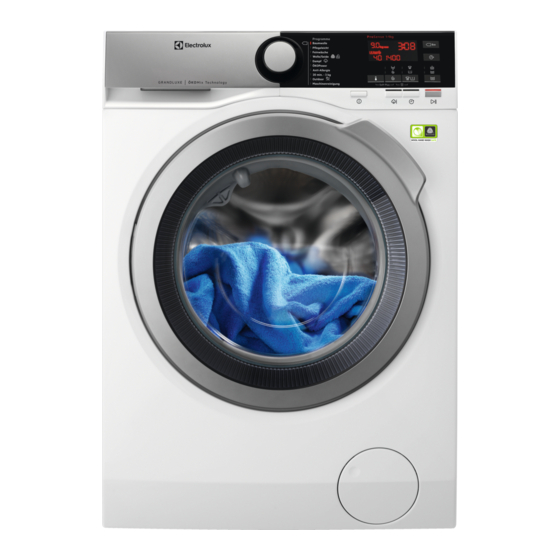
- Page 1 WAGL4E300 Washing Machine User Manual...
-
Page 2: Table Of Contents
17. GUARANTEE ....................37 WE’RE THINKING OF YOU Thank you for purchasing an Electrolux appliance. You’ve chosen a product that brings with it decades of professional experience and innovation. Ingenious and stylish, it has been designed with you in mind. So whenever you use it, you can be safe in the knowledge that you’ll get great results every time. -
Page 3: Safety Information
ENGLISH SAFETY INFORMATION Before the installation and use of the appliance, carefully read the supplied instructions. The manufacturer is not responsible for any injuries or damages that are the result of incorrect installation or usage. Always keep the instructions in a safe and accessible location for future reference. -
Page 4: Safety Instructions
The appliance must be connected to the water mains • using the new supplied hose sets, or other new hose sets supplied by the Authorised Service Centre. Old hose sets must not be reused. • If the mains power supply cable is damaged, it must •... -
Page 5: Installation
ENGLISH access to the mains plug after the • Do not put flammable products or installation. items that are wet with flammable • Do not touch the mains cable or the products in, near or on the appliance. mains plug with wet hands. •... - Page 6 3. Remove the internal film. 7. Remove the polystyrene protection from the bottom. 4. Open the door and remove the polystyrene piece from the door seal 8. Pull up the appliance in vertical and all the items from the drum.
- Page 7 ENGLISH 2. Loosen or tighten the feet to adjust the level. WARNING! Do not put cardboard, wood or equivalent materials below the appliance feet to adjust the level. 10. Remove the three bolts by using the key supplied with the appliance. 11.
- Page 8 If this occur, close the water tap and contact the authorized service centre to replace the hose. 3.5 Water drainage The drain hose should stay at a height of not less than 60 cm and not more than Make sure that the inlet hose 100 cm.
-
Page 9: Product Description
ENGLISH 5. Without the plastic hose guide: Put Make sure that the drain the drain hose in the spigot and hose end is not immersed in tighten it with a clip. Refer to the the water. There may be a illustration. - Page 10 The washing programme is tailored to relaxes the fibres and reduces fabric the laundry load and the type of fabric creasing. Ironing will be easier! without consuming more time, energy • The Stains option pre-treats and water than necessary.
-
Page 11: Control Panel
ENGLISH 5. CONTROL PANEL 5.1 Control panel description 11 10 Programme dial Delay start touch button (Delay Start) Display Steam Plus touch button (Plus Eco touch button (Eco) Steam) Time saving touch button (Time Save) Spin reduction touch button (Spin) •... - Page 12 5.2 Display Maximum load indicator. The indicator flashes during the laun‐ dry load estimation (refer to ProSense load detection paragraph) . Maximum laundry indicator. It blinks if the laundry amount exceeds the declared load. Door locked indicator. Delay start indicator.
-
Page 13: Knob And Buttons
ENGLISH Time saving indicator. Spin speed indicator. Rinse hold indicator. Extra silent indicator. Temperature indicator. The indicator appears when a cold wash is set. 5.3 Multilingual badges Adhesive badges in different languages are supplied with the appliance. The desired badge can be glued around the programme dial. - Page 14 The washing programme The display shows the indicator ends with water in the drum. (cold), the phase indicator and the The display shows the indicator spin speed. The door stays locked and the drum If it is necessary to turns regularly to reduce creasing.
- Page 15 ENGLISH The corresponding indicator above the This option increases the touch button illuminates. programme duration slightly. 6.9 Time Save When the programme stops the display shows a zero , the indicator With this option you can decrease the programme duration. steady on and the indicator starts flashing.
-
Page 16: Programmes
7. PROGRAMMES 7.1 Programme Chart Washing programmes Programme Programme description Washing programmes Cottons White cotton and coloured cotton. Normal soil and light Baumwolle soil. Standard programmes for the Energy Label consump‐ tion values. According to regulation 1061/2010, the pro‐... - Page 17 ENGLISH Programme Programme description Anti-allergy White cotton items. This programme removes micro-or‐ Anti-Allergie ganisms thanks to a washing phase with the temperature maintained above 60°C for some minutes. This helps in re‐ moving germs, bacteria, micro-organism and particles. An additional rinsing phase ensures a proper removal of deter‐ gent residues and pollens/allergenic items.
- Page 18 Programme temperature, maximum spin speed and maximum load Programme Default temper‐ Maximum spin speed Maximum ature Spin speed range load Temperature range Washing programmes Cottons 40 °C 1400 rpm 9 kg 95 °C - Cold 1400 rpm - 400 rpm Synthetics 40 °C...
- Page 19 ENGLISH ■ ■ ■ ■ ■ ■ ■ Rinse Hold ■ ■ ■ Extra Silent ■ ■ ■ ■ ■ ■ ■ Only drain ■ ■ ■ ■ ■ ■ ■ Only Spin ■ ■ ■ ■ Stains ■ ■ ■...
-
Page 20: Settings
8. SETTINGS 8.1 Child Lock buttons simultaneously for about 6 seconds. With this option you can prevent that the If you deactivate the children play with the control panel. acoustic signals, they • To activate/deactivate this option, continue operate when the... -
Page 21: Daily Use
ENGLISH 10. DAILY USE 10.3 Filling the detergent and WARNING! additives Refer to Safety chapters. 10.1 Activating the appliance 1. Connect the mains plug to the mains socket. 2. Open the water tap. 3. Press the On/Off button for a few seconds to activate the appliance. - Page 22 2. Press the lever down to remove the With the flap in the dispenser. position DOWN: • Do not use gelatinous or thick liquid detergents. • Do not put more liquid detergent than the limit shown on the flap.
- Page 23 ENGLISH display and the given information Changing the delay start after changes accordingly. the countdown has started In case a selection is not possible, no indicator To change the delay start: comes on and an acoustic 1. Touch the Start/Pause button to signal sounds.
- Page 24 10.10 Interrupting a programme this case, it will be not possible to guarantee the best washing results. and changing the options About 20 minutes after the When the programme is running, you programme start, the can change only some options: programme duration could 1.
- Page 25 ENGLISH 3. Close the door and touch the button • The drum still turns at regular Start/Pause. intervals to prevent the creases in the The programme or the delay start laundry. continues. • The door stays locked. • You must drain the water to open the 10.13 End of the programme door: 1.
-
Page 26: Hints And Tips
11. HINTS AND TIPS Special stain removers are available. WARNING! Use the special stain remover that is Refer to Safety chapters. applicable to the type of stain and fabric. 11.1 The laundry load 11.3 Detergents and other treatments • Divide the laundry into: white, coloured, synthetics, delicates and •... -
Page 27: Care And Cleaning
ENGLISH use a water softener for washing Use the correct quantity of water machines. In areas where the water softener. Follow the instructions that you hardness is soft it is not necessary to use find on the packaging of the product. a water softener. - Page 28 12.6 Cleaning the detergent dispenser To prevent possible deposits of dried detergent or clotted fabric softener and/or formation of mould in the detergent dispenser drawer, once in a while carry out the following cleaning procedure: 1. Open the drawer. Press the catch downwards as indicated in the picture and pull it out.
- Page 29 ENGLISH WARNING! • Do not remove the filter while the appliance operates. • Do not clean the pump if the water in the appliance is hot. Wait until the water cools down Proceed as follows to clean the pump: 1. Open the pump cover. 5.
- Page 30 10. Clean the filter under the water tap. When you drain the water with the emergency drain procedure, you must activate the drain system again: a. Put 2 litres of water in the main wash compartment of the detergent dispenser.
-
Page 31: Troubleshooting
ENGLISH 12.9 Emergency drain If the appliance cannot drain the water, carry out the same procedure, described in 'Cleaning the drain filter' paragraph. If necessary, clean the pump. When you drain the water with the emergency drain procedure, you must activate the drain system again: 1. - Page 32 • - The appliance does not fill with • - The mains supply is unstable. water properly. Wait until the mains supply is stable. • - The appliance does not drain • - No communication between the water. electronic elements of the appliance.
- Page 33 ENGLISH Problem Possible solution Make sure that the water tap is not clogged. Make sure that the filter of the inlet hose and the filter of the valve are not clogged. Refer to 'Care and cleaning'. Make sure that the water inlet hose has no kinks, damages or bends.
- Page 34 Problem Possible solution Set the drain or the spin programme if there is water in the drum. Make sure that the appliance receives electrical power. This problem may be caused by a failure of the appliance. Contact the Authorised Service Centre. If you need to open the door, please read carefully «Emergency door opening».
-
Page 35: Consumption Values
ENGLISH 1. Press the On/Off button to switch the CAUTION! appliance off. Risk of burns! Make sure 2. Disconnect the mains plug from the that the water temperature mains socket. is not too high and the 3. Open the filter flap. laundry is not hot. -
Page 36: Technical Data
Programmes Load Energy Water Approxi‐ Remain‐ (kg) con‐ con‐ mate pro‐ ing mois‐ sumption sumption gramme ture (%) (kWh) (litre) duration (minutes) Standard cotton programmes 0.60 Standard 60°C cotton 0.37 Standard 60°C cotton 0.36 Standard 40°C cotton 1) At the end of spin phase. -
Page 37: Accessories
ENGLISH 16. ACCESSORIES 16.1 Available in Verify the compatible www.aeg.com/shop or from stacking kit by checking the authorised dealer depth of your appliances. The stacking kit can be used only with Only appropriate the appliances specified in the leaflet accessories approved by provided with the accessory. - Page 38 Point of Service Morgenstrasse 131 3018 Bern Zürcherstrasse 204E 9000 St. Gallen Seetalstrasse 11 6020 Emmenbrücke St. Jakob-Turm Birsstrasse 320B 4052 Basel Comercialstrasse 19 7000 Chur Spare parts service Industriestrasse 10, guarantee covers the costs of materials, 5506 Mägenwil, Tel. 0848 848 111 labour and travel.
- Page 39 ENGLISH...
- Page 40 www.electrolux.com/shop...
Need help?
Do you have a question about the WAGL4E300 and is the answer not in the manual?
Questions and answers