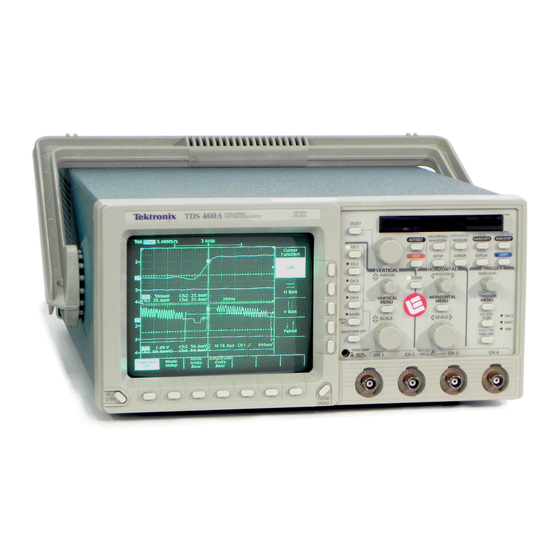
Tektronix TDS 420A User Manual
Digitizing oscilloscopes
Hide thumbs
Also See for TDS 420A:
- Programmer's manual (433 pages) ,
- Service manual (288 pages) ,
- Reference (6 pages)

Subscribe to Our Youtube Channel
Related Manuals for Tektronix TDS 420A


Summary of Contents for Tektronix TDS 420A
- Page 1 User Manual TDS 420A, TDS 430A, TDS 460A & TDS 510A Digitizing Oscilloscopes 070-9701-02...
- Page 2 Copyright Tektronix, Inc. All rights reserved. Tektronix products are covered by U.S. and foreign patents, issued and pending. Information in this publication supercedes that in all previously published material. Specifications and price change privileges reserved. Printed in the U.S.A. Tektronix, Inc., P.O. Box 1000, Wilsonville, OR 97070–1000...
- Page 3 Tektronix, with shipping charges prepaid. Tektronix shall pay for the return of the product to Customer if the shipment is to a location within the country in which the Tektronix service center is located.
- Page 5 ......... . 3–111 Setting Up Automatically: Autoset and Reset ....3–113 TDS 420A, TDS 430A, TDS 460A & TDS 510A User Manual...
- Page 6 ....... D–1 Glossary Index TDS 420A, TDS 430A, TDS 460A & TDS 510A User Manual...
-
Page 7: Table Of Contents
......... . . 3–22 TDS 420A, TDS 430A, TDS 460A & TDS 510A User Manual... - Page 8 Figure 3–48: Pulse Trigger Readouts ......3–91 TDS 420A, TDS 430A, TDS 460A & TDS 510A User Manual...
- Page 9 ......3–146 Figure D–1: Equipment Needed to Run the Example Programs ..D–1 TDS 420A, TDS 430A, TDS 460A & TDS 510A User Manual...
- Page 10 Table 1–1: Fuse and Fuse Cap Part Numbers ....1–4 Table 3–1: TDS 460A, TDS 430A, and TDS 420A Resolution Bits 3–6 Table 3–2: TDS 510A Resolution Bits .
- Page 11 Provide Proper Ventilation. To prevent product overheating, provide proper ventilation. Do Not Operate With Suspected Failures. If you suspect there is damage to this product, have it inspected by qualified service personnel. TDS 420A, TDS 430A, TDS 460A & TDS 510A User Manual...
- Page 12 Certifications and Refer to the specifications chapter of the performance verification and specifica- Compliances tions manual for a listing of certifications and compliances that apply to this product. viii TDS 420A, TDS 430A, TDS 460A & TDS 510A User Manual...
- Page 13 Preface This is the User Manual for the TDS 420A, TDS 430A, TDS 460A, and TDS 510A Digitizing Oscilloscopes. The Getting Started chapter briefly describes the digitizing oscilloscope, prepares you to install it, and tells you how to put it into service.
-
Page 14: Menu
Sometimes you may have to make a selection from a pop-up menu: Press TRIGGER MENU Type (main) Edge (pop-up). In this example, you repeatedly press the main menu button Type until Edge is highlighted in the pop-up menu. TDS 420A, TDS 430A, TDS 460A & TDS 510A User Manual... - Page 16 Up to 30,000-point record length per channel (120,000-point optional) on the TDS 420A, TDS 430A, and TDS 460A. Up to 50,000-point record length per channel on the TDS 510A Full GPIB software programmability.
- Page 17 Product Description Four channels and four eight-bit digitizers on the TDS 420A, TDS 460A, and TDS 510A. Two channels and two eight-bit digitizers on the TDS 430A On-line help at the touch of a button Appendix A lists the options and accessories.
- Page 18 TDS 510A requires 90 to 250 V for 45 Hz to 440 Hz, and may require up to 300 W. 5. Connect the proper power cord from the rear-panel power connector (see Figure 1–1 for the connector location) to the power system. 1–3 TDS 420A, TDS 430A, TDS 460A & TDS 510A User Manual...
-
Page 19: Figure 1-1: Rear Panel Controls Used In Start Up
1. Check that the rear-panel principal power switch is on (see Figure 1–1 for the location of the switch). The principal power switch controls all AC power to the instrument. 1–4 TDS 420A, TDS 430A, TDS 460A & TDS 510A User Manual... -
Page 20: Figure 1-2: On/Stby Button
Check the self test results. If the self test fails, call your local Tektronix Service Center. Depending on the type of failure, you may still be able to use the oscilloscope before it is serviced. - Page 21 Start Up 1–6 TDS 420A, TDS 430A, TDS 460A & TDS 510A User Manual...
- Page 23 To explore these topics in more depth and to read about topics not covered in this chapter, see Reference. Page 3–1 lists the topics covered. 2–1 TDS 420A, TDS 430A, TDS 460A & TDS 510A User Manual...
- Page 24 Overview 2–2 TDS 420A, TDS 430A, TDS 460A & TDS 510A User Manual...
- Page 25 Front Panel Map — Left Side File System, page 3–43 Side Menu Buttons, page 2–8 ON/STBY Switch, Main Menu Buttons, CLEAR MENU Removes page 1–3 page 2–8 Menus from the Display 2–3 TDS 420A, TDS 430A, TDS 460A & TDS 510A User Manual...
- Page 26 3–89 Vertical Control, Zoom, Horizontal Control, Triggering, page 3–25 page 3–123 page 3–143 page 3–55 Delay Triggering, page 3–11 Edge Triggering, page 3–21 Video Triggering, page 3–127 2–4 TDS 420A, TDS 430A, TDS 460A & TDS 510A User Manual...
-
Page 27: Saving And Recalling Setups
3–143 Delay Triggering, page 3–11 page 3–89 Edge Triggering, page 3–21 Removing Waveforms, Horizontal Control, Logic Triggering, page 3–67 page 3–111 page 3–55 Pulse Triggering, page 3–91 2–5 TDS 420A, TDS 430A, TDS 460A & TDS 510A User Manual... - Page 28 MAIN TRIGGER OUTPUT – (Provides main trigger (TTL) output) DELAYED TRIGGER OUTPUT – (Provides delayed trigger (TTL) Fuse, page 1–3 Serial Number Power Connector, Security Bracket output) page 1–3 TDS 510A 2–6 TDS 420A, TDS 430A, TDS 460A & TDS 510A User Manual...
- Page 29 Waveform Source Trigger Parameters, Vertical Scale of Each page 3–21 Channel, page 3–123 The main menu with choices Horizontal Scale and Time of major actions Base Type, page 3–55 2–7 TDS 420A, TDS 430A, TDS 460A & TDS 510A User Manual...
- Page 30 Press one of these buttons to select from side menu (if displayed). If side menu item has an adjustable value (shown in reverse video), adjust it with the general purpose knob. 2–8 TDS 420A, TDS 430A, TDS 460A & TDS 510A User Manual...
- Page 31 Press one of these buttons to select from side menu (if displayed). If side menu item has an adjustable value (shown in reverse video), adjust it with the general purpose knob or keypad. 2–9 TDS 420A, TDS 430A, TDS 460A & TDS 510A User Manual...
- Page 32 Press again to make selection. Alternatively, press SHIFT first to make selection in the opposite direction. A pop-up selection changes the other main menu titles. 2–10 TDS 420A, TDS 430A, TDS 460A & TDS 510A User Manual...
-
Page 33: Figure 2-1: Connecting A Probe For The Examples
CH 1 connector of the digitizing oscilloscope to the Probe Compensation connector (Figure 2–1). TDS 400A TDS 510A Figure 2–1: Connecting a Probe for the Examples 2–11 TDS 420A, TDS 430A, TDS 460A & TDS 510A User Manual... -
Page 34: Figure 2-2: Setup Button Location
Recall Factory Setup selection (see Figure 2–3). 3. Press the button to the right of the OK Confirm Factory Init side menu item. 2–12 TDS 420A, TDS 430A, TDS 460A & TDS 510A User Manual... -
Page 35: Figure 2-4: Set Level To 50% Button
1 (Ch1) on a rising edge and that the trigger level is about 200-300 mV. The time base readout shows that the main time base is set to a horizontal scale of 500 s/div. 2–13 TDS 420A, TDS 430A, TDS 460A & TDS 510A User Manual... -
Page 36: Figure 2-5: The Display After Factory Initialization
Trigger Position Indicator Channel Ground Reference Indicator Channel Time Base Trigger Readout Readout Readout Figure 2–5: The Display After Factory Initialization 2–14 TDS 420A, TDS 430A, TDS 460A & TDS 510A User Manual... -
Page 37: Figure 2-6: The Vertical And Horizontal Controls
2. Turn the vertical POSITION knob first one direction, then the other. Observe the change in the displayed waveform. Then return the waveform to the center of the graticule. 2–15 TDS 420A, TDS 430A, TDS 460A & TDS 510A User Manual... -
Page 38: Figure 2-7: Trigger Controls
Figure 2–8: AUTOSET Button Location Figure 2–9 shows the display after pressing AUTOSET. If necessary, you can adjust the waveform using the knobs discussed earlier in this example. 2–16 TDS 420A, TDS 430A, TDS 460A & TDS 510A User Manual... -
Page 39: Figure 2-9: The Display After Pressing Autoset
Figure 2–10), then you may need to compensate your probe. See pages 3–83 and 3–89 for probe calibration and compensation procedures. Figure 2–10: Display Signals Requiring Probe Compensation 2–17 TDS 420A, TDS 430A, TDS 460A & TDS 510A User Manual... -
Page 40: Figure 2-11: The Channel Buttons And Lights
The VERTICAL section of the front panel contains the channel selection buttons. On the TDS 420A, TDS 460A, and TDS 510A Digitizing Oscillo- scopes, they are CH 1, CH 2, CH 3, CH 4, and MORE (Figure 2–11). On the TDS 430A, they are CH 1, CH 2, and MORE. - Page 41 (side) to toggle the selection to 50 ; this changes the input coupling of channel 2 from 1 M to 50 . The channel readout for channel 2 (near the bottom of the graticule) now shows an indicator. 2–19 TDS 420A, TDS 430A, TDS 460A & TDS 510A User Manual...
-
Page 42: Figure 2-12: The Vertical Main Menu And Coupling Side Menu
1. 2. Press CH 2 (side) to toggle the selection to 1 M . This returns the coupling impedance of channel 2 to its initial state. 2–20 TDS 420A, TDS 430A, TDS 460A & TDS 510A User Manual... -
Page 43: Figure 2-13: The Menus After Changing Channels
The channel (CH) lights now indicate channel 1. Channel 1 has become the selected channel. When you remove the last waveform, all the CH lights are turned off. 2. Press WAVEFORM OFF again to remove the channel 1 waveform. 2–21 TDS 420A, TDS 430A, TDS 460A & TDS 510A User Manual... -
Page 44: Figure 2-14: Measure Main Menu And Select Measurement Side
5. If it is not already selected, press Select Measrmnt (main). The readout for that menu item indicates which channel the measurement will be taken from. All automated measurements are made on the selected channel. 2–22 TDS 420A, TDS 430A, TDS 460A & TDS 510A User Manual... -
Page 45: Figure 2-15: Four Simultaneous Measurement Readouts
Positive Duty Cycle (side). All four measurements are displayed. 8. To move the measurement readouts outside the graticule area, press CLEAR MENU (see Figure 2–15). Figure 2–15: Four Simultaneous Measurement Readouts 2–23 TDS 420A, TDS 430A, TDS 460A & TDS 510A User Manual... -
Page 46: Figure 2-16: General Purpose Knob Indicators
To examine the current values, press Reference Levels (main) High Ref (side). The general purpose knob is now set to adjust the high reference level (Fig- ure 2–16). 2–24 TDS 420A, TDS 430A, TDS 460A & TDS 510A User Manual... -
Page 47: Figure 2-17: Snapshot Of Channel 1
1. Press Snapshot (main) to pop up a snapshot of all available single waveform measurements. (See Figure 2–17). Figure 2–17: Snapshot of Channel 1 2–25 TDS 420A, TDS 430A, TDS 460A & TDS 510A User Manual... - Page 48 5. Press CH 2 CLEAR MENU. To save the setup, do the following steps: 6. Press SETUP Save Current Setup (main) to display the Setup main menu (see Figure 2–18). 2–26 TDS 420A, TDS 430A, TDS 460A & TDS 510A User Manual...
-
Page 49: Figure 2-18: Save/Recall Setup Menu
Positive Width (side) to add that measurement to the display. Recall a Setup To recall the setup, press SETUP Recall Saved Setup (main) Recall Setup (side) for the setup location you used in the last exercise. 2–27 TDS 420A, TDS 430A, TDS 460A & TDS 510A User Manual... - Page 50 Tutorial 2–28 TDS 420A, TDS 430A, TDS 460A & TDS 510A User Manual...
-
Page 52: Help
Pulse Triggering Many of these tasks list steps you perform to accomplish the task. You should read Conventions on page x of Preface before reading about these tasks. 3–1 TDS 420A, TDS 430A, TDS 460A & TDS 510A User Manual... - Page 53 Overview 3–2 TDS 420A, TDS 430A, TDS 460A & TDS 510A User Manual...
-
Page 54: Figure 3-1: Initial Help Screen
HELP again to re-enter help mode. Figure 3–1: Initial Help Screen 3–3 TDS 420A, TDS 430A, TDS 460A & TDS 510A User Manual... - Page 55 Accessing Help 3–4 TDS 420A, TDS 430A, TDS 460A & TDS 510A User Manual...
- Page 56 In Hi Res mode, the digitizing oscilloscope averages all samples taken during an acquisition interval to create a record point. That average results in a higher-reso- lution, lower-bandwidth waveform. 3–5 TDS 420A, TDS 430A, TDS 460A & TDS 510A User Manual...
-
Page 57: Table 3-1: Tds 460A, Tds 430A, And Tds 420A Resolution Bits
NOTE. In Hi Res mode the frequency of the external clock signal (TDS 460A, TDS 430A, and TDS 420A only) must be less than or equal to the frequency set in the external clock menu. If the frequency of the external clock signal is greater than the frequency in the menu, the displayed waveform will have the wrong amplitude. - Page 58 (see Figure 3–2). The “running” state shows the sample rate (or External Clock when external clock is enabled) and acquisition mode. The “stopped” state shows the number of acquisitions acquired since the last stop or major change. 3–7 TDS 420A, TDS 430A, TDS 460A & TDS 510A User Manual...
-
Page 59: Figure 3-2: Acquisition Menu And Readout
To limit the digitizing oscilloscope to real-time sampling or let it choose between real-time or equivalent-time sampling: Press SHIFT ACQUIRE MENU Repetitive Signal (main) ON or OFF (side). 3–8 TDS 420A, TDS 430A, TDS 460A & TDS 510A User Manual... -
Page 60: Figure 3-3: Acquire Menu - Stop After
The upper left hand corner in the display indicates Stopped and shows the number of acquisitions. If you press the button again, the digitizing oscilloscope resumes taking acquisitions. 3–9 TDS 420A, TDS 430A, TDS 460A & TDS 510A User Manual... - Page 61 ON, using the Limit Test Setup main menu. Setting up limit testing requires several more steps. See Limit Testing, on page 3–63. 3–10 TDS 420A, TDS 430A, TDS 460A & TDS 510A User Manual...
-
Page 62: Figure 3-4: Delayed Runs After Main
After Events/Time (TDS 510A only) waits for the specified number of delayed trigger events, then waits the user-specified time, and then acquires. External clks (TDS 400A) waits for the specified number of external clocks and then acquires. 3–11 TDS 420A, TDS 430A, TDS 460A & TDS 510A User Manual... - Page 63 NOTE. The Delayed Triggerable menu item is not selectable unless incompatible Main Trigger menu settings are eliminated. If such is the case, the Delayed Triggerable menu item is dimmer than other items in the menu. 3–12 TDS 420A, TDS 430A, TDS 460A & TDS 510A User Manual...
- Page 64 Horizontal menu. The Source menu lets you select which input is the delayed trigger source. 7. Press Source (main) Ch1, Ch2, Ch3, Ch4, DC Aux, or Auxiliary (side). 3–13 TDS 420A, TDS 430A, TDS 460A & TDS 510A User Manual...
-
Page 65: Figure 3-6: Delayed Trigger Menu (Tds 400A Shown)
10. Press Level (main) Level, Set to TTL, Set to ECL, or Set to 50% (side). For a description of these level settings, see To Set Level on page 3–24. 3–14 TDS 420A, TDS 430A, TDS 460A & TDS 510A User Manual... -
Page 66: Figure 3-7: Status Menu - System (Tds 400A Shown)
Waveforms displays information about the various waveforms, including live, math, and reference. I/O displays information about the I/O port(s). Firmware Date Figure 3–7: Status Menu — System (TDS 400A shown) 3–15 TDS 420A, TDS 430A, TDS 460A & TDS 510A User Manual... -
Page 67: Figure 3-8: Banner Display
Determining Status To Display the Banner To display the banner (firmware version, options, and copyright): Press SHIFT STATUS Banner (main). (See Figure 3–8.) Figure 3–8: Banner Display 3–16 TDS 420A, TDS 430A, TDS 460A & TDS 510A User Manual... -
Page 68: Figure 3-9: Display Menu - Style
Dots style displays waveform record points as dots. Intensified Samples style also displays waveform record points as dots. However, the points actually sampled are displayed intensified relative to the interpolated points. 3–17 TDS 420A, TDS 430A, TDS 460A & TDS 510A User Manual... - Page 69 4. Press Display Date/Time (side) to turn it on or off. Push Clear Menu to see the current date and time. See To Date/Time Stamp Your Hardcopy on page 3–49 for more information. 3–18 TDS 420A, TDS 430A, TDS 460A & TDS 510A User Manual...
-
Page 70: Figure 3-10: Trigger Point And Level Indicators
Cross Hair provides cross hairs and a frame. Frame displays just a frame. NTSC provides a grid useful for measuring NTSC-class waveforms. PAL provides a grid useful for measuring PAL-class waveforms. 3–19 TDS 420A, TDS 430A, TDS 460A & TDS 510A User Manual... -
Page 71: Table 3-3: Xy Format Pairs
XY format is a dot-only display, although it can have persistence. The Vector style selection has no effect when you select XY format. You cannot display Math waveforms in XY format. They disappear from the display when you select XY. 3–20 TDS 420A, TDS 430A, TDS 460A & TDS 510A User Manual... -
Page 72: Figure 3-11: Edge Trigger Readouts
When READY is lighted, the digitizing oscilloscope can accept a valid trigger event and it is waiting for that event to occur. When ARM is lighted, the trigger circuitry is filling the pretrigger portion of the waveform record. 3–21 TDS 420A, TDS 430A, TDS 460A & TDS 510A User Manual... -
Page 73: Figure 3-12: Record View, Trigger Position, And Trigger Level Bar Readouts
To bring up the Edge Trigger menu, press TRIGGER MENU Type (main) Edge (pop-up) (see Figure 3–13). 3–22 TDS 420A, TDS 430A, TDS 460A & TDS 510A User Manual... - Page 74 High frequency rejection attenuates signals above 30 kHz. LF Rej does the opposite of high frequency rejection. Low frequency rejection attenuates signals below 80 kHz. 3–23 TDS 420A, TDS 430A, TDS 460A & TDS 510A User Manual...
- Page 75 If you want to enter a large number using the general purpose knob, press the SHIFT button before turning the knob. When the light next to the SHIFT button 3–24 TDS 420A, TDS 430A, TDS 460A & TDS 510A User Manual...
- Page 76 Trigger menu. To Force a Trigger. To force the oscilloscope to immediately start acquiring a waveform record even without a trigger event, press the FORCE TRIG front panel button. 3–25 TDS 420A, TDS 430A, TDS 460A & TDS 510A User Manual...
- Page 77 To Single Trigger. To trigger on the next valid trigger event and then stop, press SHIFT FORCE TRIG. Now press the RUN/STOP button each time you want to initiate a single sequence of acquisitions. 3–26 TDS 420A, TDS 430A, TDS 460A & TDS 510A User Manual...
- Page 78 The horizontal scale for FFT math waveforms is always expressed in frequency per division with the beginning (left-most point) of the waveform representing zero frequency (DC). 3–27 TDS 420A, TDS 430A, TDS 460A & TDS 510A User Manual...
- Page 79 4. Select a math waveform. Your choices are Math1, Math2, and Math3 (main). 5. If the selected math waveform is not FFT, press Change Math Definition (side) FFT (main). See Figure 3–16. 3–28 TDS 420A, TDS 430A, TDS 460A & TDS 510A User Manual...
- Page 80 8. Press Set FFT Window to (side) repeatedly to choose from the following window types: Rectangular — Best type for resolving frequencies that are very close to the same value but worst for accurately measuring the amplitude of those 3–29 TDS 420A, TDS 430A, TDS 460A & TDS 510A User Manual...
- Page 81 See Adjust Phase Suppression, on page 3–38, provides additional informa- tion on phase suppression. 12. Press OK Create Math Wfm (side) to display the FFT of the waveform you input in step 1 (see Figure 3–17). 3–30 TDS 420A, TDS 430A, TDS 460A & TDS 510A User Manual...
- Page 82 (0 degrees or 0 radians) from the @: readout. (The waveform reference indicator at the left side of the graticule indicates the level where phase is zero for phase FFTs.) 3–31 TDS 420A, TDS 430A, TDS 460A & TDS 510A User Manual...
- Page 83 The cursor units will always be in Hz, regardless of the setting in the Time Units side menu. The first point of the FFT record is the zero frequency point for the @: readout. Figure 3–18: Cursor Measurement of an FFT Waveform 3–32 TDS 420A, TDS 430A, TDS 460A & TDS 510A User Manual...
- Page 84 FFT Frequency Domain Record — the FFT math waveform after digital signal processing converts the FFT time domain record into a frequency domain record. 3–33 TDS 420A, TDS 430A, TDS 460A & TDS 510A User Manual...
- Page 85 FFT Frequency Domain Record Figure 3–20: FFT Time Domain Record vs. FFT Frequency Domain Record Offset, Position, and Scale The following topics contain information to help you display your FFT properly. 3–34 TDS 420A, TDS 430A, TDS 460A & TDS 510A User Manual...
- Page 86 Hi Res mode, to reduce the effect of noise in the signal. However, Hi Res does affect the frequency response of the source waveform. 3–35 TDS 420A, TDS 430A, TDS 460A & TDS 510A User Manual...
- Page 87 Since you increase the Nyquist frequency as you increase the sample rate, the alias signals should appear at their proper frequency. 3–36 TDS 420A, TDS 430A, TDS 460A & TDS 510A User Manual...
- Page 88 FFT time domain waveform: Set the trigger position to 50% and horizontal position to 50% for all record lengths less than 15 K. 3–37 TDS 420A, TDS 430A, TDS 460A & TDS 510A User Manual...
- Page 89 H Bar cursor. Do not change the window selection or you will invalidate the results obtained using the cursor. 3–38 TDS 420A, TDS 430A, TDS 460A & TDS 510A User Manual...
- Page 90 Depending on the distance of the frequencies you are trying to measure from the fundamental, the Hamming window sometimes resolves frequencies better than the Hanning. 3–39 TDS 420A, TDS 430A, TDS 460A & TDS 510A User Manual...
- Page 91 When using bell shaped widows, be sure that the most interesting parts of the signal in the time domain record are positioned in the center region of the window so that the tapering does not cause severe errors. 3–40 TDS 420A, TDS 430A, TDS 460A & TDS 510A User Manual...
- Page 92 Side Lobe 0.89 –13 dB Rectangular Window 1.28 –43 dB Hamming Window 1.28 –32 dB Hanning Window 1.28 –94 dB Blackman-Harris Window Figure 3–23: FFT Windows and Bandpass Characteristics 3–41 TDS 420A, TDS 430A, TDS 460A & TDS 510A User Manual...
- Page 93 Fast Fourier Transforms 3–42 TDS 420A, TDS 430A, TDS 460A & TDS 510A User Manual...
- Page 94 Shift HARDCOPY button to bring up the Hardcopy menu. 2. Press File Utilities in the main menu to bring up the File Utilities side menu. (See Figure 3–24.) Free disk space Figure 3–24: File Utilities 3–43 TDS 420A, TDS 430A, TDS 460A & TDS 510A User Manual...
- Page 95 When you have entered the name, press the side menu OK Accept item. (See Figure 3–25). Figure 3–25: File System — Labelling Menu 3–44 TDS 420A, TDS 430A, TDS 460A & TDS 510A User Manual...
- Page 96 To Set Overwrite Lock To turn on or off the file overwrite lock, toggle the side menu Overwrite Lock button. 3–45 TDS 420A, TDS 430A, TDS 460A & TDS 510A User Manual...
- Page 97 To format a 720 Kbyte or 1.44 Mbyte disk, turn the general purpose knob until it scrolls the cursor over the name of the drive to format (fd0:). Then, press the side menu Format button. 3–46 TDS 420A, TDS 430A, TDS 460A & TDS 510A User Manual...
- Page 98 EPS Mono and Color formats are compatible with the Tektronix Phaser Color Printer, HPGL is compatible with the Tektronix HC100 Plotter, and Epson is compatible with the Tektronix HC200 Printer.
- Page 99 4. Press SHIFT HARDCOPY MENU Port (main) to specify the output channel to send your hardcopy through. Select one of the optional hardcopy ports: GPIB, RS-232, Centronics, or File. 3–48 TDS 420A, TDS 430A, TDS 460A & TDS 510A User Manual...
- Page 100 5. Press CLEAR MENU to see the date/time displayed with the new settings. To Print Directly to a To make your hardcopies, use the procedures that follow. Hardcopy Device 3–49 TDS 420A, TDS 430A, TDS 460A & TDS 510A User Manual...
- Page 101 The size of the spool is, therefore, variable. The number of hardcopies that can be spooled depends on three variables: The amount of unused RAM The hardcopy format chosen The complexity of the display 3–50 TDS 420A, TDS 430A, TDS 460A & TDS 510A User Manual...
- Page 102 3–29). Use the GPIB port to remotely request and receive a hardcopy from the digitizing oscilloscope. Use the RS-232 or a Centronics port on the controller to print output. 3–51 TDS 420A, TDS 430A, TDS 460A & TDS 510A User Manual...
- Page 103 RS-232 Cable Figure 3–29: Connecting the Digitizing Oscilloscope and Hardcopy Device Via a PC Print. If your controller is PC-compatible and it uses the Tektronix GURU or S3FG210 (National Instruments GPIB-PCII/IIA) GPIB package, do the following steps to print a hardcopy: 1.
- Page 104 Your hardcopy device should now print a picture of the digitizing oscilloscope screen. NOTE. If you transmit hardcopy files across a computer network, use a binary (8-bit) data path. 3–53 TDS 420A, TDS 430A, TDS 460A & TDS 510A User Manual...
- Page 105 Hardcopy 3–54 TDS 420A, TDS 430A, TDS 460A & TDS 510A User Manual...
- Page 106 Record View Time Base Readout Figure 3–30: Record View and Time Base Readouts 3–55 TDS 420A, TDS 430A, TDS 460A & TDS 510A User Manual...
- Page 107 Horizontal Lock is set to All in the Zoom menu. For more information on zoom see page 3–143. 3–56 TDS 420A, TDS 430A, TDS 460A & TDS 510A User Manual...
- Page 108 CH 1 and CH 2, even if CH 1 and CH 2 are not displayed, you have used three waveforms. Therefore, you can only display one additional waveform. 3–57 TDS 420A, TDS 430A, TDS 460A & TDS 510A User Manual...
- Page 109 Since the peak detect mode searches for samples with the highest and lowest values, it can detect faster signal components over time. 3–58 TDS 420A, TDS 430A, TDS 460A & TDS 510A User Manual...
- Page 110 To change the horizontal clock: (TDS 400A only) Press HORIZONTAL MENU Clock (main) Internal or External (side) and use the general purpose knob to change the scale values. 3–59 TDS 420A, TDS 430A, TDS 460A & TDS 510A User Manual...
- Page 111 Hi Res mode increases resolution and limits bandwidth (see Table 3–1 on page 3–6). As the Max Ext Clk rate is reduced, resolution increases and bandwidth decreases. 3–60 TDS 420A, TDS 430A, TDS 460A & TDS 510A User Manual...
- Page 112 SET LEVEL TO 50%. 5. Set all other oscilloscope controls (the horizontal SCALE has no effect except in ZOOM) as you would for an internally clocked acquisition. 3–61 TDS 420A, TDS 430A, TDS 460A & TDS 510A User Manual...
- Page 113 Horizontal Control 3–62 TDS 420A, TDS 430A, TDS 460A & TDS 510A User Manual...
- Page 114 NOTE. The template will be smoother if you acquire the template waveform using Average acquisition mode. Once you have selected a source, select a destination for the template. 3. Press Template Destination (side) Ref1, Ref2, Ref3, or Ref4. 3–63 TDS 420A, TDS 430A, TDS 460A & TDS 510A User Manual...
- Page 115 NOTE. When Limit Testing is on, the template waveform is dimmed so you can see the waveform through the template. When limit testing is off, use the Dots display style (see Display Modes on page 3–17). 3–64 TDS 420A, TDS 430A, TDS 460A & TDS 510A User Manual...
- Page 116 Comparisons the following operating characteristics: The waveform is repositioned horizontally to move the first sample in the waveform record that is outside of template limits to center screen. 3–65 TDS 420A, TDS 430A, TDS 460A & TDS 510A User Manual...
- Page 117 For example, CH 2 is higher than CH 1. 3–66 TDS 420A, TDS 430A, TDS 460A & TDS 510A User Manual...
- Page 118 Therefore, the Trigger Level readout will disappear on the display and the Trigger Level knob can be used to set the threshold level while the Main Trigger menu is set to Logic. 3–67 TDS 420A, TDS 430A, TDS 460A & TDS 510A User Manual...
-
Page 119: Table 3-4: Logic Triggers
NAND and for OR with NOR for both pattern and state classes. The logic inputs are channels 1, 2, 3, and 4 when using Pattern Logic Triggers. For State Logic Triggers, channel 4 becomes the clock input. 3–68 TDS 420A, TDS 430A, TDS 460A & TDS 510A User Manual... - Page 120 Pattern or State (pop-up) Set Thresholds (main) Ch1, Ch2, Ch3, or Ch4 (side). 2. Use the MAIN TRIGGER LEVEL knob, the general purpose knob, or the keypad to set each threshold. 3–69 TDS 420A, TDS 430A, TDS 460A & TDS 510A User Manual...
- Page 121 Ch1, Ch2, Ch3, or Ch4 (side). 2. Repeatedly press each input selected in step 1 to choose either High (H), Low (L), or Don’t Care (X) for each channel. 3–70 TDS 420A, TDS 430A, TDS 460A & TDS 510A User Manual...
- Page 122 TRUE. Since this time is more (216 s) than that set in the True for more than menu item (150 s), the oscilloscope issues the trigger at that point, not at the point at which it has been true for 216 s. 3–71 TDS 420A, TDS 430A, TDS 460A & TDS 510A User Manual...
- Page 123 To choose the type of logic function you want applied to the input channels: Press TRIGGER MENU Type (main) Logic (pop-up) Class (main) State (pop-up) Define Logic (main) AND, OR, NAND, or NOR (side). 3–72 TDS 420A, TDS 430A, TDS 460A & TDS 510A User Manual...
-
Page 124: Table 3-5: Measurement Definitions
Voltage measurement. The true Root Mean Square voltage over the first cycle in the waveform, or the first cycle in the gated region. Delay Timing measurement. The time between the MidRef crossings of two different traces, or the gated region of the traces. 3–73 TDS 420A, TDS 430A, TDS 460A & TDS 510A User Manual... - Page 125 Timing measurement of the first cycle in the waveform or gated region. The ratio of the positive pulse width to the signal period expressed as a percentage. PositiveWidth PositiveDutyCycle 100% Period 3–74 TDS 420A, TDS 430A, TDS 460A & TDS 510A User Manual...
- Page 126 (see Figure 3–38). When menus are displayed, the readouts appear in the graticule area. You can display and continuously update as many as four measurements at any one time. Measurement Readout Area Figure 3–38: Measurement Readouts 3–75 TDS 420A, TDS 430A, TDS 460A & TDS 510A User Manual...
- Page 127 1. Press MEASURE Select Measrmnt (main). 2. Select a measurement from the side menu. Remove Measurements To remove measurements, do the following steps: 1. Press MEASURE Remove Measrmnt (main). 3–76 TDS 420A, TDS 430A, TDS 460A & TDS 510A User Manual...
- Page 128 Gated measurements remain accurate, but the displayed positions of the cursors change when you change the selected waveform. 3–77 TDS 420A, TDS 430A, TDS 460A & TDS 510A User Manual...
- Page 129 (0%) or set explicitly in the units of the selected waveform (typically volts). See Figure 3–41. Use the general purpose knob to enter the values. % is the default selection. It is useful for general purpose applications. 3–78 TDS 420A, TDS 430A, TDS 460A & TDS 510A User Manual...
- Page 130 1. Press MEASURE Select Measrmnt (main) Delay (side) Delay To (main) Measure Delay to. 2. Press Measure Delay to (side) repeatedly to choose the delay to waveform. 3–79 TDS 420A, TDS 430A, TDS 460A & TDS 510A User Manual...
- Page 131 4. To take the measurement you just specified, press Delay To (main) Create Measurement (side). To exit the Measure Delay menu without creating a delay measurement, press CLEAR MENU. 3–80 TDS 420A, TDS 430A, TDS 460A & TDS 510A User Manual...
- Page 132 Consider the following rules when taking a snapshot: Snapshot does not warn you if a waveform is improperly scaled (clipped, low signal amplitude, low resolution, and so on). 3–81 TDS 420A, TDS 430A, TDS 460A & TDS 510A User Manual...
- Page 133 50 s/division, then you can easily calculate the waveform period as: 5 divisions 50 s/division = 250 s, or 400 kHz. 3–82 TDS 420A, TDS 430A, TDS 460A & TDS 510A User Manual...
- Page 134 3–89. Then continue with step 3 of this procedure. 1. Install the probe on the input channel. 2. Power on the digitizing oscilloscope and allow a 20 minute warm-up before doing this procedure. 3–83 TDS 420A, TDS 430A, TDS 460A & TDS 510A User Manual...
- Page 135 11. If the Probe Offset Compensation message is displayed, continue with step 15; otherwise, continue with step 12. 12. If the Compensation Error message is displayed, continue with step 13; otherwise continue with step 18. 3–84 TDS 420A, TDS 430A, TDS 460A & TDS 510A User Manual...
- Page 136 18. After the clock icon is removed, verify the word Initialized changed to Pass under Cal Probe in the main menu. (See Figure 3–44.) 19. If desired, repeat this procedure beginning at step 1 to compensate for other probe/channel combinations. 3–85 TDS 420A, TDS 430A, TDS 460A & TDS 510A User Manual...
-
Page 137: Table 3-6: Probe Cal Status
Some optical probes and most active probes have complex interfaces. 3–86 TDS 420A, TDS 430A, TDS 460A & TDS 510A User Manual... - Page 138 If the Re-use Probe Calibration data menu is displayed, do not select OK Use Existing Data unless the calibration data was created using the currently installed probe. Figure 3–45: Re-use Probe Calibration Data Menu 3–87 TDS 420A, TDS 430A, TDS 460A & TDS 510A User Manual...
- Page 139 Probe Cal 3–88 TDS 420A, TDS 430A, TDS 460A & TDS 510A User Manual...
- Page 140 Bandwidth (main) 20 MHz (side). 4. If you need to change the input impedance, press Coupling (main). Then toggle the side menu selection to get the correct impedance. 3–89 TDS 420A, TDS 430A, TDS 460A & TDS 510A User Manual...
- Page 141 6. Adjust the probe until you see a perfectly flat top square wave on the display. Figure 3–47 shows where the adjustment is located. Figure 3–47: Probe Adjustment 3–90 TDS 420A, TDS 430A, TDS 460A & TDS 510A User Manual...
-
Page 142: Table 3-7: Pulse Trigger Definitions
Runt negative Triggering occurs on a negative going pulse that crosses one threshold going negative but fails to cross a second threshold before recrossing the first going positive. 3–91 TDS 420A, TDS 430A, TDS 460A & TDS 510A User Manual... - Page 143 To bring up the Pulse Trigger menu: Press TRIGGER MENU Type (main) Pulse (pop-up) Class (main) Glitch, Runt, or Width (pop-up) (see Figure 3–49). Figure 3–49: Main Trigger Menu — Glitch Class 3–92 TDS 420A, TDS 430A, TDS 460A & TDS 510A User Manual...
- Page 144 Type (main) Pulse (pop-up) Level (main) Level, Set to TTL, Set to ECL, or Set to 50% (side). See To Set Level, on page 3–93, for more information. 3–93 TDS 420A, TDS 430A, TDS 460A & TDS 510A User Manual...
- Page 145 Polarity (main) Positive, Negative, or Either (side). Positive looks for positive-going runt pulses. Negative looks for negative-going runt pulses. Either looks for both positive and negative runt pulses. 3–94 TDS 420A, TDS 430A, TDS 460A & TDS 510A User Manual...
- Page 146 When Negative is set in the Polarity side menu, the upper threshold must be first crossed going negative, then recrossed going positive without crossing the lower threshold at all. 3–95 TDS 420A, TDS 430A, TDS 460A & TDS 510A User Manual...
- Page 147 To set the trigger level with the Level main menu: Press TRIGGER MENU Type (main) Pulse (pop-up) Class (main) Width (pop-up) Level (main) Level, Set to TTL, Set to ECL, or Set to 50% (side). 3–96 TDS 420A, TDS 430A, TDS 460A & TDS 510A User Manual...
- Page 148 Only), or Off Bus (side). (See Figure 3–52.) Talk/Listen Address configures the port for normal controller based system operation. Use the general purpose knob to define the address. 3–97 TDS 420A, TDS 430A, TDS 460A & TDS 510A User Manual...
- Page 149 Off Bus disconnects the digitizing oscilloscope from the bus. GPIB Configuration Menu Figure 3–52: Utility Menu 3–98 TDS 420A, TDS 430A, TDS 460A & TDS 510A User Manual...
- Page 150 To Turn On Roll Mode Do the following steps to turn on roll mode: 1. Press HORIZONTAL MENU Horiz Controls (main), and set Roll Mode (side) to Automatic to enable roll mode. 3–99 TDS 420A, TDS 430A, TDS 460A & TDS 510A User Manual...
- Page 151 Start at Trigger Point Complete Waveform Record Acquisitions Stop New Data New Data Old Data Old Data After Trigger After Trigger Trigger Point Figure 3–53: Roll Mode (500 Point Record Length) 3–100 TDS 420A, TDS 430A, TDS 460A & TDS 510A User Manual...
- Page 152 Roll Mode (side) to Off. 3. If you are in a single sequence roll mode and want to leave single sequence mode, press SHIFT ACQ MENU Stop After (main) RUN/STOP (side). 3–101 TDS 420A, TDS 430A, TDS 460A & TDS 510A User Manual...
- Page 153 Roll Mode Roll Trigger Mode Indicators Figure 3–54: Trigger Mode Menu 3–102 TDS 420A, TDS 430A, TDS 460A & TDS 510A User Manual...
- Page 154 Recalling a setup does not change the menu that is currently displayed. If you recall a setup that is labeled factory in the side menu, you recall the factory setup. (The conventional method for recalling the factory setup is described below.) 3–103 TDS 420A, TDS 430A, TDS 460A & TDS 510A User Manual...
- Page 155 Replaces all waveforms in reference memories with zero sample values. Replaces all setups with the factory setup. Verifies successful completion of setup and waveform erasure. Displays an unsuccessful or successful completion message. 3–104 TDS 420A, TDS 430A, TDS 460A & TDS 510A User Manual...
- Page 156 To File (side). Then use the general purpose knob to select the exact file from the resulting scrollbar list. Finally, press Save To Selected File to complete the operation. 3–105 TDS 420A, TDS 430A, TDS 460A & TDS 510A User Manual...
- Page 157 Note that in Figure 3–57, the main menu items Ref2, Ref3, and Ref4 appear shaded while Ref1 does not. References that are empty appear shaded in the More main menu. 3–106 TDS 420A, TDS 430A, TDS 460A & TDS 510A User Manual...
- Page 158 Spreadsheet (side) (see Figure 3–58). Three formats are available: Internal creates files (.WFM) in the internal format of the oscilloscope. MathCad creates files (.DAT) in a format usable by MathCad . 3–107 TDS 420A, TDS 430A, TDS 460A & TDS 510A User Manual...
- Page 159 All scaling to sample increments and offsetting has been done. Zero on the X scale is the trigger point, with negative values being pretrigger and positive values being posttrigger. Figure 3–58: Save Format Menu 3–108 TDS 420A, TDS 430A, TDS 460A & TDS 510A User Manual...
- Page 160 Text Files (*.prn, *.txt, *.csv). From the Drives menu, select the drive containing the waveform file. From the File Name menu, select the name of the waveform file. Now select OK. 3–109 TDS 420A, TDS 430A, TDS 460A & TDS 510A User Manual...
- Page 161 Saving and Recalling Waveforms 3–110 TDS 420A, TDS 430A, TDS 460A & TDS 510A User Manual...
- Page 162 Channel Reference Indicator Channel Readout Figure 3–59: The Channel Readout To Select and Remove Waveforms To select a channel, use the channel selection buttons on the right of the display. 3–111 TDS 420A, TDS 430A, TDS 460A & TDS 510A User Manual...
- Page 163 4. CH4 (TDS 420A, TDS 460A, and TDS 510A 5. MATH1 6. MATH2 7. MATH3 8. REF1 9. REF2 10. REF3 11. REF4 Figure 3–60: Waveform Selection Priority 3–112 TDS 420A, TDS 430A, TDS 460A & TDS 510A User Manual...
- Page 164 (CH 1) and scales it. Reset the Oscilloscope Do the following steps to reset your oscilloscope to its factory default settings: Press SETUP Recall Factory Setup (main) OK Confirm Factory Init (side). 3–113 TDS 420A, TDS 430A, TDS 460A & TDS 510A User Manual...
- Page 165 Setting up Automatically: Autoset and Reset 3–114 TDS 420A, TDS 430A, TDS 460A & TDS 510A User Manual...
- Page 166 “clock” icon (shown at left) is displayed on-screen. When compensation completes, the status message is updated to Pass or Fail. 5. Verify the word Pass appears under Signal Path in the main menu. (See Figure 3–61.) 3–115 TDS 420A, TDS 430A, TDS 460A & TDS 510A User Manual...
- Page 167 Signal Path Compensation Figure 3–61: Performing a Signal Path Compensation 3–116 TDS 420A, TDS 430A, TDS 460A & TDS 510A User Manual...
- Page 168 NOTE. When cursors measure certain math waveforms, the measurement may not be of time, frequency, or voltage. Cursor measurement of those math waveforms are described in Waveform Math, which begins on page 3–139. 3–117 TDS 420A, TDS 430A, TDS 460A & TDS 510A User Manual...
- Page 169 1. To display the cursor menu, press CURSOR (see Figure 3–64). 2. Press CURSOR Function (main) H Bars, V Bars, Paired, or Off (side). 3–118 TDS 420A, TDS 430A, TDS 460A & TDS 510A User Manual...
- Page 170 Position of Vertical Bar Cursors (Useful for Locating Cursors Outside the Display) Cursor Readout (Paired) Selected Cursor (Solid Vertical Bar) Non-selected Cursor (Dashed Vertical Bar) Figure 3–65: Paired Cursor Menu and Readouts 3–119 TDS 420A, TDS 430A, TDS 460A & TDS 510A User Manual...
- Page 171 Base or 1/Base, or with Option 5, video line number (side). On a TDS 510A press CURSOR Time Units (main) seconds or1/seconds, or with Option 5, video line number (side). 3–120 TDS 420A, TDS 430A, TDS 460A & TDS 510A User Manual...
- Page 172 To change the cursors speed, press SHIFT before turning the general purpose knob. The cursors move faster when the SHIFT button is lighted and the display reads Coarse Knobs in the upper right corner. 3–121 TDS 420A, TDS 430A, TDS 460A & TDS 510A User Manual...
- Page 173 Taking Cursor Measurements 3–122 TDS 420A, TDS 430A, TDS 460A & TDS 510A User Manual...
- Page 174 Use the Vertical menu (see Figure 3–67) to select the coupling, bandwidth, and offset for the selected waveform. This menu also lets you numerically change the position or scale. 3–123 TDS 420A, TDS 430A, TDS 460A & TDS 510A User Manual...
- Page 175 Bandwidth Bandwidth refers to the range of frequencies that an oscilloscope can acquire and display accurately (that is, with less than 3 dB attenuation). To select the upper 3–124 TDS 420A, TDS 430A, TDS 460A & TDS 510A User Manual...
- Page 176 Offset (main). Then use the general purpose knob to set the vertical offset. If you want to reset the offset to zero, press Set to 0 V (side). 3–125 TDS 420A, TDS 430A, TDS 460A & TDS 510A User Manual...
- Page 177 Vertical Control 3–126 TDS 420A, TDS 430A, TDS 460A & TDS 510A User Manual...
- Page 178 To select predefined setups (NTSC, PAL, or SECAM) or customize the setup: Press the TRIGGER MENU Type (main) Video (pop-up) Class, (main) NTSC, PAL, SECAM, or Custom (pop-up) (Figure 3–69). 3–127 TDS 420A, TDS 430A, TDS 460A & TDS 510A User Manual...
- Page 179 To specify the TV Delay Mode (see Figure 3–70): Press the TRIGGER MENU TV Delay Mode (main) Delay by Lines or Delay by Time (side). Use the general purpose knob to enter the value. 3–128 TDS 420A, TDS 430A, TDS 460A & TDS 510A User Manual...
- Page 180 By toggling the button next to the Interlaced option, you can trigger on interlaced field one, interlaced field two, or both fields noninterlaced. 3–129 TDS 420A, TDS 430A, TDS 460A & TDS 510A User Manual...
- Page 181 See To Set Mode and Holdoff, on page 3–24, for mode and holdoff information. Figure 3–71: Video Trigger — Scan Parameter Figure 3–72: Video Trigger — Scan Rate & Interlace 3–130 TDS 420A, TDS 430A, TDS 460A & TDS 510A User Manual...
- Page 182 6. Press OK Create Math Wfm (side) to display the derivative of the waveform you input in step 1. Use the Vertical SCALE and POSITION knobs to size and position your waveform as you require. 3–131 TDS 420A, TDS 430A, TDS 460A & TDS 510A User Manual...
- Page 183 More main menu. 2. Press MEASURE Select Measrmnt (main). 3. Select up to four measurements in the side menu (see Figure 3–74). 3–132 TDS 420A, TDS 430A, TDS 460A & TDS 510A User Manual...
- Page 184 Use vertical position and vertical offset to position your source waveform. The vertical position and vertical offset will not affect your derivative waveform unless you position the source waveform off screen so it is clipped. 3–133 TDS 420A, TDS 430A, TDS 460A & TDS 510A User Manual...
- Page 185 If you wish to see the zoom factor (2X, 5X, etc.), you need to turn zoom on (see Zoom on page 3–143). 3–134 TDS 420A, TDS 430A, TDS 460A & TDS 510A User Manual...
- Page 186 5. Press Set Function to (side). Repeatedly press the same button until intg appears in the menu label. 6. Press OK Create Math Waveform (side) to turn on the integral math waveform (see Figure 3–75). 3–135 TDS 420A, TDS 430A, TDS 460A & TDS 510A User Manual...
- Page 187 : readout. Read the integrated voltage (vertical units) over time between the selected cursor and the reference indicator of the math waveform from the @: readout. See Figure 3–76. 3–136 TDS 420A, TDS 430A, TDS 460A & TDS 510A User Manual...
- Page 188 : readout. Read the integrated voltage over time between the X of the selected cursor and the reference indicator of the math waveform from the @: readout. 3–137 TDS 420A, TDS 430A, TDS 460A & TDS 510A User Manual...
- Page 189 Just be sure the integrated waveform is the selected waveform. If you wish to see the zoom factor (2X, 5X, etc.) you need to turn Zoom on. 3–138 TDS 420A, TDS 430A, TDS 460A & TDS 510A User Manual...
- Page 190 Single Wfm Math (main). 2. To define the source waveform, press Set Function to (side) repeatedly to cycle it to the desired channel or reference waveform. Figure 3–77: More Menu 3–139 TDS 420A, TDS 430A, TDS 460A & TDS 510A User Manual...
- Page 191 5. Press OK Create Math Wfm (side) to perform the function. NOTE. If you select *, for multiply, in step 4, the cursor feature measures amplitude in the units volts squared VV rather than in volts V 3–140 TDS 420A, TDS 430A, TDS 460A & TDS 510A User Manual...
- Page 192 NOTE. If your digitizing oscilloscope is equipped with Option 2F, Advanced DSP Math, the menu item FFT will be at the same brightness as the menu items Single Wfm Math and Dual Wfm Math; otherwise, FFT will be dimmed. 3–141 TDS 420A, TDS 430A, TDS 460A & TDS 510A User Manual...
- Page 193 Waveform Math 3–142 TDS 420A, TDS 430A, TDS 460A & TDS 510A User Manual...
- Page 194 The zoom readout appears at the top of the display when zoom is on. See Figure 3–79 on page 3–145. 3–143 TDS 420A, TDS 430A, TDS 460A & TDS 510A User Manual...
- Page 195 The second zoomed view is offset in time from the first zoomed view. Also, zoom must be enabled (On or Preview) to see the dual zoom displays. 3–144 TDS 420A, TDS 430A, TDS 460A & TDS 510A User Manual...
- Page 196 To select which waveforms are controlled by the horizontal and vertical scale and offset controls, indicated by “photo-corners” on the graticule corners containing the waveforms (see Figure 3–80), press Selected Graticule (main) Upper or Lower (side). 3–145 TDS 420A, TDS 430A, TDS 460A & TDS 510A User Manual...
- Page 197 NOTE. Although zoom must be turned on to control which waveforms zoom affects, the setting for Horizontal Lock affects which waveforms the horizontal control positions whether zoom is on or off. 3–146 TDS 420A, TDS 430A, TDS 460A & TDS 510A User Manual...
- Page 199 Appendix A: Options and Accessories This appendix describes the various options and accessories that are available for the TDS 420A, TDS 430A, TDS 460A, and TDS 510A Digitizing Oscilloscopes. Options The following options are available: Option 02: Front Cover See Option XL.
-
Page 200: Table A-1: International Power Cords
With this option, Tektronix ships a test data report for the oscilloscope. Report Options A1–A5: Besides the standard North American, 110 V, 60 Hz power cord, Tektronix ships International Power Cords any of five alternate power cord configurations (listed in Table A–1) with the oscilloscope when ordered by the customer. -
Page 201: Table A-2: Standard Accessories
070-9704-XX Printed Programmer Manual 070-9876-XX 013-0278-00 Video Clamp TDS 400A Plotter (GPIB and Centronics Standard) HC100 Plotter (Centronics Standard) HC200 Oscilloscope Cart TDS 400A K212 TDS 510A K420 A–3 TDS 420A, TDS 430A, TDS 460A & TDS 510A User Manual... -
Page 202: Table A-4: Compatible Probes
DC to 1 GHz FET, DC Offset capability (requires Tektronix 1103 TekProbe Power Supply for offset capability) Active, differential voltage P6046 1X/10X, 250 V, DC to 100 MHz P5205 50X/500X, 1300 V, DC to 100 MHz A–4 TDS 420A, TDS 430A, TDS 460A & TDS 510A User Manual... -
Page 203: Table A-5: Accessory Software
The warranty statement for this product is after the title page of this manual. Service Assurance Tektronix offers the following services that you can purchase any time during the warranty period of this product: REP (Repair) Service Assurance provides one year of post-warranty repair support. - Page 204 Appendix A: Options and Accessories A–6 TDS 420A, TDS 430A, TDS 460A & TDS 510A User Manual...
- Page 205 The shipping carton must be constructed of cardboard with 170 kg (375 pound) test strength. 2. If you are shipping the digitizing oscilloscope to a Tektronix field office for repair, attach a tag to the digitizing oscilloscope showing the oscilloscope owner and address, the name of the person to contact about the oscilloscope, the oscilloscope type, and the serial number.
- Page 206 Appendix B: Packaging for Shipment B–2 TDS 420A, TDS 430A, TDS 460A & TDS 510A User Manual...
- Page 207 Table A–3 on page A–3 gives the part number of a properly shielded cable that is commercially available. NOTE. Both the red and blue signal lines are grounded. This configuration results in a green display on a color monitor. C–1 TDS 420A, TDS 430A, TDS 460A & TDS 510A User Manual...
- Page 208 Appendix C: Remote Display C–2 TDS 420A, TDS 430A, TDS 460A & TDS 510A User Manual...
- Page 209 If you have not created a program group or a Windows 95 shortcut, use the File Manager (Windows 3.1) or Explorer (Windows 95) to select and run the tds–pgm.hlp program. D–1 TDS 420A, TDS 430A, TDS 460A & TDS 510A User Manual...
- Page 210 Appendix D: Programmer Disk D–2 TDS 420A, TDS 430A, TDS 460A & TDS 510A User Manual...
- Page 212 The process of converting a continuous analog signal, such as a waveform, to a set of discrete numbers representing the amplitude of the signal at specific points in time. Digitizing is composed of two steps: sampling and quantizing. Glossary–1 TDS 420A, TDS 430A, TDS 460A & TDS 510A User Manual...
- Page 213 480 pixels high. Pop-up menu A sub-menu of a main menu. Pop-up menus temporarily occupy part of the waveform display area and are used to present additional choices associated Glossary–2 TDS 420A, TDS 430A, TDS 460A & TDS 510A User Manual...
- Page 214 Tek Secure This feature erases all waveform and setup memory locations (setup memories are replaced with the factory setup). Then it checks each location Glossary–3 TDS 420A, TDS 430A, TDS 460A & TDS 510A User Manual...
- Page 215 YT format The conventional oscilloscope display format. It shows the voltage of a waveform record (on the vertical axis) as it varies over time (on the horizontal axis). Glossary–4 TDS 420A, TDS 430A, TDS 460A & TDS 510A User Manual...
- Page 217 BMP Color, Hardcopy menu, 3–48 V Limit, 3–64 BMP Mono, Hardcopy menu, 3–48 ACQUIRE MENU button, 3–8, 3–63 Acquisition, 3–113, Glossary–1 AUX TRIGGER INPUT, 2–6 Interval, Glossary–1 DELAYED TRIGGER OUTPUT, 2–6 Index–1 TDS 420A, TDS 430A, TDS 460A & TDS 510A User Manual...
- Page 218 3–139 Tracking, 3–120 Channel, 3–111–3–112 Video Line Number, 3–120 Readout, 2–7, 3–111, 3–143 Cursor readout Reference Indicator, 2–7, 3–111 H-Bars, 3–31, 3–133, 3–136 Selection buttons, 2–18, 3–111, 3–112 Index–2 TDS 420A, TDS 430A, TDS 460A & TDS 510A User Manual...
- Page 219 YT, 3–20 Falling edge, 3–14 Display, Status menu, 3–15 Level, 3–14 Dots, 3–17 Rising edge, 3–14 Dots style, Display menu, 3–64 Slope, 3–14 Dots, Display menu, 3–17 Source, 3–13 Index–3 TDS 420A, TDS 430A, TDS 460A & TDS 510A User Manual...
- Page 220 3–37 GPIB, Utility menu, 3–97 phase suppression, 3–30, 3–38 Graticule, 3–19 procedure for displaying, 3–28 Measurements, 3–82 procedure for measuring, 3–31 Graticule, Display menu, 3–19 record length, 3–34 Index–4 TDS 420A, TDS 430A, TDS 460A & TDS 510A User Manual...
- Page 221 Help system, 3–3 HF Rej, Main Trigger menu, 3–23 Icons, 1–1 Hi Res acquisition mode, 3–5 Independent, Cursor menu, 3–120 Hi res acquisition mode, Glossary–2 Infinite Persistence, Display menu, 3–18 Index–5 TDS 420A, TDS 430A, TDS 460A & TDS 510A User Manual...
- Page 222 Pulse, 3–92, 3–94 Linear interpolation, 3–19, Glossary–2 Reject Glitch, 3–93 Linear interpolation, Display menu, 3–19 Rising edge, 3–72 Logic trigger, 3–68 Runt, 3–94 Definitions, 3–68 Set Thresholds, 3–69 Pattern, 3–69 Index–6 TDS 420A, TDS 430A, TDS 460A & TDS 510A User Manual...
- Page 223 Save/Recall, 3–103 Burst width, 3–73 Save/Recall Waveform, 3–105 Cycle area, 3–73 Setup, 2–12 Cycle mean, 3–73 Status, 3–15–3–16 Cycle RMS, 3–73 Utility, 3–47, 3–97 Delay, 3–79 Video Trigger, 3–127 Index–7 TDS 420A, TDS 430A, TDS 460A & TDS 510A User Manual...
- Page 224 Peak Detect, Acquire menu, 3–8 Negative, Main Trigger menu, 3–93, 3–94 Peak to peak, 3–74 Noise Period, 3–74 reducing in FFTs, 3–35 Persistence, 3–18 reducing in phase FFTs, 3–30, 3–38 Index–8 TDS 420A, TDS 430A, TDS 460A & TDS 510A User Manual...
- Page 225 Rise time, 2–23, 3–75 Rate 3, Video Trigger menu, 3–129 Rising edge, Delayed Trigger menu, 3–14 Rate 4, Video Trigger menu, 3–129 Rising edge, Main Trigger menu, 3–24, 3–72 Index–9 TDS 420A, TDS 430A, TDS 460A & TDS 510A User Manual...
- Page 226 Firmware version, 3–15 SELECT button, 3–120 I/O, 3–15 Select Measrmnt, Measure menu, 3–76, 3–79 System, 3–15 Selected waveform, 3–111 Trigger, 3–15 Selecting channels, 3–111 Waveforms, 3–15 Self test, 1–5 Index–10 TDS 420A, TDS 430A, TDS 460A & TDS 510A User Manual...
- Page 227 Position, 3–125 Trigger Status Lights, 3–21 Set to Zero, 3–125 Trigger When, Main Trigger menu, 3–69, 3–71 VERTICAL MENU button, 2–19 Trigger, delayed, How to set up, 3–12 Index–11 TDS 420A, TDS 430A, TDS 460A & TDS 510A User Manual...
- Page 228 Dual Zoom, 3–144 Waveform integration, 3–135 Dual Zoom Offset, 3–145 Waveform memory, 3–106 Horizontal lock, 3–144, 3–146 WAVEFORM OFF button, 2–21, 3–20, 3–112 on FFT math waveforms, 3–36 Index–12 TDS 420A, TDS 430A, TDS 460A & TDS 510A User Manual...
- Page 229 Preview, 3–145 Preview, 3–145 ZOOM button, 3–144, 3–146 Reset Zoom Factors, 3–146 Zoom menu Zoom Off, 3–146 Dual Zoom, 3–144 Zoom Off, Zoom menu, 3–146 Dual Zoom Offset, 3–145 Index–13 TDS 420A, TDS 430A, TDS 460A & TDS 510A User Manual...
- Page 230 Index Index–14 TDS 420A, TDS 430A, TDS 460A & TDS 510A User Manual...
Need help?
Do you have a question about the TDS 420A and is the answer not in the manual?
Questions and answers