Table of Contents
Advertisement
Quick Links
Advertisement
Table of Contents

Related Manuals for AEG IAE64881FB


Summary of Contents for AEG IAE64881FB
- Page 1 IAE64881FB User Manual USER MANUAL...
-
Page 2: Table Of Contents
FOR PERFECT RESULTS Thank you for choosing this AEG product. We have created it to give you impeccable performance for many years, with innovative technologies that help make life simpler – features you might not find on ordinary appliances. Please spend a few minutes reading to get the very best from it. - Page 3 installation or usage. Always keep the instructions in a safe and accessible location for future reference. 1.1 Children and vulnerable people safety This appliance can be used by children aged from 8 years • and above and persons with reduced physical, sensory or mental capabilities or lack of experience and knowledge if they have been given supervision or instruction concerning the use of the appliance in a safe way and understand the...
-
Page 4: Safety Instructions
CAUTION: The cooking process has to be supervised. A • short term cooking process has to be supervised continuously. WARNING: Danger of fire: Do not store items on the • cooking surfaces. Metallic objects such as knives, forks, spoons and lids •... - Page 5 • Seal the cut surfaces with a sealant to • Make sure not to cause damage to the prevent moisture from causing swelling. mains plug (if applicable) or to the mains • Protect the bottom of the appliance from cable. Contact our Authorised Service steam and moisture.
- Page 6 from the power supply. This to prevent an • Use only the Food Sensor recommended electrical shock. for the hob, one at a time. • Users with a pacemaker must keep a • Do not use it when it is malfunctioning or distance of minimum 30 cm from the damaged.
-
Page 7: Installation
and are not suitable for household room • Contact your municipal authority for illumination. information on how to dispose of the appliance. 2.7 Disposal • Disconnect the appliance from the mains supply. • Cut off the mains electrical cable close to WARNING! the appliance and dispose of it. -
Page 8: Product Description
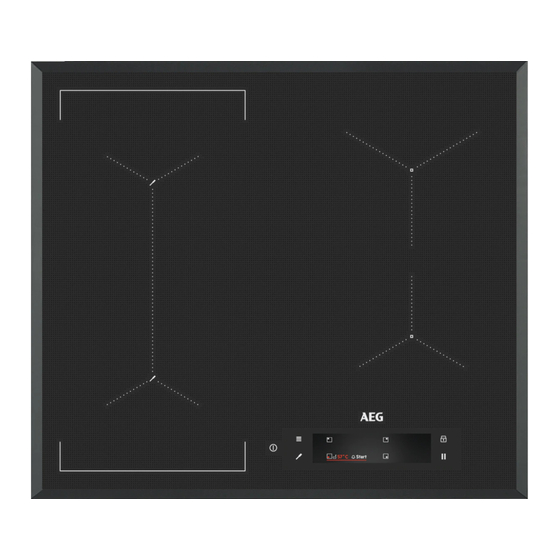
Find the video tutorial "How to install your AEG Induction Hob - Worktop installation" by www.youtube.com/electrolux typing out the full name indicated in the www.youtube.com/aeg graphic below. How to install your AEG Induction Hob - Worktop installation 4. PRODUCT DESCRIPTION 4.1 Cooking surface layout... - Page 9 Symbol Comment Zone indicator To show for which zone the slider is active. To set the timer functions. Slider To adjust the heat setting. PowerBoost To activate the function. Lock To activate and deactivate the function. The window of the Hob²Hood infrared signal communicator. Do not cover it.
- Page 10 hob provides you with clear settings and the hob cannot establish the connection, instructions to follow. Once you select the comes on. You can move the Food Sensor function via Assisted Cooking, the along the rim of the pot to establish or temperatures are defined for different food strengthen the connection.
-
Page 11: Before First Use
5. BEFORE FIRST USE WARNING! Symbols useful for display navigation Refer to Safety chapters. To cancel a setting. 5.1 Using the display • Only the backlit symbols can be used. 5.2 First connection to the mains • To activate a given option, touch the When you connect the hob to the mains you relevant symbol on the display. -
Page 12: Daily Use
5.4 Food Sensor pairing Your Food Sensor is now paired with the hob. Originally, your hob is paired with the Food Always calibrate the Food Sensor after Sensor upon delivery. pairing. If you replace the Food Sensor with a new To leave the Menu, touch or the right side one, you need to pair it with your hob. - Page 13 6.2 Automatic Switch Off main view. To close the slider faster tap the screen outside of the slider area. The function deactivates the hob When other zones are active the heat setting automatically if: for the zone you want to use may be limited. •...
- Page 14 5. Slide your finger to the left or right to For maximum duration values, select the desired time (e.g. hours and/or refer to "Technical data". minutes). 6. Touch OK to confirm your selection. 6.6 OptiHeat Control(3 step You can also choose to cancel your Residual heat indicator) selection.
- Page 15 Pause 1. Touch to access the Menu. 2. Scroll the Menu to select Settings > This function sets all cooking zones that Stopwatch. operate to the lowest heat setting. 3. Touch the switch to turn the function on / off. You cannot activate the function when The function does not stop when you lift the Assisted Cooking or Sous Vide is running.
- Page 16 6.12 Assisted Cooking • For Pan Fry, you can change the default heat level. For some dishes This function adjusts the parameters to you can check the core temperature different types of food and maintains them of the food if you use the Food throughout cooking.
- Page 17 With this function you are free to choose your KeepTemperature own time and temperature (between 35 and 85 °C), suitable for the kind of food you want You can use the Sous Vide function for to prepare. Use maximally 4 litres of water; cooking while the Food Sensor accurately cover the pot with a lid.
- Page 18 1. Insert the Food Sensor inside the food or To operate the function automatically, set the liquid up the minimum level mark. automatic mode to H1 - H6. The hob is originally set to H5. The hood reacts 2. Touch on the display to open the whenever you operate the hob.
- Page 19 certain period of time. After that time the 1. Touch on the display to open the system deactivates the fan automatically and Menu. prevents you from an accidental activation for 2. Select Settings > Setup > Display the next 30 seconds. Brightness from the list.
-
Page 20: Hints And Tips
7. HINTS AND TIPS WARNING! Refer to "Technical data". Refer to Safety chapters. 7.1 Cookware 7.2 Correct pans for Pan Fry function For induction cooking zones a Use only pans with flat bottom. To check if strong electro-magnetic field the pan is correct: creates the heat in the cookware very quickly. - Page 21 7.5 Examples of cooking is made of different materials (a sandwich construction). applications • humming: you use a high power level. The correlation between the heat setting of a • clicking: electric switching occurs, the pot zone and its consumption of power is not is detected after you place it on the hob.
- Page 22 7.6 Hints and Tips for the Food Sensor For functions such as Assisted Cooking and Sous Vide, you can use the Food Sensor on the left side of the hob only. With the Thermometer function you can use the Food Sensor also on the right side of the hob.
- Page 23 • Pay special attention to food hygiene when preparing poultry, eggs, and fish. Poultry should always be prepared at the temperature of at least 65 °C for a minimum of 50 minutes. • Make sure the fish you want to prepare with the use of Sous Vide have the sashimi quality, i.e.
- Page 24 Food type Cooking Preparation Thickness / Core temp / Cooking time method level amount of cooking (min) food temp (°C) Beef - steak Sous Vide rare 2 cm 50 - 54 45 - 210 4 cm 120 - 210 6 cm 180 - 210 medium 2 cm...
- Page 25 Food type Cooking Preparation Thickness / Core temp / Cooking time method level amount of cooking (min) food temp (°C) Rice Swelling cooked 10 - 30 Potatoes Boiling cooked 15 - 30 Vegetables Sous Vide cooked 30 - 40 (fresh) Asparagus Sous Vide cooked...
-
Page 26: Care And Cleaning
Cooker hoods with the Hob²Hood function To find the full range of cooker hoods which work with this function refer to our consumer website. The AEG cooker hoods that work with this function must have the symbol 8. CARE AND CLEANING... - Page 27 9.1 What to do if... Problem Possible cause Remedy You cannot activate or operate the The hob is not connected to an elec‐ Check if the hob is correctly connec‐ hob. trical supply or it is connected incor‐ ted to the electrical supply. Refer to rectly.
- Page 28 Problem Possible cause Remedy You put too much salt in the water. Do not salt boiling water. Temperature is not visible on the The Food Sensor did not establish Place the Food Sensor close to the display. connection with the hob because antenna on the hob surface, near The display shows a warning icon.
-
Page 29: Technical Data
Authorised Service Centre. Give the data Centres are in the guarantee booklet. from the rating plate. Make sure, you operated the hob correctly. If not the 10. TECHNICAL DATA 10.1 Rating plate Model IAE64881FB PNC 949 597 522 01 ENGLISH... -
Page 30: Energy Efficiency
10.4 Food Sensor technical specifications Food Sensor is approved for use in contact with food. 11. ENERGY EFFICIENCY 11.1 Product Information Sheet according to UK Ecodesign Regulation Model identification IAE64881FB Type of hob Built-In Hob Number of cooking zones Heating technology Induction ENGLISH... -
Page 31: Environmental Concerns
Diameter of circular cooking zones (Ø) Left front 21.0 cm Left rear 21.0 cm Right front 14.5 cm Right rear 18.0 cm Energy consumption per cooking zone (EC electric Left front 189.1 Wh / kg cooking) Left rear 189.1 Wh / kg Right front 180.2 Wh / kg Right rear... - Page 32 www.aeg.com/shop...
Need help?
Do you have a question about the IAE64881FB and is the answer not in the manual?
Questions and answers