LG WT7405C Series Owner's Manual
Hide thumbs
Also See for WT7405C Series:
- Owner's manual (76 pages) ,
- Owner's manual (41 pages) ,
- Owner's manual (56 pages)
Table of Contents
Advertisement
Advertisement
Table of Contents

Related Manuals for LG WT7405C Series


Summary of Contents for LG WT7405C Series
- Page 1 OWNER'S MANUAL WASHING MACHINE Read this owner's manual thoroughly before operating the appliance and keep it handy for reference at all times. ENGLISH WT7305C* / WT7405C* www.lg.com MFL68267085 Copyright © 2020-2022 LG Electronics Inc. All Rights Reserved. Rev.01_011022...
-
Page 2: Table Of Contents
Loading the Washer Adding Cleaning Products Control Panel Wash Cycles Cycle Modifiers Special Care Features Options and Extra Functions 31 SMART FUNCTIONS LG ThinQ Application Smart Diagnosis Function 35 MAINTENANCE Regular Cleaning Periodic Maintenance Care in Cold Climates 40 TROUBLESHOOTING... -
Page 3: Important Safety Instructions
IMPORTANT SAFETY INSTRUCTIONS IMPORTANT SAFETY INSTRUCTIONS READ ALL INSTRUCTIONS BEFORE USE Safety Messages Your safety and the safety of others are very important. We have provided many important safety messages in this manual and on your appliance. Always read and follow all safety messages. - Page 4 • If the product has been submerged in water, sitting in standing water, or waterlogged, do not come in contact with the product and immediately contact an LG Electronics customer information center for instructions before resuming use.
- Page 5 IMPORTANT SAFETY INSTRUCTIONS • Do not modify or extend the power cord. • If the electrical supply cord is damaged, it must only be replaced by the manufacturer or its service agent or a similar qualified person in order to avoid a hazard. •...
-
Page 6: Caution Statements
IMPORTANT SAFETY INSTRUCTIONS CAUTION STATEMENTS CAUTION • To reduce the risk of minor or moderate injury to persons, malfunction, or damage to the product or property when using this product, follow basic precautions, including the following: Installation • Install the product on a firm and level floor. Operation •... -
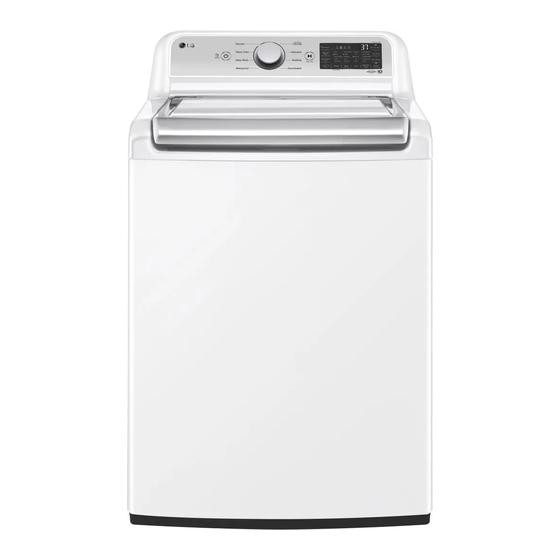
Page 7: Product Overview
• For your safety and for extended product life, use only authorized components. The manufacturer is not responsible for product malfunction, property damage or bodily injury caused by the use of separately purchased unauthorized components, parts, or non-LG products. Front View... - Page 8 PRODUCT OVERVIEW Accessories Included Accessories Tie Strap † Leg Holders † Refer to the installation guide included with the leg holders for instructions on proper usage. Required Accessories (sold separately) Hot and Cold Water Hoses Product Specifications The appearance and specifications listed in this manual may vary due to constant product improvements. Model WT7305C* WT7405C*...
-
Page 9: Installation
INSTALLATION INSTALLATION Before Installing WARNING • Moving or installation of the appliance requires two or more people. Failure to follow these instructions may result in injury. • Store and install the appliance where it will not be exposed to temperatures below freezing or exposed to outdoor weather conditions. -
Page 10: Choosing The Proper Location
10 INSTALLATION Connecting to the Power Supply Final Installation Check Tools Needed Pliers Flat-Blade Screwdriver Level Choosing the Proper • The washer must be installed on firm flooring to minimize vibration during the spin cycle. Location Concrete flooring is best, but a wood floor is sufficient, provided it is built to FHA standards. -
Page 11: Unpacking And Removing Shipping Material
• Do not reuse old hoses. Use only new hoses when installing the washer. Old hoses could leak or burst causing flooding and property damage. Contact an LG Customer Information Center for assistance in buying hoses. Remove the foam tub insert. -
Page 12: Connecting The Drain Hose
12 INSTALLATION • Connect the blue hose to the cold water NOTE faucet and the red hose to the hot water faucet. • Do not stretch the water hoses intentionally, and make sure that they are not pinched, crushed or kinked by other objects. -
Page 13: Leveling The Washer
INSTALLATION hose can result in flooding and property NOTE damage. • If the drain is large enough for the flange on the hose to fit inside, then do not insert the flange NOTE more than 1 - 2 inches into the drain. •... -
Page 14: Final Installation Check
14 INSTALLATION How to Level the Washer the top of the lid. Using these surfaces will result in the washer being unlevel. Position the washer in its final location. • Take special care not to pinch, strain, or crush the water and drain hoses. If you have a carpenter’s level , you can use it to check that the washer is level. - Page 15 INSTALLATION • Connect this appliance to a grounded outlet Press the Start/Pause button. conforming to the rating prior to use. Failure to • The test will run for about 3 minutes. do so may result in fire, electric shock, or •...
-
Page 16: Operation
16 OPERATION OPERATION Before Use Adjust settings. • Default settings for the selected cycle can be changed, if desired, using the cycle WARNING modifier and option buttons. • To reduce the risk of fire, electric shock, or injury • Not all modifiers and options are available to persons, read the SAFETY INSTRUCTIONS on all cycles. -
Page 17: Sorting Laundry
OPERATION Sorting Laundry • Use the Bedding cycle for buoyant or nonabsorbent items such as pillows or comforters. Failure to follow this caution can Grouping Similar Items result in leakage. For the best washing results, and to reduce the • Clothing or articles that are waterproof or water possibility of damage to clothing, sort clothing into resistant must be washed in the Waterproof loads made up of similar items. -
Page 18: Loading The Washer
18 OPERATION Loading the Washer Bulky Items • Do not wash entire pillows or cushions. Remove General Tips pillow or cushion inserts and wash the covers only. • Check and empty pockets. Paper clips, coins, • Use the Bedding cycle for large or bulky items matches, and other items can damage clothing such as poly-filled jackets, comforters, pillows, and the washer. -
Page 19: Adding Cleaning Products
OPERATION • To reduce tangling, load items loosely in even • Never use more than the maximum amount of piles surrounding the agitator. detergent recommended by the manufacturer. Using too much detergent can lead to oversudsing, poor rinsing, detergent buildup in clothing, and residue buildup that can contribute to odors in the washer. - Page 20 20 OPERATION • The detergent is added to the load at the NOTE beginning of the cycle. Always use HE (High- Efficiency) detergent with your washer. • Follow the manufacturer’s recommendations when adding cleaning products. • Do not exceed the maximum fill line. Using too much detergent can result in detergent buildup in clothing and the washer.
- Page 21 OPERATION cause the bleach to be dispensed immediately. • The dispenser cover cannot be removed. To Using too much bleach can damage fabrics. clean the cover, wipe it with a damp paper towel. • Never pour undiluted liquid chlorine bleach directly onto the load or into the tub.
-
Page 22: Control Panel
22 OPERATION Control Panel Control Panel Features Power On/Off Button • Press this button to turn the washer on or off. • Pressing this button during a cycle will cancel that cycle and any load settings will be lost. • The door will unlock after a brief pause. NOTE •... - Page 23 OPERATION Time and Status Display Estimated Time Remaining • When a cycle is selected, the default time for that cycle is displayed. This time will change as modifiers or options are selected. • If the display shows , then the time will be displayed after the load sensing has detected the load size.
-
Page 24: Wash Cycles
24 OPERATION Wash Cycles The wash cycles are designed for specific types of wash loads. Select the cycle that best matches the load contents for maximum wash performance and fabric care. See the Sorting Laundry section for best results, and follow the fabric care labels on your garments. For a guide to fabric care symbols, see the Sorting Laundry section. - Page 25 OPERATION Cycle Waterproof Description Suitable for washing waterproof items such as water resistant clothing, mattress covers, outdoor clothes, and plastic mats. (less than 14 lb) NOTE • Do not use any other wash cycle to wash waterproof items. • Do not use this cycle to wash a mixed load of waterproof and non-waterproof items.
- Page 26 • The default cycle is Small Load, used for normally soiled loads with a few items. This cycle is also available for download. • Refer to the LG ThinQ application to see the cycles available for download. Wash Temp. Default: Warm...
-
Page 27: Cycle Modifiers
OPERATION Cycle Modifiers • Press the Spin button repeatedly until the desired speed is selected. • Some fabrics, such as delicates, require a slower About Modifier Buttons spin speed. To protect your clothing, not all spin Each cycle has default settings that are selected speeds are available for all cycles. -
Page 28: Options And Extra Functions
28 OPERATION NOTE NOTE • Best results are obtained with smaller loads (less • This washer is equipped with a special drain than 6 lb.) feature that is designed to make your washer as safe as possible. If the washer is paused or shut off while there is still water in the tub, the water will drain automatically after several minutes of Speed Wash... - Page 29 OPERATION Press and hold the Spin button for 3 seconds. • To add water during a cycle, pause the cycle before selecting Deep Fill or Max. • You can change the spin speed by pressing the Spin button. • If the washer has already reached its maximum fill level, pressing Deep Fill or Max.
- Page 30 30 OPERATION Control Lock Use this function to disable the controls. This function can prevent children from changing cycles or operating this washer. NOTE • The function does not lock the door. • Once this function is set, all buttons are locked except the Power button.
-
Page 31: Smart Functions
Internet service provider or refer to your • Push Alerts wireless router manual. - When the cycle is complete or the appliance • LG ThinQ is not responsible for any network has problems, you will receive a push connection problems or any faults, malfunctions, message. - Page 32 This equipment generates, uses, and can radiate radio frequency energy and, if not Start a cycle from the LG ThinQ application on installed and used in accordance with the your smartphone. instructions, may cause harmful interference to...
-
Page 33: Smart Diagnosis Tm Function
LG Electronics will also provide open source code to you on CD-ROM for a charge covering the cost FCC RF Radiation Exposure of performing such distribution (such as the cost of... - Page 34 If you experience a problem with your Wi-Fi equipped appliance, it can transmit troubleshooting data to a smartphone using the LG ThinQ application. • Launch the LG ThinQ application and select the Smart Diagnosis feature in the menu. Follow the instructions provided in the LG ThinQ application.
-
Page 35: Maintenance
MAINTENANCE MAINTENANCE WARNING • To reduce the risk of fire, electric shock, or injury to persons, read this entire owner’s manual, including the SAFETY INSTRUCTIONS, before operating this appliance. • Unplug the appliance before cleaning to avoid the risk of electric shock. Failure to follow this warning can cause serious injury, fire, electric shock, or death. - Page 36 36 MAINTENANCE Leaving the Lid Open • For other tub cleaning products, follow the cleaner manufacturer’s instructions and After you finish using the washer, leave the lid recommendations. open overnight to allow air to circulate and dry the • Do not exceed the maximum fill line when tub.
- Page 37 MAINTENANCE Wipe off any moisture with a dry towel or WARNING cloth after cleaning. • The inlet screens protect the delicate parts of the inlet valve from being damaged by particles that To clean the drawer opening, use a small, could enter the valves with the water supply.
-
Page 38: Care In Cold Climates
38 MAINTENANCE preferably with the faucets wide open for Press the Start/Pause button to start the maximum flow. drain pump for 1 minute. • This will expel some of the antifreeze, NOTE leaving enough to protect the washer from damage. •... - Page 39 MAINTENANCE Press and hold the Spin button for 3 seconds to operate Spin Only cycle for draining and spinning. Press the Start/Pause button and check that the water fills properly. When the Drain Hose is Frozen Pour hot water in the washer tub and close the lid.
-
Page 40: Troubleshooting
40 TROUBLESHOOTING TROUBLESHOOTING The washer is equipped with an automatic error-monitoring system to detect and diagnose problems at an early stage. If the washer does not function properly or does not function at all, check the following before you call for service. Before Calling for Service Error Messages Problem... - Page 41 TROUBLESHOOTING Problem Possible Cause & Solution The control lock function is on to prevent anyone from changing cycles or operating the washer. CONTROL LOCK • Turn off the control lock function in the control panel. See Control Lock under Options FUNCTION and Extra Functions.
- Page 42 • Mechanical failure CLUTCH ERROR • Unplug the washer and call for service. Supply voltage is not correct. • Please call LG service center. You can find your local LG service center phone number on SUPPLY VOLTAGE the back cover page. ERROR...
- Page 43 TROUBLESHOOTING Problem Possible Cause & Solution Vibrating noise Floor is not rigid enough. • Make sure that the floor is solid and does not flex. See Flooring in INSTALLATION. Squeaking noise Packaging materials were not removed. • See Unpacking and Removing shipping Material in INSTALLATION. Banging noise when Plumbing in the home moves or flexes when the water valves in the washer shut off.
- Page 44 44 TROUBLESHOOTING Problem Possible Cause & Solution Washer will not turn Power cord is not properly plugged in. • Make sure that the plug is plugged securely into a grounded, 3-prong, 120-VAC, 60 Hz outlet. House fuse is blown, circuit breaker has tripped, or power outage has occurred. •...
- Page 45 TROUBLESHOOTING Problem Possible Cause & Solution Washer will not Extremely low water pressure. operate. • Check another faucet in the house to make sure that household water pressure is adequate. Washer is too cold. • If the washer has been exposed to temperatures below freezing for an extended period of time, allow it to warm up before pressing the Power button.
- Page 46 • Find the Wi-Fi network connected to your smartphone and remove it, then connect your not connected to the appliance on LG ThinQ. Wi-Fi network. Mobile data for your smartphone is turned on. • Turn off the Mobile data of your smartphone and connect the appliance using the Wi-Fi network.
- Page 47 TROUBLESHOOTING Problem Possible Cause & Solution Your home appliance The router frequency is not 2.4 GHz. and smartphone are • Only a 2.4 GHz router frequency is supported. Set the wireless router to 2.4 GHz and not connected to the connect the appliance to the wireless router.
-
Page 48: Limited Warranty
Should your LG Washer (“Product”) fail due to a defect in materials or workmanship under normal and proper use, during the warranty period set forth below, LG will, at its option, repair or replace the Product. This limited warranty is valid only to the original retail purchaser of the Product (“You”) and applies only when purchased lawfully and used within the United States including U.S. - Page 49 Or by mail: LG Electronics, P.O. Box 240007, Huntsville, AL 35813 ATTN: Customer Service PROCEDURE FOR RESOLVING DISPUTES: ALL DISPUTES BETWEEN YOU AND LG ARISING OUT OF OR RELATING IN ANY WAY TO THIS LIMITED WARRANTY OR THE PRODUCT SHALL BE RESOLVED EXCLUSIVELY THROUGH BINDING ARBITRATION, AND NOT IN A COURT OF GENERAL JURISDICTION.
- Page 50 Notice of Dispute. In the event you intend to commence an arbitration proceeding, you must first notify LG in writing at least 30 days in advance of initiating the arbitration by sending a letter to LG at LG Electronics USA, Inc. Attn: Legal Department- Arbitration 111 Sylvan Avenue, Englewood Cliffs, NJ 07632.
-
Page 51: Canada
ARE NOT PERMITTED. PLEASE SEE THE SECTION TITLED “PROCEDURE FOR RESOLVING DISPUTES” BELOW. Should your LG Washer ("Product") fail due to a defect in materials or workmanship under normal and proper use, during the warranty period set forth below, LG Electronics Canada, Inc. ("LGECI") will, at its option, repair, replace or pro rate the Product upon receipt of proof of the original retail purchase. - Page 52 (ASC), as determined by LG Canada. If your Product is located outside a 150 km radius from a ASC, as determined by LG Canada, it will be your responsibility to bring the Product, at your sole expense, to the ASC for in-warranty repair.
- Page 53 If you and LG are unable to resolve the dispute within 30 days of LG’s receipt of the Notice of Dispute, the dispute shall be resolved by binding arbitration in accordance with the procedure set out herein.
- Page 54 If you prevail in the arbitration, LG will pay your attorneys’ fees and expenses as long as they are reasonable, by considering factors including, but not limited to, the purchase amount and claim amount. Notwithstanding the foregoing, if applicable law allows for an award of reasonable attorneys’...
- Page 55 Memo...
- Page 56 LG Customer Information Center For inquiries or comments, visit www.lg.com or call: U.S.A. 1-800-243-0000 1-888-542-2623 CANADA Register your product Online! www.lg.com...