Table of Contents
Advertisement
Quick Links
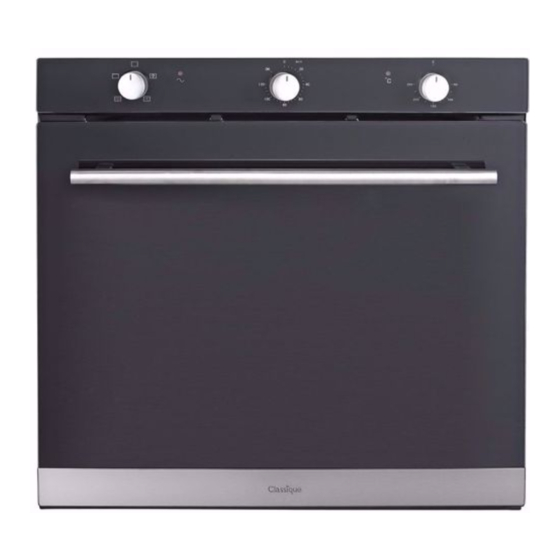
User manual for your Classique
600mm Built-in Oven
CLO64XLSS
NOTE: This user manual contains important information including safety & installation
points which will enable you to get the most out of your Classique appliance. Please keep
it in a safe place so that it is readily available for future reference.
Advertisement
Table of Contents

Related Manuals for Classique CLO64XLSS


Summary of Contents for Classique CLO64XLSS
- Page 1 NOTE: This user manual contains important information including safety & installation points which will enable you to get the most out of your Classique appliance. Please keep it in a safe place so that it is readily available for future reference.
-
Page 2: Table Of Contents
Contents Important safety information Environmental note Installation Using the appliance Description of the appliance Before first use Selecting an oven function and temperature Cleaning and maintenance Troubleshooting Cooking guidelines Technical information... -
Page 3: Important Safety Information
Child Safety Classique strongly recommend that babies and young children are prevented from being near to the appliance and not allowed to touch the appliance at any time. If it is necessary for younger family members to be in the kitchen, please ensure that they... - Page 4 General Safety Do not place heavy objects on the oven door or lean on the oven door when it is open, as this can cause damage to the oven door hinges. Do not leave heated oil or fat unattended, as this is a fire risk. ...
-
Page 5: Environmental Note
Environmental note Note: Before discarding an old appliance, switch off and disconnect it from the power supply. Cut off and render any plug useless. Cut the cable off directly behind the appliance to prevent misuse. This should be undertaken by a competent person. This appliance is marked according to the European directive 2002/96/EC on Waste electrical and Electronic Equipment (WEEE). -
Page 6: Installation
Installation Electrical connection WARNING: THIS APPLIANCE MUST BE EARTHED. This appliance should be wired into a 16 A double pole switched fused spur outlet, having 3 mm contact separation and placed in an easily accessible position adjacent to the appliance. - Page 7 Installing the oven into the kitchen cabinet The kitchen area should be dry and aired and equipped with efficient ventilation. When installing the oven, easy access to all control elements should be ensured. Positioning the appliance Ensure that the aperture that you will be fitting the oven into is of the size given in the above diagram.
- Page 8 (Figure shows the ventilation and cut-out requirements for the installation of the appliance into a standard kitchen unit). (Figure shows the ventilation and cut-out requirements for the installation of the appliance into a tall housing unit). Warning: The appliance must be installed at least 850 mm above the floor. Ensure that the oven has been securely fixed into the housing unit.
-
Page 9: Description Of The Appliance
Description of the appliance Control panel Side shelf Lamp Oven shelf Oven door Door handle Accessories Description Illustration Qty. Oven unit Side rack 1 pair Roasting dish Oven rack Wire insert for roasting dish Screw and nut... - Page 10 Control panel 1) Oven function selector knob 2) Power indicator light 3) Mechanical cut off timer 4) Oven operating light 5) Thermostat control knob...
-
Page 11: Before First Use
Before first use To remove any residue from the oven that may have been left from the manufacturing process, you should select the fan oven function and set the thermostat to its maximum temperature setting. It is perfectly normal for an odour to be produced during this process. You should make sure that any windows in the room are left open during this process. -
Page 12: Selecting An Oven Function And Temperature
Selecting an oven function and temperature Mechanical cut-off timer To use the oven without using the timer, turn the Mechanical cut-off timer knob so it is pointing to ON. You may now proceed to use the oven as normal. To use the oven with timer, simply turn the Mechanical cut-off timer knob so that it is pointing to the desired cooking time (up to 120 minutes) and proceed to cook as normal. - Page 13 Thermostat control knob The oven thermostat control knob sets the required temperature of the oven. It is possible to regulate the temperature within a range of 50 - 250°C. Turn the control knob clockwise. Oven operating light This light will come on to indicate that the oven’s heating elements are in operation.
- Page 14 Warnings o Keep the oven door closed when using any of the grill functions. o Do not use aluminium foil to cover the grill pan or heat items wrapped in aluminium foil under the grill. The high reflectivity of the foil could potentially damage the grill element.
-
Page 15: Cleaning And Maintenance
Cleaning and maintenance The oven should be cleaned after every use. When cleaning the oven the lighting should be switched on to enable you to see the surfaces better. The oven chamber should only be washed with warm water and a small amount of washing-up liquid. - Page 16 Replacement of the oven light bulb In order to avoid the possibility of an electric shock ensure that the appliance is switched off before replacing the bulb. Remove all oven shelves, the drip tray and the side rack that is on the same side as the oven light.
- Page 17 Removal of the internal glass panel (Your oven comes with a triple glass door) Press the bracket latch on two sides that is in the corner at the top of the door. Take out the inner glass from the second blocking mechanism and then take out the middle glass.
-
Page 18: Troubleshooting
Troubleshooting The oven isn’t turning on. Check that the oven is in manual operation mode. Check that you have selected a cooking function and a cooking temperature. There appears to be no power to the oven and grill. ... - Page 19 The oven light is not working Refer to page 14 and follow the “Replacing the oven light bulb” section. I am getting condensation in my oven. Steam and condensation is a natural by-product of cooking any food with high water content, such as frozen food, chicken etc.
-
Page 20: Cooking Guidelines
Cooking guidelines Please refer to the information given on food packaging for guidance on cooking temperatures and times. Once familiar with the performance of your appliance, temperatures and times can be varied to suit personal preference. If you are using the fan oven function, then you should follow the information given on the food packaging for this particular mode of cooking. - Page 21 Fan Forced Food Weight Preheat Tray Position Temperature Finished Time Beef 10 mins level 200℃ 40-50mins Pork 1 kg 10 mins level 200℃ 70-80mins Chicken 1.2 kg 10 mins level 200℃ 50-60mins Duck 1.5 kg 10 mins level 200℃ 50-60mins Steak 0.8 kg 10 mins...
-
Page 22: Technical Information
Technical information Specifications Power rating 2.6kW Voltage rating 220-240V~ 50Hz Oven dimensions H595 x W595 x D575 mm Usable capacity of the oven 70 litres Energy rating Where to find your model number and serial number Your appliance has a data plate that provides identifying information that is important to know when registering your purchase online and for service. - Page 24 Imported by Applico Ltd. Private Bag 92900 Onehunga, Auckland 1061, New Zealand Website www.classique.co.nz Phone 0800 M10 HLP 0800 610 457...
Need help?
Do you have a question about the CLO64XLSS and is the answer not in the manual?
Questions and answers