
Related Manuals for Yamaha PW50B


Summary of Contents for Yamaha PW50B
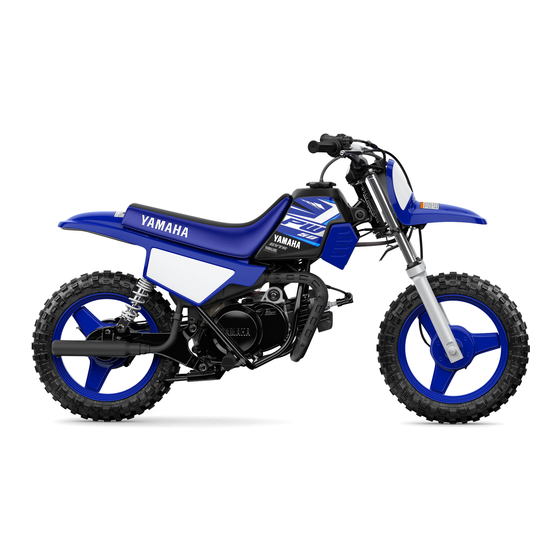
- Page 1 Read this manual carefully before operating this vehicle. OWNER’S MANUAL PW50B LIT-11626-25-39 5PG-28199-1B...
- Page 2 May 1, 2011. The CPSC has also acknowledged the low levels of lead contained in these products pose little or no adverse health effects. YAMAHA 1P6-2839Y-00 Read this manual carefully before operating this vehicle. This manual should stay with this vehicle if it is sold.
- Page 3 INTRODUCTION EAU41063 Congratulations on your purchase of the Yamaha PW50B. This model is the result of Yamaha’s vast experience in the pro- duction of fine sporting, touring, and pacesetting racing machines. It represents the high degree of craftsmanship and reli- ability that have made Yamaha a leader in these fields.
- Page 4 Your motorcycle is equipped with an adjustable speed limiter and power reduction plate. Yamaha recommends that all be- ginners start off with the speed limiter adjusting screw turned in and the power reduction plate installed in the exhaust man- ifold to limit the power available while they learn.
- Page 5 INTRODUCTION Obtain professional technical service as indicated in this Owner’s Manual and/or when made necessary by mechanical conditions.
- Page 6 IMPORTANT MANUAL INFORMATION EAU10132 Particularly important information is distinguished in this manual by the following notations: This is the safety alert symbol. It is used to alert you to potential personal injury hazards. Obey all safety messages that follow this symbol to avoid possible injury or death.
- Page 7 IMPORTANT MANUAL INFORMATION EAU10193 PW50B OWNER’S MANUAL ©2011 by Yamaha Motor Corporation, U.S.A. 1st edition, April 2011 All rights reserved. Any reprinting or unauthorized use without the written permission of Yamaha Motor Corporation, U.S.A. is expressly prohibited. Printed in Japan.
-
Page 8: Table Of Contents
TABLE OF CONTENTS LOCATION OF IMPORTANT FOR YOUR SAFETY – Checking the throttle grip free LABELS ..........1-1 PRE-OPERATION CHECKS ..... 5-1 play ........... 7-12 Tires ..........7-12 SAFETY INFORMATION ....2-1 OPERATION AND IMPORTANT Panel wheels ....... 7-13 RIDING POINTS......... 6-1 Adjusting the front and rear brake DESCRIPTION ........3-1 Starting and warming up a cold... - Page 9 TABLE OF CONTENTS SPECIFICATIONS ......9-1 CONSUMER INFORMATION...10-1 Identification numbers ....10-1 Motorcycle noise regulation ..10-3 YAMAHA MOTOR CORPORATION, U.S.A. OFF-ROAD MOTORCYCLE LIMITED WARRANTY ....10-4 YAMAHA EXTENDED SERVICE (Y.E.S.) ........10-6...
-
Page 10: Location Of Important Labels
Read and understand all of the labels on your vehicle. They contain important information for safe and proper operation of your vehicle. Never remove any labels from your vehicle. If a label becomes difficult to read or comes off, a replacement label is available from your Yamaha dealer. WARNING BEFORE YOU OPERATE THIS VEHICLE, READ THE OWNER’S... -
Page 11: Safety Information
SAFETY INFORMATION EAU4093A Safe Riding yourself conspicuous appears to Perform the pre-operation checks each be very effective in reducing the time you use the vehicle to make sure it chance of this type of accident. Be a Responsible Owner is in safe operating condition. Failure to Therefore: As the vehicle’s owner, you are respon- inspect or maintain the vehicle properly... - Page 12 SAFETY INFORMATION Many accidents have been caused Wear a face shield or goggles. carbon monoxide can collect rapidly by error of the motorcycle opera- Wind in your unprotected eyes and you can quickly be overcome and tor. A typical error made by the op- could contribute to an impairment unable to save yourself.
- Page 13 Check accessory mounts fre- mended by Yamaha, even if sold and your motorcycle. Use extra care when quently. installed by a Yamaha dealer. riding a motorcycle that has added ac- •...
- Page 14 SAFETY INFORMATION cornering clearance, limit suspen- electric failure could result, which Shift the transmission in gear (for sion travel, steering travel or con- could cause a dangerous loss of models with a manual transmis- trol operation. lights or engine power. sion).
-
Page 15: Description
DESCRIPTION EAU10410 Left view 1. Spark plug (page 7-6) 2. Fuel cock (page 4-5) 3. Throttle stop screw (page 7-11) 4. Air filter element (page 7-9) 5. Kickstarter (page 4-6) 6. Centerstand (page 7-17) -
Page 16: Right View
DESCRIPTION EAU10420 Right view 1. Spark arrester (page 7-10) 2. Seat (page 4-7) 3. Transmission oil filler cap (page 7-8) 4. 2-stroke engine oil tank (page 4-5) 5. Transmission oil drain bolt (page 7-8) -
Page 17: Controls And Instruments
DESCRIPTION EAU10430 Controls and instruments 1. Rear brake lever (page 4-3) 2. Starter (choke) lever (page 4-6) 3. 2-stroke engine oil tank cap (page 4-5) 4. Engine stop switch (page 4-1) 5. Front brake lever (page 4-2) 6. Throttle grip (page 7-12) 7. -
Page 18: Instrument And Control Functions
INSTRUMENT AND CONTROL FUNCTIONS EAU40660 The engine speed is limited while EAU41044 Handlebar switch Speed limiter and power re- this switch is set to the “START” duction plate position, therefore the motorcycle Your motorcycle is equipped with an cannot be ridden in that switch po- adjustable speed limiter and a power sition. -
Page 19: Front Brake Lever
INSTRUMENT AND CONTROL FUNCTIONS the throttle grip can only be opened ap- EAU12900 Front brake lever proximately halfway. If more power is required, please consult a Yamaha dealer. EWA14631 WARNING Improper adjustment of the speed limiter could cause improper throttle operation. -
Page 20: Rear Brake Lever
INSTRUMENT AND CONTROL FUNCTIONS EAU12950 EAU13182 EAU13212 Rear brake lever Fuel tank cap Fuel Make sure there is sufficient gasoline in the tank. EWA10881 WARNING Gasoline and gasoline vapors are extremely flammable. To avoid fires and explosions and to reduce the risk of injury when refueling, follow these instructions. - Page 21 2.0 L (0.53 US gal, 0.44 Imp.gal) 2. Maximum fuel level 3. Wipe up any spilled fuel immedi- Your Yamaha engine has been de- ately. NOTICE: Immediately wipe signed to use regular unleaded gaso- off spilled fuel with a clean, dry,...
-
Page 22: Fuel Tank Breather Hose
INSTRUMENT AND CONTROL FUNCTIONS EAU13412 EAU13453 EAU40701 Fuel tank breather hose 2-stroke engine oil Fuel cock Make sure that there is sufficient 2- The fuel cock supplies fuel from the stroke engine oil in the oil tank. Add the tank to the carburetor while filtering it al- recommended 2-stroke engine oil as necessary. -
Page 23: Starter (Choke) Lever
INSTRUMENT AND CONTROL FUNCTIONS O (on) EAU13590 EAU13680 Starter (choke) lever “ ” Kickstarter 1. Arrow mark pointing to “O” (on) 1. Starter (choke) lever “ ” 1. Kickstarter With the lever in this position, fuel flows Starting a cold engine requires a richer To start the engine, fold out the kick- to the carburetor. -
Page 24: Seat
INSTRUMENT AND CONTROL FUNCTIONS EAU40920 Seat To remove the seat 1. Remove the mudguard by remov- ing the bolts and washers. 1. Seat holder 2. Projection 2. Place the seat in the original posi- tion. 3. Install the mudguard by installing the washers and bolts. -
Page 25: For Your Safety - Pre-Operation Checks
Failure to inspect or maintain the vehicle properly increases the possibility of an accident or equipment damage. Do not operate the vehicle if you find any problem. If a problem cannot be corrected by the procedures provided in this manual, have the vehicle inspected by a Yamaha dealer. Before using this vehicle, check the following points:... - Page 26 • Make sure that operation is smooth. • Check throttle grip free play. Throttle grip 7-12, 7-16 • If necessary, have Yamaha dealer adjust throttle grip free play and lubricate cable and grip housing. • Make sure that operation is smooth. Control cables 7-15 •...
-
Page 27: Operation And Important Riding Points
(choke) is not required 2. Set the engine stop switch to understand, ask your Yamaha dealer. when the engine is warm. Instead, start “START”. the engine with the throttle slightly EWA10271 3. -
Page 28: Starting Off
OPERATION AND IMPORTANT RIDING POINTS EAU41002 EAU16780 EAU41012 Starting off Acceleration and deceleration Braking 1. While applying the rear brake le- EWA14571 WARNING ver, push the motorcycle off the centerstand. Avoid braking hard or suddenly 2. Completely close the throttle. (especially when leaning over to 3. -
Page 29: Engine Break-In
Since the engine is brand new, do not immediately have a Yamaha dealer put an excessive load on it for the first 5 check the vehicle. hours of operation. The various parts in... -
Page 30: Parking
OPERATION AND IMPORTANT RIDING POINTS EAU40722 Parking When parking, stop the engine, and then turn the fuel cock lever to “S” (stop). EWA10311 WARNING Since the engine and exhaust system can become very hot, park in a place where pedestri- ans or children are not likely to touch them and be burned. -
Page 31: Periodic Maintenance And Adjustment
– possibly leading to pending on the weather, terrain, geo- that is certified (if applicable). Yamaha death. See page 2-2 for more in- graphical location, and individual use, dealers are trained and equipped to... -
Page 32: Owner's Tool Kit
If you do not have the tools or experi- ence required for a particular job, have a Yamaha dealer perform it for you. -
Page 33: Periodic Maintenance Chart For The Emission Control System
Periodic maintenance chart for the emission control system From 18 months, repeat the maintenance intervals starting from 6 months. Items marked with an asterisk should be performed by a Yamaha dealer as they require special tools, data and technical skills. -
Page 34: General Maintenance And Lubrication Chart
EAU41756 General maintenance and lubrication chart From 18 months, repeat the maintenance intervals starting from 6 months. Items marked with an asterisk should be performed by a Yamaha dealer as they require special tools, data and technical skills. THEREAFTER INITIAL... - Page 35 Apply lithium-soap-based grease lightly. Shock absorber Check operation and for oil leakage. assemblies Replace if necessary. Apply Yamaha chain and cable lube or engine oil Control cables 10W-30 lightly. Check operation. Check throttle grip free play, and adjust if Throttle grip necessary.
-
Page 36: Checking The Spark Plug
Do not attempt to 1. Spark plug gap diagnose such problems yourself. In- stead, have a Yamaha dealer check 1. Spark plug cap Spark plug gap: the vehicle. 0.6–0.7 mm (0.024–0.028 in) 2. -
Page 37: Removing The Power Reduction Plate
PERIODIC MAINTENANCE AND ADJUSTMENT To install the spark plug EAU41103 Removing the power reduc- 1. Clean the surface of the spark plug tion plate gasket and its mating surface, and To obtain full engine performance ca- then wipe off any grime from the pability, removing the power reduction spark plug threads. -
Page 38: Transmission Oil
In order to prevent clutch slip- for oil leakage before each ride. If any page (since the transmission oil leakage is found, have a Yamaha deal- also lubricates the clutch), do er check and repair the motorcycle. In not mix any chemical additives. -
Page 39: Middle And Final Gear Cases
If any leakage is found, have maintenance and lubrication chart. a Yamaha dealer check and repair the Clean or, if necessary, replace the air motorcycle. addition,... -
Page 40: Cleaning The Spark Arrester
2. Tap the tailpipe lightly, and then Recommended oil: Cleaning the spark arrester use a wire brush to remove any Yamaha foam air filter oil or other The spark arrester should be cleaned carbon deposits from the spark ar- quality foam air filter oil... -
Page 41: Adjusting The Carburetor
Therefore, most car- checked and, if necessary, adjusted as buretor adjustments should be left to a follows at the intervals specified in the Yamaha dealer, who has the neces- periodic maintenance and lubrication sary professional knowledge and expe- chart. -
Page 42: Checking The Throttle Grip Free Play
The tire air pressure must be cracked, have a Yamaha dealer re- and, if necessary, have a Yamaha deal- checked and adjusted on cold tires place the tire immediately. er adjust it. -
Page 43: Panel Wheels
It is not recommended to patch ity, and safe operation of your motorcy- model by Yamaha Motor Co., Ltd. a punctured tube. If unavoid- cle, note the following points regarding able, however, patch the tube the specified wheels. -
Page 44: Adjusting The Front And Rear Brake Lever Free Play
EWA10650 nut in direction (b). WARNING Front If proper adjustment cannot be ob- tained as described, have a Yamaha dealer make this adjustment. 1. Front brake lever free play Rear 1. Front brake lever free play adjusting nut 1. Rear brake lever free play... -
Page 45: Checking The Front And Rear Brake Shoes
[EWA10711] Recommended lubricant: Yamaha Chain and Cable Lube or 4- stroke engine oil If the lining thickness of a brake shoe is less than 1.5 mm (0.06 in), have a Yamaha dealer replace the brake shoes as a set. -
Page 46: Checking And Lubricating The Throttle Grip And Cable
The operation of the throttle grip should which must be adjusted by a Yamaha be checked before each ride. In addi- dealer at the intervals specified in the tion, the cable should be lubricated by a... -
Page 47: Checking And Lubricating The Centerstand
WARNING! To avoid injury, have a Yamaha dealer check or re- and the pivots and metal-to-metal con- securely support the vehicle so pair it. -
Page 48: Checking The Steering
If any free then removing the cable from the hub or if the wheel does not turn play can be felt, have a Yamaha brake camshaft lever and brake smoothly, have a Yamaha dealer check dealer check or repair the steering. - Page 49 PERIODIC MAINTENANCE AND ADJUSTMENT EAU41032 To install the front wheel 1. Install the brake shoe plate into the wheel hub as shown. 1. Brake camshaft lever 1. Retainer 2. Brake shoe plate 3. Insert the wheel axle from the right 3.
-
Page 50: Rear Wheel
PERIODIC MAINTENANCE AND ADJUSTMENT 8. Push down hard on the handlebar EAU25080 Rear wheel several times to check for proper fork operation. EAU41084 To remove the rear wheel EWA10821 WARNING To avoid injury, securely support the vehicle so there is no danger of it falling over. - Page 51 PERIODIC MAINTENANCE AND ADJUSTMENT 6. Remove the exhaust manifold bolts, and then remove the ex- haust chamber, the power reduc- tion plate and the gasket. 1. Rear shock absorber mounting bolt 1. Rear arm 2. Washer 8. Remove the axle nut while apply- 3.
- Page 52 PERIODIC MAINTENANCE AND ADJUSTMENT 5. Install the right-side rear shock ab- sorber by installing the mounting Make sure that the spring clamp is po- bolt. sitioned with the projection side facing 6. While applying the rear brake, inward. tighten the axle nut to the specified torque.
-
Page 53: Troubleshooting
However, should your motorcycle require any repair, take it to a Yamaha dealer, whose skilled technicians have the necessary tools, experience, and know-how to service the motorcycle properly. -
Page 54: Troubleshooting Chart
Wipe off with a dry cloth and correct the the kickstarter. spark plug gap, or replace the spark plug. Remove the spark plug and check the electrodes. The engine does not start. Have a Yamaha dealer check the vehicle. Have a Yamaha dealer check the vehicle. 7-24... -
Page 55: Motorcycle Care And Storage
Be ble. Rust and corrosion can develop ECA17110 even if high-quality components are sure to consult a Yamaha dealer for NOTICE used. A rusty exhaust pipe may go un- advice on what products to use be- Avoid using strong acidic wheel fore cleaning the vehicle. - Page 56 MOTORCYCLE CARE AND STORAGE Do not use any harsh chemical After riding in the rain or near the sea 5. Touch up minor paint damage products on plastic parts. Be Since sea salt is extremely corrosive, caused by stones, etc. sure to avoid using cloths or carry out the following steps after each 6.
-
Page 57: Storage
Always store your motorcycle in a cool, 3. Drain the carburetor float chamber dry place and, if necessary, protect it Consult a Yamaha dealer for advice on by loosening the drain bolt; this will against dust with a porous cover. Be what products to use. - Page 58 MOTORCYCLE CARE AND STORAGE e. Remove the spark plug cap from the spark plug, and then install the spark plug and the spark plug cap. WARNING! To prevent damage or injury from sparking, make sure to ground the spark plug elec- trodes while turning the en- gine over.
-
Page 59: Specifications
40.0 × 39.2 mm (1.57 × 1.54 in) Size: NGK/BP4HS Compression ratio: 2.50-10 4PR Manufacturer/model: 6.00 : 1 Manufacturer/model: DENSO/W14FPL Starting system: BRIDGESTONE/KNOBBY Spark plug gap: Kickstarter Manufacturer/model: 0.6–0.7 mm (0.024–0.028 in) Lubrication system: IRC/KNOBBY Clutch: Separate lubrication (Yamaha autolube) Clutch type: Wet, centrifugal automatic... - Page 60 SPECIFICATIONS Loading: Wheel travel: 60.0 mm (2.36 in) Maximum rider weight: Rear suspension: 25.0 kg (55 lb) Tire air pressure (measured on cold Type: Unit swing tires): Spring/shock absorber type: Front: Coil spring/oil damper 100 kPa (1.00 kgf/cm², 15 psi) Wheel travel: Rear: 50.0 mm (1.97 in)
-
Page 61: Consumer Information
Record the vehicle identification num- ber and model label information in the spaces provided below for assistance when ordering spare parts from a Yamaha dealer or for reference in case the vehicle is stolen. VEHICLE IDENTIFICATION NUMBER: 1. Vehicle identification number 1. - Page 62 CONSUMER INFORMATION EAU48270 tions related to exhaust emissions as Vehicle Emission Control Informa- required by federal law, state law and tion label Environment Canada. 1. Vehicle Emission Control Information label 1. Vehicle Emission Control Information label The Vehicle Emission Control Informa- tion label is affixed at the location in the illustration.
-
Page 63: Motorcycle Noise Regulation
CONSUMER INFORMATION EAU26560 Motorcycle noise regulation TAMPERING WITH NOISE CONTROL SYSTEM PROHIBITED: Federal law prohibits the following acts or the causing thereof: (1) The removal or rendering inoperative by any person other than for purposes of maintenance, repair, or replacement of any device or element of design incorporated into any new ve- hicle for the purpose of noise control prior to its sale or delivery to the ultimate purchaser or while it is in use or (2) the use of the vehicle after such device or element of design has been removed or rendered inoperative by any person. -
Page 64: Yamaha Motor Corporation, U.s.a. Off-Road Motorcycle Limited Warranty
1. Operate and maintain the motorcycle as date limitations. Covered off-road motorcycles are specified in the appropriate Owner's Manual, those units certified by Yamaha to EPA noise reg- YAMAHA MOTOR CORPORATION, ulations and come equipped from the factory with MAKES NO OTHER WARRANTY OF ANY 2. - Page 65 CONSUMER INFORMATION 10-5...
-
Page 66: Yamaha Extended Service (Y.e.s.)
This excellent Y.E.S. plan coverage is only available to dealer to see how comforting uninterrupted factory- Yamaha owners like you, and only while your Yamaha is still backed protection can be. within the Yamaha Limited Warranty period. So visit your authorized Yamaha dealer to get all the facts. - Page 67 Yamaha Limited Warranty expires. A special note: If visiting your dealer isn’t convenient, contact Yamaha with your Primary ID number (your frame number). We’ll be happy to help you get the Y.E.S. coverage you need.
- Page 68 INDEX Tires ............7-12 Tool kit............. 7-2 Acceleration and deceleration....6-2 Kickstarter..........4-6 Transmission oil ........7-8 Air filter element, cleaning....... 7-9 Troubleshooting ........7-23 Autolube pump, adjusting ..... 7-16 Labels, location........1-1 Troubleshooting chart ......7-24 Brake lever, front........4-2 Maintenance and lubrication, periodic ..7-4 Vehicle Emission Control Information Brake lever, rear ........
- Page 69 Yamalube – Take care of your Yamaha with legendary Yamalube oils, lubricants, and care products. They’re formulated and approved by the toughest judges we know: the Yamaha engineering teams that know your Yamaha from the inside out.
- Page 70 PRINTED ON RECYCLED PAPER PRINTED IN JAPAN 2011.05-0.9×1 CR...