Table of Contents
Advertisement
Quick Links
- 1 Accessories / Product Specification
- 2 Main Body
- 3 Display and Buttons
- 4 Disassembling the Filter
- 5 Turning the Power On/Off / Fan Speed / Sleep Mode
- 6 Filter Reset Function / Checking the Air Cleanness
- 7 Cleaning the Exterior of the Air Purifier / Cleaning the Sensors
- 8 Cleaning the Air Outlet
- Download this manual
Advertisement
Table of Contents

Related Manuals for Samsung AX40R3030WM


Summary of Contents for Samsung AX40R3030WM
- Page 1 Air purifier User manual AX40R3030WM ꞏ Thank you for purchasing this Samsung air purifier. ꞏ Before operating this unit, please read this user manual carefully and retain it for future reference.
-
Page 2: Table Of Contents
Business users should contact their supplier and check the terms and conditions of the purchase contract. This product and its electronic accessories should not be mixed with other commercial wastes for disposal. For information on Samsung’s environmental commitments and product-specific regulatory obligations, e.g. REACH, WEEE, Batteries, visit: www.samsung.com/uk/aboutsamsung/sustainability/environment/our-... -
Page 3: Safety Precautions
Safety Precautions Safety Precautions These safety precautions are for owner’s safety and preventions of property damage. Therefore, please read this manual thoroughly before using your product. WARNING Hazards or unsafe practices that may result in severe personal injury or death. CAUTION Hazards or unsafe practices that may result in minor personal injury or property damage. - Page 4 Safety Precautions CAUTION The appliance should be installed in a place where the power cord of the product can be easily pulled out. ·Failure to do so may result in electric shock or fire due to electric leakage. Install your appliance on a level and hard floor that can support its weight. ·Failure to do so may result in abnormal vibrations, noise, or problems with the product.
- Page 5 Plug the power plug into the wall socket firmly. Do not use a damaged power plug, damaged power cord or loose wall socket. ·Failure to do so may result in electric shock or fire. When unplugging the product, do not pull the power cord. Grip the power plug, and then pull the power plug.
- Page 6 Safety Precautions Do not unplug the appliance during operation. ·When plugging the appliance in again, flame may occur and it may result in electric shock or fire. When a repair is needed, contact the service center. ·Failure to do so may result in a product malfunction, water leakage, electric shock or fire.
- Page 7 Do not place an object near the product that makes it possible for children to climb onto the machine. ·The child could fall and injure themselves or the product may fall over and injure the child. If water has entered the power supply module, unplug the power cable and dry the product completely before use.
- Page 8 Safety Precautions Safety Precautions Do not tilt or turn the product upside down while the product is connected to the wall outlet. ·Failure to do so may result in a malfunction or fire. Do not spray volatile material such as insecticide onto the product. ·As well as being harmful to humans, this may also result in electric shock, fire or a product malfunction.
-
Page 9: Confirmations Before Use
Dimension of the product is based on maximum value of the measurement. Measurement may vary depending on the side. For product improvement purposes, design and specifications of the product are subject to change without prior notice. Model & Name AX40R3030WM Product dimension (W*H*D) 350 mm*640 mm*350 mm Effective area 40 m²... -
Page 10: Checking The Air Purifier
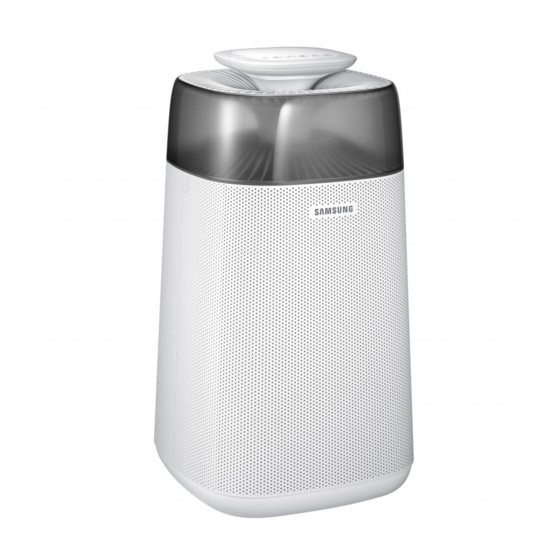
Check air purifi er Checking the air purifi er Main body 08 Gas sensor 01 Air outlet 09 Dongle 02 Display and buttons § This model does not support smart function. 03 Lighting You cannot install a dongle to this model. 10 2-in-1 fi lter (Deodorization 04 Air inlet/ front panel Filter+Dust Collecting Filter) -
Page 11: Display And Buttons
Display and buttons 07 Fan speed button 01 Comprehensive Air-quality indicator 08 Sleep mode button 02 Timer indicator 09 Filter reset button 03 Child-Lock indicator 10 Timer button 04 Filter replacement indicator 11 Lighting function/Child-Lock 05 Fan speed indicator button 06 Power button... -
Page 12: Disassembling The Filter
Checking the air purifi er Disassembling the fi lter When using the 2-in-1 fi lter for the fi rst time or replacing them with a new set, remove the vinyl packaging fi rst. STEP 1 Open the cover front f Press the top part of the product with your thumb and pull the cover front with other fi ngers. -
Page 13: Assembling The Filter
Assembling the fi lter STEP 1 Put the 2-in-1 fi lter f Insert the fi lter on the grooves at the bottom to fi x the fi lter. STEP 2 Put the Pre fi lter STEP 3 Close the cover front f Insert the hooks on the grooves at the bottom fi rst. - Page 14 If the 2-in-1 filter is saturated with odor and the air purifier stinks, please replace the new 2-in-1 filter. f User needs to undertake filter replacement cost produced during the period of free maintenance. f You can purchase a new filter from a nearby Samsung Electronics service center.
-
Page 15: Using The Air Purifier
Use of air purifier Using the air purifier Turning the power on/off f The air purifier turns on with a ringing sound and begins purification. - When you turn on the air purifier, Sensor loading indication will be displayed for 30 seconds and then Comprehensive Air-quality indicator will be displayed. -
Page 16: Timer Function / Lighting Function / Lock Function
Using the air purifi er Timer function You can set the Timer to turn off the purifi er at desired time. f Press the [ ] button you can select the time of the Timer from 1 hour to maximum 12 hours in 1 hour unit. f The Timer function will run after 3 seconds when you set it to turn off the purifi er at desired time. -
Page 17: Filter Reset Function / Checking The Air Cleanness
Filter reset function This function let users know when to change the fi lter. f During operation of the air purifi er, change with a new 2-in- 1 fi lter if the [ ] indicator is on and emits a beep; after change, long press the [ ] button for more than 3 seconds to reset, during which the [... -
Page 18: Use Of Dongle / Clean And Dry Pre Filter
Using the air purifier Clean and dry pre filter Clean pre filter f Remove big dust through dust collector in case of serious dust pollution, and then softly wash through warm water with neutral washing agent. - Pre Filter (clean intervals: two weeks, 24 hours each day) CAUTION ·... -
Page 19: Cleaning And Maintenance
Cleaning and maintenance Cleaning the exterior of the air purifier CAUTION § Please make sure the air purifier is stopped, and pull out the plug from the power socket in the wall while cleaning. f Dip a towel in warm water and wring it out before using it to clean the product. -
Page 20: Cleaning The Air Outlet
Cleaning and maintenance Cleaning the air outlet § If the air outlet is dirty, re-assemble it after removal and cleaning of the grille. § If other matters fall into the air outlet, re-assemble it after removal of the air outlet grille. Grille Removal and Assembling Disassembling the grille STEP 1... -
Page 21: Others
Appendix Troubleshooting Refer to the following chart if the air purifier operates abnormally. This may save time and unnecessary expenses. Problem Solution § Check if the power is on and try to turn on the air purifier again. Product is not §... - Page 22 Troubleshooting Problem Solution Fan speed is not changing § Set the fan speed to Auto. When the fan speed is set to according High, Medium, Low, or Sleep, the fan speed will not change to the automatically. Comprehensive Air-quality. Filter replacement §...
- Page 23 Memo...
- Page 24 Atenţie: Dacă efectuaţi apelul din reţeaua Digi (RCS/RDS), vă rugăm să ne contactaţi formând numărul Telverde fără ultimele două cifre, astfel: 0800872678. CYPRUS 8009 4000 only from landline, toll free www.samsung.com/gr/support 80111-SAMSUNG (80111 726 7864) only from land line GREECE (+30) 210 6897691 from mobile and land line LITHUANIA 8-800-77777 www.samsung.com/lt/support...
- Page 25 Bedienungsanleitung heruntergeladen von der Website loveair.de...
Need help?
Do you have a question about the AX40R3030WM and is the answer not in the manual?
Questions and answers