Lenovo IdeaPad 5i Chromebook User Manual
Hide thumbs
Also See for IdeaPad 5i Chromebook:
- User manual ,
- Hardware maintenance manual (58 pages) ,
- Hardware maintenance manual (48 pages)
Table of Contents
Advertisement
Advertisement
Table of Contents

Related Manuals for Lenovo IdeaPad 5i Chromebook


Summary of Contents for Lenovo IdeaPad 5i Chromebook
- Page 1 User Guide IdeaPad 5i Chromebook (14″, 6), Lenovo Slim 5 Chromebook...
- Page 2 • Setup Guide First edition (June 2021) © Copyright Lenovo 2021. LIMITED AND RESTRICTED RIGHTS NOTICE: If data or software is delivered pursuant to a General Services Administration “GSA” contract, use, reproduction, or disclosure is subject to restrictions set forth in Contract No. GS-...
-
Page 3: About This Documentation
• Depending on the model, some features and software programs might not be available on your computer. • Documentation content is subject to change without notice. Lenovo makes constant improvement on the documentation of your computer, including this User Guide. To get the latest documentation, go to https:// support.lenovo.com... -
Page 5: Table Of Contents
Use the touchpad ....Lenovo support Web site ... Call Lenovo customer support center .. - Page 6 User Guide...
-
Page 7: Chapter 1. Meet Your Chromebook
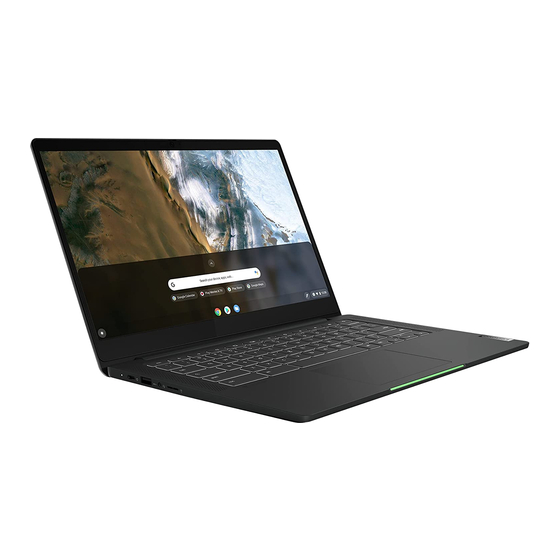
Chapter 1. Meet your Chromebook Note: Your computer might look different from the illustrations in this chapter. Front 1. Camera 2. Camera cover slider 3. Camera light 4. Microphones 5. Multi-touch screen* * For selected models © Copyright Lenovo 2021... -
Page 8: Base
Base 1. Power button 2. Keyboard 4. Touchpad 3. Speakers 5. Lightbar Lightbar behavior When the computer is shut down, the LED is off. When the computer is connected to ac power: Lid open in sleep From sleep mode to Lid close Computer status Open the lid in... - Page 9 When the computer is unplugged: Computer status Lid open in sleep Open the lid in From sleep mode to Lid close mode working mode working mode LED status 3s on, off 3s on, off All LED on (green) Battery 80% – 100% 80% LED on (green) Battery 60% –...
-
Page 10: Left
Left ® 1. Charging LED 2. Power connector/USB-C connector 3. USB (3.2 Gen 1) Type-A connector 4. Combo audio jack 5. MicroSD card slot User Guide... -
Page 11: Right
Right 1. Power connector/USB-C connector Chapter 1 Meet your Chromebook... -
Page 12: Features And Specifications
Features and specifications Dimensions Approximately 324 mm x 221.3 mm x 16.6 mm (12.8 inches x 8.7 inches x 0.7 inches) Weight Approximately 1.49 kg (3.28 lb) Screen • Multi-touch screen* • Resolution: 1920 x 1080 pixels FHD • Size: 355.6 mm (14 inches) Memory •... -
Page 13: Statement On Usb Transfer Rate
* For selected models Statement on USB transfer rate Depending on many factors such as the processing capability of the host and peripheral devices, file attributes, and other factors related to system configuration and operating environments, the actual transfer rate using the various USB connectors on this device will vary and will be slower than the data rate listed below for each corresponding device. - Page 14 User Guide...
-
Page 15: Chapter 2. Get Started With Your Chromebook
(red) plugged in being charged, remaining power is less than 5% on (amber) plugged in being charged, remaining power is between 5% and 97% plugged in on (green) fully charged (97% to 100%) unplugged discharging © Copyright Lenovo 2021... -
Page 16: User Interface
User interface 1. The Launcher button Open the search box and App Launcher. 2. App shelf Pin your frequently-used app or Web page to the app shelf for easy access. 3. Search box and App Launcher • Type the name of your device, app, or Web page in the search box. •... -
Page 17: Connect To Bluetooth Devices
Connect to Bluetooth devices Your Chromebook supports Bluetooth feature. You can connect your Chromebook to a Bluetooth keyboard, mouse, speakers, or other Bluetooth devices. Note: The Bluetooth devices must be within a short distance, usually 10 meters (33 feet), from the Chromebook. - Page 18 User Guide...
-
Page 19: Chapter 3. Navigate The Screen
• Do not use fingernails, gloved fingers, or inanimate objects for input on the screen. • Regularly calibrate the accuracy of the finger input to avoid a discrepancy. Use the special keys Your Chromebook keyboard works just like a conventional keyboard but with a few special keys. © Copyright Lenovo 2021... -
Page 20: Use The Touchpad
Go to the previous page Go to the next page Reload your current page Hide the tabs and the App Launcher in full-screen mode Show all windows in overview mode Decrease the brightness of the computer screen Increase the brightness of the computer screen Mute the speakers Decrease the volume Increase the volume... - Page 21 Two-finger tap Tap anywhere on the touchpad Tap anywhere on the touchpad with one finger to select or open with two fingers to display a an item. shortcut menu. Two-finger scroll Swipe three fingers up or down Put two fingers on the touchpad Put three fingers on the touchpad and move them in the vertical or and move them up or down to...
- Page 22 User Guide...
-
Page 23: Chapter 4. Use Multimedia
1. Use a USB-C to USB-C cable (not supplied) to connect your Chromebook to an external display. Note: If the external display does not support input through USB-C connector, you may need to purchase and use adapters. Lenovo provides various USB-C accessories at https://www.lenovo.com/ accessories , to help you expand your computer functionality. - Page 24 User Guide...
-
Page 25: Chapter 5. Account, Login, And Logout
Note: The owner of a Chromebook has permissions to enable (or disable) Guest account login and restrict login of certain Google Accounts. 1. Start your Chromebook. 2. Select your local language and keyboard when prompted. 3. Set up connection to your wireless router (or a wireless LAN) that has the Internet access. © Copyright Lenovo 2021... -
Page 26: Sign In With A Google Account Other Than The Owner's
Note: This step cannot be skipped. You must be connected to the Internet when starting your Chromebook for the first time. 4. Sign in with your Google Account. If you do not have a Google Account, select Create a Google Account and follow the on-screen instructions to create one. -
Page 27: Control Who Can Use Your Chromebook
Control who can use your Chromebook By default, anyone with a valid Google Account can sign in to a Chromebook. However, as a Chromebook owner, you can set up permissions to only allow people with certain accounts to sign in. 1. -
Page 28: Reset Your Chromebook
Reset your Chromebook If you need to transfer ownership of your Chromebook or if you experience problems with the operating system, you might need to reset your Chromebook. Important: After resetting your Chromebook, user data for all accounts stored locally will be deleted. Back up important data to Google Drive or external storage devices before resetting your Chromebook. -
Page 29: Chapter 6. Manage Files And Folders
If you have failed saving a large-size file, you may need to check the amount of available storage and then decide if you need to delete unused files to free more storage. 1. Start the Files app from the App Launcher. © Copyright Lenovo 2021... -
Page 30: Expand The Local Storage
2. On the left pane, select a storage space. 3. Click the settings icon in the upper right corner. The amount of available storage is displayed. Expand the local storage You can insert a microSD card into the microSD card slot to expand the Chromebook’s local storage capacity. -
Page 31: Chapter 7. Language Settings
2. Click the name of your desired input method. Notes: As a shortcut, use key combinations to switch among input methods. • Alt + Shift to switch among available input methods. • Ctrl + Space to switch to your previous input method. © Copyright Lenovo 2021... - Page 32 User Guide...
-
Page 33: Chapter 8. Add And Manage Apps
You can download and install Android apps on your Chromebook using the Google Play™ Store. 1. Start Play Store from the App Launcher. 2. Select the app that you want to install and then select Install. © Copyright Lenovo 2021... -
Page 34: Pin Apps To Shelf
Note: Not all apps in the Play Store are free of charge. Some apps require purchase for downloading or full-function using. The installed Android apps are accessible from the App Launcher. Pin apps to shelf Apps pinned to shelf are accessible from the lower-left corner of the Chrome desktop. 1. -
Page 35: Chapter 9. Lenovo Help And Support
• Lenovo hardware repair - If the problem is determined to be caused by Lenovo hardware under warranty, trained service personnel are available to provide the applicable level of service. - Page 36 Note: Phone numbers are subject to change without notice. If the number for your country or region is not provided, contact your Lenovo reseller or Lenovo marketing representative. User Guide...
-
Page 37: Appendix A. Important Safety Information
Do not heat to more than 100 °C (212 °F). The following statement applies to users in the state of California, U.S.A. Products containing manganese dioxide lithium coin-cell batteries may contain perchlorate. Perchlorate Material - special handling may apply, see www.dtsc.ca.gov/hazardouswaste/perchlorate © Copyright Lenovo 2021... - Page 38 User Guide...
-
Page 39: Appendix B. Compliance Information
Lenovo encourages owners of information technology (IT) equipment to responsibly recycle their equipment when it is no longer needed. Lenovo offers a variety of programs and services to assist equipment owners in recycling their IT products. For information about recycling Lenovo products, go to https://www.lenovo.com/... - Page 40 Responsible Party: Lenovo (United States) Incorporated 7001 Development Drive Morrisville, NC 27560 Email: FCC@lenovo.com Location for the FCC ID and IC ID If you purchased your computer in the United States or Canada and the computer includes factory- preinstalled wireless modules, a piece of text containing identification strings for these modules (FCC ID and IC ID) is visible on the computer’s bottom cover.
-
Page 41: Appendix C. Accessibility, Ergonomic, And Maintenance Information
Accessibility information Lenovo is committed to providing users who have hearing, vision, and mobility limitations with greater access to information and technology. This section provides information about the ways these users can get the most out of their computer experience. You also can get the most up-to-date accessibility information from the following Web site: https://www.lenovo.com/accessibility... - Page 42 keyboard with all the standard keys. You can select keys using the mouse or another pointing device, or you can tap to select the keys if your computer supports multi-touch screen. • High Contrast High Contrast is a feature that heightens the color contrast of some text and images on your screen. As a result, those items are more distinct and easier to identify.
- Page 43 Your computer provides industry-standard connectors that enable you to connect assistive devices. Documentation in accessible formats Lenovo provides electronic documentation in accessible formats, such as properly tagged PDF files or HyperText Markup Language (HTML) files. Lenovo electronic documentation is developed to ensure that visually impaired users can read the documentation through a screen reader.
- Page 44 Many product solutions are available to help you modify and expand your computer to best suit your needs. You can find some of these options at https://www.lenovo.com/accessories Explore your options for docking solutions and external products that provide the adjustability and features that you want.
- Page 45 Cleaning your computer It is a good practice to clean your computer periodically to protect the surfaces and ensure trouble-free operation. Cleaning the computer cover Wipe it with a lint-free cloth dampened in mild soap and water. Avoid applying liquids directly to the cover. Cleaning the keyboard Wipe the keys one by one with a lint-free cloth dampened in mild soap and water.
- Page 46 User Guide...
-
Page 47: Appendix D. Open Source Information
General Public License and/or the Lesser General Public License (or any other license requiring us to make a written offer to provide corresponding source code to you) from Lenovo for a period of three years without charge except for the cost of media, shipping, and handling, upon written request to Lenovo. This offer is valid to anyone in receipt of this device. - Page 48 User Guide...
-
Page 49: Notices And Trademarks
Lenovo representative for information on the products and services currently available in your area. Any reference to a Lenovo product, program, or service is not intended to state or imply that only that Lenovo product, program, or service may be used. Any functionally equivalent product, program, or service that does not infringe any Lenovo intellectual property right may be used instead. - Page 50 Actual results may vary. Users of this document should verify the applicable data for their specific environment. This document is copyrighted by Lenovo and is not covered by any open source license, including any Linux agreement(s) which may accompany software included with this product. Lenovo may update this document at any time without notice.
Need help?
Do you have a question about the IdeaPad 5i Chromebook and is the answer not in the manual?
Questions and answers