Advertisement
Quick Links
Advertisement

Related Manuals for Shopsmith MARK V


Summary of Contents for Shopsmith MARK V
- Page 1 MARK V ALIGNMENT & MAINTENANCE...
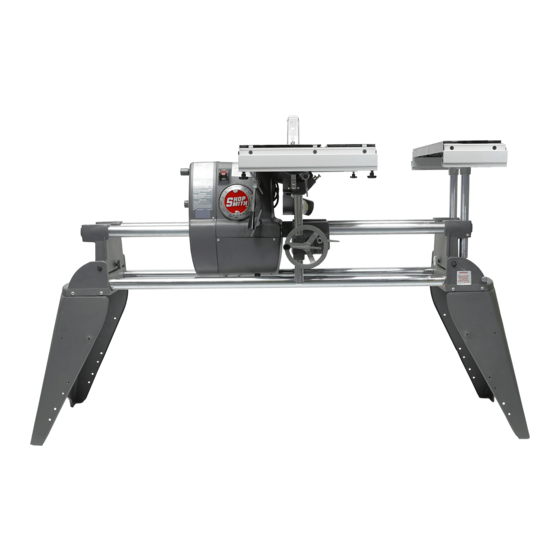
- Page 2 Lathe. the Lathe Tailstock. Power Mount - Holds the Extension Basically, the MARK V is a rigid Bench that Table and the Major Accessories. holds the Headstock and a Worktable System. Way Tube Tie Bar - Holds the free end of The upper part of this Bench can be positioned the Way Tubes.
- Page 3 26. Table Insert - Used for sawing, sanding, either a horizontal or vertical position. drilling and boring. It can be replaced 17. Base Lock - Secures the MARK V in the with inserts for dadoing, molding, drum vertical position. sanding and shaping.
- Page 4 Stop Bolts is shown.) 50. Lower Saw Guard - Protects you from the part of the Blade or cutter below the MARK V MODELS 510 & 520 Table. The Saw Guard has a Dust Chute. The Lower Saw Guard is also used with the Sanding Disc.
-
Page 5: Tools Needed
Square for alignment and adjustment. To make sure they are retracted and the Legs on the check that your Square is accurate, select a MARK V sit firmly on a level floor. Check this board with at least one straight and true edge. Page 5... - Page 6 Nut located at the back of the Carriage Assembly, as shown in Figure 2. Also, remember that your MARK V could possibly go out of alignment if it is moved to an area with varying floor levelness. Remember to recheck alignment and make needed adjustments after moving your MARK V, if needed.
- Page 7 Use a 5/32" Allen Wrench to remove the WARNING Table Insert, as demonstrated in Figure Always make sure the MARK V Head- stock and Carriage are locked and all Casters are raised off the floor before lifting the MARK V into the vertical Drill Press position.
- Page 8 Way Tubes. Then move the Carriage between the Headstock and Base Mount (right side). Tighten the Headstock and Carriage Locks. Place the MARK V in the vertical position by loosening the Headrest Handle, firmly grasping the Way Tubes Figure 9...
- Page 9 845180 SHOPSMITH MARK V WARNING Always make sure the MARK V Head- stock and Carriage are locked and all Casters are raised off the floor before lifting the MARK V into the vertical Drill Press position. Use your fingers to tighten the Base Lock.
- Page 10 SHOPSMITH MARK V 845180 Figure 18 Figure 20 NOTE 10. When the Table is exactly perpendicular Check the straitness of the Drill Bit by rolling it on to the Drill Bit, lock the Table, as seen in a flat surface or you can also hand-rotate the Drill Figure 21.
- Page 11 845180 SHOPSMITH MARK V Hold the Blade with the teeth point- ing toward you, as shown in Figure 25, then insert the Arbor through the hole. Replace the Nut and fin- ger tighten it. 90° Stop (Rear) Figure 23 12. Recheck the setting by loosening the Tilt Lock, moving the Table, and then re- peating Steps 9 through 11.
- Page 12 Figure 30 or 31. without the Upper or Lower Saw Guards is during alignment and ONLY MARK V MARK V after the MARK V is turned off and Model 500 Models 510 & 520 unplugged. Mount the Saw Blade on the Spindle and...
- Page 13 MARK V MARK V Model 500 Models 510 & 520 (MARK V MODELS 510 & 520) 12. To adjust the 0° Stop, simultaneously depress the Table Stop Pin and use a 1/ 2" Wrench to adjust the Stop Bolt. The Stop Bolt should just contact the side of the Stop Pin.
- Page 14 Saw Blade and the Worktable, as ADJUST THE WORKTABLE'S 45° STOP shown in Figure 39. Make sure the Com- (MARK V MODELS 510 & 520) bination Square doesn't rest on the Table Insert. Loosen the Table Height Lock and raise the Table until it clears the Saw Blade.
- Page 15 845180 SHOPSMITH MARK V Loosen the Quill Feed (shown in Figure 41) and extend the Quill so the Saw Tighten the Tilt Lock, then use a 1/2" Blade is centered beneath the slot in the Wrench to adjust the 45° Stop on the Table Insert.
- Page 16 Blade and tighten the Set Screw. Figure 49 If the Miter Slots need to be aligned, do the following: (MARK V MODEL 500) Use a 9/16" Wrench to loosen the Bolts which hold the Worktable to Figure 47 the Trunnions, (Front Trunnion...
- Page 17 Figure 52 alignment. If it is off, repeat steps 5a through 5c. (It is very important to recheck this setting!) (MARK V MODELS 510 & 520) Tilt the Table to 45° and tighten the Tilt Lock. Figure 53 Use a 5/16" Allen Wrench to loosen...
- Page 18 SHOPSMITH MARK V 845180 NOTE slide it back and forth in the Slot to check if the Miter Gauge scrapes against the Table. If the Miter Gauge rocks or scrapes Tighten the Bolts only after the Table Tilt Lock is the Table, adjust the Glides.
- Page 19 845180 SHOPSMITH MARK V ADJUST THE 90° POSITIVE STOP Use a Small Screwdriver to back out the 90° Stop Screw 2 to 3 turns, as shown in Figure 61. 45° Stop Figure 58 If the Miter Gauge Face is not perpen-...
- Page 20 Unlock the Table Height Lock and lower the Table to a comfortable working height. Tighten the Lock. ALIGN THE RIP FENCE (MARK V MODEL 500 STYLE 1) Figure 64 Place the Rip Fence on the Worktable by first putting the Fence Base on the Front...
- Page 21 Slide the Miter Gauge back and forth in ALIGN THE RIP FENCE the Slot. The tip of the Allen Wrench (MARK V MODEL 500 STYLE 2) should keep in slight contact with the Rip Fence. Place the Rip Fence on the Worktable by...
- Page 22 If it pulls away from or binds against the ALIGN THE RIP FENCE Rip Fence, the Fence needs aligning. To (MARK V MODEL 510) align the Rip Fence, do the following: Place the Rip Fence on the Worktable by Loosen the Rear Clamp Lever.
- Page 23 Rip Fence on the Worktable. Figure 75. If further adjustments are needed, repeat Steps 4a through 4d. ADJUST THE OUTFEED CLAMP (MARK V MODEL 510) Outfeed Clamp Place the Rip Fence Base on the infeed Fence Table Tube, then lower the Rip Fence Rest onto the outfeed tube.
- Page 24 Rip Fence. See ALIGN THE RIP FENCE PARALLEL Figure 81. WITH THE WORKTABLE (MARK V MODEL 510) Place the Miter Gauge in the Left Slot of the Worktable on the infeed side, as shown in Figure 79.
- Page 25 Fence until the WITH THE WORKTABLE Allen Wrench makes consistent con- (MARK V MODEL 520 - PRO FENCE) tact along the entire length of the Rip Fence. Again, remember to not Place the Miter Gauge in the Left Slot of scratch the Fence.
- Page 26 Screws completely. table. ALIGN THE EXTENSION TABLE NOTE (MARK V MODEL 500 STYLE 1) The Extension Table Fence Mounting Bar must The Shim Kit contains two size Shims. You’ll use be parallel to an in line with the Fence Mount- a combination of thicknesses to align the Exten- ing Bar on the Worktable.
- Page 27 Fence Figure 86 Rail Bevel ALIGN THE EXTENSION TABLE (MARK V MODELS 500 SYLE 2, 510 & 520) NOTE Figure 88 These instructions are for aligning the Extension Table on the right side of the Headstock. You can The Worktable should already be also follow these same procedures to align it to the mounted in the Carriage Mount.
- Page 28 1/8 additional turn. Over- tightening the nuts will stretch and damage the threads. NOTE If you move the MARK V to another location - especially one with an uneven floor - remember to Figure 92 recheck the Extension Table alignment.
- Page 29 Arbor Set Screw. Readjust the Saw Guard Keps close to the Blade. Nuts MOUNT THE LOWER SAW GUARD (MARK V MODELS 510 & 520) Loosen the Accessory Mount Lock and remove the Extension Table. Loosen the Figure 95 Table Height Lock and remove the Work- table.
- Page 30 Screws are engaged in the Tie Bar and slip the Tie Bar Shield over them. Use a 5/32" Allen Wrench to tighten the Button Head Socket Screws. Remount the Worktable on the MARK V. The Mounting Block is located beneath the Table on the outfeed side.
- Page 31 Saw Blade using the Quill. INSTALL THE RIVING KNIFE (MARK V MODELS 510 & 520) Loosen the Guard Lock Knob and insert the Upper Saw Guard's Riving Knife Figure 103 between the Guard and the Lock Plate, as demonstrated in Figure 101.
- Page 32 SHOPSMITH MARK V 845180 Use a 5/32" Allen Wrench to adjust the Stop Screw located below the Lower Saw Guard's Collar. Shown in Figure 105. • If the Riving Knife is to the left of the Saw Blade, back out the Stop Screw (counterclock- wise).
-
Page 33: Maintenance Preparation
CLEANING As you work, sawdust will accumulate on and in your MARK V. This residue can affect Figure 110 its performance. To prevent problems, clean To adjust the Cup Center Point ver-... - Page 34 NOTE BRUSHING OFF Give the entire machine a good going Some older MARK V’s do not have an access hole. over with a soft brush to remove any Blowing out the Headstock, on those machines, remaining sawdust. If you find any...
- Page 35 845180 SHOPSMITH MARK V only time the MARK V should be turned When you've lubricated both Sheaves, off at other than “Slow” speed. replace the Logo Cover and Belt Cover. Attach the Sanding Disc to the Main Oil the Upper Control Sheave first. While...
-
Page 36: Checking The Belt Tension
Use paste floor or furniture wax. Do not use car Figure 116. wax or spray furniture polish. The MARK V needs wax for both protection and lubrication. Car wax offers good protection for paint, but it is extremely hard and has little value as a lubricant. - Page 37 845180 SHOPSMITH MARK V NOTE If the Poly V-belt seems tight but it still slips, DO NOT increase the belt tension, this will just stretch the Belt out of shape. Instead, apply a very small amount of "belt dressing" to the inside of the Belt to increase its traction.
- Page 38 In normal use, regular cleaning, lubrica- on these parts. tion, and waxing will prevent the fer- rous parts of the MARK V from rusting. SANDING DISC However, if the machine is to be stored for an extended period or under unusu-...
- Page 39 845180 SHOPSMITH MARK V NOTES Page 39...
-
Page 40: Maintenance Schedule
Headrest & Carriage Locks, Work- table Stops, Table Tilt Indicator, Miter Gauge Slots, Miter Gauge, Rip Fence, Extension Table & Lathe Centers. Refer to Alignment for your MARK V model. • Repeat the preceding steps. Every 25 Hours of Running Time...
Need help?
Do you have a question about the MARK V and is the answer not in the manual?
Questions and answers
How do I idnetify my specific Shop Snith model
To identify your specific Shopsmith MARK V model, check for the production year and compatibility of parts. Older models, like the "Greenie" from 1955, may still be compatible with parts made in 1985. The newer Mark 7 version requires newer parts. Shopsmith still sells parts for the Mark V. You can verify your model by examining component features and checking Shopsmith's website for identification details.
This answer is automatically generated
How much does this cost