
Related Manuals for Esatto EFLW9


Summary of Contents for Esatto EFLW9
- Page 1 Product: Model Code/s: Front Load EFLW9 Washing Machine User Manual Exactly what you need Online: esatto.house...
- Page 2 It is important that you read through the following use and care manual thoroughly to familiarise yourself with the installation and operation requirements of your appliance to ensure optimum performance. Again, thank you for choosing an Esatto appliance and we look forward to being of service to you. Kind Regards, The Residentia Team Postage.
-
Page 3: Table Of Contents
Contents Welcome Safety Instructions Your Esatto Installation Washing Machine Washing Quick Start Your Clothes Guide Controls Operating Your Washing Machine Maintenance Troubleshooting Technical Data Appendix Purchase Warranty Details Information... - Page 4 User Manual Safety Instructions → If the supply cord is damaged,it must be replaced by → Before washing the clothes at first time, the washing the manufacturer,its service agent or similarly qualified machine shall be operated in one round of the whole persons in order to avoid a hazard.
-
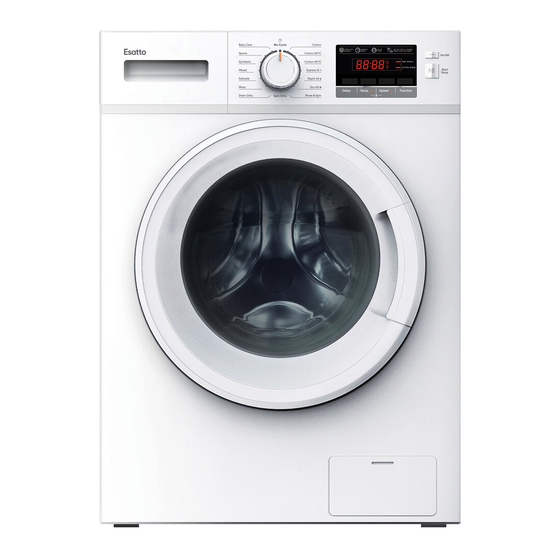
Page 5: Your Esatto Washing Machine
Overview of Washing Machine Your Esatto Washing Machine Component Detergent Drawer Control Panel Power Plug Door Outlet Hose Service Panel Detergent Box Accessories plug Transport Inlet pipe Inlet pipe Outlet hose optional hole plug H (optional) support (optional P.07... - Page 6 User Manual Installation UNPACKING THE WASHING MACHINE ADJUST LEG Unpack your washing machine and check if there is any When positioning the washing machine, please first damage during the transportation. Also make sure that all check if the legs are closely attached to the cabinet. the items in the attached bag are received.
- Page 7 INSTALL INLET PIPE NOTE: Connect the elbow to tap and fasten it clockwise. If the machine has outlet hose support, please install it like Connect the other end of inlet pipe to the inlet valve at the following pictures.
-
Page 8: Washing Your Clothes
User Manual WARNING This machine must be earthed properly. If there is any short circuit, earthing can reduce the danger of electrical shock. This machine is equipped with power cord, which includes plug, earthing wire at earthing terminal. Washing machine shall be operated in a circuit separate from other electrical appliances. - Page 9 FOR THE CLOTHES TO BE WASHED, THEY ARE NOTE: CLASSIFIED ACCORDING TO THE FOLLOWING It is suggested that the parts that are easily stained such CHARACTERISTICS: as white sockets, collars and sleeves etc. shall be hand washed before being put into washing machine to achieve The symbol types of care labels: the clothes to be washed more ideal washing effects.
- Page 10 User Manual Operate Washing Machine Quick Start Guide Quick start 1 Install the washing machine 10 Press the [start/pause] 2 Open the door and 9 Select the desired programme Load the laundry 3 Measure out the detergent 8 Press the On/Off 7 Plug the power supply 4 Close the door 6 Turn on the water tap...
- Page 11 Controls POWER OFF EXPRESS DELAY SET MY CYCLE / SIGNAL: MEMORY WASH START PRESS FOR 3 SECONDS PRE-WASH PAN TON E 2018 C EX TRA RINSE PANTONE White Delay Temp. Speed Function ➀ ➁ ➂ ➃ PROGRAM SELECTION KNOB NOTES: →...
- Page 12 User Manual Operate Washing Machine Operating Your Washing Machine Washing Clothes at first time Before washing clothes at first time, the washing machine shall be operated in one round of the whole procedures without clothes in as follows: 1.Connect power source and water. 2.Put a little detergent into the box and close it.
- Page 13 Operate W Operate Washing Machine First, turn the rotary switch to select the corresponding procedures according to the types - Wool of textiles. You can sel Second, select the proper temperature according to the dirtiness. Generally, the higher the Please sele temperature is, the more the power is consumed.
- Page 14 User Manual Operate Washing Machine - Wool You can select this procedure to wash the wool textiles labeled with “Machine Wash”. Please select the proper washing temperature according to the label on the articles to be washed. Furthermore, the proper detergent shall be selected for wool textiles. - Drain Only Separate Drain only Procedure.
- Page 15 Operate W Operate Washing Machine Table o - Power off Memory For the convenience of the users, this program remember the washing program and function that is the choice of the users at the last time. The next time when selecting the program Memory, this machine will run the program of your memory automatically.
- Page 16 User Manual Maintena Maintenance Maintenance Clean Before your maintenance starts, please do pull out the power plug or disconnect power and close the tap. Clean dete 1.Press do inside th - Solvents are forbidden to avoid that the washing machine is damaged, and toxic gases 2.Lift the c are generated or exploded.
-
Page 17: Maintenance
Maintenance Clean detergent box and grooves Clean detergent drawer and grooves 1.Press down the arrow location on softener cover inside the drawer. 2.Lift the clip up and take out softener cover and wash all grooves with water. 3.Restore the softener cover and push the drawer into position. - Page 18 User Manual Maintenance Troublesh Trouble Pull out the power plug to avoid electrical shock before washing. After using the washing machine, pull out the power cord and close the door tightly to avoid Washing m pinching the kids. cannot sta Remove foreign matters Drain Pump Filter: Drain pump filter can filter the yarns and small foreign matters from the washings.
-
Page 19: Washing Machine
Troubleshooting Troubleshooting Troubles Reason Solution Check if the door is closed tightly. Check if power plug is inserted well. Washing machine Check if water supply tap is opened. cannot start up Check if button “Start/Pause” is pressed. Check if button “On/Off” is pressed. - Page 20 User Manual Remove the problems Display Description Reason Solution Door is not closed properly. Restart after the door is closed. Door lock problem Please call up service line if there are still troubles. Open the tap or wait till the Tap is not opened or water water supply becomes normal.
-
Page 21: Appendix
Appendix Appendix The label and sign on the fabric can help you to choose the best way to launder your clothes. Normal wash Hand wash Bleach Tumble dry. Medium Chlorine bleach may be used (max 150℃ ) Wa r m w a s h Tumble dry. - Page 22 User Manual Attach your receipt to this page...
- Page 23 Purchase Details For future reference, please record the following information The rating plate of your hob is located on the underneath which can be found on the rating plate and the date of of the appliance. Therefore please fit the duplicate data purchase which can be found on your sales invoice.
-
Page 24: Warranty Information
User Manual Warranty Information WARRANTY TERMS & CONDITIONS IN THIS WARRANTY WASHING MACHINES & CLOTHES DRYERS ‘acceptable quality’ as referred to in clause 10 of this warranty has the same meaning referred to in the ACL; This document sets out the terms and conditions of the ‘ACL’... - Page 25 You will bear the cost of transportation, travel and For Appliances and services provided by Residentia delivery of the Appliance to and from Residentia Group Group in Australia, the Appliances come with a or its ASR. If you reside outside of the service area,...
- Page 26 User Manual This page is intentionally left blank...
- Page 27 This page is intentionally left blank...
- Page 28 Appliances Exactly what you need W W W. R E S I D E N T I A . G R O U P...
Need help?
Do you have a question about the EFLW9 and is the answer not in the manual?
Questions and answers