
Related Manuals for RST meteoscan 937PRO


Summary of Contents for RST meteoscan 937PRO
- Page 1 RST01937Manual 25.10.2017 11:57 Страница 1 professional wireless Internet weather statiom meteoscan 937PRO RST01937 Operation Manual www.barometer.ru...
- Page 2 RST01937Manual 25.10.2017 11:57 Страница 2 OVERVIEW Installation Program Mode page 2...
- Page 3 RST01937Manual 25.10.2017 11:57 Страница 3 Overview Outdoor sensor 1. Wind Vane 2. Wind Speed Sensor 3. Solar panel 3. Battery compartment 5. LED Indicator: light on for 4s if the unit power up. Then the LED will flash once every 16 seconds (the sensor transmission update period).
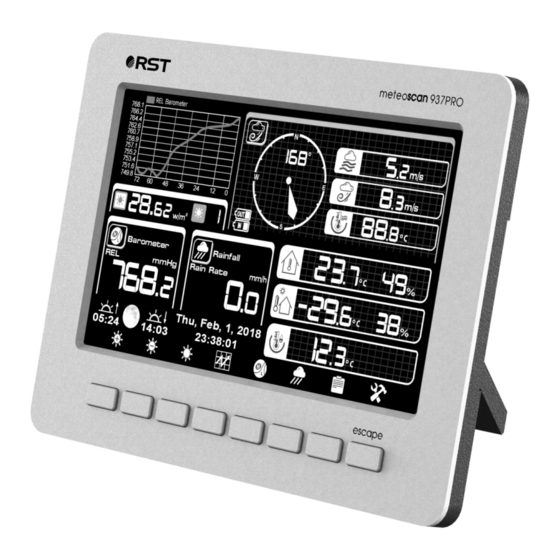
- Page 4 RST01937Manual 25.10.2017 11:57 Страница 4 Display unit Note: The USB port in the console of weather station is only for software update, not for data communication. Contents The weather station consists of the following parts: Display Console Y shape outdoor sensor (Thermo-hygrometer / Rain Gauge / Wind Speed Sensor /Transmitter) Wind Vane Indoor sensor...
- Page 5 RST01937Manual 25.10.2017 11:57 Страница 5 Feature Installation Before placing and installing all components of the weather station at there final desti- nation, please set up the weather station with all parts being nearby for testing the correct function. 1. Install wind vane Push the wind vane into the shaft.
- Page 6 RST01937Manual 25.10.2017 11:57 Страница 6 3. Install Batteries Insert 2XAA batteries in the battery compartment. The LED indicator on the back of the transmitter will turn on for four seconds and normally flash once every 16 seconds (the sensor transmission update period). figure 6 figure 7 Note: If no LED light up or is lighted permanently, make sure the battery is inserted the...
- Page 7 RST01937Manual 25.10.2017 11:57 Страница 7 Take out the batteries and wait one minute, while covering the solar panel to drain the voltage. Put batteries back in and resynchronize with console by powering down and up the con- sole with the sensor array about 3 meter away. figure 10 Best Practices for Wireless Communication Note: To insure proper communication, mount the remote sensor(s) upright on a vertical...
- Page 8 RST01937Manual 25.10.2017 11:57 Страница 8 Indoor sensor Remove the battery door on the back of the sensor with a Philips screwdriver (there is only one screw, at the bottom of the unit). Insert two AAA batteries as shown in Figure 11 (we recommend lithium bat- teries for cold weather climates, but alkaline batteries are sufficient for most climates).
- Page 9 RST01937Manual 25.10.2017 11:57 Страница 9 Then it start to scan the Wi-Fi network, if it didn’t found the available Wi-Fi it will shows” not find any AP (Access Point)”. Press key to return to normal display mode. Only after connect to WLAN you can upload the data to weather website. If the data upload to server successfully, the icon will show on beneath the wind chill.
- Page 10 RST01937Manual 25.10.2017 11:57 Страница 10 Each icon in the display matches a black keys on plastic case. Please press the keys for operation. Icon Description Brightness control key Press this key to enhance the brightness Brightness control key Press this key to decrease the brightness Backlight on/off key Press this key to on/off the backlight Graph display key...
- Page 11 RST01937Manual 25.10.2017 11:57 Страница 11 2.1 MAX/MIN Mode While in normal display, press the key once to enter MAX/MIN Mode. Icon Description Select key Press this key to select the unit or scrolls the value Select key Press this key to select the unit or scrolls the value. Left key Press this key to select the set value.
- Page 12 RST01937Manual 25.10.2017 11:57 Страница 12 2.2 History Record Mode While in normal display, press the key twice to enter History Record Mode. Icon Description File Select key Press this key to enter the file selection mode Page Select key Press this key to enter the page selection mode. Scroll left key Press this key to view the left of the scrollable area.
- Page 13 RST01937Manual 25.10.2017 11:57 Страница 13 While in History Record Mode, press key to enter the file selection mode: Press key to select the history file of annual data. Press key to delete the selected file. Press key to exit and open the selected file. Press key to return to History record Mode.
- Page 14 RST01937Manual 25.10.2017 11:57 Страница 14 2.3 History graph mode While in normal display, press the key twice to enter History graph Mode. Icon Description Zoom In key Zoom Out key Scroll left key Press this key to view the left of the scrollable area. Scroll right key Press this key to view the right of the scrollable area.
- Page 15 RST01937Manual 25.10.2017 11:57 Страница 15 3.Setting Mode While in normal display, press the key to enter Setting Mode. You can select the below sub-mode by pressing the 3.1 Menu Setting Mode Icon Description Select key Press this key to select the unit or scrolls the value Select key Press this key to select the unit or scrolls the value.
- Page 16 RST01937Manual 25.10.2017 11:57 Страница 16 3.1.1. Date and Time setting While in Menu Setting Mode, press key to select Date and Time Setup field, press key to enter Date and Time Setup mode: Time setting (hour/minute/second) Press key to select time setting field, the hour digit turn red, press the key to change the hour setting.
- Page 17 RST01937Manual 25.10.2017 11:57 Страница 17 DST setting If the state that were in the Time Zone observe DST, the option of “automatically adjust clock for Daylight Saving Change” will show on beneath the Time Zone setting. Press the key to select this option.. Internet time server The default server is time.nist.gov.
- Page 18 RST01937Manual 25.10.2017 11:57 Страница 18 3.1.11 Backlight setting While in Menu Setting Mode, press key to select Backlight Setup field, press key to enter backlight Setup mode: Automatic control backlight: Turn on the backlight: Turn off the backlisth: Automatic brightness adjustment: Maximum brightness: Minimum brightness: Icon...
- Page 19 RST01937Manual 25.10.2017 11:57 Страница 19 If the auto backlight turn-on time has been set, you can press key to turn off the backlight within the turn on time. Backlight will turn on aприрост automatically at next turn on time. You can press any key to turn on the backlight for 60 s within the turn off time 3.1.12 Longitude_Latitude setting While in Menu Setting Mode, press...
- Page 20 RST01937Manual 25.10.2017 11:57 Страница 20 3.1.16 Current weather The five weather icons are Sunny, Partly Cloudy, Cloudy, Rainy and Storm. Sunny Partly Cloudy Cloudy Rainy Storm 3.1.17 Rainfall season (default: January) Rainfall season influence the annual rainfall maximum, minimum and total value. When one month was selected, the annual rainfall and annual max/min rainfall were zero clearing at 0:00 of the first day of the selected month, 3.1.18...
- Page 21 RST01937Manual 25.10.2017 11:57 Страница 21 1) Set Station ID. Press to highlight the Station ID. Enter your station ID obtained from Wunderground.com. Press to display the keyboard. Press to scroll to the character and press to select the character. Press to return to the Wunderground.com setup page.
- Page 22 RST01937Manual 25.10.2017 11:57 Страница 22 WeatherUndeground.com website: page 22...
- Page 23 RST01937Manual 25.10.2017 11:57 Страница 23 Enter the Station ID obtained and password you entered into the ObserverIP Weather Server panel. Note: If Wunderground.com is not updating, make sure the Station ID and Password are correct. The Station ID is all capital letters, and the password is case sensitive. The most com- mon issue is substituting an O for 0 in the Station ID.
- Page 24 RST01937Manual 25.10.2017 11:57 Страница 24 3.2 Alarm Setting Mode Icon Description Select key Press this key to select the unit or scrolls the value Select key Press this key to select the unit or scrolls the value. Left key Press this key to select the set value. Right key Press this key to select the set value.
- Page 25 RST01937Manual 25.10.2017 11:57 Страница 25 3.3 Calibration Mode Icon Description Select key Press this key to select the unit or scrolls the value Select key Press this key to select the unit or scrolls the value. Left key Press this key to select the set value. Right key Press this key to select the set value.
- Page 26 RST01937Manual 25.10.2017 11:57 Страница 26 Parameter Type of Calibration Default Typical Calibration Source offset current value Temperature Red Spirit or Mercury Thermometer (1) offset current value Humidity Sling Psychrometer (2) offset current value ABS Bar. Calibrated laboratory grade barometer offset current value REL Bar.
- Page 27 RST01937Manual 25.10.2017 11:57 Страница 27 Place the sensor in a shaded, controlled environment next to the fluid thermometer, and allow the sensor to stabilize for 48 hours. Compare this temperature to the fluid thermometer and adjust the console to match the fluid thermometer. Humidity is a difficult parameter to measure electronically and drifts over time due to contam- ination.
- Page 28 RST01937Manual 25.10.2017 11:57 Страница 28 Calibration is only useful if you have a known calibrated source you can compare it aприростst, and is optional. This section discusses practices, procedures and sources for sensor calibration to reduce man- ufacturing and degradation errors. Do not compare your readings obtained from sources such as the in- ternet, radio, television or newspapers.
- Page 29 RST01937Manual 25.10.2017 11:57 Страница 29 3.3.6 Backup data Press key to select Backup data field, press the key to enter backup mode: Press key to select the history year file. Press key to confirm the selection. Press to change the activated option field. Press key to start backup, press key aприрост...
- Page 30 RST01937Manual 25.10.2017 11:57 Страница 30 The format of the data is csv (comma separated value) and can be opened in a spread- sheet program such as Microsoft Excel for advanced data analysis, with the following head- ers: Column Parameter 3.3.7 Language (English, Chinese, Danish, Dutch, French, German, Italian, Spanish) 3.3.8 About information...
- Page 31 RST01937Manual 25.10.2017 11:57 Страница 31 Maintenance 1. Clean the rain gauge once every 3 months. Rotate the funnel counter-clockwise and lift to expose the rain gauge mechanism, and clean with a damp cloth. Remove any dirt, debris and insects. If bug infestation is an issue, spray the array lightly with insecticide. 2.
- Page 32 RST01937Manual 25.10.2017 11:57 Страница 32 Problem Solution page 32...
- Page 33 RST01937Manual 25.10.2017 11:57 Страница 33 Problem Solution page 33...
- Page 34 RST01937Manual 25.10.2017 11:57 Страница 34 Specifications Outdoor data Transmission distance in open field: 100m (330 feet) Frequency: 868 MHz Temperature range: -40°C...60°C (-40°F...140°F) Accuracy: + / - 1°C Resolution: 0.1°C Measuring range rel. humidity: 1 %~99 %rH Accuracy: +/- 5 %rH Rain volume display: 0 –...
- Page 35 RST01937Manual 25.10.2017 11:57 Страница 35 meteoscan 937PRO RST01937 www.barometer.ru page 35...
-
Page 36: Основные Компоненты
RST01937Manual 25.10.2017 11:57 Страница 36 Основные компоненты внешний датчик RST02915 внутренний датчик RST02911 page 36... -
Page 37: Основные Функции
RST01937Manual 25.10.2017 11:57 Страница 37 основной блок Примечание: комплетация Основные функции page 37... -
Page 38: Установка Метеостанции
RST01937Manual 25.10.2017 11:57 Страница 38 Установка метеостанции Выносной сенсор 1. Установка флюгера 2. Установка датчика скорости ветра page 38... - Page 39 RST01937Manual 25.10.2017 11:57 Страница 39 3. Установка батарей Примечание Примечание 3. Монтаж наружных датчиков. page 39...
- Page 40 RST01937Manual 25.10.2017 11:57 Страница 40 5. Кнопка сброса и LED индикатор Рекомендации по беспроводной связи 1. Электромагнитные помехи (EMI) 2. Радиочастотные помехи (RFI) 3. Линия обзора. 3. Металлические барьеры. page 40...
-
Page 41: Начальная Настройка Метеостанции
RST01937Manual 25.10.2017 11:57 Страница 41 Материал Снижение мощности радиосигнала Внутренний датчик Начальная настройка метеостанции page 41... -
Page 42: Программный Режим
RST01937Manual 25.10.2017 11:57 Страница 42 Программный режим 1. Нормальный режим отображения page 42... - Page 43 RST01937Manual 25.10.2017 11:57 Страница 43 символ описание Кнопка увеличения яркости Кнопка уменьшение яркости Кнопка включения/выключения дисплея Кнопка отображения графика Кнопка режимов атмосферного давления Кнопка данных осадков Кнопка включения режима истории Кнопка настроек 2. Режим истории данных page 43...
- Page 44 RST01937Manual 25.10.2017 11:57 Страница 44 2.1 Режим максимальных и минимальных значений (MAX/MIN) MAX/MIN символ описание Кнопка выбора Кнопка выбора Кнопка режима истории Кнопка вверх Кнопка вниз Кнопка возврата Кнопка выбора page 44...
- Page 45 RST01937Manual 25.10.2017 11:57 Страница 45 2.2 Режим записи истории данных символ описание Кнопка выбора файла Кнопка выбора страницы Кнопка влево Кнопка вправо Кнопка вверх Кнопка вниз Кнопка возврата Кнопка режима истории page 45...
- Page 46 RST01937Manual 25.10.2017 11:57 Страница 46 page 46...
- Page 47 RST01937Manual 25.10.2017 11:57 Страница 47 3.3 Режим графиков изменения данных символ описание Кнопка приближения Кнопка отдаления Кнопка влево Кнопка вправо Выбор файла Кнопка вниз (уровень ниже) Кнопка режима истории Кнопка возврата page 47...
- Page 48 RST01937Manual 25.10.2017 11:57 Страница 48 3. Режим настроек 3.1 Меню настроек символ описание Кнопка выбора Кнопка выбора Кнопка влево Кнопка вправо Кнопка вверх Кнопка вниз Кнопка настроек Кнопка возврата page 48...
- Page 49 RST01937Manual 25.10.2017 11:57 Страница 49 3.1.1. Настройка времени и даты Установка времени: часы, минуты, секунды Установка даты 3.1.2 Формат времени 3.1.3 Формат даты page 49...
- Page 50 RST01937Manual 25.10.2017 11:57 Страница 50 3.1.4 Единицы температуры 3.1.5 Единицы температуры 3.1.6 Единицы измерения скорости ветра 3.1.7 Единицы осадков 3.1.8 Единицы освещенности ㎡ 3.1.9 Отображение осадков Интенсивность дождя - Примечание: сезонные осадки 3.1.10 Атмосферное давление 3.1.11 Чувствительность символьного барометра (прогноза погоды) 3.1.12 Чувствительность...
- Page 51 RST01937Manual 25.10.2017 11:57 Страница 51 3.1.13 Прогноз погоды 3.1.14 Сезонные осадки 3.1.15 Интервал сохранения данных 3.1.16 Настройка подсветки Автоматическое управление подсветки: Включите подсветку: Отключите подсветку: Автоматическая регулировка яркости: Максимальная яркость: Минимальная яркость: page 51...
- Page 52 RST01937Manual 25.10.2017 11:57 Страница 52 символ описание Кнопка выбора Кнопка выбора Кнопка влево Кнопка вправо Кнопка вверх Кнопка вниз Кнопка возврата 3.1.17 Настройка широты/долготы page 52...
- Page 53 RST01937Manual 25.10.2017 11:57 Страница 53 3.2 Настройка сигнала предельно допустимых минимальных и максимальных значений символ описание Кнопка выбора Кнопка выбора Кнопка влево Кнопка вправо Кнопка вверх Кнопка вниз Кнопка настроек Кнопка возврата page 53...
- Page 54 RST01937Manual 25.10.2017 11:57 Страница 54 3.3 Режим калибровки символ описание Кнопка выбора Кнопка выбора Кнопка влево Кнопка вправо Кнопка вверх Кнопка вниз Кнопка настроек Кнопка возврата page 54...
- Page 55 RST01937Manual 25.10.2017 11:57 Страница 55 Параметр Тип калибровки По умолчанию Источник калибрующих значений page 55...
- Page 56 RST01937Manual 25.10.2017 11:57 Страница 56 ПРИМЕЧАНИЕ page 56...
- Page 57 RST01937Manual 25.10.2017 11:57 Страница 57 3.4 Сброс до фабричных настроек 3.4.1 Перерегистрация внутреннего датчика Re-reg- ister Transmitter 3.4.2 Перерегистрация внутреннего датчика 3.4.3 Очистка истории Clear Memory 3.4.4 Сброс минимальных и максимальных значений Clear Max/Min 3.4.5 Сброс до фабричных настроек. Reset to Factory Default page 57...
- Page 58 RST01937Manual 25.10.2017 11:57 Страница 58 3.4.6 Резервное копирование данных на MINI SD карту Внимание! С Mini SD карты нельзя скопировать файлы с погодными данными обратно в метеостанцию. page 58...
-
Page 59: Сервер Погоды
RST01937Manual 25.10.2017 11:57 Страница 59 3.4,7 Языки станции: Сервер погоды Weather Server, символ описание Кнопка выбора Кнопка выбора Кнопка влево Кнопка вправо Кнопка вверх Кнопка вниз Кнопка настроек Кнопка возврата wun- derground.com wunderground.com wunderground.com page 59... - Page 60 RST01937Manual 25.10.2017 11:57 Страница 60 1) Установка ID станции. wunderground.com. 2) Установrf пароля. Примечание Как создать учетную запись Wunderground.com и идентификатор(ID) станции. https://www.wunderground.com/members/signup.asp http://www.wunderground.com/personal-weather-station/signup page 60...
- Page 61 RST01937Manual 25.10.2017 11:57 Страница 61 Примечание: page 61...
- Page 62 RST01937Manual 25.10.2017 11:57 Страница 62 Поиск сетей Wi-Fi Программное обеспечение Easy Weather IP http://www.barometer.ru/files/ page 62...
- Page 63 RST01937Manual 25.10.2017 11:57 Страница 63 page 63...
- Page 64 RST01937Manual 25.10.2017 11:57 Страница 64 page 64...
- Page 65 RST01937Manual 25.10.2017 11:57 Страница 65 page 65...
-
Page 66: Обслуживание И Уход
RST01937Manual 25.10.2017 11:57 Страница 66 Обслуживание и уход page 66... -
Page 67: Спецификация
RST01937Manual 25.10.2017 11:57 Страница 67 Спецификация беспроводная передача данных: атмосферное давление: уровень освещённости: ˚ ˚ температура: ℉ ℉ ˚ ˚ ℉ ℉ влажность (относительная): датчик ветра (флюгер, анемометр): датчик дождя (дождемер): периодичность обновления данных: продолжительность звукового сигнала: питание: page 67... -
Page 68: Table Of Contents
RST01937Manual 25.10.2017 11:57 Страница 68 внимание! Все вышеупомянутые инструкции могут быть изменены производителем в любой момент без согласования. Воспроизведение инструкции или её части без письменного согласия Производителя запрещено. Примеры отображения информации на дисплее, приведённые в данной инструкции, могут отличаться от действительного изображения...
Need help?
Do you have a question about the meteoscan 937PRO and is the answer not in the manual?
Questions and answers